Tuesday, 17 October 2023
Fragrant Forest and Grassy Grove in a gorgeous autumnal colour combination
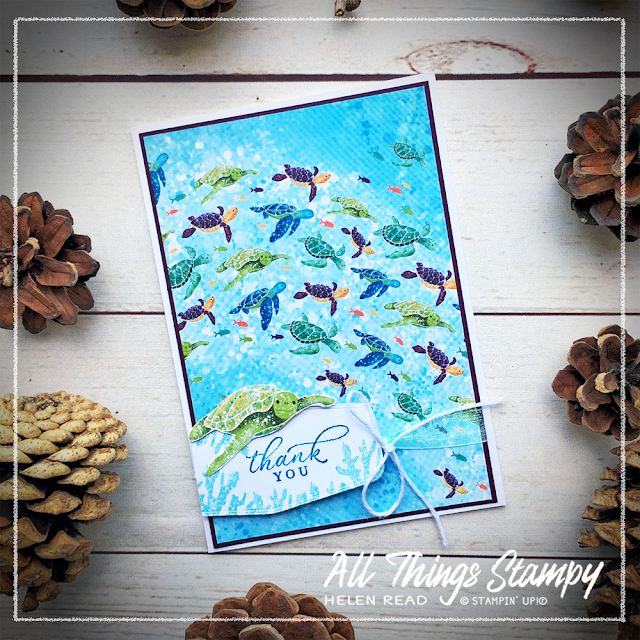
I have a colour combination for you today, and a card which blends the brand new Fragrant Forest background stamp with a Stampin’ Up!® old favourite, Grassy Grove.
Monday, 19 October 2020
Sponged trees with the Evergreen Forest 3D Embossing Folder
This Evergreen Forest 3D Embossing Folder delivers SO much more than it seems
to at first glance. Yes, it looks great when used on green cardstock,
and super-classy when used on crisp white cardstock but stop! Why not
have a bit of fun with it?
I saw these beautiful designs by Barry and Jay at Mitosu Crafts and couldn’t resist having a go myself. It’s just a simple case of embossing then sponging on some colour.
For the blue card, I used Seaside Spray, Misty Moonlight and just a hint of Night of Navy in the corners.
For the purple version, I used Highland Heather, Gorgeous Grape and just a hint of Blackberry Bliss in the corners and at the base.
Next I
took some diluted Whisper White Craft Ink (about 1:1) and, using a small
paintbrush, spattered it across the sponged sections. And they’re
finished off with some Adhesive-Backed Snowflakes which I absolutely
adore.
The Foam Adhesive Sheets are ideal when die-cutting this tree. It may feel a bit fiddly to press out but that’s because the die may not have gone all the way through to the backing sheet, but if you peel the tree out carefully it will be perfectly fine. And it looks so much more professional without all those fiddly little bits of cut-up Stampin’ Dimensional on the back.
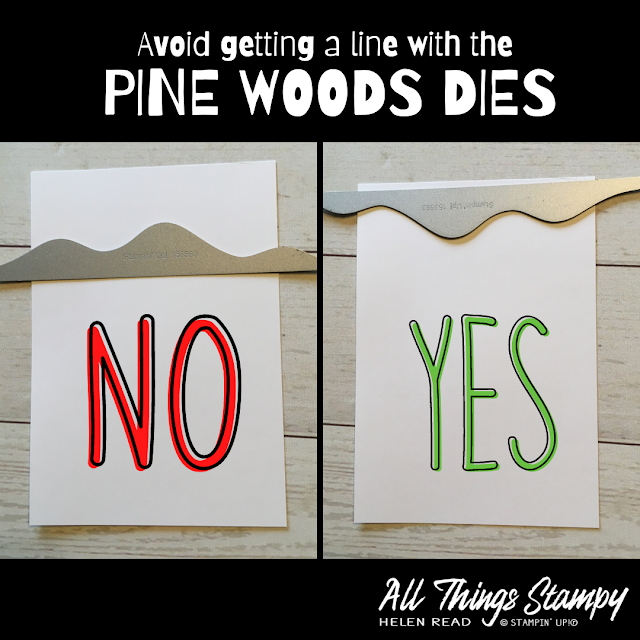
When I was cutting the snowy hill using these dies, I kept getting an unsightly embossed line where the edge of the die had been. Then I had a light-bulb moment and realised I was using them upside-down. Use them as I have done in the pic on the right, and the embossed line will be on the piece you discard (unless you wish to trim it off and have a smaller hill for another project).
So what do you think? Are you going to have a go at sponging this gorgeous embossing folder? Which colours do you prefer?
Monday, 24 August 2020
10 simple cards using the Whale of a Time Suite
How fabulous is the Whale of a Time Suite? I bought the whole suite collection, which is not something I’d done until this year. Now I’m all over it as a concept as it’s so easy!
Friday, 29 May 2020
Sneak Peek: Forever Greenery Suite
I just love the delicate leaf images in the Forever Fern stamp set and the bold colours of the Forever Greenery Designer Series Paper – and I can’t wait to get my customers crafting with it!
Leaves don’t have to be green. They even look fab stamped in Blackberry Bliss... but let’s face it, Blackberry Bliss looks good on everything – even your fingers!
Monday, 3 February 2020
Painted Poppies Week... starring Blackberry Bliss
I hope you enjoyed Sale-a-Bration week last week. This week it's Painted Poppies Week! In celebration of this beautiful stamp set which is on page 26 of the Spring/Summer catalogue and part of the stunning Peaceful Poppies Suite.
Friday, 24 January 2020
Peaceful Poppies desk calendar
Colour your leaves from Peaceful Poppies simply by stamping on top with the large splatter stamp from the same set. No faff, and you can do two or more at a time!
Monday, 13 January 2020
Painted Poppies notebooks
My team is growing fast this Sale-a-Bration and I decided to welcome the first new members with a handy little notebook so they can write down everything they need to know about being a Stampin' Up!® demonstrator... or perhaps their stamping shopping lists!
These note books have a plastic sleeve front and back which makes them really easy to cover. I’ve had them for a long time but think I bought them in Home Bargains. Seems very probable.
The Painted Poppies stamp set is designed so you can colour the black outline of your poppy with just one stamp in red ink. But if you like a really intense colour – or your ink pad is getting ready for a refresh – simply ink and restamp a few times. It doesn’t matter if you go over the lines because you’re cutting out the image and it doesn’t matter if the ink is darker in places... in fact it looks more natural.
Thursday, 26 December 2019
Sneak peek: Peaceful Poppies bundle
It’s Boxing Day here in the UK but I’m ready to move on to 2020, so do you fancy a sneak peek? You'll love the Peaceful Poppies Suite from the new Spring/Summer catalogue, which goes live on 3rd January.
The suite includes the Painted Poppies Bundle which I've used to create the greeting frame and to stamp the inside. But the star of the show here is the Peaceful Poppies Designer Series Paper. This sheet is perfect for the crafter in a hurry as it has this wide floral border down both edges so you can cut it into six 6x4 pieces and then trim them to fit your card fronts.
Mixing and matching allows you to get more from your products. I was still waiting for my coordinating Peaceful Moments stamp set when I made these cards so I stamped the greetings with another new set – Timeless Tropical – instead, which works just as well. The ribbon and twine are from the Magnolia Lane Suite in the Annual Catalogue.
Wednesday, 13 November 2019
Team rewards slider pen boxes
There’s a big Stampin' Up!® event in Germany this weekend called OnStage Live... but unfortunately none of my team members, including me, were in a position to make the trip.
Instead, we held our own event – OffStage Derby – with demonstrations, Make & Takes and even our own awards ceremony. I decided to award certain team members with these lovely Stampin’ Up!® pens in a handmade box. It’s simply a tray with a piece of DSP wrapped around it but the black foil cardstock adds a touch of glamour and the sentiment on top is sincerely meant!
Rewards were not for top sales or recruiting but for making an extra effort – for example, one team member has worked tirelessly to create videos and blog posts and has finally been rewarded with two customers. Effort pays off in the end!
Make any sized box, to suit your gift, by drawing a plan around your gift on some grid paper.
Monday, 8 April 2019
Accented Blooms Mother’s Day card
I’ve fussy-cut the image and overlaid it onto two stitched squares in Granny Apple Green and some Nature's Poem DSP. TWO stitched squares? Yep, you read that right.
There’s a really simple way to create stitched squares using the Stitched Rectangle Framelits and I’m sure you’ve already worked it out for yourself; you simply cut each shape twice to make exactly the size and shape of rectangle/square you need. The corners aren’t as perfect as when you just cut once but nobody's going to notice, I promise you!


