Sorry I can't update the blog right now. Please find me on Facebook

Showing posts with label Nature's Poem DSP. Show all posts

Monday, 6 May 2019

Bird boxes made with retiring Gift Bag Punch Board


Way back in November I thought I was being organised by buying Christmas gifts for my stamping club ladies. And then I was laid low with the lurgy... for weeks.

All of a sudden it’s spring and I realised I still hadn't given them their gifts, so I gathered together some retiring products and made these cute little boxes, each containing a bottle of Copper Shimmer Paint. What was particularly galling is that by the time they received the gifts, the paint was on the Clearance Rack and half the price. Doh!


The boxes are made using the retiring Gift Bag Punch Board; instead of making it to the instructions, I scored at the "Side 2" point every time, to make a square-based box. For the flap, I cut a separate strip, punched and scored at Side 2 repeatedly, then used the score lines to cut down... so the rounded flap that is normally the base becomes a front flap to finish off the box. Make sense? Didn't think so, sorry.


Other retiring products featured here include the Best Birds stamp set and co-ordinating dies, Nature’s Poem Designer Series Paper, Fresh Fig and Powder Pink cardstock. Get them while you can... if you still can!

Monday, 22 April 2019

Hello card with Accented Blooms


Well, hello! I love the greetings that go with this Accented Blooms stamp set because sometimes you just want to send a card to say "hello".

I've coloured the image using ink pads and blender pens, for speed, and teamed it up with some leafy Nature's Poem Designer Series Paper. Remember, this paper will be retiring soon, as will the main colour on this piece, Tranquil Tide, although the stamp set and punch live to tell the tale for another year.


Monday, 8 April 2019

Accented Blooms Mother’s Day card


I made this card for my Mum for Mothering Sunday, which was a week or so ago here in the UK. It uses – as do so many of my projects this month – the Accented Blooms stamp set which I’ve coloured in using ink pads and blender pens.

I’ve fussy-cut the image and overlaid it onto two stitched squares in Granny Apple Green and some Nature's Poem DSP. TWO stitched squares? Yep, you read that right.

There’s a really simple way to create stitched squares using the Stitched Rectangle Framelits and I’m sure you’ve already worked it out for yourself; you simply cut each shape twice to make exactly the size and shape of rectangle/square you need. The corners aren’t as perfect as when you just cut once but nobody's going to notice, I promise you!


http://helenread.stampinup.net

Monday, 4 March 2019

Incredible Like You week: simple thank you cards


After ignoring the stamp set for several months, recently I’ve been stamping up a storm with the Incredible Like You stamp set, so I will be showcasing this versatile set all week. 

I made a BIG batch of cards like these to thank my February customers (and still ran out!). I’ve used Calypso Coral for the flowers, and everybody’s favourite Mint Macaron for the leaves and greeting. The Designer Series Paper is Nature’s Poem. 

And, of course, the Stamparatus made producing multiples of these cards incredibly speedy!

http://helenread.stampinup.net

Wednesday, 20 June 2018

Tutorial: Rooted in Nature teabag holder


Every month I like to honour and reward my team members who have gone above and beyond. for my first level team members, there are rewards for promotions, achievements and for simply selling more than they did in the previous month.

For my extended team, I also send out three “random rewards” which are little handmade gifts to three people chosen at random (the only qualification is that they have placed an order during the month).


This month I sent out these cute teabag holders, inspired by a gift from my downline Stampy Sue and shown on Monday in this post. Inside are three little envelopes, each containing an individually wrapped teabag - plastic-free of course!

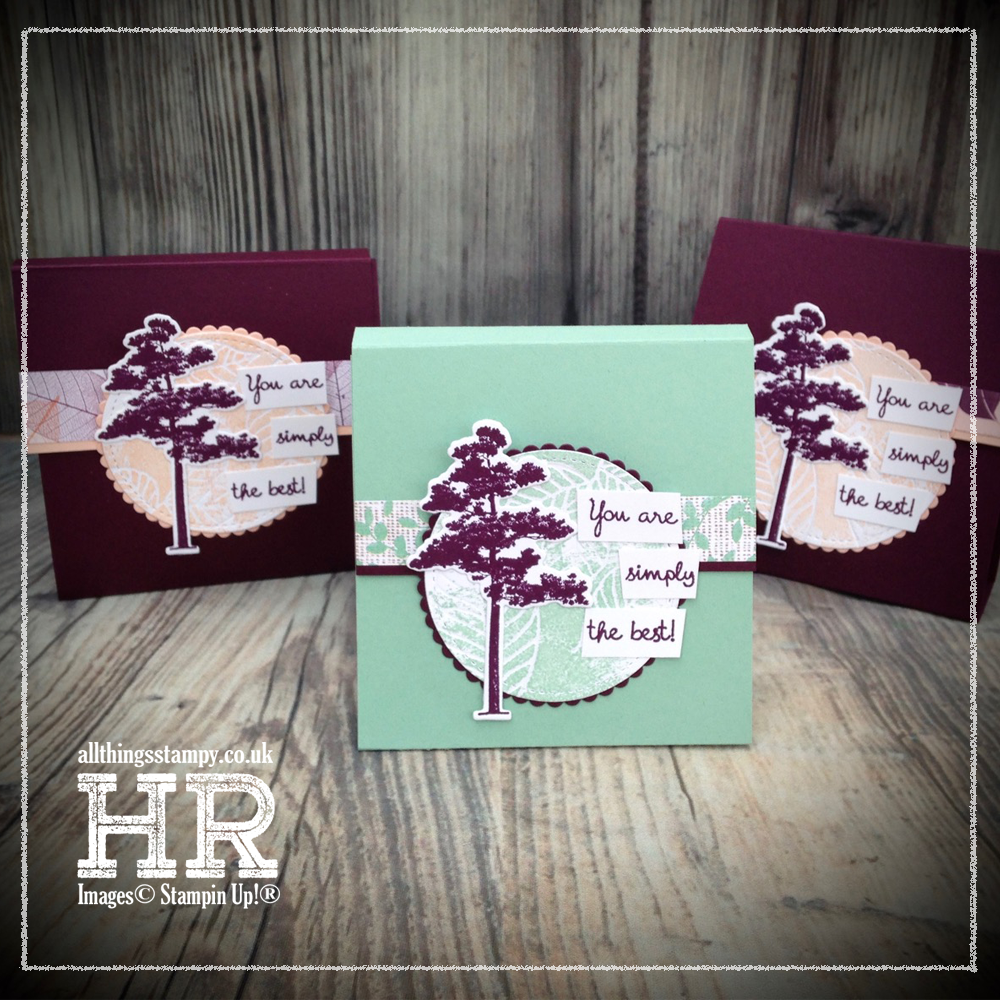
But before I show you how to make these, here’s a close-up of the front. For the circle panel, I embossed using the clever leaf embossing dies from the Rooted in Nature bundle. Then I stamped on top using the Artisan Textures stamp set, for a rustic look. 


Here are the measurements... you should be able to see a larger image if you click on it.

Once you’ve made the outer, as shown above, you simply make three little envelopes using the Envelope Punch Board. I’m turning to inches for these as it’s easier... 

They are made from 5.5" squares
The first score line is at 2 3/4"
Then simply proceed as normal, turning the DSP 90º anticlockwise to make the envelope.

These are then stuck inside - onto the green M shape in the diagram above. 


Finally, decorate the front, making sure you leave the top section of your decorative panel without adhesive, so the front flap can slide in and out easily. 

Hope you like it - and have fun!

Monday, 23 April 2018

Sneak Peek: OnStage Make & Takes


These are some of the Make & Takes from OnStage this year; they were all really impressive this year. 

Having spent a couple of months working with this beautiful stamp set, Rooted In Nature – which is one of the stamp sets I received for my Display Board project – I was happy to be inspired to use it in yet another way. 

The set is absolutely gorgeous, themed around trees of course, and again, you’re going to love it. 


I confess when I first saw this set, my first thought was that this meant the end for Lovely as a Tree but no, the good news is, we get both!


This is another speciality DSP in the new catalogue; in fact, it’s Designer Vellum, from the Graceful Glass Suite. You can colour the vellum with either Stampin’ Write markers or Stampin’ Blends. 


There are two of the brand new In Colors on here – the collection really POPS this year!

Monday, 9 April 2018

No post yet but it will be worth the wait!

Please be patient!

Please come back this evening (after 8pm) to see some amazing sneak peeks from the upcoming Annual Catalogue!

I don’t normally share products this early as I think it’s a bit unfair if you can’t get your hands on them for almost two months, but I made samples for the OnStage 2018 display boards which other demonstrators are sure to be sharing, so I thought I’d better join in this time!


The small print

This is my personal blog and my sole responsibility as an Independent Stampin' Up!® demonstrator. All images are © Stampin' Up!® All content including photographs, projects and text are © Helen Read, unless otherwise stated. Please feel free to copy my ideas for your personal use and inspiration - if you are a SU demonstrator you may use these ideas for your events but please give credit where it is due. Please do not use my ideas for monetary gain, competitions or publication. The images on this blog - including blog buttons - should not be copied and used elsewhere on the internet or on CDs.