Showing posts with label #allthingsstampy. Show all posts

Friday, 21 August 2020

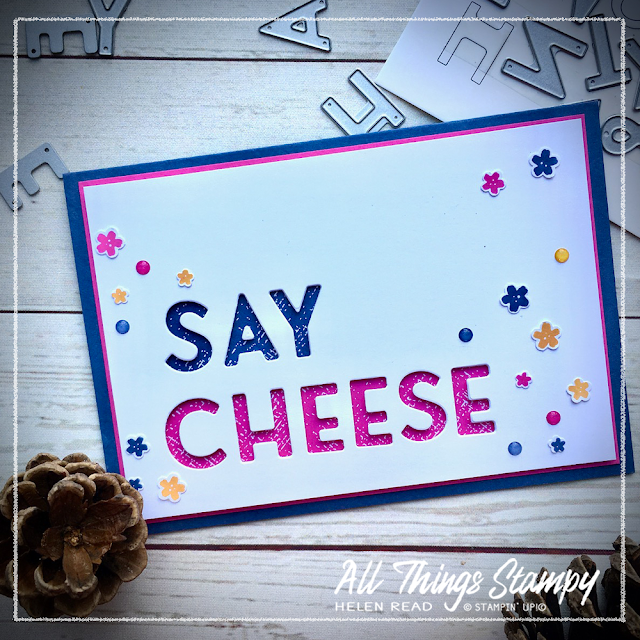
Say cheese with the Playful Alphabet Dies

Playful Alphabet Dies Stampin Up allthingsstampy Helen Read

With the Playful Alphabet Dies you can spell literally anything you like, which somehow makes it harder to decide. Too much choice!

I thought long and hard before making this card for a friend. She’s a professional photographer and, as a gift I’d bought her a camera-shaped cookie cutter. The greeting was almost staring me straight in the face: Say cheese!

Playful Alphabet Dies Stampin Up allthingsstampy Helen Read

I cut the letters out, placed my In Color Designer Series Paper behind, then was stumped. I added some In Color Enamel Dots. Still a bit boring, but it was too late to stamp on top so I had another think an eventually settled on these little flowers from Field of Flowers, punched out using the Confetti Flowers Border Punch. Just a little insight into the not-always-so-streamlined creative process, there!

 
Playful Alphabet Dies Stampin Up allthingsstampy Helen Read

Playful Alphabet Dies Stampin Up allthingsstampy Helen Read

You CAN cut your whole word out in one go if the letters don’t repeat (I think there are two Es in the set), but I prefer to do a few at a time. If you letters don’t repeat and you’re feeling brave, you can line them up nicely with a straight edge such as a ruler; just use it to push the dies up from the bottom edge so they all sit neatly at the same level.


Monday, 17 August 2020

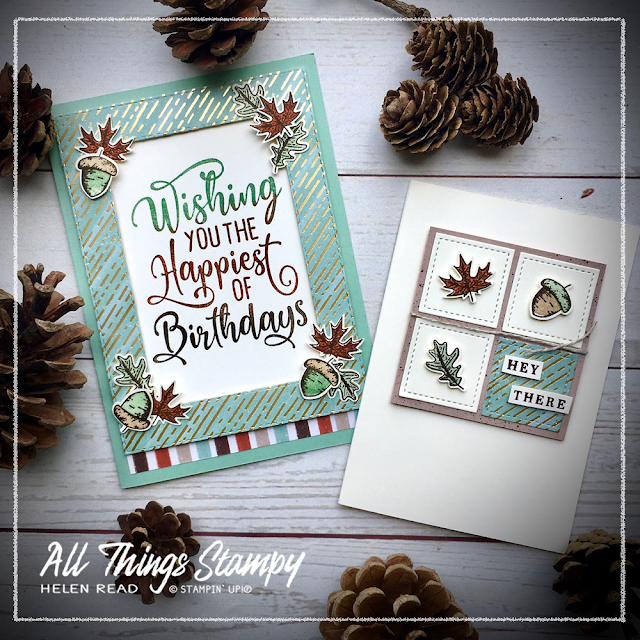
Gilded Autumn Suite - two beautiful cards for the best season of the year

 Gilded Autumn Beautiful Autumn Stampin Up Helen Read Allthingsstampy
 
It’s Monday! And let’s start the week with a look ahead to autumn, one of my favourite times of year.

Summer isn’t really my thing; I burn to a crisp in minutes and the heat just drags me down. Thankfully, not a major problem in the UK, although sadly becoming more of one. As the days shorten, I miss the long, light evenings, but I welcome the cooler weather and beautiful colours that autumn brings. 

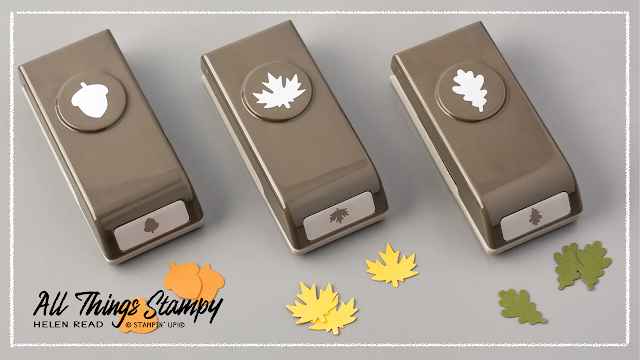
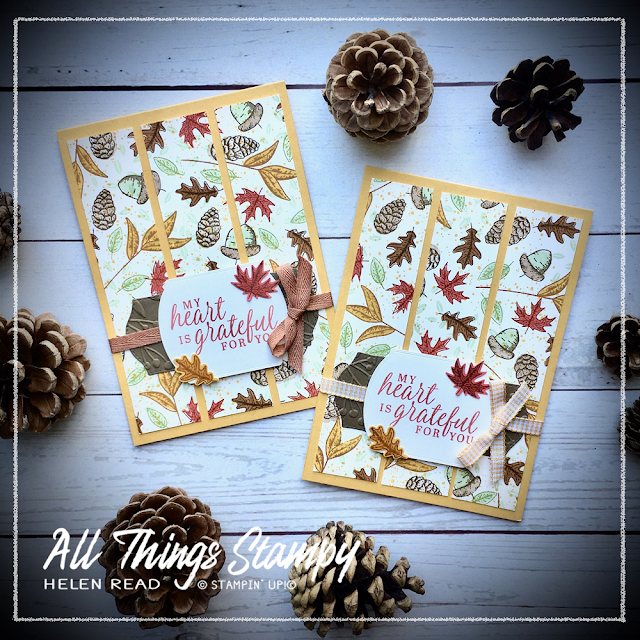
It is no surprise, therefore, that the first products I bought from the new August-December Mini Catalogue was the whole of the Gilded Autumn Suite. I haven’t used every part of the Suite yet but I have been enjoying the Beautiful Autumn stamp set, the Autumn Punch Pack and the stunning Gilded Autumn Specialty Designer Series Paper which has beautiful copper and gold foil on some designs, such as the one you see here. 
 
Gilded Autumn Punch Pack Stampin Up Helen Read Allthingsstampy

I have to say, the stamps line up beautifully. They are photopolymer, which helps, and lining up the leaf and acorn centres with the outlines is really easy, although they look good offset, too, if there’s enough of a colour contrast.

Gilded Autumn Beautiful Autumn Stampin Up Helen Read Allthingsstampy

For this card, I used one of my favourite Annual Catalogue stamp sets, Happiest of Birthdays. This is SUCH a great stamp set and ideal for masculine and teen cards as the greeting does all the heavy lifting for you.

Gilded Autumn Beautiful Autumn Stampin Up Helen Read Allthingsstampy

Yes, this is a product-heavy card; on top of all the Gilded Autumn goodies and the Happiest of Birthdays stamp set, it uses the Stitched Rectangles Dies to create a DSP frame around the words. I’ve embellished the frame using those beautiful stamped and punched leaves and acorns.
 
Gilded Autumn Beautiful Autumn Stampin Up Helen Read Allthingsstampy
 
When it came to the second card, I had a bit of a wobble about my acorns, and decided the colours should be the other way round. Green cap, brown acorn. Then I checked with my husband, a keen naturalist (I said naturalist!!!!) and he confirmed that either is fine as they change colour over the course of the season. 
 
Gilded Autumn Beautiful Autumn Stampin Up Helen Read Allthingsstampy
 
This little Very Vanilla Notecard used up some leftover punched pieces and DSP, and the Stitched Shapes Dies. It’s always great to be able to product a second card from the bits left on your craft table, isn’t it? 
 
I love the colours, the crispness and the images... yes I know I shouldn’t say so myself but why not? I made a card and I love it. If you receive this – or indeed the first card – in the post, you know you’re pretty high up in my estimation!

Gilded Autumn Beautiful Autumn Stampin Up Helen Read Allthingsstampy
To get the three-colour greeting, I used the Stamparatus. Always start with the palest colour... inking the top of the stamp using your ink pad or sponges, or even a brayer if that’s easier.

Stamp it using the Stamparatus and then, without moving the cardstock (held down with the magnet), ink up with the next colour. It can be difficult to do this using an ink pad, and can give you a harsh line, which is where the sponges, sponge daubers or brayer come in handy. Even if you manage it with an ink pad, the sponge can soften the line. Stamp and repeat with the darkest colour at the bottom.

Using the Stamparatus allows you to avoid any gaps and go back and add more colour where required.


Monday, 3 August 2020

Playful Alphabet Dies meet Rainbow Glimmer Paper

Playful Alphabet Dies Stampin Up Allthingsstampy Helen Read

I needed an 18th birthday card for my nephew. I know, tough crowd, right? Most of my stamps were unsuitable but I thought these Playful Alphabet Dies would do the trick perfectly.

It may be a bit of an overstatement but, to me, the Playful Alphabet Dies are a game-changer. Without wishing to state the obvious, you can spell out anything on your cards – personalising them and creating sentiments that aren’t available within our stamp range. You can even send a cheeky message to a friend... but if it’s too cheeky, perhaps don’t tell the nice folk at Stampin’ Up!®

Playful Alphabet Dies Stampin Up Allthingsstampy Helen Read

Yes, I know we’ve had alphabet dies – and stamps – before, but there’s something about these which makes them so much more versatile. For me, it’s the chunky, simple font and the small size. Each letter die is about 3/4" but, because of the chunky font, they aren’t too fiddly to handle. Those who know me will know I don’t do fiddly.

But the thing that swayed me towards this set of dies is the way they look SO good when you use the negative... so in many cases you get two projects from one. Not so much here, as I only needed a card to contain a cash gift but I could have made a gift tag using the letters I cut out.

Playful Alphabet Dies Stampin Up Allthingsstampy Helen Read

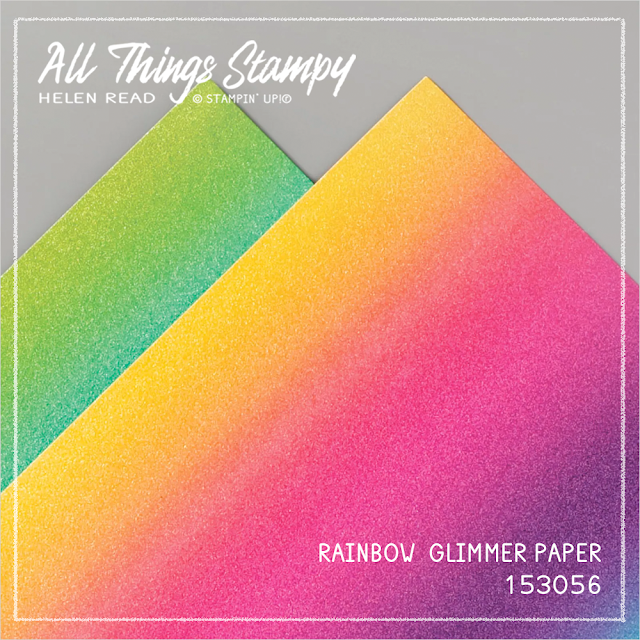
What I did do was place some small cut-offs from the FAB.U.LOUS new Rainbow Glimmer Paper behind the letters. This is gorgeous and best of all, it doesn’t shed! I cannot stand glitter bits everywhere, not just because they’re annoying but for environmental reasons.

Using the dies in this way is a really handy way of using up any tiny pieces of glimmer paper, Designer Series Paper, cardstock etc that you just can’t bear to throw away. Come on, I know I’m not the only who hoard little pieces “just in case”!

Playful Alphabet Dies Stampin Up Allthingsstampy Helen Read


Monday, 27 July 2020

Sneak Peek: Beautiful Autumn One-Sheet Wonder

Beautiful Autumn Stampin Up One Sheet Wonder Allthingsstampy Helen Read

The theme of today's post is the wonderful One-Sheet Wonder which is an old technique that never goes out of style.

Each week in my customer Facebook Group and in our weekly Show & Tell Zoom sessions I set a challenge. Last week this was to create a One-Sheet Wonder then use it to make one or more projects.

I was blown away by their creativity; we had dogs, leaves, flowers, snowflakes, pine boughs and even cars – and some amazing projects made with their sheets. Not everyone made cards; some made scrapbook pages or boxes, too! Really, anything goes.

Best of all, everyone said they had really enjoyed the challenge and loved making their One-Sheet Wonders.

If you’re not familiar with the One-Sheet Wonder concept, it’s very simple. It’s just a fancy name for making your own patterned paper so all you have to do is take a sheet of any cardstock – it doesn’t have to be white – and stamp all over it.

Beautiful Autumn Stampin Up One Sheet Wonder Allthingsstampy Helen Read

I’ve stamped here using the new Beautiful Autumn stamp set – yes, this is my first Sneak Peek from the new August-December catalogue. I bought the whole Suite of products again because it’s just so lovely, but I have only had chance to use the stamps and dies so far.

Beautiful Autumn Stampin Up One Sheet Wonder Allthingsstampy Helen Read

I wouldn’t say this was the ideal set for a One-Sheet Wonder, mainly because the images are so small that it’s quite time-consuming. This A4 sheet took me over an hour to stamp ... but then I did use eight different ink pads!

Beautiful Autumn Stampin Up One Sheet Wonder Allthingsstampy Helen Read

However, I think it was worth it; I have to blow my own trumpet a little and admit I think it looks pretty fab. Hope you like it too!

Beautiful Autumn Stampin Up One Sheet Wonder Allthingsstampy Helen Read

Beautiful Autumn Stampin Up One Sheet Wonder Allthingsstampy Helen Read


The Beautiful Autumn Bundle includes the Autumn Punch Pack; three fab medium-sized punches which create these gorgeous little leaves. The stamps are all two-step, too, so I stamped the outlines in a darker shade and then filled in with a lighter one. They’re photopolymer, so positioning is really easy.

Beautiful Autumn Stampin Up One Sheet Wonder Allthingsstampy Helen Read


To mat the greeting, I used the Tasteful Labels dies on Soft Suede cardstock  and embossed them using the Greenery Embossing Folder. My obsession with leaves and trees means many of my products co-ordinate beautifully across different Suites.

Beautiful Autumn Stampin Up One Sheet Wonder Allthingsstampy Helen Read
My main tip for creating a One-Sheet Wonder is to start with the largest stamps and stamp randomly over the sheet, leaving roughly equal spaces between them. Remember to keep turning the stamps so you don't end up with a pattern.

Take the next largest stamp and stamp again in a different colour. Repeat until you get to the smallest stamps. This allows you to maximise the space and get as many images on there as possible.

I usually say to start with the palest colour and work your way through to the darkest colour, but this is one rule that is definitely made to be broken!

Beautiful Autumn Stampin Up One Sheet Wonder Allthingsstampy Helen Read

When your sheet is stamped, you can cut it up as you wish to make as many projects as you like. I simply cut my sheet into quarters, then cut each one down to fit onto a card front, slicing them into thirds. The excess strips were used to embellish the insides of the cards.

Beautiful Autumn Stampin Up One Sheet Wonder Allthingsstampy Helen Read
When you cut up your sheet, you may find you have some empty areas around the edges. Don't worry, you can fill these in with more stamping if necessary.

Another tip to maximise your One-Sheet Wonder is to stamp all over with your chosen colours, then cut in half and add another colour to one of the pieces. You can repeat this if you wish to get lots of different looks from one sheet.

One of the main advantages of a One-Sheet Wonder is that it’s a time-saving device if you have a lot of cards to make (unless you use tiny stamps and eight different ink pads!), which means it’s ideal for your Christmas cards or for party invitations.

The other main advantage is that it’s very therapeutic. You just stamp away merrily without having to think too hard about what you’re doing. And we all need a bit of mindless crafting these days, don’t we?

Beautiful Autumn Stampin Up One Sheet Wonder Allthingsstampy Helen Read

Friday, 24 July 2020

More ideas for the Flowers for Every Season Suite

https://www.stampinup.uk/products/flowers-for-every-season-ribbon-combo-pack?demoid=5000075

I’m finishing the week with yet more ideas for the Flowers for Every Season Suite from Stampin’ Up!® – this time focussing on the lovely Jar of Flowers stamp set

You can buy this stamp set on its own but really, you kind of need the punch, too, to get the most out of it. The Jar of Flowers bundle features some beautiful floral images and a fantastic Jar Punch.

 https://www.stampinup.uk/products/flowers-for-every-season-ribbon-combo-pack?demoid=5000075

But wait...  it gets better! The Jar Punch can be used to fit around the stamps, on its own – or with the Mason Jar Shaker Domes. Yes, you can make very quick and easy shaker projects, just like this one...
 
https://www.stampinup.uk/products/flowers-for-every-season-ribbon-combo-pack?demoid=5000075

And this one, which combines the Jar Punch and Mason Jar Shaker Domes with the gorgeous Celebrate Sunflowers bundle I showcased on Wednesday....

https://www.stampinup.uk/products/flowers-for-every-season-ribbon-combo-pack?demoid=5000075

And look at that lovely Just Jade gingham ribbon, too! Who doesn’t love gingham?


Please do let me know if I can help you with any of these products – if you’re in the UK, I would love to have you as a customer, or even as a member of my team!


Friday, 17 July 2020

Spotlight on the Nothing's Better Than bundle

Nothing's Better Than Stampin' Up cards projects allthingsstampy helen read
What’s your secret (or not so secret) vice? Coffee? Cocktails? Cookies? Chocolate? This set covers all of those addictions and I really love the retro colours and imagery on these projects. 

Nothing's Better Than Stampin' Up cards projects allthingsstampy helen read

My vice is definitely chocolate, so the Nothing's Better Than stamp set definitely speaks to me!

Have you spotted it yet? It's on Page 91 of the Annual Catalogue and features a great range of images and greetings to create fun cards like this. There’s the Nothing’s Better Than photopolymer stamp set... and, even better, the bundle features all these great dies, too, so you can cut out your words and shapes. 

Check out these fabulous samples...
Nothing's Better Than Stampin' Up cards projects allthingsstampy helen readChocolate? Yes please! But it has to be milk and good quality – for some bizarre reason people think I like dark chocolate but I don’t; that goes straight into the baking cupboard.
Nothing's Better Than Stampin' Up cards projects allthingsstampy helen read Coffee? No thanks! I’d much rather have a nice cup of tea. Well I AM British, after all!
Nothing's Better Than Stampin' Up cards projects allthingsstampy helen read
Cookies? Yes please! Chocolate chip, of course! I just love the clever creation of a plate using the Layering Circle Dies in this project.

Monday, 15 June 2020

Stamping tip: How to colour your Forever Gold Laser-Cut paper

Forever Gold Stampin Up blends allthingsstampy

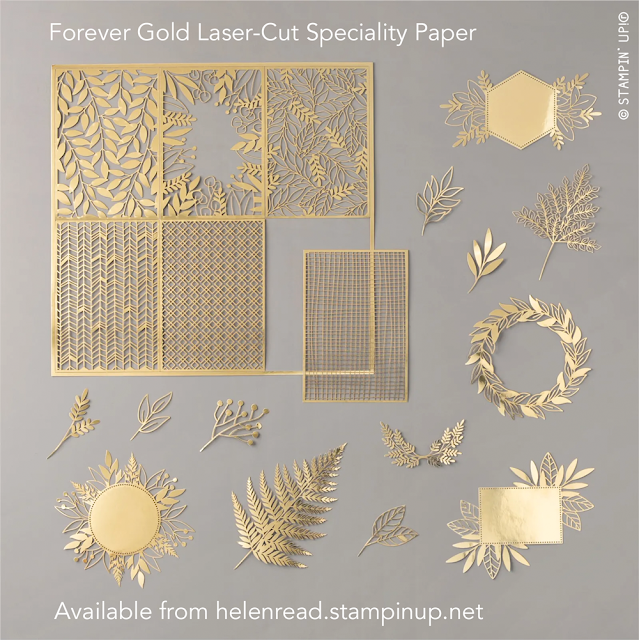
The Forever Gold Laser-Cut Speciality Paper pack has some really fun and glamorous elements in very shiny gold.

I do love them but I have to confess I’m not a huge user of bling, so I was keen to explore other options. This week I have several tips for using these fabulous elements, looking beyond the obvious.

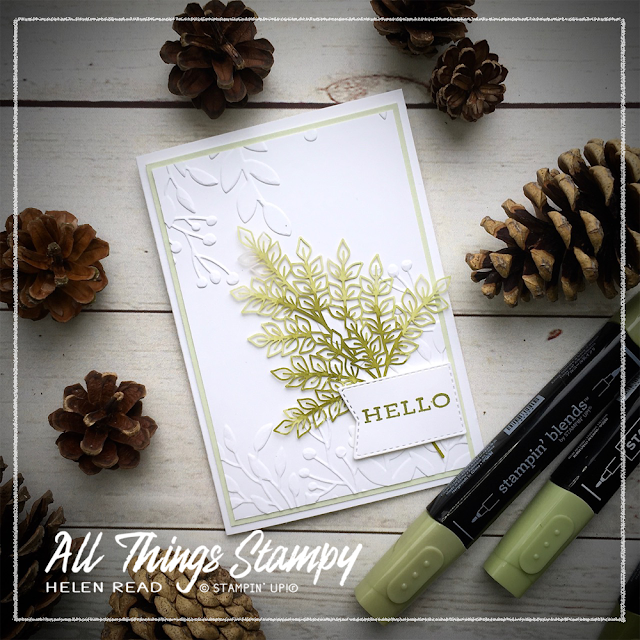
For starters, the back is white, which gives you a crisp effect, but how about colouring them? The surface is shiny, so your water-based inks and markers won’t work, but it CAN be done. All you need are some Stampin’ Blends.

I made a short video to show this technique. To get an ombre effect, I used three shades of green: Light Granny Apple Green, Light Old Olive and Dark Old Olive. What do you think?


Forever Gold Stampin Up blends allthingsstampy


If your wish list is bigger than your bank balance, why not consider joining my team during June? You’ll get up to £130 of craft supplies of your choice, PLUS an additional bundle (stamps + dies or stamps + punch) to add to your Starter Kit. Please get in touch for info, or click the image or here to get started.

Monday, 25 May 2020

#Loveitchopit with Magnolia Lane


As customers scrabble to purchase their favourite products before they retire, I’m scrabbling to use up my favourite retiring products because I only like to show you things that you can still buy. This is my choice; it’s often said to me “you have to use current products, don’t you?” but that’s not actually true. I just choose to concentrate on current products only because my crafting time is so limited.
Everything I make has to serve not only its desired purpose (a birthday card, a gift, a class project etc) but be shown on my blog, Facebook page and Instagram too. Waste not, want not!

This card uses the fabulous #loveitchopit technique pioneered by Aussie demo Kylie Bertucci. Basically you cut your 12x12 Designer Series Paper into 6x4 pieces, then use them on card fronts. It’s such a simple idea which not only gets you using your paper but means you can make beautiful and easy cards in next to no time!

I made this one using Magnolia Lane Designer Series Papers and the new Ornate Thanks stamp set. Hope you like it!


Friday, 22 May 2020

Old and new combine for thank you pouches


A mix of old and new here: three outgoing products and not one but THREE new products! Can you spot them?

The three outgoing products are:
1. Perennial Essence Designer Series Paper
2. Gorgeous Grape Mini Striped Ribbon
3. You Always Deliver stamp set.

And the three NEW products are:
1. A tiny image from a new stamp set called Comfort & Hope
2. Some little flowers punched out with the new Confetti Flowers Border punch
3. Labels created with the very clever new Lovely Labels Pick a Punch.

They came from my fantastic pre-order which arrived on Friday. Feast your eyes on this little lot...


You too can order brand new products before the  catalogue goes live if you sign up as a Stampin’ Up!® demonstrator! You get lots of perks and meet some wonderful people, too. Please get in touch if you’d like more details of what you could order, or click below to get started. 
 

The small print

This is my personal blog and my sole responsibility as an Independent Stampin' Up!® demonstrator. All images are © Stampin' Up!® All content including photographs, projects and text are © Helen Read, unless otherwise stated. Please feel free to copy my ideas for your personal use and inspiration - if you are a SU demonstrator you may use these ideas for your events but please give credit where it is due. Please do not use my ideas for monetary gain, competitions or publication. The images on this blog - including blog buttons - should not be copied and used elsewhere on the internet or on CDs.