Showing posts with label Tasteful Labels dies. Show all posts

Tuesday, 26 October 2021

Sweet Stockings Designer Series Paper projects

Sweet Stockings Stampin Up Christmas Cards UK demonstrator
 
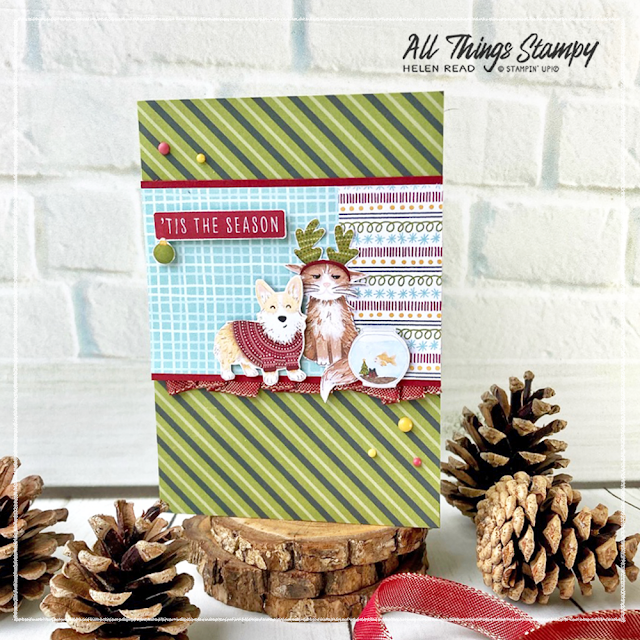
Do you love cats and dogs as much as I do? If so you won’t want to miss the beautiful Sweet Stockings Suite from Stampin’ Up!®. For my October kit of the month I used the Sweet Stockings Designer Series Paper and put together a selection of coordinating products. These are a really economical way to get your hands on everything you need to make fully coordinated projects and are idea if you find you don’t always manage to get through full packs.

Everyone who buys the kit from me gets access to an exclusive PDF of project ideas, with measurements, for them to copy or take inspiration from. I love that some of my customers then get together on Zoom to make the projects while they chat. 
 
Sweet Stockings Stampin Up Christmas Card UK demonstrator

These are some of the projects I shared with them this month. This is a Kraft Gift Box decorated with a fun tag made using the Seasonal Labels Dies and beautiful Pool Party striped ribbon. 

Sweet Stockings Stampin Up Christmas Card UK demonstrator
 
Isn’t that dog cute? And there are plenty more where that came from. To stamp the greeting, I used the little set that comes with the Christmas Whimsy Card Kit. It’s so useful.
 
Sweet Stockings Stampin Up Christmas Card UK demonstrator
 
Here are some more of the cut animals cut out from the Sweet Stockings Designer Series Paper. I love how grumpy the cat looks with his seasonal antlers on. All the greetings for the rest of the projects came from the Christmas to Remember stamp set – I particularly love this ’Tis the Season stamp as it gives you white on a colour without the hassle of embossing.
 
Sweet Stockings Stampin Up Christmas Card UK demonstrator
 
Behind the bottom edge of the Designer Series Paper layer, I have pleated the ribbon, which is one of my favourite ribbon techniques. Simply lay a strip of double-sided tape along the edge of the paper or cardstock then pleat the ribbon onto it, and lay a second strip of tape on top to hold it in place.
 

 When using double-sided table, always stick to the firmer surface first. So if you are using paper and cardstock, stick it to the cardstock. If using ribbon, stick to the paper or cardstock, then add the ribbon on top. Otherwise you’ll be there all day trying to peel off the backing.
 
 
Sweet Stockings Stampin Up Christmas Card UK demonstrator

This card uses the lovely Kraft cardstock which is something I have longed to see back in the catalogue for many years. It makes a beautiful warm neutral backdrop for this festive dog with his wreath collar. 
 
Sweet Stockings Stampin Up Christmas Card UK demonstrator

November’s Kit By Mail uses the brand new Eden’s Garden products – I am only taking orders for this kit until midnight on 31st October so I can order first thing on 1st November when these products go live to customers. This is because the Designer Series Paper, speciality cotton paper and Garden Gems are all only available while supplies last, and I would hate for anyone to miss out. 
 
Eden's Garden kit stampin up uk demonstrator
 
 
Please click here to order your kit today – I can post them out to anywhere in the UK.

Does your wish list come to more than £99? Please get in touch and I will help you get more for your money and unlock discounts all year round.  
 

Monday, 1 February 2021

FREE tutorials: Paper Blooms birthday cards

Happy new month! To mark the end of possibly the longest January in history, I held a lovely relaxing craft class on Saturday. I called this my Birthday Bash event... which in retrospect was not the best name as several people have asked if I was my birthday (they didn’t send cake though, sadly).

But no, the idea was to create a set of six cards ready for all those birthdays that spring up on you in the new year.

It was also a great opportunity to use the Paper Blooms Designer Series Paper from the Sale-a-Bration brochure. Everyone received a quarter of a pack for their six projects, giving them lots of versatility and choice. 


We began with this fun fold card – although I’m not sure everyone found it as fun as I did! It's made from a full sheet of A4 cardstock; the piece you cut off can be trimmed down to use as the belly band – and in fact provided the belly band for the second card, too.

Download the FREE tutorial here (opens in new window)


This is what the card looks like when it’s opened out. Plenty of space to write. 

 
The second card was a simple Z-fold, where you just score the front at the halfway point and fold it back on itself. I set out to make this a masculine card but failed miserably. Never mind – we can always use more floral cards, can’t we?


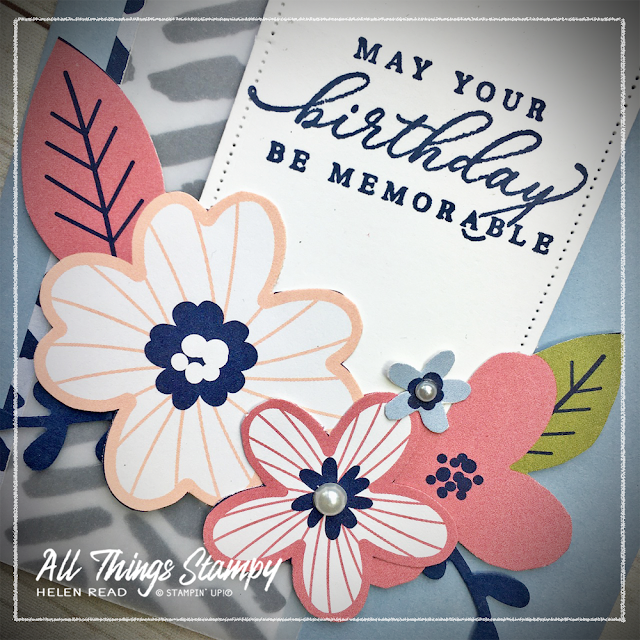
Our third card utilised vellum to tone down this lovely but bold Designer Series Paper. By offsetting it a little, you can add interest. The front is decorated with flowers cut out from the Paper Blooms pack. 
 
 
When using vellum, you don't want your adhesive to show, so make sure you only apply glue or tape behind your elements. I quite like the way the vellum then sits loosely on the card but if you need more security, add a glue dot and cover it with another flower or rhinestone/pearl.
 
 
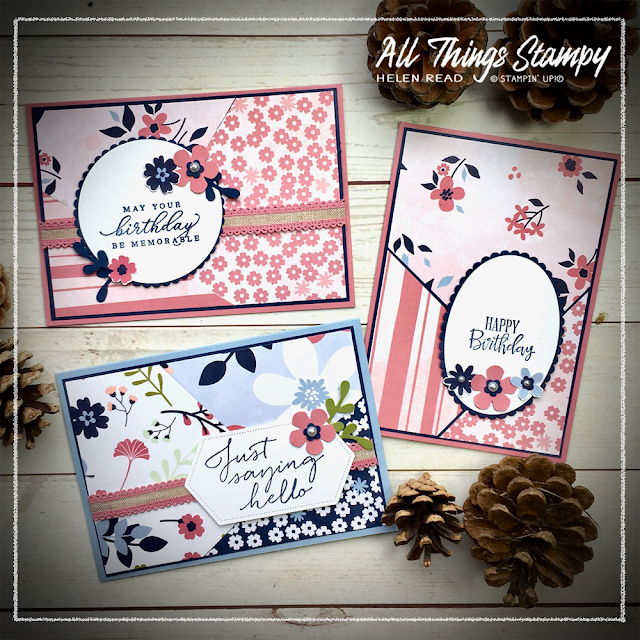
Our last three cards were from a three-in-one pattern, which is fun to make and really speeds things along. Basically, you cut three pieces of DSP to the same size, then cut them up in exactly the same pattern – I used a guillotine-style cutter so did them all in one go. Then you mix up the designs to create three different cards. You don't have to follow this pattern, you can do it with vertical or horizontal strips, or use your imagination!

If you would like to follow this pattern, however...


You can earn this gorgeous Designer Series Paper FREE during Sale-a-Bration, which runs to the end of February. This is one of your choices when you place a £45 order. If you are in the UK and would like to order, please visit my store and, if you use the February host code D6PKN76U, I’ll send you a little thank you gift in March!


Does your wish list come to more than £99? Please get in touch and I will help you get more for your money and unlock discounts all year round.  
 

NB: Please note orders are currently taking quite a bit longer than usual to arrive, due to a combination of extra paperwork required following Brexit, lower staffing levels due to the pandemic, and an influx of orders as a result of both lockdown and Sale-a-Bration. Please ask if you require more information.


Monday, 28 September 2020

Forest bathing with In The Pines

In The Pines Stampin Up ideas

In The Pines is a bundle with my name all over it. There are few places I’d rather be than among trees.

In Japan, shinrin yoku is the art of forest bathing and recognised for its benefits on people’s physical and mental health. This isn't new-age nonsense; far from it. There are very good reasons behind it, so are you ready for some science?

Studies have shown that being among trees can not only improve your concentration and memory, but reduce your blood pressure and lower levels of cortisol, the stress hormone. On top of this, trees and plants emit phytoncides, which have antibacterial and anti-fungal properties, helping us to fight disease.

If those aren’t good enough reasons to get out into the woods, then I don’t know what is. I love to go for countryside walks but am always drawn to the trees; in lockdown, when we weren't supposed to drive anywhere for leisure, I managed to work out a four-mile walk which took me through little woodlands, although they were no substitute for ancient woodlands and my favourite Scottish pine forests. 

The pine forests of Scotland – particularly Abernethy Forest in the Cairngorms – were the inspiration for these projects using In The Pines stamp set and the Pine Woods Dies. Expect more where these came from...

In The Pines Stampin Up ideas

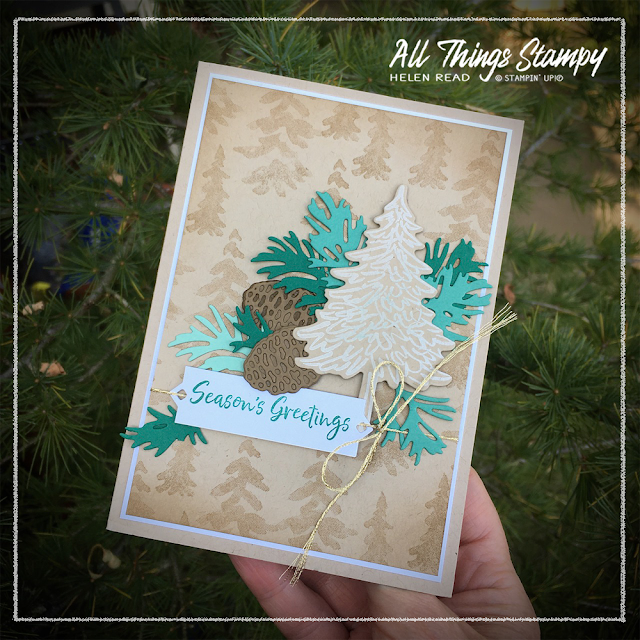
This project uses the Beautiful Boughs dies, too. As you can imagine, I have a whole section of craft room dedicated to tree-themed products! The back pine cone was sponged in Soft Suede before the top layer was stuck on. I’d already made the first one so went with it. I like how only some of the “bits” have come out; I like the look of some still remaining so left them there. Easier, too!

In The Pines Stampin Up ideas

I stamped the main tree image in Whisper White Craft ink onto Crumb Cake and cut it out using the Pine Woods Dies. To make the label, I cut it using the Beautiful Boughs dies then trimmed it down to make it slimmer. The gold trim is from the Forever Greenery Suite.

In The Pines Stampin Up ideas

This is a simpler card which uses just the In The Pines stamp set, along with the Tasteful Labels dies, although any label dies or a punch would do a similar job.  The trees felt a little lost on the stark white background, so I gave it some depth by sponging around the top and bottom using Mint Macaron and just a hint of Pretty Peacock. 

In The Pines Stampin Up ideas

In The Pines Stampin Up ideas

This card is actually not inspired by Scotland but by Lea Wood nature reserve near Cromford. There's a little patch of Scots Pines at the top; if you stand in the centre and look up, you see this effect. This is a fascinating phenomenon called ‘crown shyness’ where trees avoid their branches touching each other. Not all trees do it and nobody really knows why. But don’t say I never tell you anything!

In The Pines Stampin Up ideas


Monday, 24 August 2020

10 simple cards using the Whale of a Time Suite

Whale of a Time Stampin Up Allthingsstampy Helen Read

How fabulous is the Whale of a Time Suite? I bought the whole suite collection, which is not something I’d done until this year. Now I’m all over it as a concept as it’s so easy!
Public service announcement
 If you’re shopping online and the suite is showing as unavailable or on backorder, do check the individual items. It may be that just one item is temporarily out of stock which puts the whole suite on backorder. But you can still order the individual items separately.

Whale of a Time Stampin Up Allthingsstampy Helen Read

Ok, onto the projects! Above are all of the projects were are currently making in this month’s remote workshops. Guests have had the choice of attending every Tuesday at 1pm, or coming to the Saturday morning class which was this past weekend. They could even attend both if they wished – and one lady turned up “just to watch and heckle”. 😂

Each week the ladies make two simple cards using the Whale of a Time Designer Series Paper, adding their own greeting stamps or using the Whale Done stamp set if they chose it as an optional extra. For eight of the cards we used Whisper White Notecards and Envelopes, with two shaker cards on a standard Pool Party card base.

Whale of a Time Stampin Up Allthingsstampy Helen Read

We began with a double whale week and, thanks Stampin’ Up!®'s fabulous co-ordination, you can punch out the large whales from the DSP. Those who hadn’t upgraded to include the Whale Punch could fussy cut them instead. We set aside one of the whale patterned pieces to use just for this purpose. 

Whale of a Time Stampin Up Allthingsstampy Helen Read

I love this Pool Party Sheer Ribbon, too – it’s so soft and shimmery.

Whale of a Time Stampin Up Allthingsstampy Helen Read
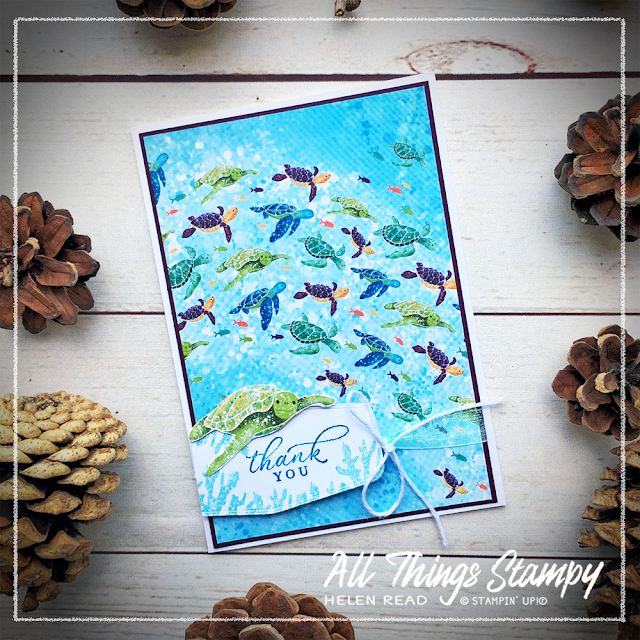
 Onto Week 2... which was turtle week and another opportunity to show off the gorgeous DSP...

Whale of a Time Stampin Up Allthingsstampy Helen Read

To provide a cute focal point for the projects, we fussy cut the turtles from the DSP. Again, we set aside the piece with the turtles on to use for this. 

Whale of a Time Stampin Up Allthingsstampy Helen Read

The Whale of a Time Sequins make great accents when stuck down with a Glue Dot. I love these tiny translucent shells. 

Whale of a Time Stampin Up Allthingsstampy Helen Read

I had die-cut a series of labels using the Tasteful Labels Dies and Stitched Rectangles Dies. All different, so I could cut them all for each person in one go.
I did throw in a couple of shaker cards to mix things up a little, which meant some preparation time using the Snow Globes Scenes Dies but worth it I think as they look so fab with the sequins behind.

Whale of a Time Stampin Up Allthingsstampy Helen Read

This was the first one; it’s hard to photograph a shaker card but you may just be able to see a cut-out turtle within the Snow Globe Shaker Dome.
This was accompanied by another turtle card; both show off the absolutely gorgeous Whale of a Time Designer Series Paper

Whale of a Time Stampin Up Allthingsstampy Helen Read

Whale of a Time Stampin Up Allthingsstampy Helen Read
This Tuesday we will be making another shaker card, this time with a sponged and embossed surround. Yes, more work for me die-cutting and embossing in advance but I really wanted to show off this gorgeous Seabed 3D Embossing Folder

Whale of a Time Stampin Up Allthingsstampy Helen Read
We’ll also be making this fab little notecard. I LOVE this piece of Designer Series Paper, it's so lovely. Guests at this series of classes received a quarter of a pack of the DSP; of course, if you have a whole pack, you get four pieces of this, so can make lots of lovely projects. 

Whale of a Time Stampin Up Allthingsstampy Helen Read

To finish off, we will be making these cards – I left these to the end because they can be adapted to suit any leftover scraps. This is a great way of using up scraps of any Designer Series paper.

Whale of a Time Stampin Up Allthingsstampy Helen Read

Whale of a Time Stampin Up Allthingsstampy Helen Read

So are you inspired by this Suite? My customers have been loving it. If you’re inspired enough to buy it and are in the UK, you can shop the Suite here

Whale of a Time Stampin Up Allthingsstampy Helen Read

Wednesday, 19 August 2020

#Sharesunshine with Mini Paper Pumpkin Boxes

Mini Paper Pumpkin Boxes Allthingsstampy Helen Read Stampin Up

I talked last week about sharing sunshine through the new Box of Sunshine Paper Pumpkin Kit, which is an exclusive kit currently available while supplies last.

There are many ways we can #sharesunshine and one is through the Mini Paper Pumpkin Boxes which are sized to fit our Notecards & Envelopes and ideal for little gifts. 

Mini Paper Pumpkin Boxes Allthingsstampy Helen Read Stampin Up

I wanted to thank my customers who had shown incredible commitment during lockdown to complete the 12 craft challenges I set them. They had from the start of lockdown until the end of June to complete the challenges and could do them in any order. One lady did them all in the first week, others tackled them methodically and went right up to the wire.

Mini Paper Pumpkin Boxes Allthingsstampy Helen Read Stampin Up

Somewhat conveniently, 10 ladies completed all 12 challenges, so I use one full pack of Mini Paper Pumpkin Boxes to hold their gifts of Rainbow Glimmer Paper, mini note cards and... I think there was some yellow ribbon in there, too. To be honest, these gifts went out a while ago, I just haven’t got round to posting them here.

Rainbow Glimmer Paper Allthingsstampy Helen Read Stampin Up

I tried to stick with the sunshine theme and decorated the lids using Bumblebee cardstock, with some stamping and die-cutting from the Forever Fern Bundle from the Forever Greenery Suite and label made with the Tasteful Labels dies. They were all tied with different ribbons because I thought I had purchased some specially but couldn’t find it in the chaos of my craft room!

Mini Paper Pumpkin Boxes Allthingsstampy Helen Read Stampin Up

The greeting is from Rooted in Nature and felt perfect for the occasion. 

My ladies are now working on weekly challenges via my private Facebook group. This is open to my customers and class-goers so if you fit into this category, please let me know so I can add you. 

Mini Paper Pumpkin Boxes Allthingsstampy Helen Read Stampin Up

Pop up the label using Stampin’ Dimensionals, keeping the centre clear so the ribbon slides through freely. This will enable the recipient to untie the ribbon and open the box without destroying the décor.

Bonus tip: If you’re in the UK and plan to mail out these boxes, be warned that they’re just a little too deep to go as a Large Letter and will incur the Small Parcel rate.


The small print

This is my personal blog and my sole responsibility as an Independent Stampin' Up!® demonstrator. All images are © Stampin' Up!® All content including photographs, projects and text are © Helen Read, unless otherwise stated. Please feel free to copy my ideas for your personal use and inspiration - if you are a SU demonstrator you may use these ideas for your events but please give credit where it is due. Please do not use my ideas for monetary gain, competitions or publication. The images on this blog - including blog buttons - should not be copied and used elsewhere on the internet or on CDs.