Friday 28 February 2020

Two ways to use Pigment Sprinkles


Pigment sprinkles add a watercoloured, naturalistic look to any project and I love them! I just wish I'd bought them sooner.

I’ve used them in two ways for this project. For the pineapple, I wet the watercolour paper, sprinkled on my pigment and spritzed it liberally with more water to give this washy look.

For the background, I flicked on some sprinkles using a dry brush and only spritzed very lightly. This made the different colours within the pigment separate to give this fun multi-coloured look.

When I ran the pineapple body through the Big Shot, because it was watercolour paper, the pieces didn’t fall out easily, so I quickly taped them in place from behind as I liked the look. I hesitate to advise how to recreate this look, as all die-cutting machines are calibrated differently but you can try thicker cardstock or maybe two pieces – the top one will be cut all the way through while the bottom one should be cut partially to give you the pattern without all the pieces falling out. 
 

Wednesday 26 February 2020

Honey Bee bundle meets Pigment Sprinkles


Another outing for the Honey Bee bundle... this time a project CASEd from Sandra Budde, a Stampin’ Up!® demonstrator based in Germany.

For my version, I added an extra bee and, to ring the changes a little, I created my background using Pigment Sprinkles. These are extremely fun and ideal if you like playing around with techniques – but not if you don’t like messy projects!

Cover your work surface and beyond when using pigment sprinkles as this stuff gets everywhere!


Monday 24 February 2020

Honey Bee bundle: How to attach the honeycomb die to your projects

 
When it came to pre-ordering from this Spring/Summer catalogue, I went a bit mad. Not in a “buy everything” way, but in a “buy a load of stuff I don’t really like and ignore the sets I love” kind of a way.

Consequently, I ignored the beautiful Honey Bee bundle until recently when, really, it should have been at the top of my list. I've always been drawn to bee stamps and had them in my collection almost from day one. As I don't keep anything that isn’t current, I was bee-less, so I'm more than happy to have this on my shelf.

And it seems I'm not alone, as I presented this card at my Stampy Buffet, where it proved to be the most popular project of the day by far, with some of the ladies making three of them. I hope you think it’s the bee’s knees, too.
To attach the very fine honeycomb die-cut, you can either use wet glue, gently applied to the back with a sponge, or carefully tape it behind the aperture. Both ways are quite fiddly as it's only just big enough - but it's worth the effort. 


Friday 21 February 2020

Meerkat Week: A totally tropical finale


Bringing Meerkat Week to a close is this totally tropical card which we made at Crafty Friday at the beginning of the month. I sponged my background and then stamped the meerkats on top, which is why they have a slightly blue tinge to their faces, but the ladies are no fan of sponging so chose to brayer theirs instead.

This really would look better if the meerkats were masked first using a sticky note. You can brayer or sponge your background, but if you’re sponging, you have to be very careful not to disturb the mask: sweep the sponge away from the mask instead of towards it. Brayering is more forgiving as you are rolling the mask down with each stroke of the brayer. 


Thursday 20 February 2020

Meerkat Week: Silhouetted meerkats


I take my hat off to the first person to come up with this silhouette idea. But there are so many versions of this by now that I can’t work out who was the originator.

Begin by masking and brayering a lovely bright sunset, then all you do is stamp your image, then colour the whole lot in black. How easy is that?

Brayering is easy but most people, in my experience, give up too early and are disappointed with their results. The keys are:

1. Start OFF the edge of the paper so you don't get a hard line where the ink begins... AND
2 Keep going: brayer over and over and over again until you get a good even colour distribution. 
 

Wednesday 19 February 2020

Meerkat Week: Simple or stepped up?


A simple card is taken to the next level with the addition of a few extra supplies. I swapped the Delightful Tag Topper Punch for the Stitched Nested Labels dies, added some Noble Peacock Foil Sheets, some 2019-2021 In Color Faceted Dots, a tone-on-tone cactus background and, of course, a little gecko friend. Which one do you prefer?


Colouring around your image using the light Pool Party Stampin' Blend makes your images really stand out. It’s a bit scary, but give it a try! 


Tuesday 18 February 2020

Meerkat Week: The Gang's All Meer striped celebration

I’m so proud of my downline Christine, who promoted to Bronze Elite this week – an impressive achievement for someone who joined “for the kit”!

To celebrate her achievement, I naturally sent her a card and a gift, using my set of the moment, The Gang's All Meer. I shamelessly CASEd this project from Amy Koenders because I love the bold striped background and added some coloured flowers using the In The Tropics dies.

Create this fun background by colouring in the white areas on some striped Golden Honey Designer Series Paper wiht your chosen Stampin’ Blends alcohol markers. Initially, the bees on the other side will show through the paper, but once the ink has dried fully, they will disappear to leave clean coloured stripes.
 

Monday 17 February 2020

Meerkat Week: The Gang's All Here treat holder tutorial

 
I was wandering around B&M Bargains the other day, like you do, trying to avoid buying a load of stuff I didn’t need because it’s cheap… when I spied a Christmas reductions shelf. Whaaat? It’s February already!

Unable to resist a bargain, I found some tubes of mini packs of Love Hearts which are just perfect for Valentine’s Day treats! There was no price on them but the tubes of other Christmas sweets and chocolates had been reduced to 49p so I grabbed three packs. But when I got to the checkout, it turned out they were reduced to 10p! If the shop wasn’t so huge I’d have dashed back for more.


Anyway… this is what I made with some of them. I adapted a Hershey’s Nugget holder because

a) you can’t buy these in the UK and
b) if you can, please don’t tell me where because I’ve tasted them and have no desire to repeat that experience.

Download the tutorial here
 

Here’s another version, which holds a pack of mini doilies (still on the Clearance Rack last time I looked). No tutorial for this as it’s just a standard card base cut down to a square, with a piece of ribbon tied around it!

If you're cutting your meerkats out and intend to add hats, there's no need to fussy-cut around the tops of their heads. In fact, leaving a tab of cardstock gives you something to attach your hat to. Which doesn’t matter such much when gluing flat, as I’ve done above on the circle, but is very helpful on the popped-up meerkat on the first little treat holder. 


Friday 14 February 2020

Timeless Tropical with the brightest of brights


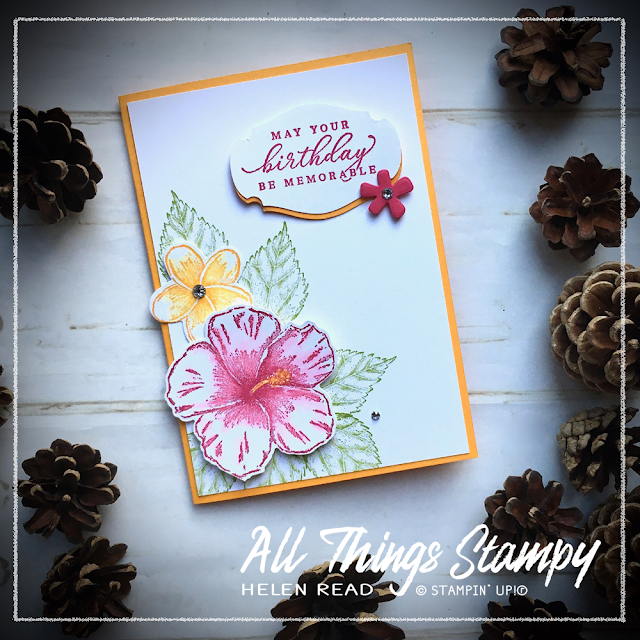
On cold winter days, a splash of tropical colour is always welcome. The beautiful Tropical Oasis Suite is perfect for brightening up dark days but it’s easy to go overboard and end up with a project which takes you until spring to complete.

For my Stampy Buffet, I kept things relatively simple with this project CASEd from Cindy Elam. Guests could die-cut or fussy-cut the stamped flowers, and the punched greeting is as quick as they come.

With a juicy ink pad such as Lovely Lipstick, used here, you don’t need more ink on your blender pen when colouring the image; in fact, adding extra ink can just make it blotchy. Instead, I just dragged the ink from the centre of the flower to add some depth.


Wednesday 12 February 2020

Garden Goodness with two-tone tomatoes


I’m really not into Valentine’s Day projects. Hearts, flowers, soppy sayings and all that pink and red just turn me off. If you’re like me and want something a little quirky, how about sending a card made with Garden Goodness?

Why? Because tomatoes are also known as “love apples”, thanks to the French seeing their heart-like shape and assuming this must mean they have aphrodisiac qualities! They called them “pommes d’amour”! 🍅❤️

What do you think? Do tomatoes put you in the mood for luuurrrve?

To get the two-tone toms, first ink up with an orange ink (Pumpkin Pie used here), then sponge on top with a red ink (I used Merry Merlot because this was one of my Stampy Buffet projects and my other red inks were busy elsewhere). 


Monday 10 February 2020

Sale-a-Bration swap card with free products


Swapping is a big part of being a demonstrator – and it’s a great way to pick up fabulous new ideas, often with stamp sets you don't own.

I joined a swap recently with the broad theme of both Sale-a-Bration and new products from the Spring/Summer catalogue. I went down the SAB route and made this project using not one but two SAB items: the Power of Hope bundle and Lily Impressions Designer Series Paper.

Now I need a design a project that uses all those die-cut rectangles I have left over from the centres of these cards!
I wanted to give my lady black hair but knew that would disappear into a shapeless blog, so I coloured her hair with Blackberry Bliss instead. Black hair never looks completely black anyway, does it? It reflects the colours around it. 


Friday 7 February 2020

Painted Poppies Week: Monochromatic Poppies

Painted Poppies Stampin Up Helen Read Allthingsstampy Monochromatic


It’s the last day of Painted Poppies Week here at All Things Stampy but I’m sure this won’t be the last you see of this lovely stamp set!

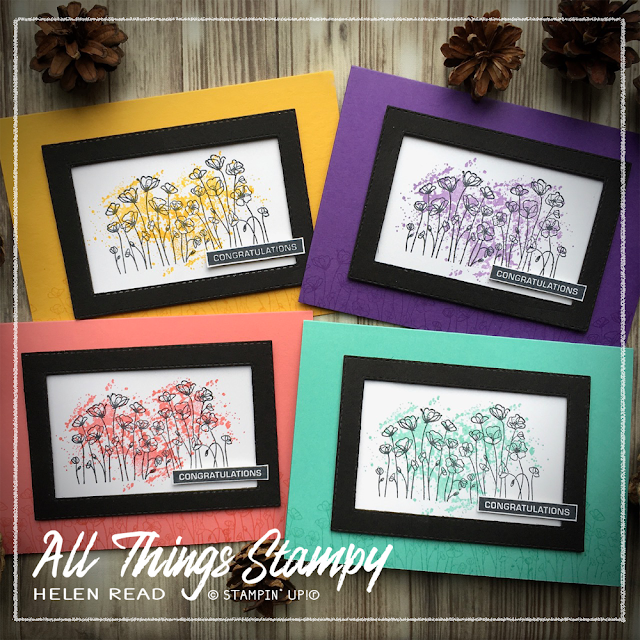
These four fun cards were quick and easy to make – and I love how you can tailor the design to almost any of our lovely colours.

Painted Poppies Stampin Up Helen Read Allthingsstampy Monochromatic

Painted Poppies Stampin Up Helen Read Allthingsstampy Monochromatic

Painted Poppies Stampin Up Helen Read Allthingsstampy Monochromatic

Painted Poppies Stampin Up Helen Read Allthingsstampy Monochromatic

I borrowed the idea from Lynn Dunn, but simplified her design slightly to use Label Me Bold instead of embossing – I really have to be in the mood for embossing!

My colours are Crushed Curry, Gorgeous Grape (but with Highland Heather stamping), Flirty Flamingo and Coastal Cabana. Which one is your favourite?

Some colours will swamp your poppy heads, which is why I used Highland Heather instead of Gorgeous Grape. If you don't have a paler ink, you can stamp off onto scrap paper first, then this will give you a lighter shade.


Thursday 6 February 2020

Painted Poppies Week: Lovely landscape


Real Red, Pear Pizzazz and Call Me Clover really make the poppies stand out on this #simplestamping project. I took inspiration from a talented stamper out there in the stampiverse but I'm afraid I can't find the original so I cannot credit her. If you know, please comment and I'll amend this post to give her credit.
You could make this project even simpler by stamping straight onto the notecard, but that cane be a little daunting for new stampers, so I prefer to give them a separate piece of cardstock so they have the option of turning it over if they're not happy with their first attempt.  


Wednesday 5 February 2020

Painted Poppies Week: Simple to Stepped-up


I haven't posted a #simplestamping project for a while, so here you are... with a stepped-up calendar version thrown in for good measure.


This calendar card was one of my Cuppa & Card projects in January. It was a rash decision to make something so time-consuming within our one-hour session, but I had some calendar tabs to use up.

However, just in case I had more people turn up than calendar tabs, I had the second #simplestamping card ready to go. Same design as the calendar, just stuck onto a notecard instead. Cunning, eh?

Get the trendy white-on-black look of embossing without the tools, the faff and the time by using the new Label Me Bold stamp set. I love it!


The small print

This is my personal blog and my sole responsibility as an Independent Stampin' Up!® demonstrator. All images are © Stampin' Up!® All content including photographs, projects and text are © Helen Read, unless otherwise stated. Please feel free to copy my ideas for your personal use and inspiration - if you are a SU demonstrator you may use these ideas for your events but please give credit where it is due. Please do not use my ideas for monetary gain, competitions or publication. The images on this blog - including blog buttons - should not be copied and used elsewhere on the internet or on CDs.