Tuesday 30 June 2020
Pride 2020 blog hop: Sponged rainbow cards
Crafting is for everyone, so I am delighted to take part in this Pride 2020 blog hop. This international hop by Stampin’ Up!® demonstrators is designed to show support for crafters (and non-crafters) in the LGBTQ+ community, as well as showing off some beautiful, colourful projects.
We crafters love colour, so what better opportunity to stamp a rainbow? From one sponged piece of cardstock, I made two very different projects. It all began with a piece of Whisper White cardstock which I sponged in rainbow colours. I used, from top, Real Red, Pumpkin Pie, Daffodil Delight, Granny Apple Green, Bermuda Bay, Pacific Point and Gorgeous Grape.
Even though I only really needed the outer edges for this frame, which I die-cut using the Stitched Rectangles Framelits, I tried to keep the sponging nice and even across the whole panel, as I knew I could use the centre for another project.
My next step was to use the Stamparatus to stamp this rainbow greeting from Happiest of Birthdays. I love this set because I really needed a BIG greeting and this one is simple and straight to the point.
Using sponge daubers, I built up the image line by line, stamping in between each colour to see where I needed to ink next. The Stamparatus means you can hit the mark every single time (although read on for a fine example of this not being true, LOL).
After a couple of attempts, I settled on stamping on this In Good Taste Designer Series Paper to give the background a little texture... or at least the appearance of texture. I had some excess at the red end, so use this to punch a little heart using the Dog Builder punch. It’s all mounted onto a piece of Whisper White embossed using the Brick & Mortar 3D Embossing Folder.
To use the centre piece, I knew I wanted to do something a little different, so splashed the sponged piece with some water to create this lovely effect. I use this technique a lot as it can represent lots of different things, such as snow or stars on a dark blue background. In this context, I think they look a little like seedheads blowing in the wind.
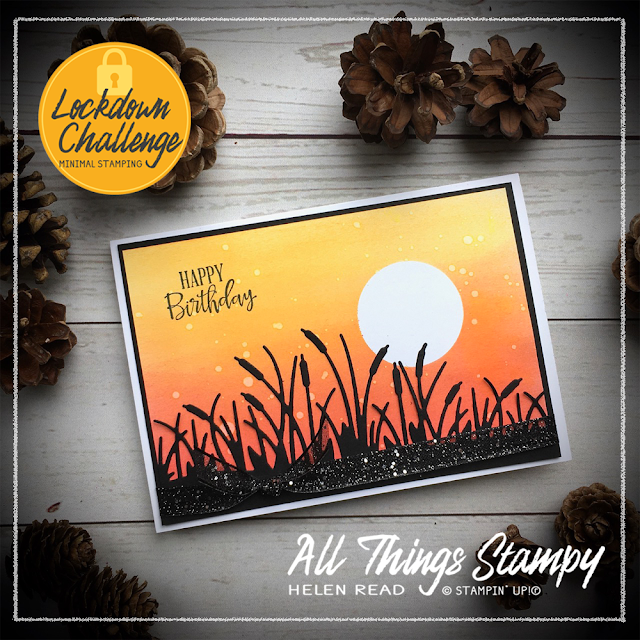
Now to the stamping and, armed with my trusty Stamparatus, what could possibly go wrong? The cardstock could slip when you’re not looking, that’s what! This is how I ended up with this double grass effect. Not what I intended but I don’t hate it, so I left it on the card. It’s stamped with the new Field of Flowers stamp set, which I just love for creating silhouettes on arty backgrounds. I do love playing around with fun background techniques!
Again, it’s mounted on the Brick & Mortar 3D Embossing Folder (an old favourite but new to my craft room so it’s getting a lot of love) with just a hint of a black border.
I hope you like my Pride 2020 projects – please enjoy your trip around the world as you look at the other projects here:
Monday 29 June 2020
Whale of a Time shaker card
I’m currently obsessed with Stampin' Up!®’s new Whale of a Time Suite; I bought the whole Suite and have been having fun designing projects for my August classes.
The Suite is just crying out for shaker cards – I mean, who doesn’t love a shaker card? And the Designer Series Paper just has to be seen – it’s fin-tastic!
I made this for a fabulous friend who has landed herself a kriller job - and I'm sure she’ll be a big fish in her new orca-pation.
Think
carefully before assembling a shaker card. I had to start again because
I had the layers in the wrong order! You need to ensure the window
sheet is sandwiched between the top layer and the foam
tape/Dimensionals. If using Dimensionals, you can cut strips from the
edge pieces - and make sure you don't have any gaps!
And another tip is that the fabulous recruiting offer ends soon! You need to join in June to get the free bundle in your Starter Kit. Please click below to get started or get in touch for details.
Friday 26 June 2020
Forever Greenery Suite from Stampin' Up!®
I have been enjoying the Forever Greenery Suite from the new Stampin'
Up!® catalogue – it’s the first time I’ve ever purchased a whole Suite
in one go.
When using the Greenery Embossing Folder with the small repeating leaf pattern, because it has a repeating pattern, you can emboss a whole card front panel if you do half the piece at a time. Simply reinsert the cardstock into the embossing folder, slotting part of the embossed area back into coordinating indentations on the folder
Wednesday 24 June 2020
Multicoloured sponging on Tasteful Touches
This project was heavily influenced by a swap card I received, created by fellow Stampin’ Up!® demonstrator Jo Blackman. I loved it and couldn’t wait to CASE it.
I used the Tasteful Touches bundle,
which is so beautiful and enhanced by the gorgeous In Good Taste
Designer Series Paper from the same suite, which adds texture without
bulk.
To get the multicoloured effect on the feather stamp, I used sponges with the following inks: Terracotta Tile, Coastal Cabana and Pretty Peacock. If you start with the paler colours, it avoids transferring dark ink onto your lighter ink pads.
Monday 22 June 2020
Video: One-sheet wonder with Forever Fern
The one-sheet wonder technique never goes out of style! Simply update it by using the latest stamp sets. Here I've used Forever Fern with one of my In Color combinations. This combo really stood out to me as I loved the retro feel.
As always, my tips for a OSW are the same: Start with the largest stamp in the lightest colour and work your way through to the smallest stamp in the darkest colour. Of course, rules are made to be broken, so feel free to play around and see what you come up with.
When you have cut up your sheet into smaller pieces to make a card or other project, you may find you have some white edges but these can be filled in with a little more stamping. But if you've kept your images close together and overlapping to start with, this shouldn't be necessary.
These are all going out to my new team members who have joined me in June. The four ladies receiving these felt it was an offer they couldn't refuse; around £170 of products for just £99 (and free shipping). Want to find out more? Please get in touch.
Friday 19 June 2020
Stamping tip: Maximising your Forever Gold Laser-Cut Specialty Paper
I have another tip for the Forever Gold Laser-Cut Speciality Paper for you today. This time it maximises every last scrap of that lovely gold paper.
When you’ve used all your elements – and even before – don’t discard the outer pieces as you can use these for die-cutting yet more leaves using the Forever Flourishing Dies. Waste not, want not!
Wednesday 17 June 2020
Stamping tip: Forever Gold Laser-Cut paper
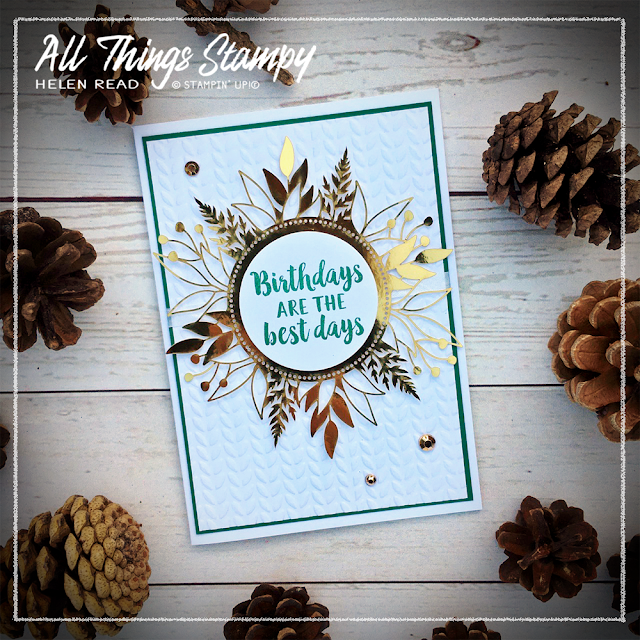
My catalogue launch party on Saturday was all about the Forever Greenery Suite and I particularly wanted to show the versatility of the Forever Gold laser-cut speciality paper.
On Monday I showed you how I coloured the back of the leaves using Stampin' Blends and here I have stamped onto the back paper using Stazon. I used Saddle Brown to echo the gold, but black would work just as well. The important thing is to use a permanent ink, as a water-based ink will simply pool and wipe off.
Be careful when removing your stamp, as the surface is quite slippery and even with a permanent ink such as Stazon it can smudge (ask me how I know!)
Monday 15 June 2020
Stamping tip: How to colour your Forever Gold Laser-Cut paper
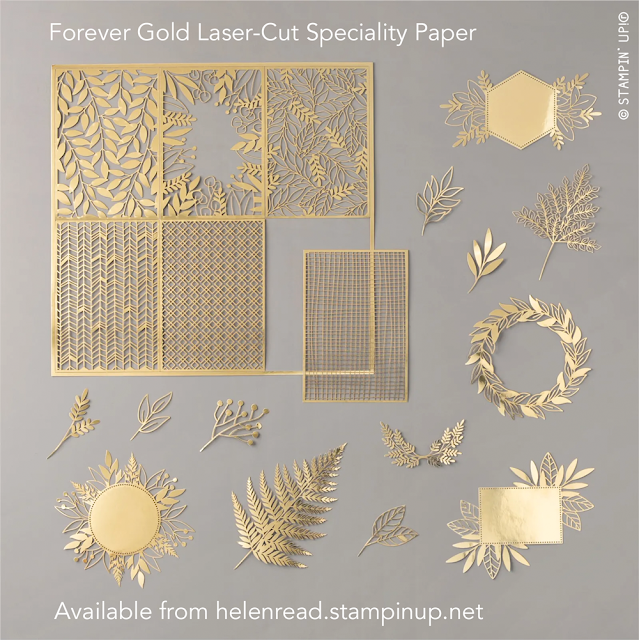
The Forever Gold Laser-Cut Speciality Paper pack has some really fun and glamorous elements in very shiny gold.
I do love them but I have to confess I’m not a huge user of bling, so I was keen to explore other options. This week I have several tips for using these fabulous elements, looking beyond the obvious.
For starters, the
back is white, which gives you a crisp effect, but how about colouring
them? The surface is shiny, so your water-based inks and markers won’t
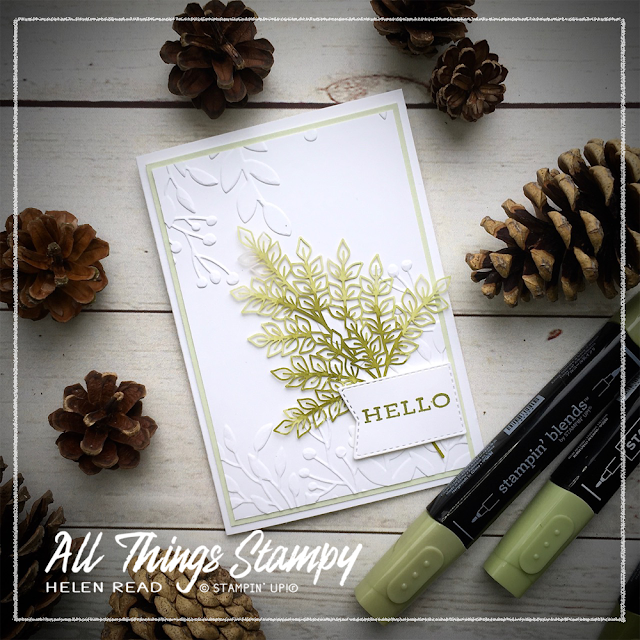
work, but it CAN be done. All you need are some Stampin’ Blends.
I made a short video to show this technique. To get an ombre effect, I
used three shades of green: Light Granny Apple Green, Light Old Olive
and Dark Old Olive. What do you think?
If your wish list is
bigger than your bank balance, why not consider joining my team during
June? You’ll get up to £130 of craft supplies of your choice, PLUS an
additional bundle (stamps + dies or stamps + punch) to add to your
Starter Kit. Please get in touch for info, or click the image or here to get
started.
Friday 12 June 2020
Silhouette stamping with Field of Flowers
Field of Flowers: have you seen this new stamp set yet? I think it’s
absolutely gorgeous and will be running a class with it next month. Here
I’ve stamped onto beautiful watercoloured backgrounds, which really
shows off the rich silhouettes.
The best way to stamp onto watercolour paper is to use the Stamparatus so you can stamp in the same spot multiple times to get the richest, darkest image.
Wednesday 10 June 2020
Simple stamping with Forever Fern
It can be good to clamber out of your comfort zone – because you never know what you may discover.
And when I made this card, I learned that I can work with pink if I put my mind to it.
While that may not have been a favourite project of mine, these two definitely are. I found that the delicate leaves in the new Forever Fern stamp set really lend themselves to the brighter colours. What do you think?
Stamping in opposite corners of the card provides balance to the design.
Monday 8 June 2020
Creating beautiful backgrounds to show off your dies
No new products today – just some great examples of how you can
create beautiful projects where the die-cuts are the stars of the show.
I
had fun creating backgrounds to show off the Friendly Silhouettes Dies.
Let me walk you through them.
For these first two projects, I
masked a circle using a punched/die-cut sticky note, then brayered the
background using Crushed Curry and Poppy Parade ink pads. You could
sponge, too – but if you do, make sure you sponge away from the centre
of the mask or you could dislodge it.
For the top card, I then
lightly splashed with water from a fine paintbrush. Allow to dry, then
dab it dry with a tissue. This creates this lovely effect which can look
like seed heads blowing on the breeze, fireflies, rain or, on a dark
blue background, like snow. It’s such a simple effect and so versatile.
For this
card, I brayered as before, but instead of splashing, I used that same
very fine paintbrush to paint fine lines following the edge of the
circle. With ideas clearly way above my station, I call this the Van
Gogh technique.
For the third card, I took the leftover template from the bullrushes in the first card and used this as a mask. I sponged with Pumpkin Pie to create a background image, then removed the mask and brayered around the top edge of the card in Melon Mambo. The beauty of brayering is that you can give it a go in any colours and get some lovely effects.
Want to have a go at fun techniques like this? If you’re in the UK, why not talk to me about joining my remote classes?
Friday 5 June 2020
Remote classes still running - check out these Ornate Garden samples
Getting together with friends is one of the joys of crafting – and thanks to the wonders of technology, we still can!
On Saturday, I held a class for 10 people, who all crafted in their own homes while chatting over Zoom.
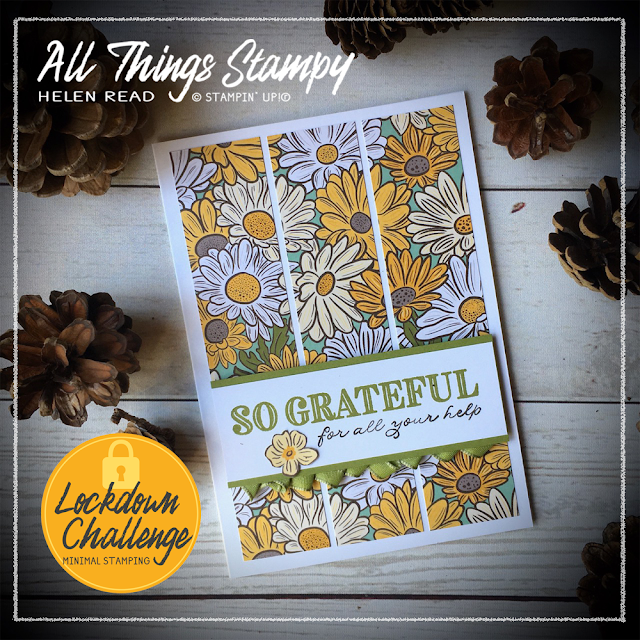
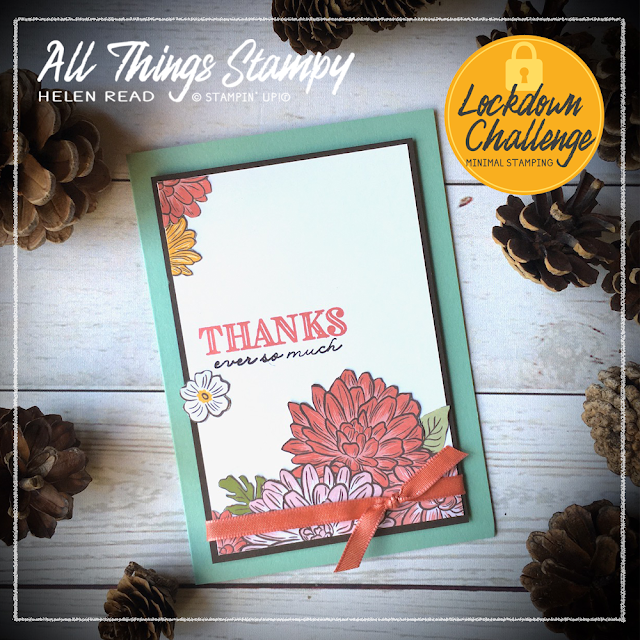
Everyone received a quarter of a pack of Ornate Garden Designer Series Paper, and some took up the option to add the Ornate Thanks stamp set onto their kit, too. Such pretty paper, isn't it?
Everyone received a quarter of a pack of Ornate Garden Designer Series Paper, and some took up the option to add the Ornate Thanks stamp set onto their kit, too. Such pretty paper, isn't it?
You
can make beautiful cards using just the Designer Series Paper, if you
can face all the fussy-cutting! With this paper, it can be a bit of a
struggle to whole flowers but they are there and then you can use
strategic placing to give the illusion of whole flowers. You can adhere
part flowers at the edge of the cardstock, or cover any missing petals
with a small whole flower.
Thursday 4 June 2020
Amazing offer if you join Stampin' Up!® in June!
How big is your new Stampin' Up!® catalogue wish list? Mine is HUGE but
I’m lucky that I can buy everything I want at a discount. I say “lucky” –
it’s not really luck, is it? Because you too could enjoy all the
benefits of being a Stampin’ Up!® demonstrator – and if you join my
friendly team in June, you’ll get even more for your money.
The cost is just £99, including shipping and in your Starter Kit you get:
✂️ £130 of craft supplies of your choice
✂️ A new catalogue bundle (stamps and dies or stamps and punch) of your choice
✂️ A business pack including eight new catalogues.
Once you’ve joined you benefit from:
💛 Discounts on everything you buy
💛 Sneak peeks and early purchasing
💛 Exclusive demonstrator events
💛 New friendships with like-minded crafters
💛 The opportunity to build a business doing something you love
So if your wishlist is bigger than your bank balance, please talk to me today about bringing that price down to something affordable.
Wednesday 3 June 2020
Introducing the In Good Taste Suite
The new Annual Catalogue goes live today and I can’t think of a better Suite to kick things off than this one; In Good Taste.
It’s not my usual style but the Suite was swung for me by the Designer Series Paper and the Tasteful Labels dies. Thought I may as well get the stamp set as well, or I’d only regret it!
The first card is one I made for a swap, so I kept the DSP to a minimum so I wouldn't run out.
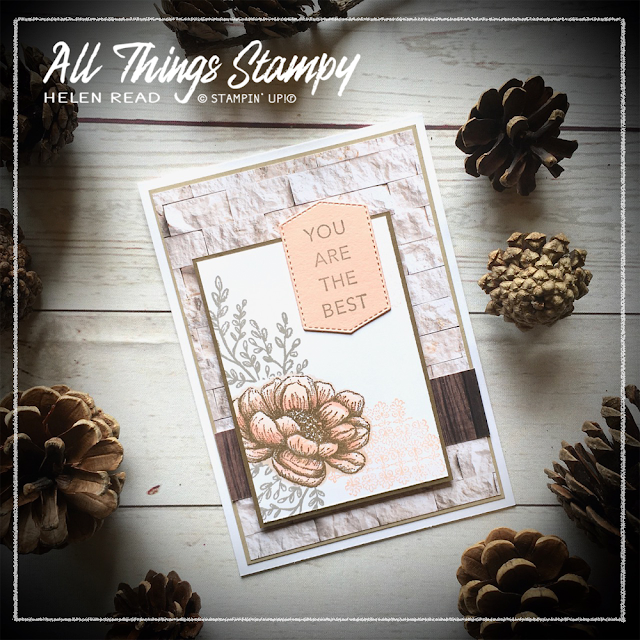
The second is a little bolder and uses a piece of the gorgeous In Good Taste DSP to create a background. I absolutely love this paper; I know it won’t float everyone’s boat but I think it’s fabulous for providing texture without bulk.
The image was stamped in Gray Granite (first card) and Soft Suede (second card) and then coloured with Stampin’ Blends; I used Light Calypso Coral and Light Petal Pink. Around the bottom of the flower, I used some gray ink and a blender pen to create a light shadow.
I created a mask of the flower so I could stamp the leaves around it without crashing into it. I didn’t bother masking for the pink lacy background as it's so subtle that a bit of crashing doesn't matter.
To make the mask, I simply stamped onto a sticky note, then cut it out. Cut it ever so slightly smaller than the image so you don't get a white edge when you stamp.
Monday 1 June 2020
In Color™ Shares - and a time-saving tip for the Lovely Labels Pick a Punch
These bookmarks show off the new In Colors™ well and are inspired by the project on page 140 of the new Annual Catalogue. I don’t have the new ink pads yet as they weren’t available to pre-order but I got a similar look using Versamark; a must-have ink pad which creates a watermark effect.
I am very much loving the new In Colors™ and was excited to present my 50 new colour combinations to the world at the weekend. You can find them here.
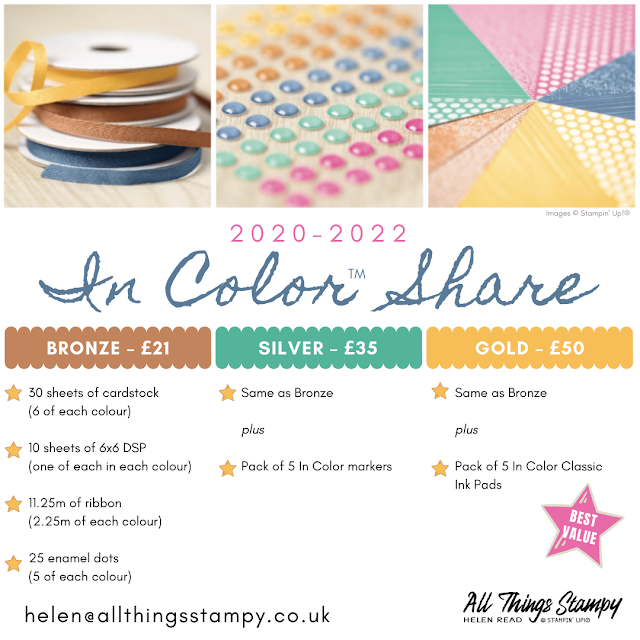
I am also excited to present my annual In Color™ shares, with three fabulous options to get your hands on the brand new products. I will be ordering soon, so please get in touch if you’re in the UK and would like one.
Subscribe to:
Posts (Atom)
The small print
This is my personal blog and my sole responsibility as an Independent Stampin' Up!® demonstrator. All images are © Stampin' Up!® All content including photographs, projects and text are © Helen Read, unless otherwise stated. Please feel free to copy my ideas for your personal use and inspiration - if you are a SU demonstrator you may use these ideas for your events but please give credit where it is due. Please do not use my ideas for monetary gain, competitions or publication. The images on this blog - including blog buttons - should not be copied and used elsewhere on the internet or on CDs.


