Monday 31 August 2020

Masculine cards with World of Good Designer Series Paper

World of Good masculine stampin up helen read allthingsstampy

I’ve had the World of Good Designer Series Paper since pre-order back in May and *gasp* had never used it! Enough was enough, so I finally cracked it open.

The only issue is... I didn’t buy the Beautiful World stamp set to go with it, so would I be able to create anything without the benefit of Stampin’ Up!®’s amazing coordination? Of course I could! And it’s PERFECT for masculine cards – something I know many people struggle with.

World of Good masculine stampin up helen read allthingsstampy

For starters, that old favourite from last year, Sailing Home, goes perfectly. Here are two cards which tap into the nautical theme in traditional blues. 

World of Good masculine stampin up helen read allthingsstampy

World of Good masculine stampin up helen read allthingsstampy

I love how Sailing Home and the Smooth Sailing Dies are given a refresh with our new colour, Misty Moonlight. Die-cutting from Brass Foil sheets picks up the foiled accents from the DSP. 

allthingsstampy helen read card sketch stampin up

They are product-heavy projects but if you have it, use it! I was also following this sketch – which is based on the card on page 87 of the current Annual Catalogue – for these projects, after setting my customers a challenge to do the same. 

World of Good masculine stampin up helen read allthingsstampy

And of course, Designer Series Paper on its own can help you make fabulous cards, too. Mixing things up a little, I made two more cards using the browns from the pack. This is where Cinnamon Cider cardstock and ribbon comes into play. The 21st birthday card is a total CASE from Ellen Woodbridge’s fabulous 50th birthday card.

I used the Playful Alphabet dies (an absolute must-have, in my opinion) and the equally essential Foam Adhesive Sheets. The greeting from Whale Done is just the job for a 21st birthday card, and the map design reflects the recipient’s love of travel. 

World of Good masculine stampin up helen read allthingsstampy


The final card showcases one of my favourite greeting stamps of all time, from Happiest of Birthdays. I sliced off half of the front of the card, then decorated the front panel and the inside with contrasting designs of World of Good Designer Series Paper. It’s finished off with Gilded Gems.

World of Good masculine stampin up helen read allthingsstampy

To get the shadow effect you see on the Happiest of Birthdays card, use the Stamparatus. Position your cardstock in the corner, then move it a hair’s breadth down and towards the centre (left or right, depending on how you use your Stamparatus). Hold it down with a magnet and stamp in your dark colour.

Then move the cardstock into the corner and repeat. You can do this with the same colour without reinking, to get a paler shade, or clean off the stamp and use a different shade, as I’ve done here. I used Early Espresso and Cinnamon Cider

World of Good masculine stampin up helen read allthingsstampy


Friday 28 August 2020

Spotlight on the Lovely You Bundle


Lovely You Stampin Up Helen Read Allthingsstampy

One of the most popular stamp sets from the Annual Catalogue so far has been Lovely You, with its elegant sentiments and versatile images. This style of greeting has always been popular with my customers, so this comes as no surprise to me.

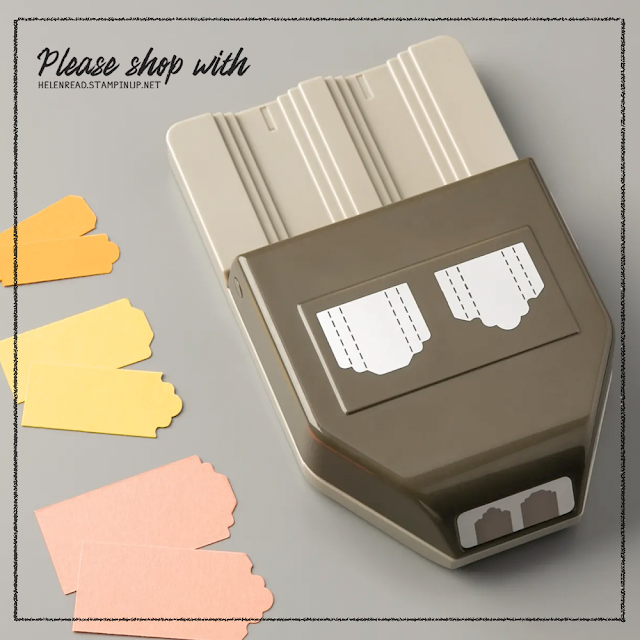
Take a look at these beautiful projects using the Lovely You Bundle – remember, if you purchase the stamps and Lovely Labels Pick a Punch together, you save 10%.
Lovely You Stampin Up Helen Read Allthingsstampy
The punch is great because you can create SIX different styles of label, of varying widths. It’s very clever! You can see some of the different label styles on this card, which has a lovely boho, patchwork vibe. 

Lovely You Stampin Up Helen Read Allthingsstampy
This project has the words heat embossed in Whisper White Craft ink on vellum, for a really classy and elegant feel. Wouldn’t this be lovely on a wedding card?

Lovely You Stampin Up Helen Read Allthingsstampy


Wednesday 26 August 2020

Simple stamping with Forever Fern

 Forever Fern Stampin Up allthingsstampy Helen Read 

Could you make a card in 15 minutes or less? That is the challenge I set to my customers last week – and they have until tonight’s Show & Tell session to complete their projects.

I know it can be done because I’ve done it myself – and here’s one to prove it. Forever Fern and Ornate Thanks on a Whisper White Note Card; Bish, bash, bosh - done! I even stamped the envelope!

Join Helen Read Stampin Up Demonstrator

Monday 24 August 2020

10 simple cards using the Whale of a Time Suite

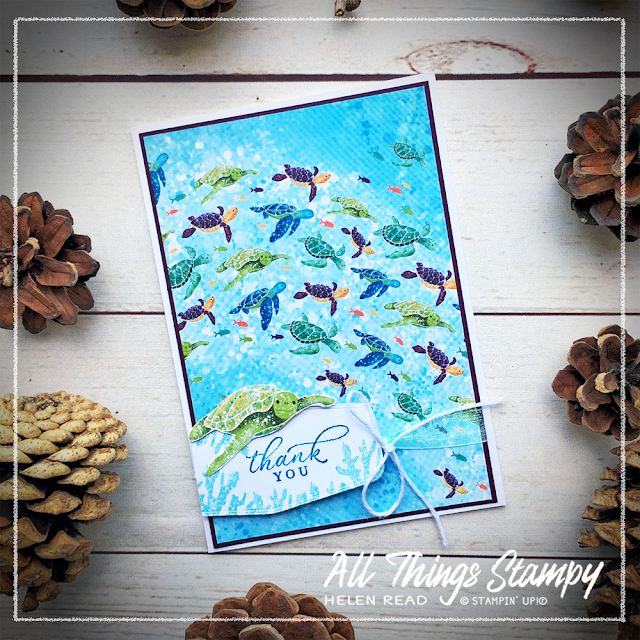
Whale of a Time Stampin Up Allthingsstampy Helen Read

How fabulous is the Whale of a Time Suite? I bought the whole suite collection, which is not something I’d done until this year. Now I’m all over it as a concept as it’s so easy!
Public service announcement
 If you’re shopping online and the suite is showing as unavailable or on backorder, do check the individual items. It may be that just one item is temporarily out of stock which puts the whole suite on backorder. But you can still order the individual items separately.

Whale of a Time Stampin Up Allthingsstampy Helen Read

Ok, onto the projects! Above are all of the projects were are currently making in this month’s remote workshops. Guests have had the choice of attending every Tuesday at 1pm, or coming to the Saturday morning class which was this past weekend. They could even attend both if they wished – and one lady turned up “just to watch and heckle”. 😂

Each week the ladies make two simple cards using the Whale of a Time Designer Series Paper, adding their own greeting stamps or using the Whale Done stamp set if they chose it as an optional extra. For eight of the cards we used Whisper White Notecards and Envelopes, with two shaker cards on a standard Pool Party card base.

Whale of a Time Stampin Up Allthingsstampy Helen Read

We began with a double whale week and, thanks Stampin’ Up!®'s fabulous co-ordination, you can punch out the large whales from the DSP. Those who hadn’t upgraded to include the Whale Punch could fussy cut them instead. We set aside one of the whale patterned pieces to use just for this purpose. 

Whale of a Time Stampin Up Allthingsstampy Helen Read

I love this Pool Party Sheer Ribbon, too – it’s so soft and shimmery.

Whale of a Time Stampin Up Allthingsstampy Helen Read
 Onto Week 2... which was turtle week and another opportunity to show off the gorgeous DSP...

Whale of a Time Stampin Up Allthingsstampy Helen Read

To provide a cute focal point for the projects, we fussy cut the turtles from the DSP. Again, we set aside the piece with the turtles on to use for this. 

Whale of a Time Stampin Up Allthingsstampy Helen Read

The Whale of a Time Sequins make great accents when stuck down with a Glue Dot. I love these tiny translucent shells. 

Whale of a Time Stampin Up Allthingsstampy Helen Read

I had die-cut a series of labels using the Tasteful Labels Dies and Stitched Rectangles Dies. All different, so I could cut them all for each person in one go.
I did throw in a couple of shaker cards to mix things up a little, which meant some preparation time using the Snow Globes Scenes Dies but worth it I think as they look so fab with the sequins behind.

Whale of a Time Stampin Up Allthingsstampy Helen Read

This was the first one; it’s hard to photograph a shaker card but you may just be able to see a cut-out turtle within the Snow Globe Shaker Dome.
This was accompanied by another turtle card; both show off the absolutely gorgeous Whale of a Time Designer Series Paper

Whale of a Time Stampin Up Allthingsstampy Helen Read

Whale of a Time Stampin Up Allthingsstampy Helen Read
This Tuesday we will be making another shaker card, this time with a sponged and embossed surround. Yes, more work for me die-cutting and embossing in advance but I really wanted to show off this gorgeous Seabed 3D Embossing Folder

Whale of a Time Stampin Up Allthingsstampy Helen Read
We’ll also be making this fab little notecard. I LOVE this piece of Designer Series Paper, it's so lovely. Guests at this series of classes received a quarter of a pack of the DSP; of course, if you have a whole pack, you get four pieces of this, so can make lots of lovely projects. 

Whale of a Time Stampin Up Allthingsstampy Helen Read

To finish off, we will be making these cards – I left these to the end because they can be adapted to suit any leftover scraps. This is a great way of using up scraps of any Designer Series paper.

Whale of a Time Stampin Up Allthingsstampy Helen Read

Whale of a Time Stampin Up Allthingsstampy Helen Read

So are you inspired by this Suite? My customers have been loving it. If you’re inspired enough to buy it and are in the UK, you can shop the Suite here

Whale of a Time Stampin Up Allthingsstampy Helen Read

Friday 21 August 2020

Say cheese with the Playful Alphabet Dies

Playful Alphabet Dies Stampin Up allthingsstampy Helen Read

With the Playful Alphabet Dies you can spell literally anything you like, which somehow makes it harder to decide. Too much choice!

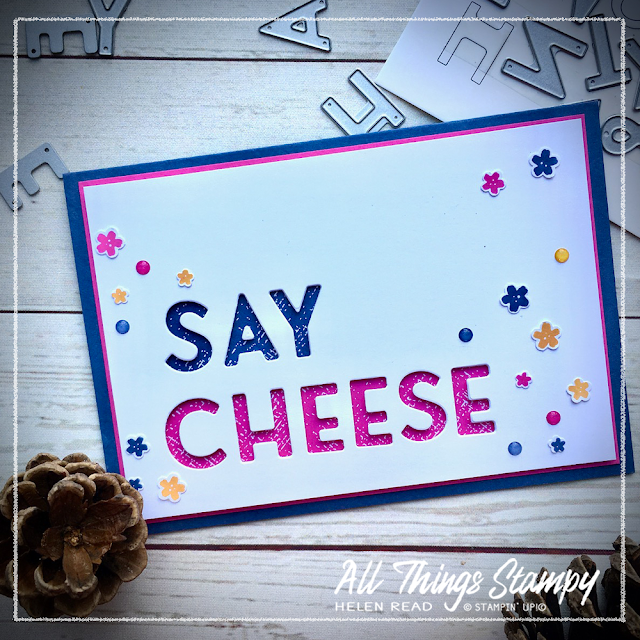
I thought long and hard before making this card for a friend. She’s a professional photographer and, as a gift I’d bought her a camera-shaped cookie cutter. The greeting was almost staring me straight in the face: Say cheese!

Playful Alphabet Dies Stampin Up allthingsstampy Helen Read

I cut the letters out, placed my In Color Designer Series Paper behind, then was stumped. I added some In Color Enamel Dots. Still a bit boring, but it was too late to stamp on top so I had another think an eventually settled on these little flowers from Field of Flowers, punched out using the Confetti Flowers Border Punch. Just a little insight into the not-always-so-streamlined creative process, there!

 
Playful Alphabet Dies Stampin Up allthingsstampy Helen Read

Playful Alphabet Dies Stampin Up allthingsstampy Helen Read

You CAN cut your whole word out in one go if the letters don’t repeat (I think there are two Es in the set), but I prefer to do a few at a time. If you letters don’t repeat and you’re feeling brave, you can line them up nicely with a straight edge such as a ruler; just use it to push the dies up from the bottom edge so they all sit neatly at the same level.


Wednesday 19 August 2020

#Sharesunshine with Mini Paper Pumpkin Boxes

Mini Paper Pumpkin Boxes Allthingsstampy Helen Read Stampin Up

I talked last week about sharing sunshine through the new Box of Sunshine Paper Pumpkin Kit, which is an exclusive kit currently available while supplies last.

There are many ways we can #sharesunshine and one is through the Mini Paper Pumpkin Boxes which are sized to fit our Notecards & Envelopes and ideal for little gifts. 

Mini Paper Pumpkin Boxes Allthingsstampy Helen Read Stampin Up

I wanted to thank my customers who had shown incredible commitment during lockdown to complete the 12 craft challenges I set them. They had from the start of lockdown until the end of June to complete the challenges and could do them in any order. One lady did them all in the first week, others tackled them methodically and went right up to the wire.

Mini Paper Pumpkin Boxes Allthingsstampy Helen Read Stampin Up

Somewhat conveniently, 10 ladies completed all 12 challenges, so I use one full pack of Mini Paper Pumpkin Boxes to hold their gifts of Rainbow Glimmer Paper, mini note cards and... I think there was some yellow ribbon in there, too. To be honest, these gifts went out a while ago, I just haven’t got round to posting them here.

Rainbow Glimmer Paper Allthingsstampy Helen Read Stampin Up

I tried to stick with the sunshine theme and decorated the lids using Bumblebee cardstock, with some stamping and die-cutting from the Forever Fern Bundle from the Forever Greenery Suite and label made with the Tasteful Labels dies. They were all tied with different ribbons because I thought I had purchased some specially but couldn’t find it in the chaos of my craft room!

Mini Paper Pumpkin Boxes Allthingsstampy Helen Read Stampin Up

The greeting is from Rooted in Nature and felt perfect for the occasion. 

My ladies are now working on weekly challenges via my private Facebook group. This is open to my customers and class-goers so if you fit into this category, please let me know so I can add you. 

Mini Paper Pumpkin Boxes Allthingsstampy Helen Read Stampin Up

Pop up the label using Stampin’ Dimensionals, keeping the centre clear so the ribbon slides through freely. This will enable the recipient to untie the ribbon and open the box without destroying the décor.

Bonus tip: If you’re in the UK and plan to mail out these boxes, be warned that they’re just a little too deep to go as a Large Letter and will incur the Small Parcel rate.


Monday 17 August 2020

Gilded Autumn Suite - two beautiful cards for the best season of the year

 Gilded Autumn Beautiful Autumn Stampin Up Helen Read Allthingsstampy
 
It’s Monday! And let’s start the week with a look ahead to autumn, one of my favourite times of year.

Summer isn’t really my thing; I burn to a crisp in minutes and the heat just drags me down. Thankfully, not a major problem in the UK, although sadly becoming more of one. As the days shorten, I miss the long, light evenings, but I welcome the cooler weather and beautiful colours that autumn brings. 

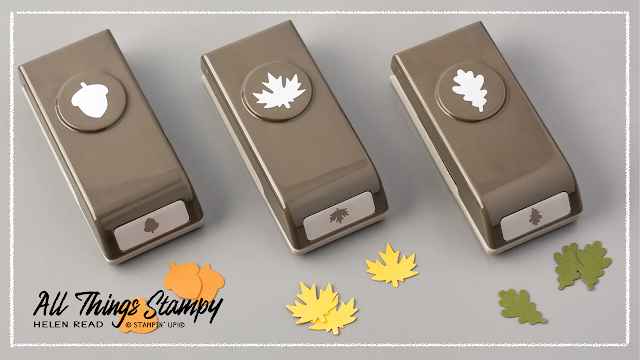
It is no surprise, therefore, that the first products I bought from the new August-December Mini Catalogue was the whole of the Gilded Autumn Suite. I haven’t used every part of the Suite yet but I have been enjoying the Beautiful Autumn stamp set, the Autumn Punch Pack and the stunning Gilded Autumn Specialty Designer Series Paper which has beautiful copper and gold foil on some designs, such as the one you see here. 
 
Gilded Autumn Punch Pack Stampin Up Helen Read Allthingsstampy

I have to say, the stamps line up beautifully. They are photopolymer, which helps, and lining up the leaf and acorn centres with the outlines is really easy, although they look good offset, too, if there’s enough of a colour contrast.

Gilded Autumn Beautiful Autumn Stampin Up Helen Read Allthingsstampy

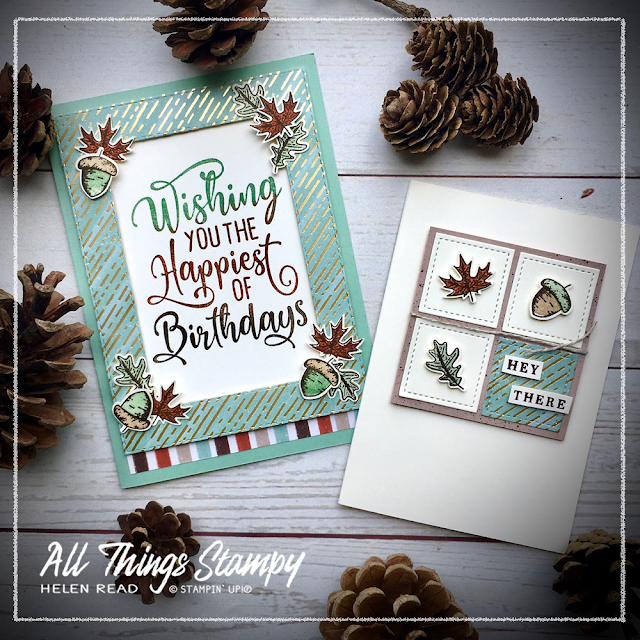
For this card, I used one of my favourite Annual Catalogue stamp sets, Happiest of Birthdays. This is SUCH a great stamp set and ideal for masculine and teen cards as the greeting does all the heavy lifting for you.

Gilded Autumn Beautiful Autumn Stampin Up Helen Read Allthingsstampy

Yes, this is a product-heavy card; on top of all the Gilded Autumn goodies and the Happiest of Birthdays stamp set, it uses the Stitched Rectangles Dies to create a DSP frame around the words. I’ve embellished the frame using those beautiful stamped and punched leaves and acorns.
 
Gilded Autumn Beautiful Autumn Stampin Up Helen Read Allthingsstampy
 
When it came to the second card, I had a bit of a wobble about my acorns, and decided the colours should be the other way round. Green cap, brown acorn. Then I checked with my husband, a keen naturalist (I said naturalist!!!!) and he confirmed that either is fine as they change colour over the course of the season. 
 
Gilded Autumn Beautiful Autumn Stampin Up Helen Read Allthingsstampy
 
This little Very Vanilla Notecard used up some leftover punched pieces and DSP, and the Stitched Shapes Dies. It’s always great to be able to product a second card from the bits left on your craft table, isn’t it? 
 
I love the colours, the crispness and the images... yes I know I shouldn’t say so myself but why not? I made a card and I love it. If you receive this – or indeed the first card – in the post, you know you’re pretty high up in my estimation!

Gilded Autumn Beautiful Autumn Stampin Up Helen Read Allthingsstampy
To get the three-colour greeting, I used the Stamparatus. Always start with the palest colour... inking the top of the stamp using your ink pad or sponges, or even a brayer if that’s easier.

Stamp it using the Stamparatus and then, without moving the cardstock (held down with the magnet), ink up with the next colour. It can be difficult to do this using an ink pad, and can give you a harsh line, which is where the sponges, sponge daubers or brayer come in handy. Even if you manage it with an ink pad, the sponge can soften the line. Stamp and repeat with the darkest colour at the bottom.

Using the Stamparatus allows you to avoid any gaps and go back and add more colour where required.


The small print

This is my personal blog and my sole responsibility as an Independent Stampin' Up!® demonstrator. All images are © Stampin' Up!® All content including photographs, projects and text are © Helen Read, unless otherwise stated. Please feel free to copy my ideas for your personal use and inspiration - if you are a SU demonstrator you may use these ideas for your events but please give credit where it is due. Please do not use my ideas for monetary gain, competitions or publication. The images on this blog - including blog buttons - should not be copied and used elsewhere on the internet or on CDs.