Tuesday 28 September 2021

Scrappy strip technique - and mosaic technique

Stampin Up scrappystriptechnique scrappy strips
 

Have you heard of the Scrappy Strips technique developed by Aussie Stampin’ Up!® demonstrators Kylie and Bruno Bertucci? It’s brilliant for using up little scraps of cardstock and DSP and you can mix and match to your heart’s content.

It’s a simple 4-step technique:

1. Cut a panel to fit your card (I make my 5mm smaller than my card front, so if you’re using A4 cardstock that’s 10cm x 14.3cm)
2. Prepare four pieces of cardstock or Designer Series Paper – I cut these to 10.5cm x 14.8cm, so a quarter sheet of A4.
3. Cut these into 2cm wide (or 1") strips (along the length or width, it doesn’t matter), then cut each strip on the diagonal, roughly, without measuring.
4. Assemble these strips onto your panel and trim off the excess.

That’s it. You now have a fun panel to add to your card front and finish off with a greeting label. 

Stampin Up scrappystriptechnique scrappy strips
 

Oh and best of all, if you start off with four different colours/designs on the equivalent of four card fronts, you should have enough strips to create four cards as I did here. 


Stampin Up scrappystriptechnique scrappy strips


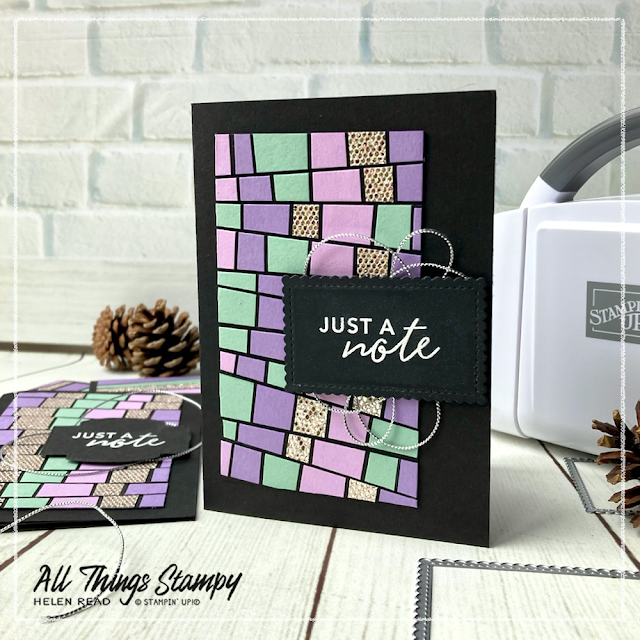
I used a subtle colour combination of Highland Heather, Mint Macaron and Fresh Freesia against striking Basic Black, because I don’t do well with pale colours normally.
I like the idea of including a metallic finish in the design, although this lovely Be Dazzling Speciality Paper from the Sale-a-Bration collection is quite thick, so make sure you stick it down firmly and be careful when you cut it up. 

Remember, Sale-a-Bration ends on Thursday so if you want Be Dazzling paper or any of the free items, or want to join my team and get yourself a free bundle, please act VERY fast. Don’t leave it until Thursday evening as the SU office will be closed so no tech help will be available. 


Stampin Up colour combination Fresh Freesia Highland Heather Mint Macaron

I have used this technique a few times without thinking much about its origin but last week I saw a card which took it to the next level and discovered that it had been developed by a demonstrator called Linda Driggs and again showcased by Kylie Bertucci.

Stampin Up scrappystriptechnique scrappy strips

This turns your scrappy strips into a wonderful mosaic pattern. What you do is complete steps 1-4 as above, then cut your finished panel up again into further strips. I learned after making my version that simple strips would suffice, but I went off-piste and cut my strips on the diagonal again. This results in a slightly eye-boggling finished card but I still quite like it. 

Stampin Up scrappystriptechnique scrappy strips

I mounted my panels onto black cardstock as I think that makes them extra striking, and finished off with an embossed greeting in white on black. However, I’m afraid I’ve broken my own rule here and used a retired greeting; Just a Note comes from the retired Simply Citrus Card Kit, but it’s such a useful sentiment and size of stamp that I hung onto it. I didn’t realise my error until I was taking photos of the projects. Oops.

Have you tried the scrappy strip technique? Why not give it a go this week? Honestly, if you get hooked on this technique you will never throw any scraps of cardstock of DSP away again. 

Stampin Up scrappystriptechnique scrappy strips

 If you are in the UK and would like to order, please To order these or any other current Stampin’ Up!® products from my store, please shop using this link

Does your wish list come to more than £99? Please get in touch and I will help you get more for your money and unlock discounts all year round.  


Tuesday 21 September 2021

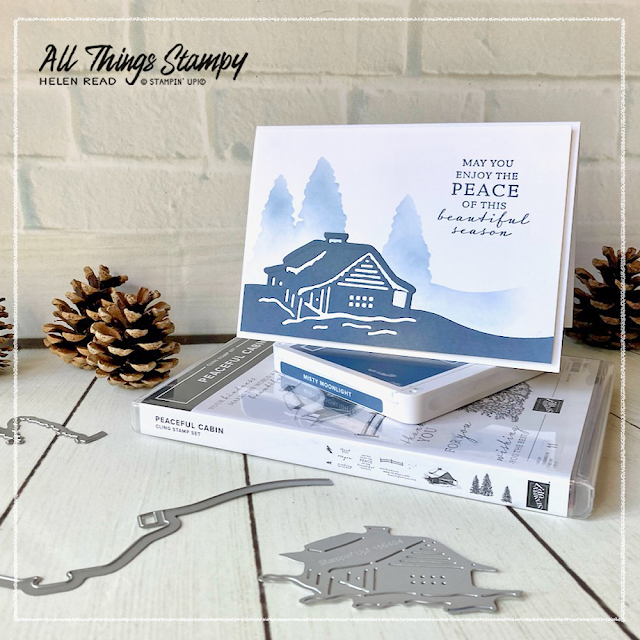
Peaceful Cabin with (largely) monochromatic Misty Moonlight

Stampin Up Peaceful Cabin Christmas gift wallet UK demonstrator

Stampin’ Up!® demonstrators are a fabulous source of inspiration and for some of today’s Peaceful Cabin projects I have been inspired by two US demonstrators; Candy Rattray and Anna Helman.

What I love about finding inspiration from other Stampin’ Up!® demonstrators is that it gives you the opportunity either to CASE (copy and share everything) something using products you have or, as in this case, to adapt projects to suit your own supplies.

I have been crafting with the gorgeous Peaceful Cabin bundle for my first in-person Stampin’ Up!® party for many, many months.

Stampin Up Peaceful Cabin Christmas gift wallet UK demonstrator

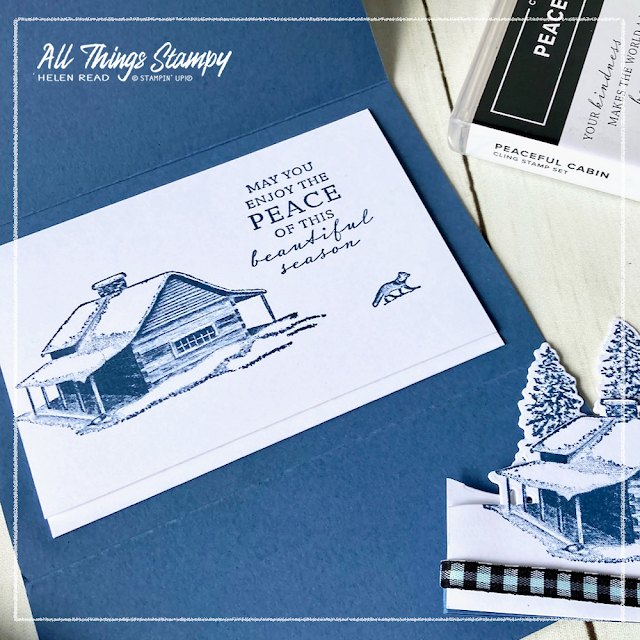
In these times of online shopping and growing offspring who don’t want big presents any more, the gift wallet has really come into its own.  

Candy Rattray’s beautiful wedding gift wallet.

Inside Candy’s gift wallet.

I found this fabulous design on Candy’s blog but I’m not one for measurements and I knew I’d have to convert them to fit our A4 cardstock anyway so just winged it.

My own version is made from:

  • Outer cardstock: 14.8cm x 26cm
  • Scored at 6cm and 16.5cm

Stampin Up Peaceful Cabin Christmas gift wallet UK demonstrator

The inner is just a smaller card with a lip to hold money, a gift card or gift certificate, so I would make this to fit the contents instead of winging it, as I did. 

Stampin Up Peaceful Cabin Christmas gift wallet UK demonstrator

 
I stuck to a monochromatic colour palette of Misty Moonlight and white, with a hint of Pool Party on the black gingham ribbon as it was the only blue I have in Stampin’ Blends and I was too impatient to colour it in any other way. 

You can colour your ribbons in various ways, including Stampin’ Write (water-based) markers or sponging ink from an ink pad onto the ribbon. These both take quite a while to dry and if you don’t wait long enough the ink will transfer onto your project. It’s quicker to use Stampin’ Blends alcohol markers which dry quickly, although they can make your ribbon a little stiff. Weigh up the options and prepare ahead if necessary!

Stampin Up Peaceful Cabin bundle blending brushes UK demonstrator

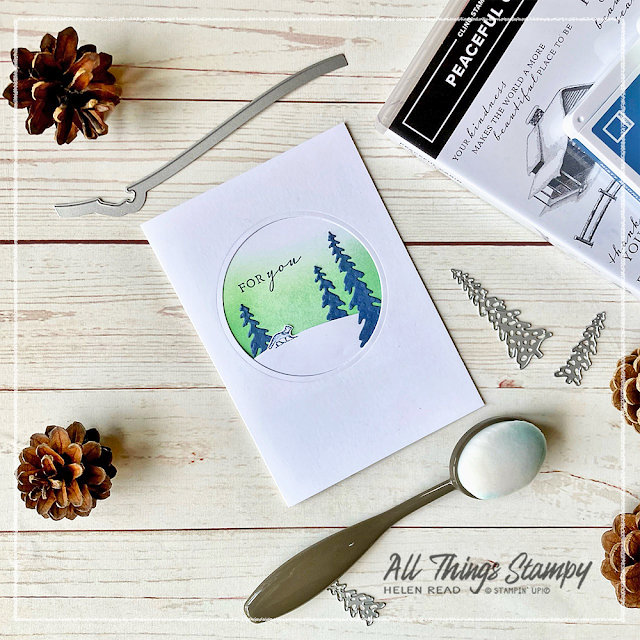
I found more inspiration on Anna’s blog for this simple circle aperture card. Anna’s project 
is actually a paper lantern which was inspired by the July Paper Pumpkin Kit which was available in the North American market. We occasionally get a global Paper Pumpkin Kit and I really wish we’d had this one as I love the colours and theme.

Anna Helman’s paper lantern, which was the inspiration for my card.

Stampin Up Peaceful Cabin bundle blending brushes UK demonstrator

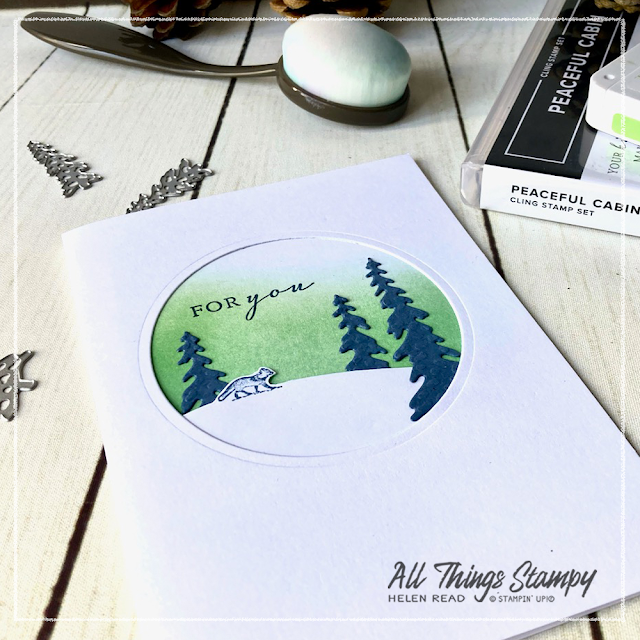
I tried to emulate the colours using Granny Apple Green. Well, I confess I just used what was on a dirty Blending Brush from an earlier craft session but I’m confident it was Granny Apple Green! I’m experimenting with not washing my brushes to see how that goes as they do take a long time to dry.

I used the cute fox stamp and dies from the Peaceful Cabin Bundle and some Misty Moonlight die-cut trees from the same set of Cabin Dies. I love that this could be a Christmas card or just a generic card for any occasion. 

Stampin Up Peaceful Cabin bundle blending brushes UK demonstrator
 

Stampin Up Peaceful Cabin bundle Evergreen embossing folder UK demonstrator


My Peaceful Cabin mojo was by now well and truly active so I carried on to create more projects, including this white scene (the photo has turned it grey) with an Evergreen embossed background. 

I am so happy we still have this Embossing Folder in the catalogue as it’s perfect for Christmas and for my favourite themes of woodlands.

Stampin Up Peaceful Cabin bundle Evergreen embossing folder UK demonstrator

Stampin Up Cabin Dies blending brushes UK demonstrator

Finally I made this very simple card for the Make & Take for a Stampin’ Up!® party on Saturday. I used the tree die from Cabin Dies to create a simple stencil, which I then brushed around using Blending Brushes. It’s a really quick and easy way to make a stunning background for the die-cut cabin, and makes a Christmas card that isn’t too time-consuming to reproduce in bulk.

Stampin Up Cabin Dies blending brushes UK demonstrator

Stampin Up Cabin Dies blending brushes UK demonstrator

I hope you are inspired by my Peaceful Cabin projects and that you, too, will find inspiration from Candy and Anna’s blogs. I love to hear what you think, so please leave a comment below if you can.


Stampin Up Cabin Dies blending brushes UK demonstrator

If you are in the UK and would like to order, please To order these or any other current Stampin’ Up!® products from my store, please shop using this link

Does your wish list come to more than £99? Please get in touch and I will help you get more for your money and unlock discounts all year round.  


Tuesday 14 September 2021

Three fun ink techniques with the Harvest Meadow Suite

Harvest Meadow Stampin Up card UK demonstrator

Today I want to show you some fun effects you can create with ink. These cards are all created with the Harvest Meadow Suite and some simpe techniques.

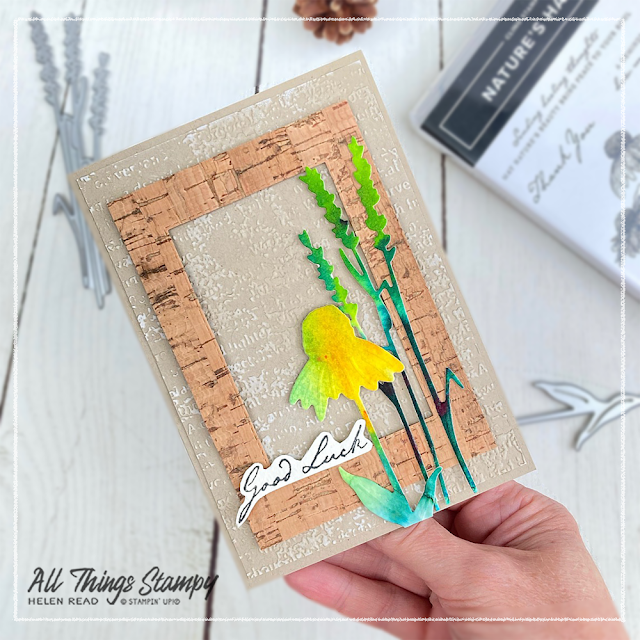
The first card is heavily inspired by the one on page 54 of the current Stampin’ Up!® Mini Catalogue.

Harvest Meadow Stampin Up card UK demonstrator
 

I love creating watercolour backgrounds and often get carried away, making more than I need. Sometimes they don’t look like I want them to so I store all of these extras for future craft sessions. It was in this stash that I found this colourful yellow piece with some lovely rich greens which I thought would be perfect for the project.

I mounted the flowers onto a border created with Stitched Rectangles Dies and the beautiful Cork Speciality Paper, which is absolutely gorgeous. It’s a little pricey at £7 for two 12x12 sheets but a little goes a long way – for instance, the piece I cut out of the centre here will give me accents for three or four more projects.

Harvest Meadow Stampin Up card UK demonstrator

The background of the card is embossed using the Timeworn Type 3D embossing folder, then swiped with Whisper White Craft Ink to make the embossed areas stand out a little more. I'm really happy with the way it turned out and if you'll forgive me blowing my own trumpet for a moment, I think I prefer my version to the one in the catalogue!

Harvest Meadow Stampin Up card UK demonstrator

Harvest Meadow Stampin Up card UK demonstrator

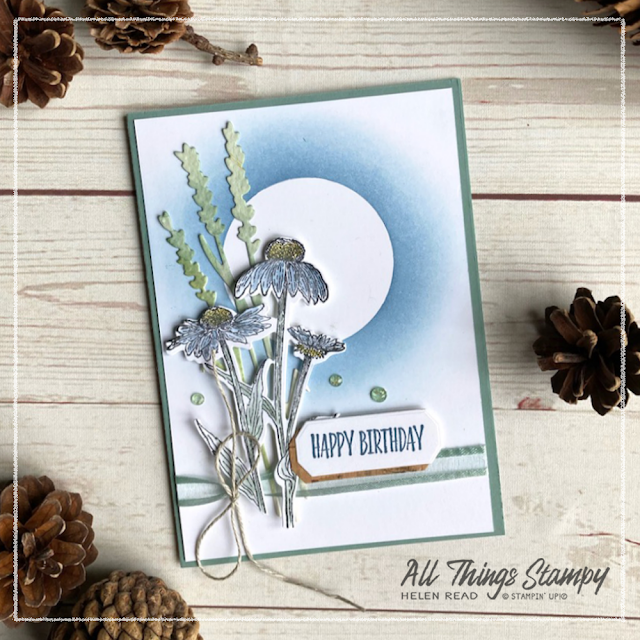
The next two cards are really simple to create using our lovely Blending Brushes. All I did was swirl the ink with the brush in the centre of the card, in a circular motion, to create this soft oval of colour. The trick here is to keep going – most people give up too early and end up with wishy-washy, uneven colour.


Harvest Meadow Stampin Up card UK demonstrator 

Once I was happy with the colour saturation, I splashed a little water over the top. This is one of my favourite techniques and I love how it turns out. Bigger drops equals bigger splashes (I know, who knew, right?) so start small if you're not feeling confident. 

 Harvest Meadow Stampin Up card UK demonstrator
These blended backgrounds provide a stunning backdrop for the crisp white die-cut flowers and grasses. 

You can cut your die-cut shapes up further. There are only two stems on the grasses on these cards because I trimmed one off to provide more balance.

Harvest Meadow Stampin Up card UK demonstrator

The final card combines some of the above techniques, with the addition of Nature’s Harvest stamps. I stamped and die-cut the flowers, colouring in using ink from ink pad lids, applied with a Blender Pen. The grasses are again created from a watercoloured piece; it had been coloured in Mint Macaron which goes perfectly with the Soft Succulent Ribbon.

The background here is again created with the Blending Brushes, with the addition of a circular mask to create a lovely moon effect. To do this, just die-cut (or draw round something if you don't have dies) a circle from thin paper. A sticky note is ideal but otherwise you can use some thin paper and some Tombow Multi-Purpose Glue; apply some tiny dots or a thin layer and allow it to dry clear to create a temporary adhesive. Then blend with your brushes as before, starting on the mask and working outwards. Avoid working towards the edges of the mask as you can disturb it and end up putting colour exactly where you don't want it.

Have you tried any of these techniques? Which is your favourite?

If you are in the UK and would like to order, please To order these or any other current Stampin’ Up!® products from my store, please shop using this link

Does your wish list come to more than £99? Please get in touch and I will help you get more for your money and unlock discounts all year round.  


Tuesday 7 September 2021

Whale Done 21st birthday card with blending brushes

Whale Done Stampin Up card ideas Demonstrator Derbyshire

It’s back to the Stampin' Up!® Annual Catalogue for today’s projects as I needed another 21st birthday card... this time for my “baby” boy. He seems to be creating some sort of Sealife centre in his room at the moment, with the arrival of a tropical fish tank plus a separate tank for Wallace the turtle. Wallace belongs to him and his girlfriend, but she can't take him/her (we’re not sure yet) with her to uni.

Whale Done Stampin Up card ideas Demonstrator Derbyshire 

It’s hard to create cards for 21-year-old males but the Whale Done stamp set was perfect for the occasion. I suspect it’s the wrong sort of turtle but it’s close enough, I’m sure.

Whale Done Stampin Up card ideas Demonstrator Derbyshire

I began by using my Blending Brushes to create a background of Pacific Point and Coastal Cabana. On top of this I stamped some Night of Navy fish, a few Whisper White bubbles and some Evening Evergreen weeds. This part of the card was heavily inspired by this card by US demonstrator Michelle Zindorf but then I went my own way.

Whale Done Stampin Up card ideas Demonstrator Derbyshire

I cut out the layer using the Stitched So Sweetly Dies, then realised I had enough of this background left to create a second panel for another card, so I cut this out with one of the smaller dies.

Whale Done Stampin Up card ideas Demonstrator Derbyshire
 

Wallace the turtle is stamped in Evening Evergreen but I tackled this in reverse by “colouring” the image in advance. I stamped some speckles in Bumblebee repeatedly onto some white cardstock, then stamped the Evening Evergreen turtle on top. This is as close as I can get to real-life Wallace. I fussy cut the image and popped it up on Stampin’ Dimensionals. 

Whale Done Stampin Up card ideas Demonstrator Derbyshire
 

For the greeting, I inked the stamp first in Coastal Cabana, then added Pacific Point to the bottom section, blurring the hard edge slightly with a Sponge Dauber.

I stuck some Coastal Cabana cardstock to a Foam Adhesive Sheet and cut out the 21 using Playful Alphabet Dies. I KNEW there was a figure 1 in there but couldn’t find it for Robin’s card last week!

The front of the card has a panel embossed with the Seashells 3D embossing folder which is really designed to be used portrait I think but looks fine here as the image panel covers most of it.

Whale Done Stampin Up card ideas Demonstrator Derbyshire

Confession: I hated this card and thought it was really unbalanced until I added the finishing touch of some linen thread. It’s funny how something so simple can make all the difference, isn’t it?
 
Whale Done Stampin Up card ideas Demonstrator Derbyshire

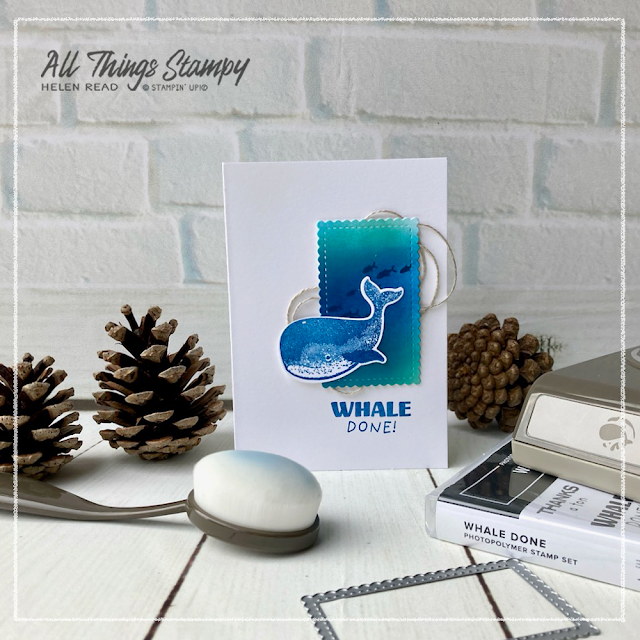
For the second card – which I don’t immediately need but thought I may as well make while I had the supplies out – I used the whale stamp and Whale Builder Punch as my focal point on top of the mini sponged panel that was left over from the birthday card. 
 
Whale Done Stampin Up card ideas Demonstrator Derbyshire
 
Aside from the sponging, it’s a very simple card, with a swirl of linen thread behind the panel and a greeting stamped directly onto the Basic White Notecard.

It was fun to dig out a stamp set that hadn’t seen ink for many months and reminded me of how much I love the Whale Done stamps and punch. 

Whale Done Stampin Up card ideas Demonstrator Derbyshire


Do you have a sealife-loving person in your life? To order these or any other current Stampin’ Up!® products from my store, please shop using this link

Does your wish list come to more than £99? Please get in touch and I will help you get more for your money and unlock discounts all year round.  


The small print

This is my personal blog and my sole responsibility as an Independent Stampin' Up!® demonstrator. All images are © Stampin' Up!® All content including photographs, projects and text are © Helen Read, unless otherwise stated. Please feel free to copy my ideas for your personal use and inspiration - if you are a SU demonstrator you may use these ideas for your events but please give credit where it is due. Please do not use my ideas for monetary gain, competitions or publication. The images on this blog - including blog buttons - should not be copied and used elsewhere on the internet or on CDs.