Showing posts with label backgrounds. Show all posts

Tuesday, 2 July 2024

A rainbow of colourful Wildflower Designs cards

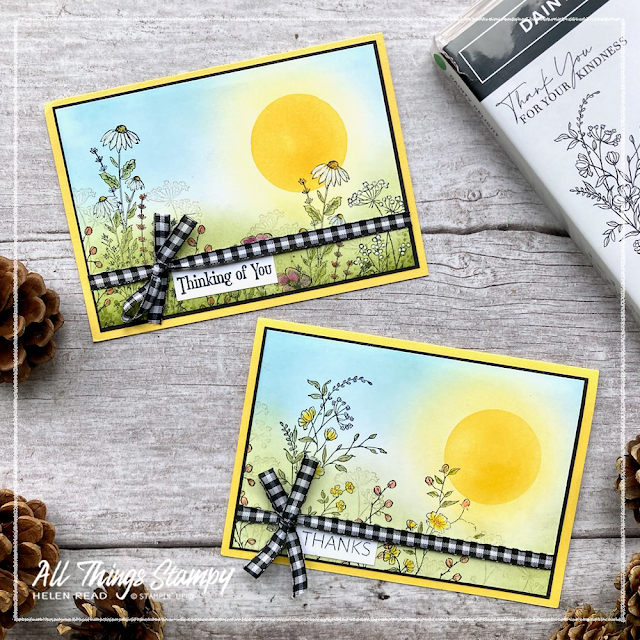
Stampin Up Wildflower Designs masking blending brush ideas

I cannot get enough of Stampin’ Up!®’s Wildflower Designs stamp set at the moment!

This gorgeous stamp set lends itself perfectly to Blending Brush and masking techniques, so I had another play session with Wildflower Designs to create a set of colourful cards.

Tuesday, 25 June 2024

Three card ideas using Wildflower Designs from Stampin’ Up!®

 Stampin Up Wildflower Designs card ideas

I am always drawn to Stampin’ Up!® stamp sets featuring wildflowers, seed heads and big allium-style flowers, so it was inevitable that I would add Wildflower Designs to my craft stash.

This beautiful stamp set is part of the Wildly Flowering Suite. I thought I could get away with just purchasing the stamp set but no, I have since ordered the dies to complete the bundle at least.

If you’re on the hunt for quick and easy Stampin’ Up!® ideas, then look away now. But if you’re up for a big ole messy craft session featuring lots of ink splashing, then I am here for you!

Tuesday, 22 August 2023

Bird’s Eye View card ideas using the bubble technique

Stampin Up UK Bird's Eye View bubble technique
 

Have you ever tried the bubble background technique using your Stampin’ Up!® ink refills? It’s so much fun and the results are amazing, as you can see from these Bird’s Eye View projects. 
 

Tuesday, 7 February 2023

Six cards using Dainty Delight, with top tips for using Stampin’ Up!® Blending Brushes

Stampin Up Blending Brushes Dainty Delight card ideas

My monthly Crafty Friday classes for 2023 are focussing on techniques. Each month on Zoom, crafters around the UK can learn a different technique to make beautiful Stampin’ Up!® cards. 
 
This month the focus was on our gorgeous Stampin’ Up!® blending brushes. We now sell blending brushes in two sizes; standard and small. The standard brushes are perfect for covering large areas, while the small are ideal if you want to add colour to smaller spaces. 
 
Today I have three projects to show you, plus some great tips for getting the best results using your Stampin’ Up!® blending brushes.
 

Tuesday, 2 August 2022

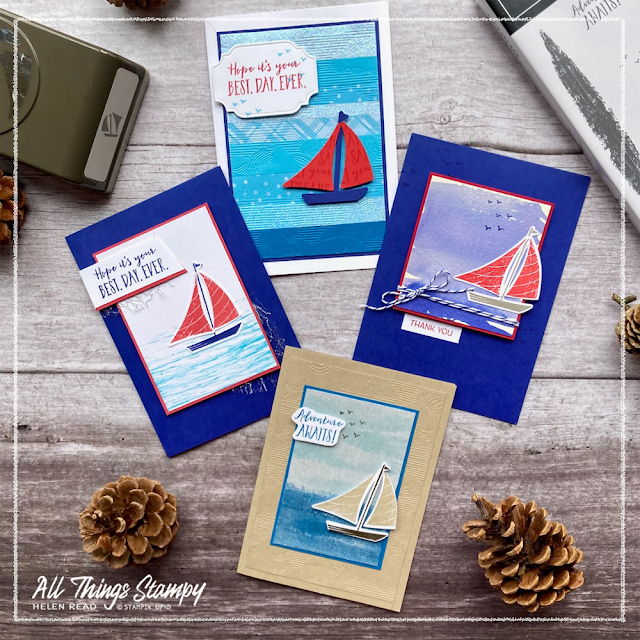
Four fun background techniques for Let's Set Sail from Stampin’ Up!®

Let's Set Sail stampin up card ideas
 

I love using my Stampin’ Up!® supplies to branch out into other techniques so have been having lots of fun creating cool backgrounds to go with the Let’s Set Sail bundle.

I’ve always been a fan of nautical and seaside-themed products so this stamp set with matching punch really floats my boat. (See what I did there?)

Here are four cards I made with the Let’s Set Sail bundle, each showcasing a different background technique. Best of all, most of them don’t require any special equipment.

Tuesday, 25 January 2022

How to add colour to Awesome Otters using Watercolour Pencils, Blender Pens and Blending Brushes

Stampin Up UK Awesome Otters

Stampin’ Up!® is really good at creating cute stamp sets that everyone wants to own – and Awesome Otters, the new Sale-a-Bration stamp set, is a prime example. It’s been really popular with my customers here in the UK, as many of them love wildlife as much as I do. We do have otters here in Derbyshire but they are very elusive – maybe 2022 will be the year that I see one?
 
Stampin Up UK Awesome Otters

This stamp set, which is free with a £45 order, is perfect for new crafters or those who are new to Stampin’ Up!® and want to start building up their collection as it features both greetings and images; three fun otters which can be used separately or together.
 
Stampin Up UK Awesome Otters
 
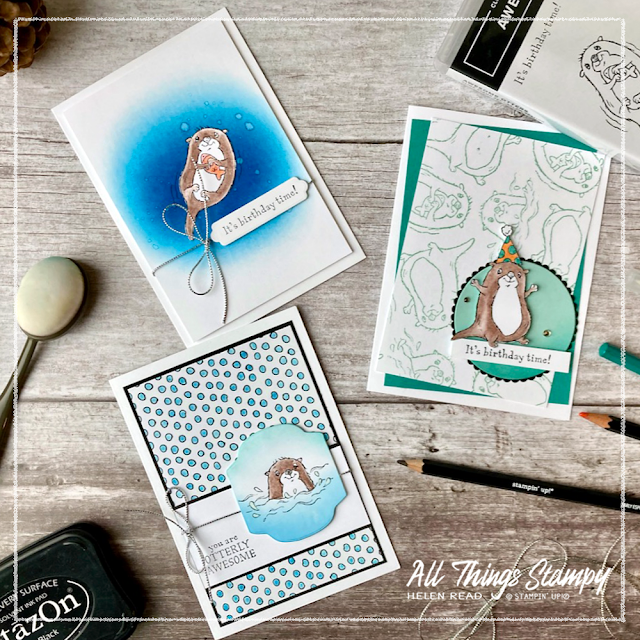
I’ve made a card with each of the otter images to add to my very depleted birthday card stash. I think these cards could be sent to anyone – men, women and children – and I would be more than happy to receive an otter birthday card myself. 
 
These cards show you how to add colour to your images using watercolour pencils with blender pens, and also how to add depth using Blending Brushes. 

All the images on my cards are stamped in Stazon and coloured with watercolour pencils and Stampin’ Up!® Blender Pens. When I say Blender Pens I mean the clear markers that you use with ink or pencils and not Stampin’ Blends, which are coloured alcohol markers. I know there is often some confusion because of the very similar product names.

When using Blender Pens (the clear ones), ideally use a permanent ink such as Stazon, although you can get away with a water-based ink such as Memento Tuxedo Black if you allow it to dry fully and work sparingly. 
 
Colour with your pencils, concentrating on the areas where you want darker colour to appear. Make sure you have enough colour on before you start blending as it’s difficult to add extra colour with the pencils once you have used the Blender Pens. When you are happy with the level of colour, gently blend it with your Blender Pens, working towards the uncoloured areas to create a soft graduated look.

Stampin Up UK Awesome Otters

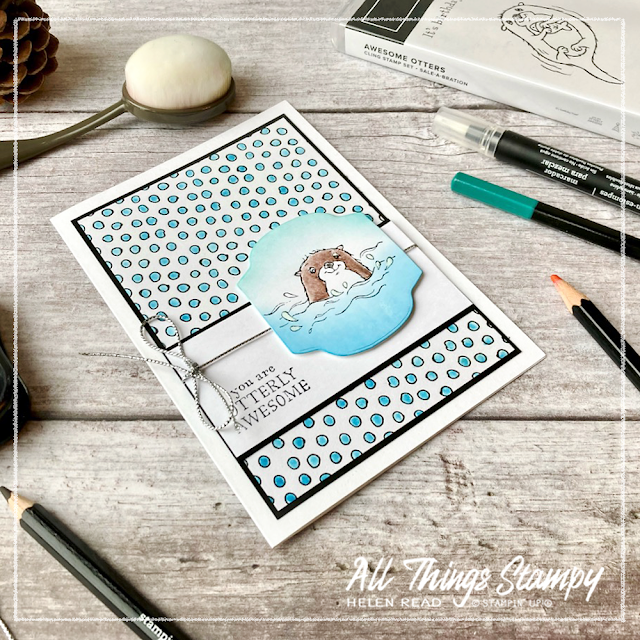
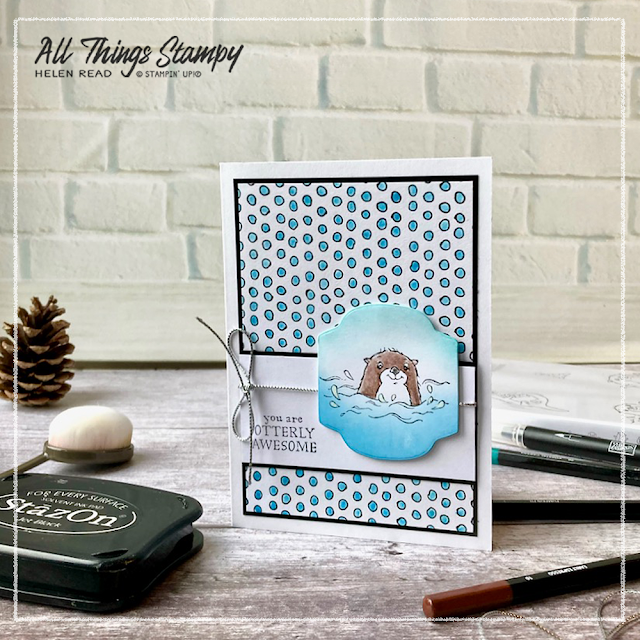
For my first card, I have created a background panel using patterned paper from the Pattern Party Designer Series Paper Pack, which is one of the host products in the Stampin’ Rewards section of the Stampin’ Up!® catalogue. This means you cannot buy it, but you can earn it free when you host a party with a workshop total of £150 or more or place your own order to this amount. The paper has bright colours one one side and black and white designs on the reverse; I’ve used one of these to create a blue spotty panel, adding the colour using my Pacific Point ink pad and a Blender Pen.

Stampin Up UK Awesome Otters

For my main element, I stamped the partially submerged otter onto a label die-cut using Seasonal Labels Dies. These dies were in the July-December Mini Catalogue but have carried over into the first part of 2022. I coloured the image using an Early Espresso watercolour pencil, then added extra colour using Stampin’ Up!® Blending Brushes; a hint of Pool Party at the top and some Pacific Point at the bottom. Blending brushes are an excellent way to add colour and depth to an element. 
 
Stampin Up UK Awesome Otters
 
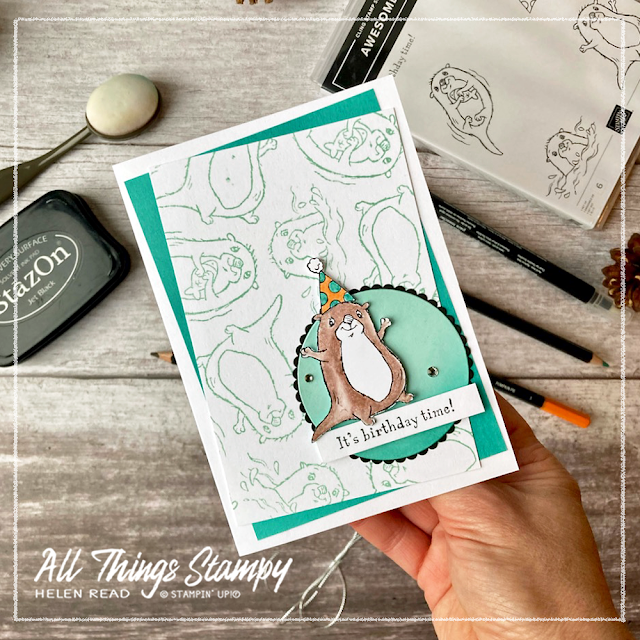
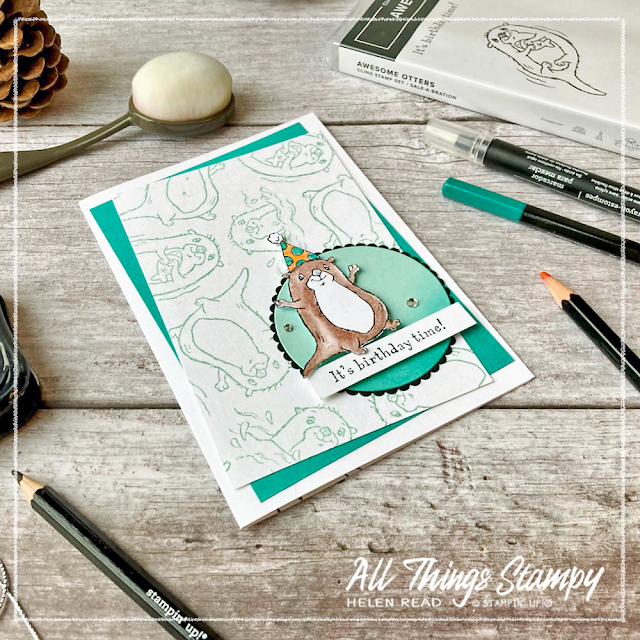
I’ve used a Blending Brush on this second card, too, to add a little depth to the Pool Party circle. The Pool Party theme is continued on the background, where I’ve stamped all the different otters at random, as close together as possible. This is a quick and easy way to make your own patterned paper to match your project perfectly.

Stampin Up UK Awesome Otters
 
The main otter image is stamped and cut out freehand, with a little party hat cut out and added on top. I’ve popped him up onto the Pool Party circle using Stampin’ Dimensionals, just resting his little foot and tail to overlap onto the greeting banner.
 
Stampin Up UK Awesome Otters
 
By positioning the stamped panel and the Bermuda Bay panel behind it at jaunty angles, this emphasises the fun feel of the card. It’s not necessarily something I would do for a more serious occasion, such as a sympathy card. 
 
Stampin Up UK Awesome Otters

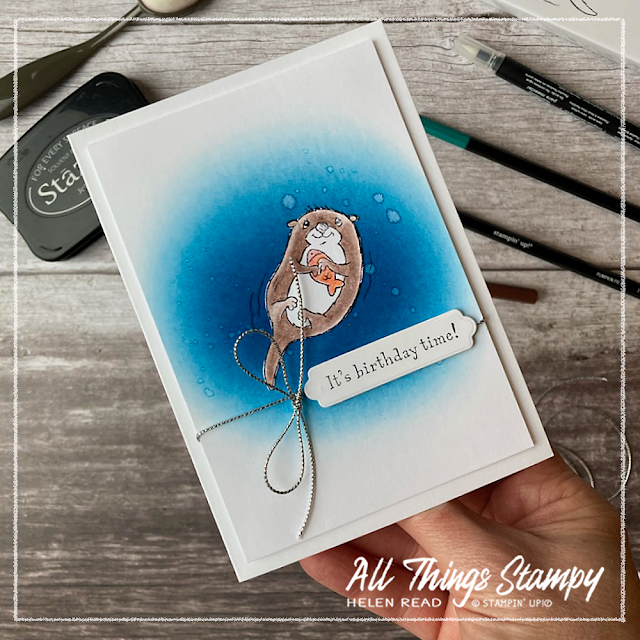
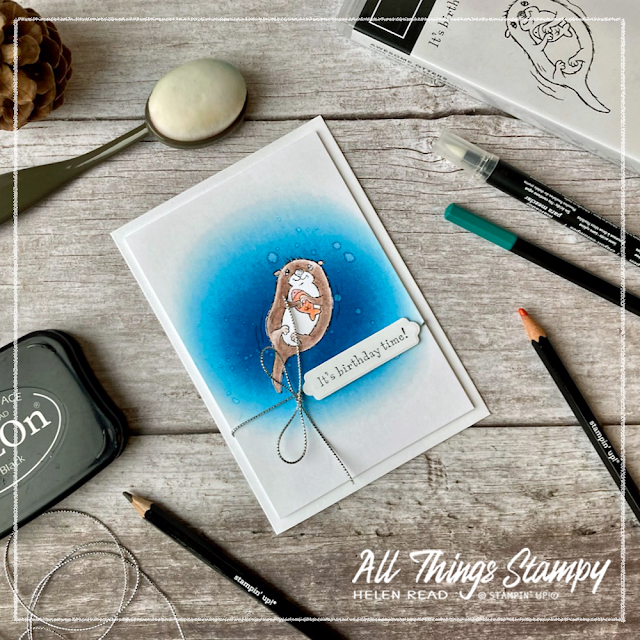
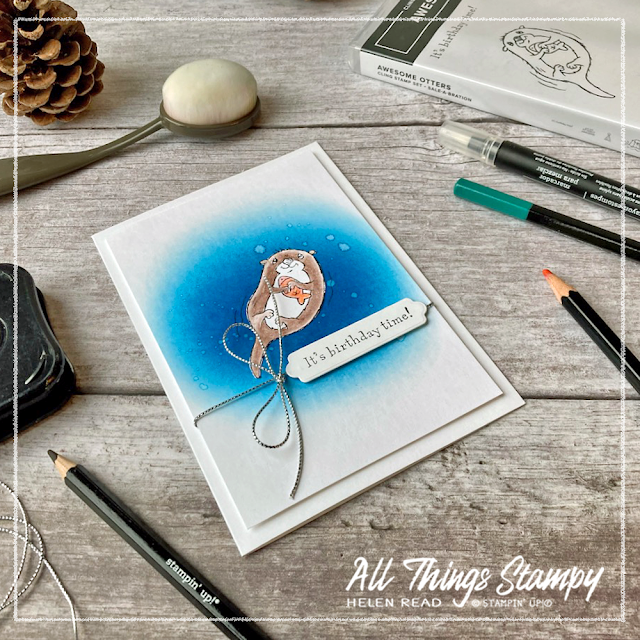
My third card really makes use of the Blending Brush by creating a dark pool of blue water in the centre of the card with the bright otter standing out from the background. I did this by stamping the otter onto a separate piece of Basic White cardstock and cutting it out closely. 
 
Stampin Up UK Awesome Otters

For the background, I applied Pacific Point ink with a Blending Brush in a circular motion, which creates much darker colour in the centre, graduating out to paler blue towards the edge of the cardstock layer. I stamped the otter directly on top of this blue ink, which meant I retained the finer details such as the movement lines. 
 
Stampin Up UK Awesome Otters

After I did this, I flicked some clear tap water onto the blue ink and allowed it to dry. This soaks up some of the ink to create pale splashes and is one of my very favourite techniques. Next I stuck the cut-out otter on top of the stamped blue layer, matching up the images perfectly. This is a great tip if you have fine details, such as whiskers or hair, that you really can’t fussy cut successfully.

The banner on this card, too, is cut out with Seasonal Labels Dies, and fits the “It’s birthday time!” greeting perfectly. It’s finished off with some Elegant Trim from the Stampin’ Up!® Annual Catalogue, for quite a clean and simple card. 
 
Stampin Up UK Awesome Otters
 
What I love about these projects is that they are largely created with white cardstock, which means you can adapt them to suit the ink pads you have. Any blue will do for this final card, although I love the richness and depth of Pacific Point. 
 
Stampin Up UK Awesome Otters
 
The fun birthday card could use any colours which can be picked up in the party hat and the background layer could be swapped to match.

Stampin Up UK Awesome Otters
 
And the Pattern Party Designer Series Paper, with its black and white designs, can be coloured in any colour – or none! – depending on what supplies you already own. These designs would also work with other animal images. 
 
It just shows you don’t have to own everything to make great projects; you can often work with what you have.
 
I hope you enjoyed my Awesome Otter projects and will consider adding this fabulous stamp set to your order next time. If you are in the UK and would like to order, please visit my store and, if you use the current host code RNU3JCR9, I’ll send you a thank you gift next month month. 


Does your wish list come to more than £99? Please get in touch and I will help you get more for your money and unlock discounts all year round.  


Monday, 8 June 2020

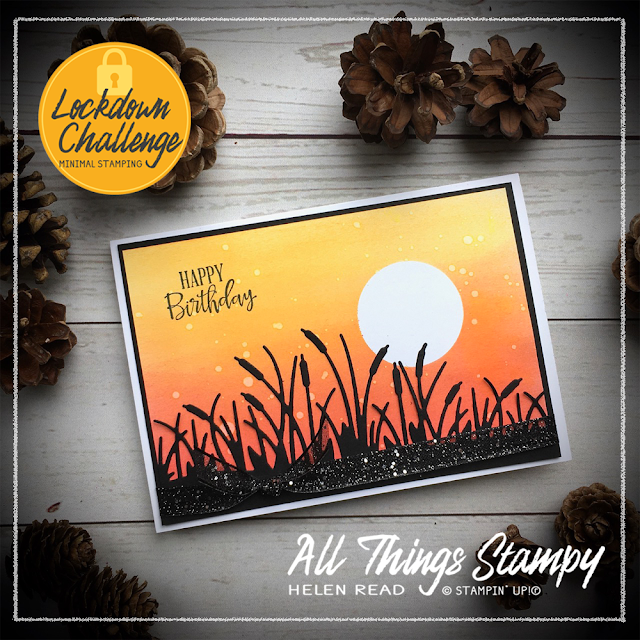
Creating beautiful backgrounds to show off your dies


No new products today – just some great examples of how you can create beautiful projects where the die-cuts are the stars of the show.

I had fun creating backgrounds to show off the Friendly Silhouettes Dies. Let me walk you through them.

For these first two projects, I masked a circle using a punched/die-cut sticky note, then brayered the background using Crushed Curry and Poppy Parade ink pads. You could sponge, too – but if you do, make sure you sponge away from the centre of the mask or you could dislodge it.

For the top card, I then lightly splashed with water from a fine paintbrush. Allow to dry, then dab it dry with a tissue. This creates this lovely effect which can look like seed heads blowing on the breeze, fireflies, rain or, on a dark blue background, like snow. It’s such a simple effect and so versatile.


For this card, I brayered as before, but instead of splashing, I used that same very fine paintbrush to paint fine lines following the edge of the circle. With ideas clearly way above my station, I call this the Van Gogh technique.


For the third card, I took the leftover template from the bullrushes in the first card and used this as a mask. I sponged with Pumpkin Pie to create a background image, then removed the mask and brayered around the top edge of the card in Melon Mambo. The beauty of brayering is that you can give it a go in any colours and get some lovely effects.

Want to have a go at fun techniques like this? If you’re in the UK, why not talk to me about joining my remote classes?


Monday, 6 August 2018

Sponging with Dandelion Wishes


Friday was my monthly Crafty Friday event and, for the first time, we took things outside onto the covered patio.

The theme was sponging and we used the popular Dandelion Wishes stamp set to make two projects; this delicate emboss resist card and the one you see below.

For the card above, we stamped in Versamark and then embossed in clear or white (it really doesn’t matter when you’re using white cardstock) before sponging over the top in Bermuda Bay. Well, I used Bermuda Bay – the ladies could choose as the rest of their supplies would go with absolutely anything. The only stipulation was that it had to be in my trolley which I’d wheeled outside! The background is Softly Falling, but showing the “debossed” side for a change.

Next we moved onto this project...


This time we punched a circle from a sticky note and used it to mask the cardstock, which we sponged in a circular motion. On top of this we painted light strokes with water, to create a vague Vincent van Gogh-ian effect. We stamped in black on top.

Again, everyone made something slightly different – they had the choice of any colour... as long as it was an In Color, as that was the DSP pack I had.

Friday, 3 August 2018

Delightfully Detailed laser-cut paper with brayered background


Another project from my brayering session. For this one, I masked a panel and brayered in Pacific Point, graduating it towards the top so it faded out. On top of this I sprinkled some water and allowed it to dry, which gives a lovely effect.

To create a focal point, I trimed a section from the Delicately Detailed Laser-cut DSP and sponged in different colours. It’s not easy to stick down but I used some tiny dabs of Tombow which did the trick.

Some Soft Sea Foam sequins finish it off - I'm in love with these!


Monday, 17 August 2015

Mix It Up Monday: Giddy goat


This project started out as a tasteful leaf card but quickly evolved into a silly goat. I was playing with watercolour background using the the block technique but it just wasn’t going my way. 

The technique I was trying to use involves scribbling on your clear block with markers, then spritzing it with water before pressing onto Whisper White cardstock. I think I was spritzing too much because the Pool Party and Mint Macaron just disappeared into each other, so I tried again without the water and got this textural effect instead.  

I decided this looked a little like a grassy hill, which was the perfect spot for my paper-pieced goat. The goat looks happy about it anyway. 

I was going to keep the card really simple with just one or two layers, but decided I’ve done a bit too much of that lately, so added some of our lovely new corrugated cardstock to add more texture. And the jute ribbon is quite fun on this project; having removed all but two strands from a strip, I was left with some pretty – and very subtle – fringing, which glistens in certain lights. 


My colour combo, in the end, was Mint Macaron, Pool Party, Soft Sky and Tip Top Taupe… so qualifies for Mix It Up Monday, as this is a combination from my In Color Charts. 

Building update: The builders plan to knock through from the new extension this week, so we’ve moved out of our kitchen and are making do with a kettle and a microwave for a while. It’ll be fine, apparently. And people keep telling me it will be worth it, so I hope they’re right!


Friday, 14 August 2015

Got all my (Barnyard Babies) ducks in a row


So I got all my ducks in a row for this card (more or less) which started me wondering where this phrase originated. I thought it was a relatively modern one but apparently not; the first known usage of the phrase appeared in print in 1932. But the internet cannot agree on its origin at all. Does it come from bowling? Carnival games? Or even from actual ducks? The debate could rage on. 

What’s indisputable is that the Barnyard Babies stamp set - the source of the ducks on this card - is a really cute stamp set. It’s also pretty safe to say that this card is not my best work, but the blog needs feeding and the cupboard is bare.

Talking of bare cupboards, our kitchen is being removed this weekend and we’ll be living on takeaways and cereal. If you pop round from Monday onwards, we’ll even struggle to give you a cup of tea but hopefully we’ll have all our ducks in a row and some sort of makeshift kitchen set up in a week or so.


Thursday, 19 February 2015

Die-cut butterfly on watercoloured texture paste background


First things first: when using these fabulously intricate butterfly dies, always sandwich a piece of wax paper (or greaseproof if you can't find it) between your die and cardstock. It will make a world of difference when it comes to popping out the shape! You may or may not be able to see that I inked the edges of the butterfly slightly with the Silver Encore ink pad, to pick up the vague hint of silver on the background. 

For this project I was having a play with texture paste, in readiness for my upcoming All-Day Craftathon (now fully booked). We’re not taking on anything this complicated but it was fun having a go. I used the stencil from the Build a Banner Simply Created Kit (p2013 of the main catty). Here’s how to get the same effect:
  • Create your own texture paste using 1 part cheap white glue, 1 part cheap white paint, 2 parts cornflour.
  • Make a spreader from a piece of thick cardstock or chipboard and stencil the paste onto your cardstock (watercolour paper would have been better than Whisper White but it worked ok)
  • Allow to dry thoroughly.
  • Using a lot of water and the ink from the lids of your ink pads, paint a graduated background, allowing the colours to spread into each other. I went slightly darker around the edges but didn't worry too much about a pattern. 
  • Allow to dry thoroughly and then lightly brush with Silver Encore ink pad
  • Finally, it's ready to use as your card background. 


125576s
125576

The small print

This is my personal blog and my sole responsibility as an Independent Stampin' Up!® demonstrator. All images are © Stampin' Up!® All content including photographs, projects and text are © Helen Read, unless otherwise stated. Please feel free to copy my ideas for your personal use and inspiration - if you are a SU demonstrator you may use these ideas for your events but please give credit where it is due. Please do not use my ideas for monetary gain, competitions or publication. The images on this blog - including blog buttons - should not be copied and used elsewhere on the internet or on CDs.