Sorry I can't update the blog right now. Please find me on Facebook

Showing posts with label Seasonal Labels Dies. Show all posts

Tuesday, 8 March 2022

In the Moment meets Waves of the Ocean for International Women’s Day

Stampin Up UK In the Moment stamp set Waves of the Ocean patterned paper

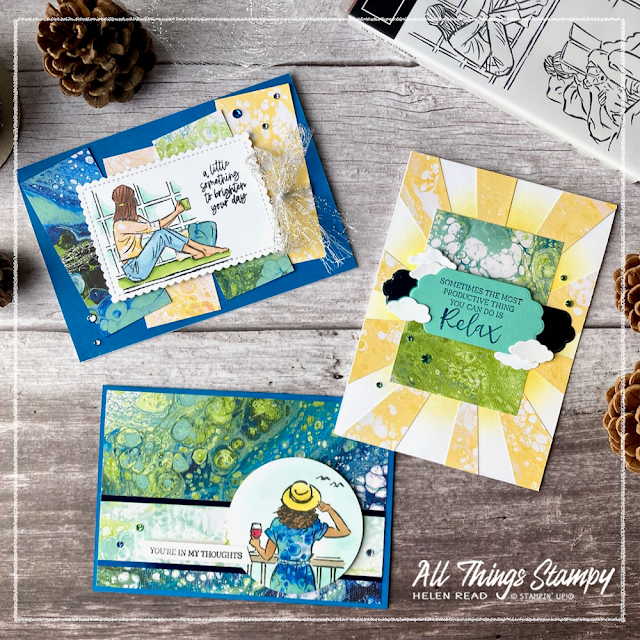
When you planned to use the In the Moment stamp set to celebrate International Women’s Day but you also want to show off your new Waves of the Ocean Designer Series Paper... THIS is what you come up with. 


Stampin Up UK In the Moment stamp set Waves of the Ocean patterned paper

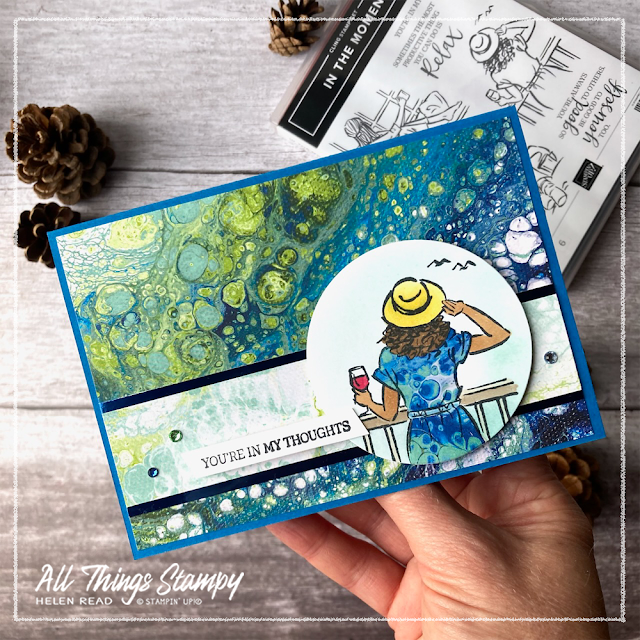
I love the marble patterns of this gorgeous paper in its rich blues on one side and tropical pastels on the reverse. Naturally, as someone who frequently shuns pastel shades, I am drawn to the richer colours so used this stunning green and blue piece as the background to this card. 
 

Stampin Up UK In the Moment stamp set Waves of the Ocean patterned paper

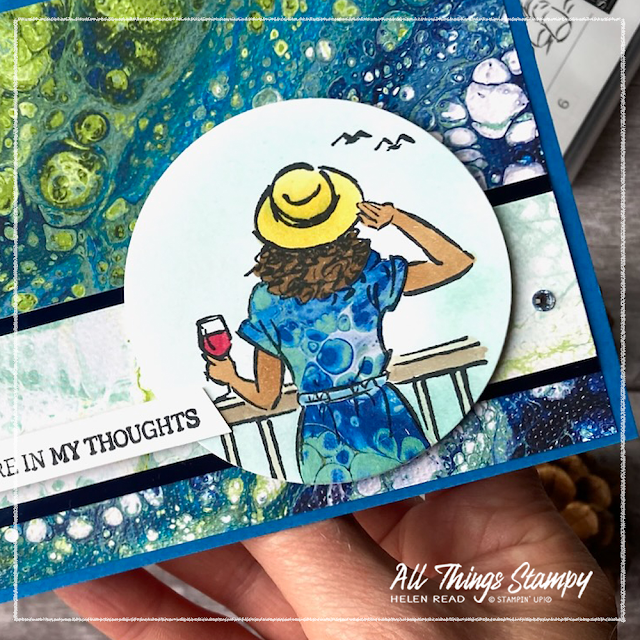
Rich Blue Foils (another new product only available while supplies last) add some shine to the horizontal strip and the image is cut out using Layering Circle Dies to break up the hard lines. 
Stampin Up UK In the Moment stamp set Waves of the Ocean patterned paper

I’ve coloured the image using a combination of Stampin’ Blends, including some of our new Natural Tones, and paper piecing. This is a simple technique which means you stamp the image again on to Designer Series Paper and cut out the shapes. Here I’ve cut out the shape of the dress and overlaid it onto the first stamped image; I love how this gives the dress a really natural look of printed fabric.

This is one of three images of women in relaxed poses in the beautiful In The Moment stamp set, available to Stampin' Up!® UK customers in the current Jan-June Mini Catalogue, is perfect for creating cards for all the fabulous women in your life. 


Stampin Up UK In the Moment stamp set Waves of the Ocean patterned paper


Waves of the Ocean is a new pack of Designer Series Paper which is only available while supplies last. The designs were created by Stampin’ Up!® artists who look like they’re having lots of fun in this video. This beautiful patterned paper is designed to coordinate with our new Waves of Inspiration stamp set and die bundle which is an early release ahead of the upcoming Stampin’ Up!® Annual Catalogue. However, it is versatile enough to work well with lots of other stamp sets, such as In the Moment as I’ve used here. 
 

Stampin Up UK In the Moment stamp set Waves of the Ocean patterned paper
  

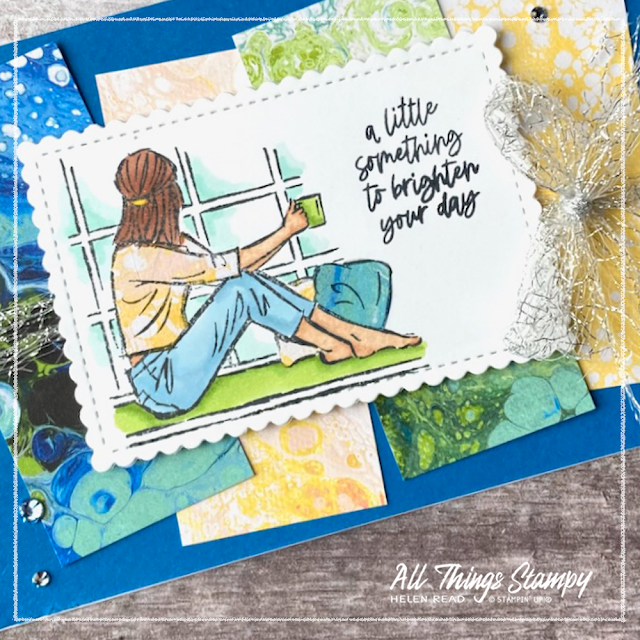
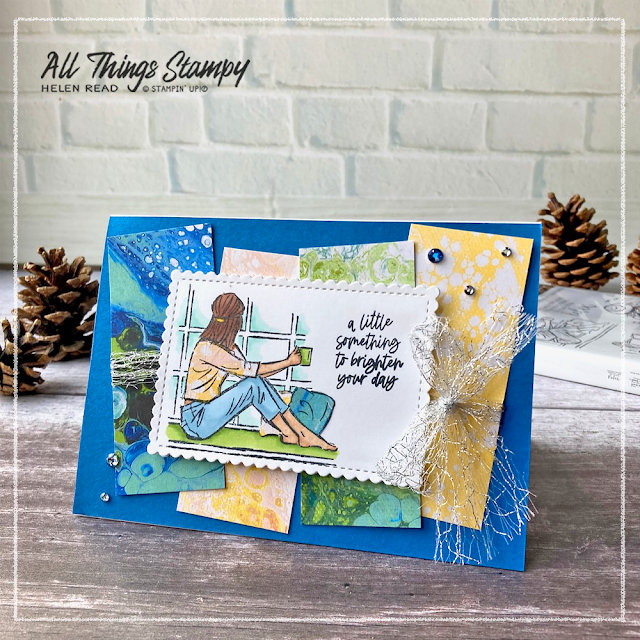
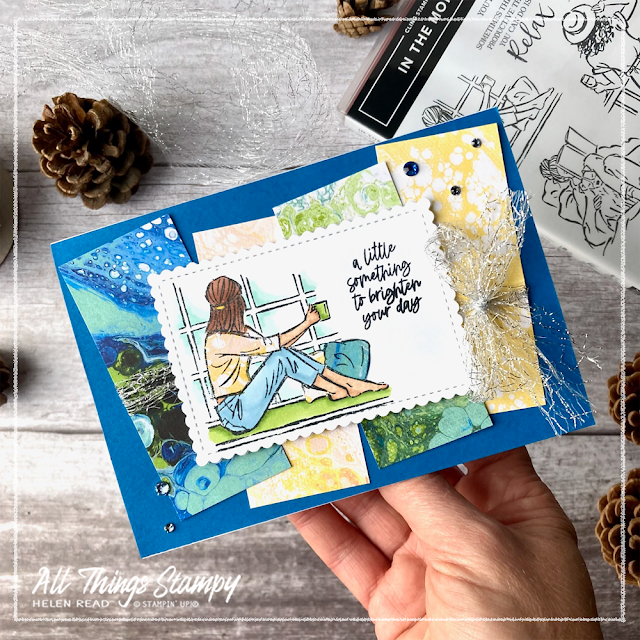
For my second card I used the image from In the Moment of the lady sitting on the window seat enjoying a cuppa and a look at the view. I’ve cut this one out using Stitched So Sweetly Dies, which left the perfect space for this sentiment from the Rainbow of Happiness stamp set.  

Stampin Up UK In the Moment stamp set Waves of the Ocean patterned paper

To show off as several designs of patterned paper from Waves of the Ocean, I cut strips and overlapped them at jaunty angles. I finished off with some silver Metallic Mesh Ribbon and Rhinestone Waves Basic Jewels (trust me, there’s nothing basic about these!). 


Stampin Up UK In the Moment stamp set Waves of the Ocean patterned paper

Stampin Up UK In the Moment stamp set Waves of the Ocean patterned paper

I’ve used the paper piecing technique again here, adding pattern to the T-shirt and cushions to link the main image to the background designs. 

If you want to know where all those tiny pieces of Waves of the Ocean Designer Series Paper came from for the paper piecing, take a look at this card, which goes in a very different direction...

Stampin Up UK In the Moment stamp set Waves of the Ocean patterned paper

It’s a variation on the card on the Stampin’ Up!® website, which looks like this:


Stampin Up UK Waves of the Ocean patterned paper
 
Stampin Up UK In the Moment stamp set Waves of the Ocean patterned paper


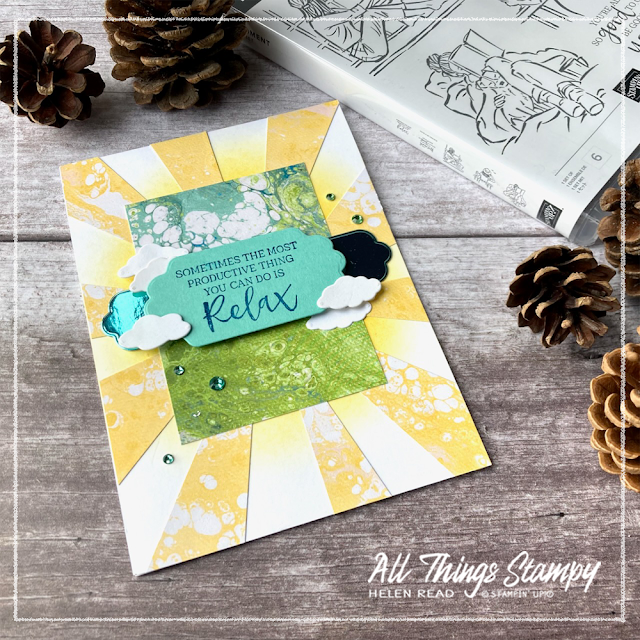
My version uses the same paper pattern, with the blending brush behind, but I don’t have the Waves of Inspiration bundle so I compromised by using Seasonal Labels dies and the small clouds from the Brilliant Rainbow dies. The greeting comes from In The Moment.  

The starburst pattern is created by making a starburst mask (or drawing lightly in pencil directly onto your patterned paper if you’re feeling brave). I explain how to do this in this blog post. 

This created lots of scraps of paper which I retained for the paper piecing you see above, to reduce waste. 
Stampin Up UK In the Moment stamp set Waves of the Ocean patterned paper


I hope you like my In the Moment/Waves of the Ocean cards for International Women’s Day and are inspired to create your own. If you are a crafter in the UK and would like to order any of the products you see here, you can order at any time, day or night, via my Stampin’ Up! store. If you do this and use the March host code UDVDUXFH I will send you a thank you gift next month. Plus I will donate 10% of the purchase price (excluding shipping) to the British Red Cross Ukrainian Crisis Fund.

Does your wish list come to more than £99? Please get in touch and I will help you get more for your money and unlock discounts all year round.  


Tuesday, 25 January 2022

How to add colour to Awesome Otters using Watercolour Pencils, Blender Pens and Blending Brushes

Stampin Up UK Awesome Otters

Stampin’ Up!® is really good at creating cute stamp sets that everyone wants to own – and Awesome Otters, the new Sale-a-Bration stamp set, is a prime example. It’s been really popular with my customers here in the UK, as many of them love wildlife as much as I do. We do have otters here in Derbyshire but they are very elusive – maybe 2022 will be the year that I see one?
 
Stampin Up UK Awesome Otters

This stamp set, which is free with a £45 order, is perfect for new crafters or those who are new to Stampin’ Up!® and want to start building up their collection as it features both greetings and images; three fun otters which can be used separately or together.
 
Stampin Up UK Awesome Otters
 
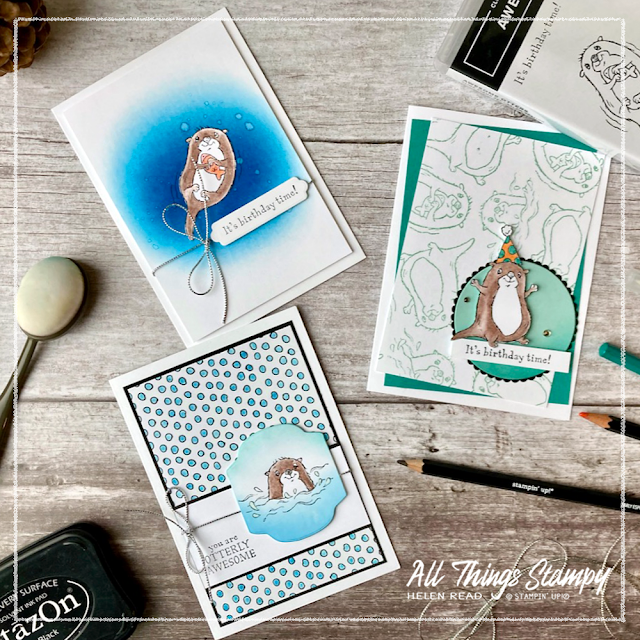
I’ve made a card with each of the otter images to add to my very depleted birthday card stash. I think these cards could be sent to anyone – men, women and children – and I would be more than happy to receive an otter birthday card myself. 
 
These cards show you how to add colour to your images using watercolour pencils with blender pens, and also how to add depth using Blending Brushes. 

All the images on my cards are stamped in Stazon and coloured with watercolour pencils and Stampin’ Up!® Blender Pens. When I say Blender Pens I mean the clear markers that you use with ink or pencils and not Stampin’ Blends, which are coloured alcohol markers. I know there is often some confusion because of the very similar product names.

When using Blender Pens (the clear ones), ideally use a permanent ink such as Stazon, although you can get away with a water-based ink such as Memento Tuxedo Black if you allow it to dry fully and work sparingly. 
 
Colour with your pencils, concentrating on the areas where you want darker colour to appear. Make sure you have enough colour on before you start blending as it’s difficult to add extra colour with the pencils once you have used the Blender Pens. When you are happy with the level of colour, gently blend it with your Blender Pens, working towards the uncoloured areas to create a soft graduated look.

Stampin Up UK Awesome Otters

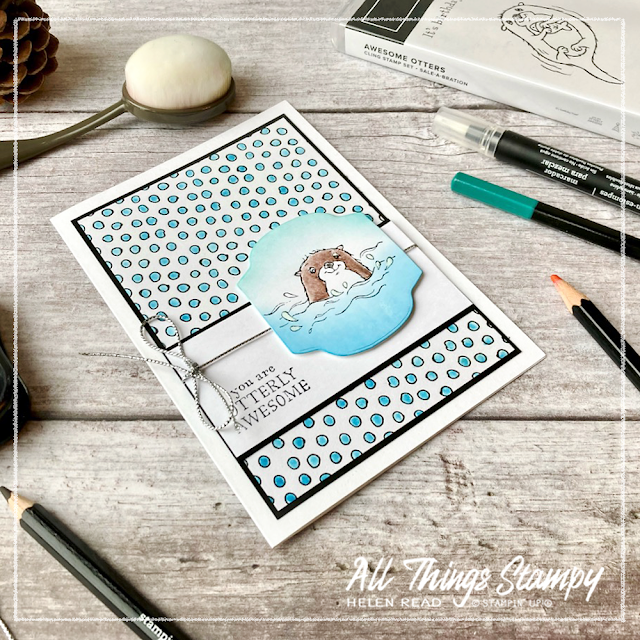
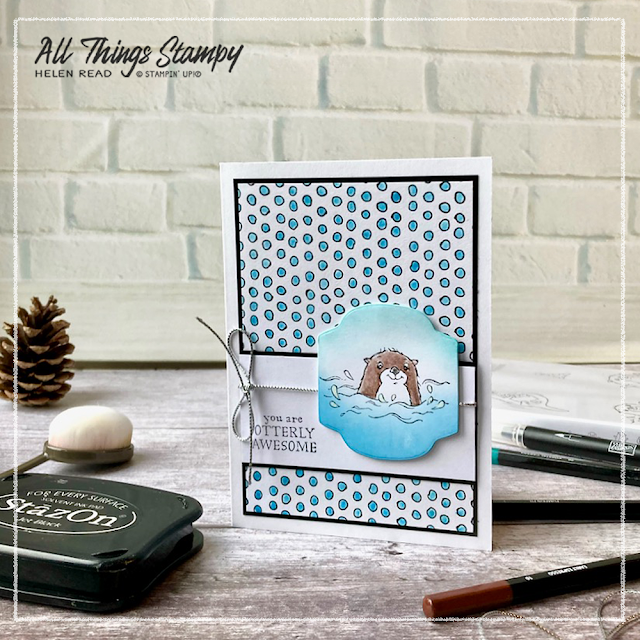
For my first card, I have created a background panel using patterned paper from the Pattern Party Designer Series Paper Pack, which is one of the host products in the Stampin’ Rewards section of the Stampin’ Up!® catalogue. This means you cannot buy it, but you can earn it free when you host a party with a workshop total of £150 or more or place your own order to this amount. The paper has bright colours one one side and black and white designs on the reverse; I’ve used one of these to create a blue spotty panel, adding the colour using my Pacific Point ink pad and a Blender Pen.

Stampin Up UK Awesome Otters

For my main element, I stamped the partially submerged otter onto a label die-cut using Seasonal Labels Dies. These dies were in the July-December Mini Catalogue but have carried over into the first part of 2022. I coloured the image using an Early Espresso watercolour pencil, then added extra colour using Stampin’ Up!® Blending Brushes; a hint of Pool Party at the top and some Pacific Point at the bottom. Blending brushes are an excellent way to add colour and depth to an element. 
 
Stampin Up UK Awesome Otters
 
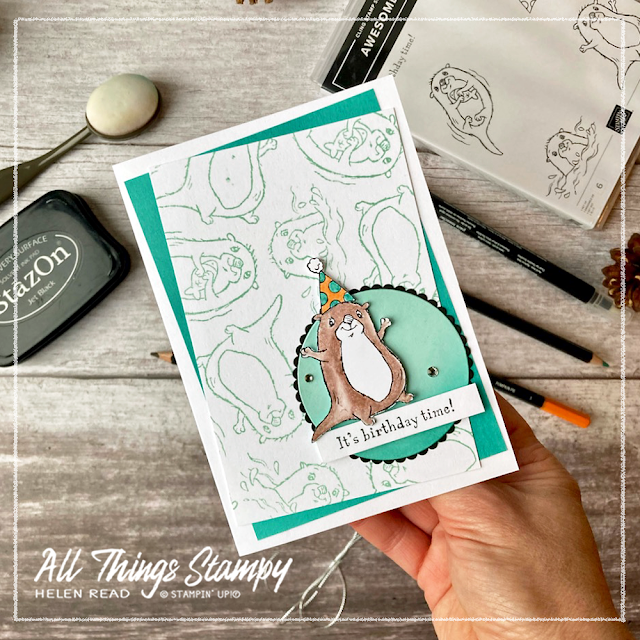
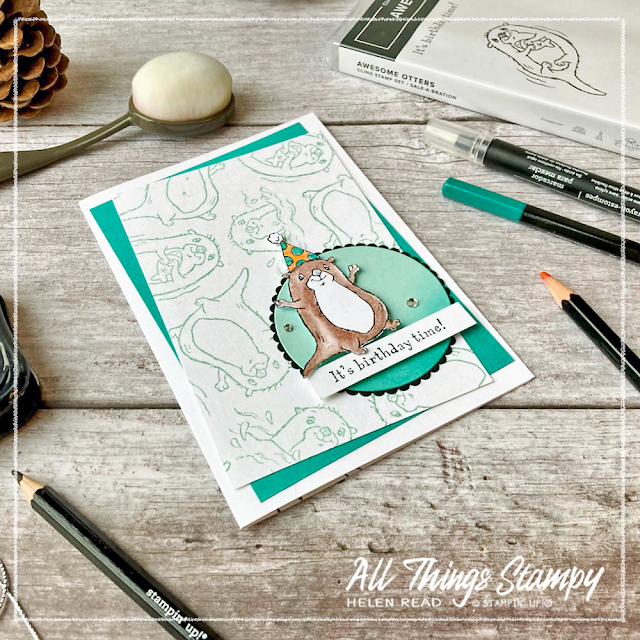
I’ve used a Blending Brush on this second card, too, to add a little depth to the Pool Party circle. The Pool Party theme is continued on the background, where I’ve stamped all the different otters at random, as close together as possible. This is a quick and easy way to make your own patterned paper to match your project perfectly.

Stampin Up UK Awesome Otters
 
The main otter image is stamped and cut out freehand, with a little party hat cut out and added on top. I’ve popped him up onto the Pool Party circle using Stampin’ Dimensionals, just resting his little foot and tail to overlap onto the greeting banner.
 
Stampin Up UK Awesome Otters
 
By positioning the stamped panel and the Bermuda Bay panel behind it at jaunty angles, this emphasises the fun feel of the card. It’s not necessarily something I would do for a more serious occasion, such as a sympathy card. 
 
Stampin Up UK Awesome Otters

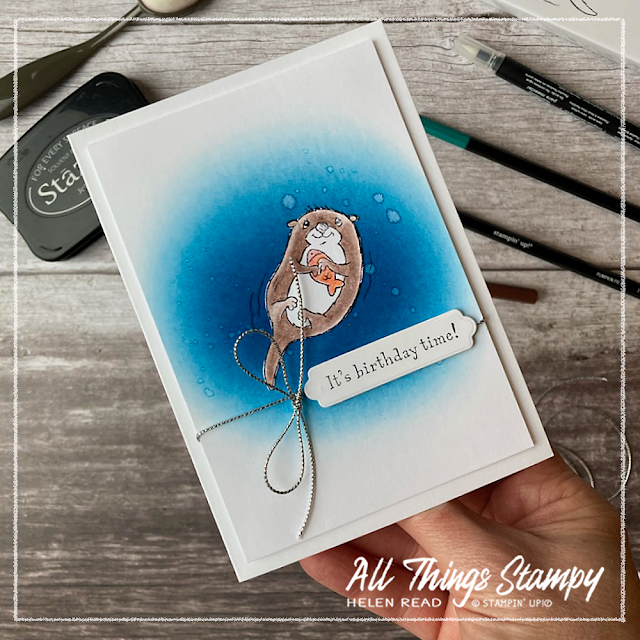
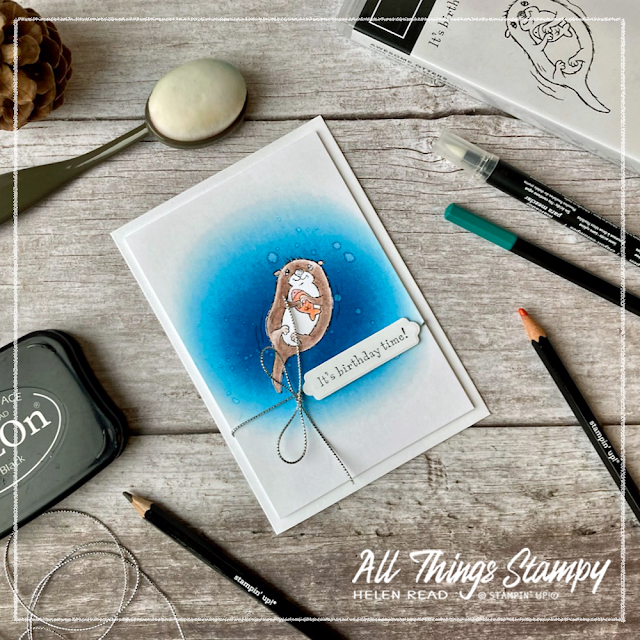
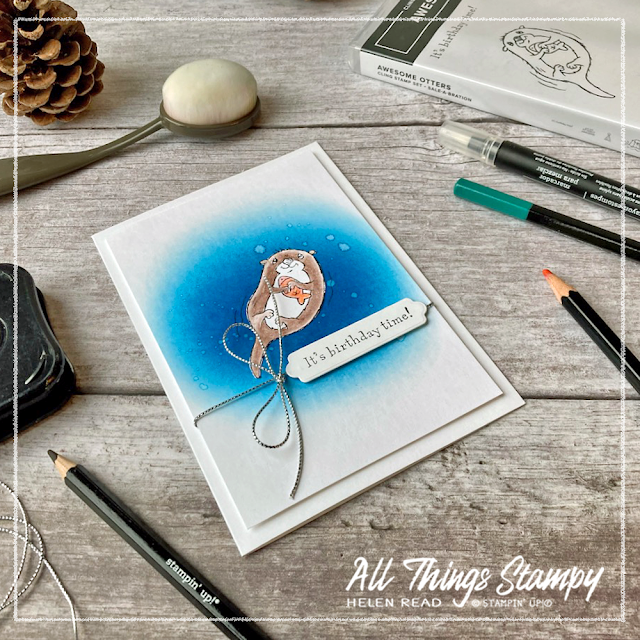
My third card really makes use of the Blending Brush by creating a dark pool of blue water in the centre of the card with the bright otter standing out from the background. I did this by stamping the otter onto a separate piece of Basic White cardstock and cutting it out closely. 
 
Stampin Up UK Awesome Otters

For the background, I applied Pacific Point ink with a Blending Brush in a circular motion, which creates much darker colour in the centre, graduating out to paler blue towards the edge of the cardstock layer. I stamped the otter directly on top of this blue ink, which meant I retained the finer details such as the movement lines. 
 
Stampin Up UK Awesome Otters

After I did this, I flicked some clear tap water onto the blue ink and allowed it to dry. This soaks up some of the ink to create pale splashes and is one of my very favourite techniques. Next I stuck the cut-out otter on top of the stamped blue layer, matching up the images perfectly. This is a great tip if you have fine details, such as whiskers or hair, that you really can’t fussy cut successfully.

The banner on this card, too, is cut out with Seasonal Labels Dies, and fits the “It’s birthday time!” greeting perfectly. It’s finished off with some Elegant Trim from the Stampin’ Up!® Annual Catalogue, for quite a clean and simple card. 
 
Stampin Up UK Awesome Otters
 
What I love about these projects is that they are largely created with white cardstock, which means you can adapt them to suit the ink pads you have. Any blue will do for this final card, although I love the richness and depth of Pacific Point. 
 
Stampin Up UK Awesome Otters
 
The fun birthday card could use any colours which can be picked up in the party hat and the background layer could be swapped to match.

Stampin Up UK Awesome Otters
 
And the Pattern Party Designer Series Paper, with its black and white designs, can be coloured in any colour – or none! – depending on what supplies you already own. These designs would also work with other animal images. 
 
It just shows you don’t have to own everything to make great projects; you can often work with what you have.
 
I hope you enjoyed my Awesome Otter projects and will consider adding this fabulous stamp set to your order next time. If you are in the UK and would like to order, please visit my store and, if you use the current host code RNU3JCR9, I’ll send you a thank you gift next month month. 


Does your wish list come to more than £99? Please get in touch and I will help you get more for your money and unlock discounts all year round.  


Tuesday, 14 December 2021

Last-minute Christmas gift projects – with free tutorial


It’s around about this time of year that I begin to lose interest in Christmas projects and get anxious to start crafting with my new Stampin’ Up!® supplies. But there are still Christmas gifts, decorations and more to be made so for my penultimate craft class of the year we made a gift card holder and a couple of packages for tiny gifts. 
 
All of these projects can be made from one sheet of Stampin’ Up!® Painted Christmas Designer Series Paper (or any other designs of your choice). 
 
 
We began by making the bauble/gift holder which can be made from any size square but I went with 7" (17.8cm) to allow enough leftovers to fit the gift card holder.

This is far simpler than it looks and requires no cutting, measuring or special tools. I used this tutorial by Aussie demonstrator Fiona Bradley
 
 
The only thing I changed from Fiona’s tutorial was to punch my corner holes after the first two folds – it’s way easier to do this when the paper is still flat. Punch through both layers when the paper is folded corner to corner, then repeat on the other two corners. 
 
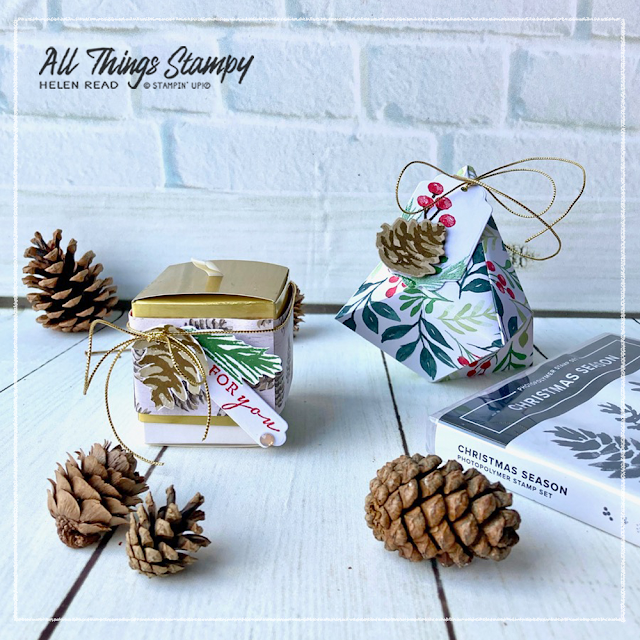
We held our baubles together using Simply Elegant Trim and decorated with a gift tag made with the Seasonal Labels Dies and coordinating Christmas Season stamp set. 
 

The card is a square one made to fit some 13cm (5") envelopes from my stash. All the pieces of Designer Series Paper you need can be cut out of the remaining sheet you used for the bauble.
 
 
 Make sure any decorations you add to the front of the small square don’t overhang on the left or this will make the card difficult to open.  


Inside the right flap you can stick a piece of Designer Series Paper and there is just enough room for a credit card-sized gift card... if you don’t apply adhesive on the right hand side. 


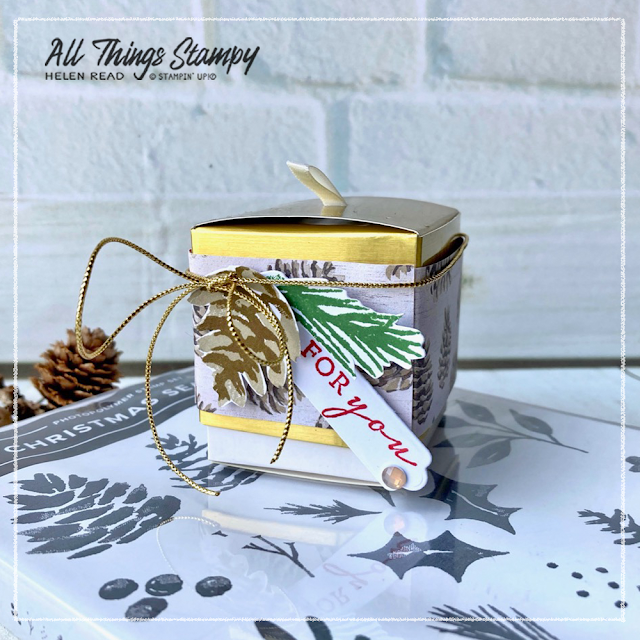
With our leftover pieces we decorated these little Simply Classic Treat Boxes, which are ideal for table gifts or for packaging something small such as jewellery. You could even hang them on the Christmas tree filled with chocolates.
 
There wasn't a long enough strip of Designer Series Paper left to go around the whole box so I cut two 3.5cm wide strips and joined them. Once the gold trim and decorations are added you can’t see the joins.

I hope these projects have inspired you to make some last-minute festive packaging. They are a great way to use up any leftovers – and don’t feel you have to hoard this pack of paper as it is only going into hibernation. The Painted Christmas Designer Series Paper will not be available from 4th January but will return in July 2022. 

The Christmas Season stamp set and Seasonal Labels Dies are both carrying over into the new year, although will not be available as a bundle from 4th January. So if you want to make your 10% saving, I suggest you order before then. They have proved to be my most-used Christmas stamps this year and the dies will prove useful all year round.

Want to craft with beautiful projects like these? If you’re in the UK, please head on over to my store to shop. If you use the host code TFBG2JJB before the end of December, I will send you a thank you gift next month.


Does your wish list come to more than £99? Please get in touch and I will help you get more for your money and unlock discounts all year round.  


Tuesday, 23 November 2021

Painted Season gift projects – with FREE tutorials

Painted Season Christmas Stampin Up UK Demonstrator

Some of you are way more organised than me and already have your Christmas cards made – and perhaps even written them. Therefore, your thoughts will be turning to gift packaging. 

I made these gift wrap ideas using the beautiful Painted Christmas Designer Series Paper from Stampin’ Up!®. 
 
As you may guess from the fact that pine cones feature in all of my project photos, this Suite is absolutely right up my street – the designs, the colours, everything. Finally, those pine cones make sense!
 
Painted Season Christmas Stampin Up UK Demonstrator

The large bag is a great design which I borrowed from UK Stampin’ Up!® demonstrator Julie Kettlewell at The Paper Haven
 
 Painted Season Christmas Stampin Up UK Demonstrator
 
It requires two full sheets of 12x12 Designer Series Paper but produces a bag which is big enough for a book or box of chocolates. Hopefully the recipient will like the bag enough to use it again next year, too.

 
Painted Season Christmas Stampin Up UK Demonstrator

I decorated the bag with a gift tag made using the Christmas Season bundle. 

Painted Season Christmas Stampin Up UK Demonstrator

The tag can be as simple or as detailed as you like. I love the pine cones (obviously) so stamped these onto Crumb Cake cardstock to really make them stand out.
 
Painted Season Christmas Stampin Up UK Demonstrator

The half-cracker gift box is a brilliant little design which can be used as novelty gift packaging or as table crackers which can be used year after year. 
 
Painted Season Christmas Stampin Up UK Demonstrator
 
Regular readers with good memories will recall I made this half cracker gift box last year, too but it’s such a good little box that I wanted to repeat it at an event this year using this gorgeous Painted Christmas Designer Series Paper... after first checking that none of this year’s ladies had attended last year, of course!
 
 
Painted Season Christmas Stampin Up UK Demonstrator


Again, I made a gift tag using the Christmas Season stamp set and Seasonal Labels dies, which are available as a bundle. This time I used a smaller label die and the smaller of the two pine cones from the set.

I had two packs of this beautiful Painted Christmas Designer Series Paper which enabled me to create a matching cracker box to go with each bag. But if you mix and match they look beautiful, too. 
 
Painted Season Christmas Stampin Up UK Demonstrator

Painted Season Christmas Stampin Up UK Demonstrator

If you are in the UK and would like to order, please visit my store and, if you use the November 2021 host code P6VRQPMJ, I’ll send you a thank you gift in the following month.


Does your wish list come to more than £99? Please get in touch and I will help you get more for your money and unlock discounts all year round.  


The small print

This is my personal blog and my sole responsibility as an Independent Stampin' Up!® demonstrator. All images are © Stampin' Up!® All content including photographs, projects and text are © Helen Read, unless otherwise stated. Please feel free to copy my ideas for your personal use and inspiration - if you are a SU demonstrator you may use these ideas for your events but please give credit where it is due. Please do not use my ideas for monetary gain, competitions or publication. The images on this blog - including blog buttons - should not be copied and used elsewhere on the internet or on CDs.