In the class I showed everyone how you can create stunning skies from simple homemade masks. What’s exciting about this type of class is that everyone’s projects turn out differently because we all use our own stamps and ink pads. What’s always surprising is how much overlap there is, with lots of people turning to the same stamp sets!
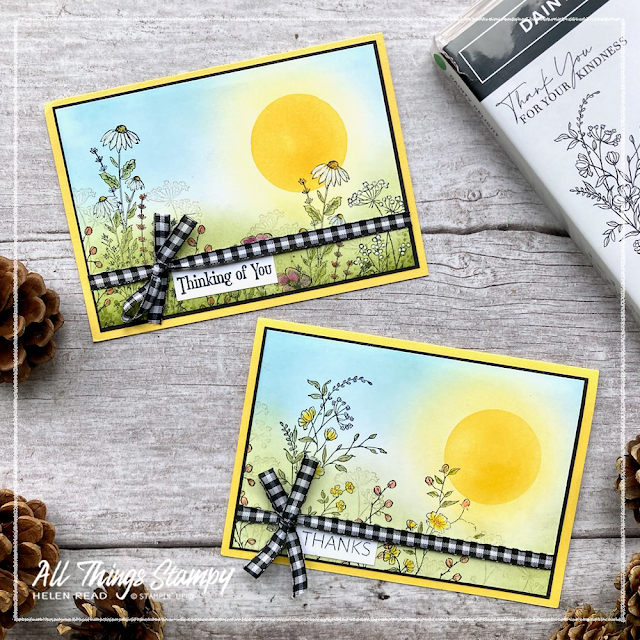
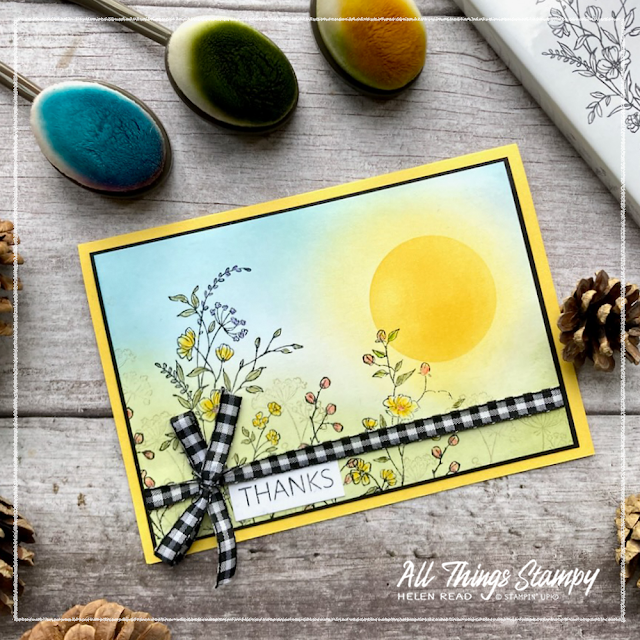
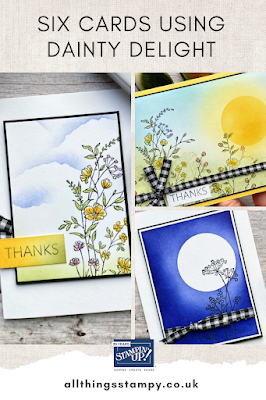
We began with this lovely garden scene. I’d provided everyone with a quarter sheet of printer paper with a circle die-cut out of the centre. By overlaying this onto Basic White cardstock, we created a bright yellow sun with our Stampin’ Up!® Blending Brushes and, in my case, Daffodil Delight ink.
Removing the sun, we continued to blend in a circular motion to add some rays around the sun.
Next we added some pale blue (Balmy Blue) for the sky and some Old Olive at the base for the grass.
I always start with an over-sized piece when blending as sometimes you get a dark line at the edge of the cardstock, so we trimmed it down and then stamped on top using our chosen flower stamps. For my sample version (Thanks card) I used Dainty Delight, stamped in black and coloured in using Blender Pens and ink pads.
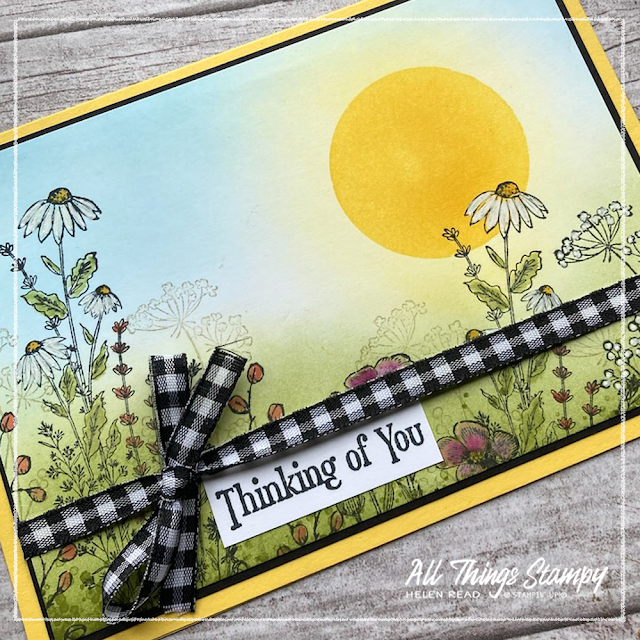
On the day, I made this card using a variety of my favourite flower stamps; Dragonfly Garden for the daisies (which I coloured using an old Chalk Marker) Quiet Meadow for the flowers in the centre (which I messed up so covered with the ribbon) and then Dainty Delight to fill in the gaps.
On both cards I added some seed heads in Crumb Cake stamped off (on scrap paper first to create a paler image) to add depth to the image.
We finished off with some black and white gingham ribbon (a must have in your ribbon collection as it goes with everything) and a greeting.
For our second card, we used torn paper as a mask to create a cloudy sky.
I have two version here again. My sample (Thanks) was created with Starry Sky ink as one lady had told me she had no pale blue. I wanted to show how it was possible with a dark blue and a light touch. In fact, if you’ve been using blue on another project, you don’t even need to re-ink your brush as there will be enough left on it to provide that required light touch.
The Thinking of You card is created using Balmy Blue – you still need quite a light touch but you may need to add a little ink to your brush, even if you’ve just come from another Balmy Blue project.
For this card, all you need is some torn scrap paper which you use as a mask, holding it in place while you blend and moving around to a new position for more clouds. It’s really effective and works for hills and mountains too.
At the bottom we added some Old Olive – again using that already inky brush – then finished off with some stamped flowers. My greeting is stamped on a scrap of cardstock which I blended in a mix of Daffodil Delight and Old Olive. This is a great way of getting a coordinating layer if you don’t have the correct colour cardstock but do have the ink.
For both of my cards I used stamps from the Dainty Delight stamp set. Simply choosing different images and colours gives two very distinct looks.
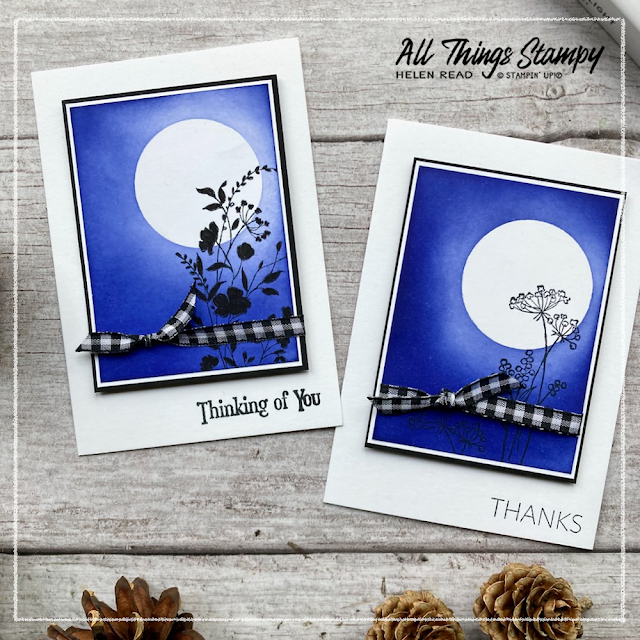
Our final card uses yet another masking technique. This time we took the die-cut paper circle, applied Tombow Multi-purpose Adhesive to the back and allowed it to dry clear. This turns it into a temporary adhesive making it perfect for creating masks.
With the mask in position, we used Stampin’ Up!® Blending Brushes to blend around the circle (I used Starry Sky), gradually increasing the ink as we reached the edges of the cardstock. When the mask is removed, this gave the impression of a full moon with its faint glow.
On top of this I stamped with the Dainty Delight Stampin' Up!® stamp set, choosing different images for each card. For the Thanks card, I simply stamped seed heads and left it like that.
For the Thinking of You card, I used the floral image then carefully coloured i in with a black marker to create a silhouette effect.
Here are my tips for using Stampin’ Up!® Blending Brushes:
- Start with a slightly oversized piece of cardstock so you can trim off any dark edges.
- Apply ink using a stroking motion across the top of your ink pad.
- When you apply the brush to your cardstock, it can smudge at first so tap off excess ink on some scrap paper OR start your blending off the edge of the cardstock and work your way onto it. In the case of the moon card, I started in the centre of the moon mask (so the mask took that first smudge) and worked my way outwards.
- Work the brush in a circular motion.
- Don’t give up! Almost everyone I have had in my classes tries to give up too soon. It can take a while to reach colour saturation.
- When using dark colours like this, change your grid paper before your next project to avoid contamination.
If you are in the UK or Ireland and would like to order any Stampin’ Up!® products, please
visit my store and, if you use the February 2023 host code 3T2Y4EYV, I’ll send you a thank you gift in March.
Please pin these images!







Thanks for sharing these beautiful cards, and all those techniques and tips xxx
ReplyDeleteThank you so much for your lovely comment.
DeleteWhat a gorgeous collection Helen! :)
ReplyDelete