It’s another exciting day in the world of Stampin’ Up!® crafting as we have another international blog hop for you so a warm welcome to everyone, particularly those who are here for the first time.
This time we are showcasing the
Trimming the Town Suite, which is a fabulous suite in the August-December Mini Catalogue.
And the Designer Series Paper, which I haven’t used today but
made great use of in these projects, is currently available at 15% off until the end of October, so make sure you don’t miss that!
In fact, I have the whole Suite (that happens more and more lately!) but today I particularly want to concentrate on the beautiful
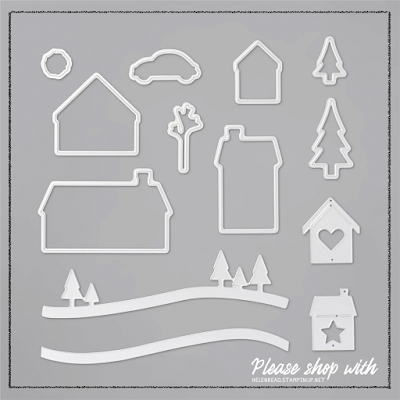
Home Together Dies because I have been using these recently in my events.
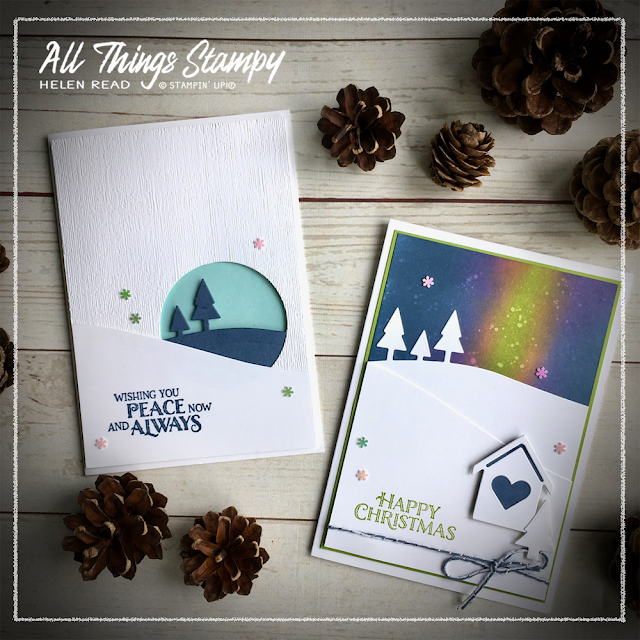
All my events are currently held on Zoom, which is the closest we can safely get to a real craft class right now, and I like to offer a variety of events to suit all budgets, which often means creating projects based on dies, which I can cut in advance. For my October Crafty Friday event, where we enjoy playing with techniques, we made two cards:
We eased ourselves in gently with this clean and simple white card, which draws the eye into a pair of trees on a hill.
The layer with the circle is also embossed using the
Subtle 3D Embossing Folder, which is one of my favourites. I also know that many of the ladies attending had that folder, and those who didn’t could use something equally neutral.
When die-cutting and embossing the same piece, make sure you do the die-cutting first. Otherwise, the cutting process will squash your lovely embossing.
I stamped this lovely sentiment from
Yuletide Pasture in Misty Moonlight. I love how Misty Moonlight goes so beautifully with one of my favourite colours, Pool Party.
The card is finished off with these gorgeous
Adhesive-Backed Snowflakes which I discovered recently. I actually bought them for a November class but couldn’t resist opening them early and have since had to re-order. Honestly, just buy them; they’re so delicate and subtle.
The ladies asked me why we’d started with the simpler card instead of this Northern Lights card which followed. The answer was because the Northern Lights card is sponged and I really didn’t want inky fingers on a such a clean, white project!
I love the Northern Lights technique. It’s one of those which turns out different every time, so it’s not for those among you who like order and predictability in their crafting!
You begin by sponging a couple of stripes, diagonals or smudges on your Whisper White cardstock using a bright colour or two. I’ve used Granny Apple Green and Magenta Madness. Make sure you fully blend them into each other as you don’t want to see any white cardstock through.
Next sponge around them using a dark blue ink – I used Misty Moonlight. And again, make sure you blend in well to the bright colours so you don’t get any gaps. You’re aiming for full colour saturation here, so don’t worry if you go over some of the pink/green.
If in doubt, just keep going. If you’re not happy with the results (and everyone reaches this stage in the Northern Lights project), just plough on and add more ink. It will work out in the end, trust me.
To add a wintry feel to the sky, we then splashed it with clear water. This is another favourite technique of mine. You can do it to any sponged or brayered background; just take a fine paintbrush with a little water, hold it over the project from about 10cm away and tap the top to flick water on it. If it looks like nothing has happened, just wait a few seconds to allow the ink to lift and you’ll see magical snowflakes appear in front of your very eyes. If you don’t just repeat the process. But be warned: if your paintbrush is too big or too full, you will get great big splashes instead of delicate dots.
Once you have your Northern Lights background you can do whatever you like with it. We added a snowy hill from the
Home Together Dies, along with a little house, a greeting and some baker’s twine from the
Flowers for Every Season Ribbon Combo Pack. And, of course, some of those must-have snowflakes, too!
I hope you have been inspired by my Trimming the Town projects. Please head on over to the rest of the blogs in the hop for yet more inspiration.


