Showing posts with label In Good Taste DSP. Show all posts

Monday, 9 November 2020

In the Pines stamped onto DSP

In The Pines Stampin Up

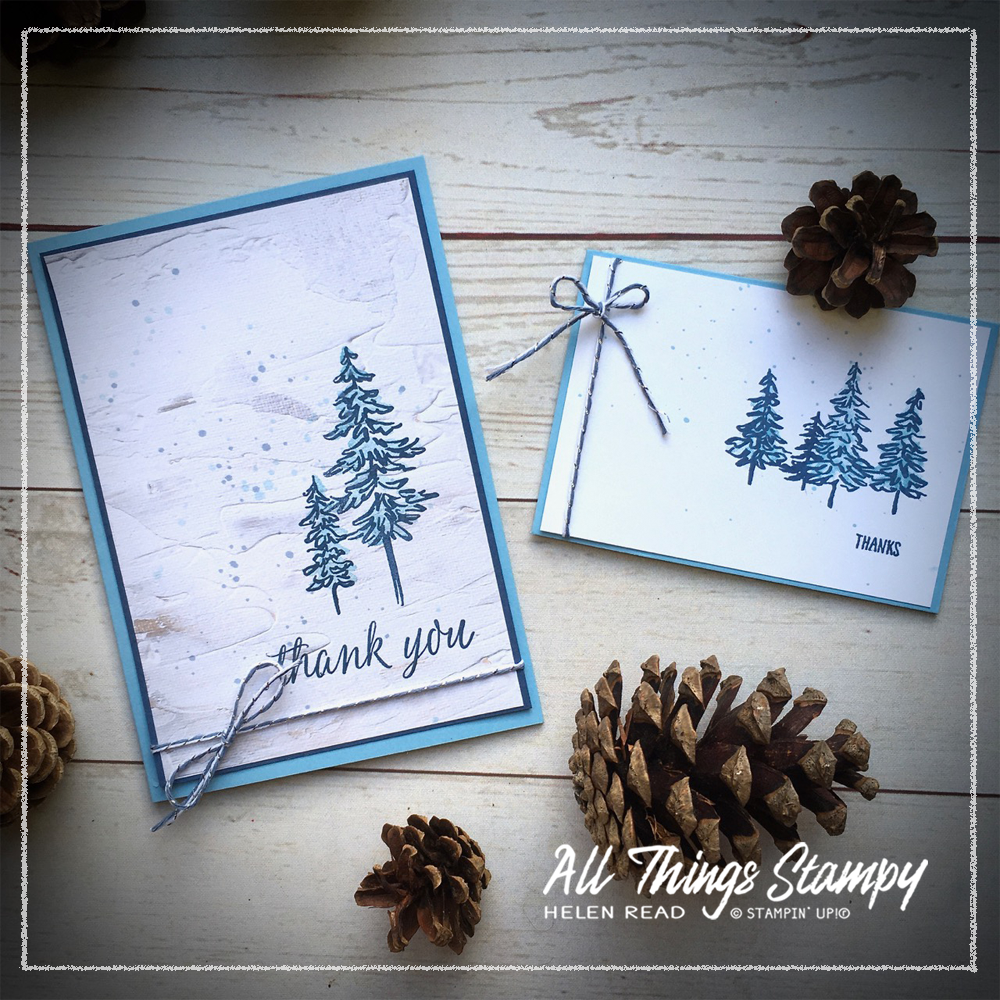
In The Pines is not just for Christmas! I used it recently to make a batch of cards for a variety of occasions.

The small cards are to thank customers who ordered from me at a party I held for a long-time customer, Mandy. Mandy has stuck with me for many years, for which I’m truly grateful. 

In The Pines Stampin Up

So how did I make them? The small cards are simply a standard card base cut in half. I stamped them using the Stamparatus for speed and accuracy, in Balmy Blue and Misty Moonlight ink. The “Thanks” comes from Waterfront – a must-have set which has been around a few years but remains as versatile and useful as ever – and the gorgeous Misty Moonlight twine is from the Flowers for Every Season Combo Pack.

In The Pines Stampin Up

The spattering is done with a paintbrush. I wet the brush and then picked up some Balmy Blue ink from the ink pad lid, then tapped the brush on top to spatter the ink across the project. Very simple but very effective.

In The Pines Stampin Up

In The Pines Stampin Up

For the standard-sized cards, I stamped directly on to In Good Taste Designer Series Paper, which gives the card a look of texture without the bulk. Then I stamped as before, with larger stamps, using the Stamparatus and the same colours. I used various greetings; some from Beautiful Autumn and the congratulations sentiment is from Beautiful Friendship. 

The BIG celebration was my downline Sue, who celebrated her 10th anniversary as a Stampin' Up!® demonstrator. This is an amazing achievement but of course, she wouldn't have stuck around if it hadn’t been so much fun! 

In The Pines Stampin Up

On these cards, I spattered ink in both colours; Balmy Blue and Misty Moonlight. The water dilutes the colour for a soft effect.

I really enjoyed making these projects and it made a change from Christmas cards! I love how the trees look in blue and it just shows how In The Pines – which at appears at first glance to be a Christmas stamp set – offers so many more possibilities.

If you’d like to order this set – or anything else – please follow the link below and use the November 2020 host code RMK743TS if you’re spending less than £150. If you’re spending more than £150, please talk to me first and I will help you get the best value. 


Monday, 12 October 2020

In The Pines distressed texture card

In The Pines Stampin Up
 
It’s all about trees for me at the moment and I have been having LOTS of fun with the In The Pines Bundle recently.

Today I would like to show you this very out-of-character project. Why out of character? Because it uses GREY. I don’t get the whole grey craze – grey walls, grey décor, grey clothes, grey cards. We have enough grey skies in this country without adding to the gloom!

But I pushed myself to use a little bit of Smoky Slate AND Basic Grey on this card, throwing in lots of texture to make it more “me”. 

In The Pines Stampin Up

As my backdrop, I have used the In Good Taste Designer Series Paper, which is SO versatile and even better, currently available at a 15% discount (until 31st October). 

In The Pines Stampin Up
 
I love this pack, which includes lots of lovely designs which give you the look of texture without the bulk. I mean, doesn’t that background look exactly like it’s been create with texture paste? Well it’s not – it’s printed paper and perfectly flat. For a change, and a blast from the past, I distressed the edges using the side of my Stampin’ Snips.

In The Pines Stampin Up
The patterned strip is from the same pack but I wanted it darker so I brayered on top of the design with some Smoky Slate ink. This is a great way of getting more mileage out of your Designer Series Paper. Brayer it, sponge it, stamp on it, colour in the images... these are all ways you can change the colour to make it fit your project.

In The Pines Stampin Up

As I’d already committed to using two sets of dies –  the Pine Woods Dies and Beautiful Boughs, I stuck with the latter for my labels. The greeting label uses the same die as the white panel behind it; it’s just trimmed down.

And the white panel behind is embossed using the Evergreen Forest 3D Embossing Folder. This was the first time I’d used this amazing folder but you’ll be seeing a lot more of it here next week.

The tree is stamped in Night of Navy onto Smoky Slate and die-cut. I’ve also painted over it using Wink of Stella to add some shine, but I’m not sure that comes out in the photo. Finally, some bling gives it another lift.
 
Hope you like it! Please come back on Thursday for another blog hop and some more trees! And if you are in the UK and are looking for a demonstrator, please get in touch or shop at my store using the link below. This month’s host code is ET479TKQ and if you use this when spending between £25 and £149, I’ll send you a thank you gift. (If you order over £150, don’t use the code as you will get your own Stampin’ Rewards.)


The small print

This is my personal blog and my sole responsibility as an independent creator and craft coach. All content including photographs, projects and text are © Helen Read, unless otherwise stated. Please feel free to copy my ideas for your personal use and inspiration. Please do not use my ideas for monetary gain, competitions or publication. The images on this blog - including blog buttons - should not be copied and used elsewhere on the internet or on electronic files for sale or otherwise.