Sorry I can't update the blog right now. Please find me on Facebook

Showing posts with label Petal Pink. Show all posts

Wednesday, 3 June 2020

Introducing the In Good Taste Suite

Stampin Up In Good Taste Suite Tasteful Touches Allthingsstampy

The new Annual Catalogue goes live today and I can’t think of a better Suite to kick things off than this one; In Good Taste.

It’s not my usual style but the Suite was swung for me by the Designer Series Paper and the Tasteful Labels dies. Thought I may as well get the stamp set as well, or I’d only regret it!

The first card is one I made for a swap, so I kept the DSP to a minimum so I wouldn't run out.
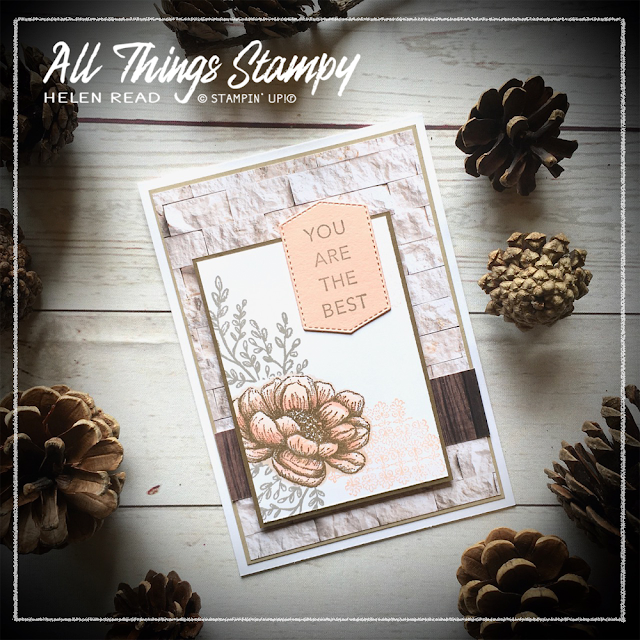
Stampin Up In Good Taste Suite Tasteful Touches Allthingsstampy

The second is a little bolder and uses a piece of the gorgeous In Good Taste DSP to create a background. I absolutely love this paper; I know it won’t float everyone’s boat but I think it’s fabulous for providing texture without bulk.

The image was stamped in Gray Granite (first card) and Soft Suede (second card) and then coloured with Stampin’ Blends; I used Light Calypso Coral and Light Petal Pink. Around the bottom of the flower, I used some gray ink and a blender pen to create a light shadow.

Stampin up stamping tips Helen Read Allthingsstampy
I created a mask of the flower so I could stamp the leaves around it without crashing into it. I didn’t bother masking for the pink lacy background as it's so subtle that a bit of crashing doesn't matter.

To make the mask, I simply stamped onto a sticky note, then cut it out. Cut it ever so slightly smaller than the image so you don't get a white edge when you stamp.

Wednesday, 1 January 2020

Sneak Peek: Timeless Tropical


Happy New Year! In the crafting world, a new year does, of course, mean new stamps!

Flower power is not my area but something odd has happened: I've gone bafflingly botanical! I honestly don't know what's come over me but I do know that I love this new stamp set, Timeless Tropical, which is coming to Stampin' Up!® on 3rd Jan. What do you think? Looks great stamped in brown Stazon, doesn't it? Yep, that's another fabulous new product we can look forward to.


When creating cards with lots of elements, it's a good idea to lay them all how you want them then take a quick photo with your phone. It makes it a lot easier to recreate the same layout when you start adding adhesives. 


Friday, 13 December 2019

Sneak peek: Painted Poppies with You Always Deliver


Are YOU excited about the new catalogue? We demonstrators can order from it now and a HUGE box of goodies arrived for me last week.

The first stamp set to see ink was Painted Poppies, which you can see here in the background. It's a beautiful set which you'll be seeing a lot as it's sure it be incredibly popular.

I've used it with Beautiful Friendship for the greeting and the little dog from You Always Deliver to create a birthday card for a friend. Look out for more sneak peeks soon because, quite frankly, I’ve had enough of Christmas projects now!

The Designer Series Paper frame is popped up on this card. To get the poppies in the perfect position, you can either use the Stamparatus to stamp directly onto the card base, or do what I did here and stamp it on a separate piece of Whisper White cardstock. That way I could position it after stamping and get it nicely centred.
 

Friday, 18 October 2019

Nature's Beauty gets the feminine touch


Add a feminine touch to the Nature's Beauty stamp set by using a piece of floral Designer Series Paper. This is from the Perennial Essence collection, which has a distinctive impressionist vibe.

This is the gorgeous Nature's Beauty stamp set - buy this and you'll be supporting Mental Heath Europe, which will receive £2.50 from the sale of each stamp set sold in Europe. If you're in a different market, ask your demonstrator which mental health charity will benefit.

Don't attempt to glue your ribbon down – it looks more natural when it's appears to be free. I simply taped this piece of ribbon at the back, then tied the embellishment around it using linen thread.


Monday, 22 July 2019

Magnolia Blooms note card


Introducing the Magnolia Blooms stamp set. This little set is great starter set... which is exactly why you will only find it in the new Experience Creativity brochure for new crafters.


This little publication is a great place to start someone on their crafting journey, so if you're in the UK and would like a copy to pass on to someone who needs crafting in their life, please drop me a line.


Don’t be afraid to mix and match products. The Magnolia Blooms stamp set is designed to 
co-ordinate with the Magnolia Lane Suite and the Magnolia Lane Designer Paper. However, I don’t have any of these products so used the Come Sail Away Designer Paper instead. It has a similar striped Mossy Meadow sheet which works just as well, and the fine print design is neutral enough to go with anything.

Monday, 8 July 2019

Birds of a feather... earn team rewards together


Sometimes I struggle with Designer Series Paper because it’s too pretty to hide. This batch of cards solved that problem - and resolved the issue of needing several cards in a hurry, too.

They were made for those members of my Stampin' Up!® who have gone above and beyond this month; Petal Pink for the ladies, and Pool Party for the gentleman stamper in my team. Yes, men can be demonstrators, too!


Don't be afraid to mix things up. You wouldn’t expect to use a stamp set called Seaside Notions with the Bird Ballad Designer Series Paper... but the greeting and speckled stamp are ideal to finish off these cards. 


Monday, 24 June 2019

Free as a Bird thank you card in Petal Pink


This is my version of a beautiful card by New Zealand demonstrator Jan Clothier. I decided to use the new Scalloped Note Cards and envelopes, as they have been sitting unopened for a few weeks now. 


The Petal Pink notecard goes really well with this Bird Ballad Designer Series Paper to give you an overall serene and subtle card - yes you have come to the right place!

If you cut out the stamped leaves and then cut them up into groups of one, two or three leaves, you can get more variety for a more natural look. 


Friday, 8 March 2019

Incredible Like You Week - celebration cards


I’m ending my Incredible Like You Week with two similar cards I made to celebrate some amazing team members.

I’ve combined the stamp set with some greetings from Stamp Your Way to the Yop, a demonstrator-exclusive stamp set which helps us honour our teams.

On the left is a welcome card for Karen, my latest recruit, who couldn’t resist the fantastic Sale-a-Bration offer and the beautiful craft tote...


From my newest team member to my oldest (in the terms of longest serving, that is!)... the second card celebrates an incredible sales milestone by Tracey, who joined me nearly 11 years ago and has worked consistently hard ever since.


The colour combination is well away from my usual palette but I really like it. Flowers, pastel shades and fussy cutting? What on earth is happening to me?


http://helenread.stampinup.net

Friday, 1 March 2019

Incredible Like You - Crafty Friday projects


Today is Crafty Friday and the first day of a new organised me! With an increasing number of events planned, I have decided to focus on one stamp set per month ... for most of my events at least. This means that this month, at least three of my events will be using this lovely stamp set called Incredible Like You.

I have owned this stamp set since last November, when I was given it at OnStage Local in Telford. However, I dismissed it as “not really me” until last month when I was inspired by Mikaela at The Crafty oINK Pen to start using it. And, I have to say (U-turn alert!), I’ve really enjoyed it.


These are the projects we will be making at this morning’s Crafty Friday event. I love how you can make the stripes really evenly spaced using the Stamparatus, or just wing it by doing it freehand, because the stamps are photopolymer, which means you can see where you’re stamping.

We’ll start with the #simplestamping project above, then move on to the slightly more complicated card below, which uses Soft Sea Foam for the background spots (love this polka dot effect).

The flowers are stamped in Lovely Lipstick, to match the Sale-a-Bration foil (still available in the UK but low inventory!). What is incredible about this stamp set is that you can stamp the background to the flowers and the foreground petals using the same ink pad, without having to stamp off – the stamps are VERY cleverly designed. The same goes for the two-tone leaves.

Hope you like them!


http://helenread.stampinup.net

Thursday, 19 July 2018

Tropical Chic celebration card


I’m quite chuffed with how this card turned out, which is a relief as it’s for a very special occasion. It’s not every day that one of your team reaches such a major milestone as their 10th anniversary! Congratulations go to Kellie for sticking around – here’s to many more years!

To create the background I stamped repeatedly using Granny Apple Green, stamping over and over again without reinking to get various shades of green. I added some Petal Pink speckles to give a lift and to link to the die-cut Petal Pink flowers. These Basic Adhesive-Backed Sequins give it the perfect finishing touch. 


Wednesday, 20 June 2018

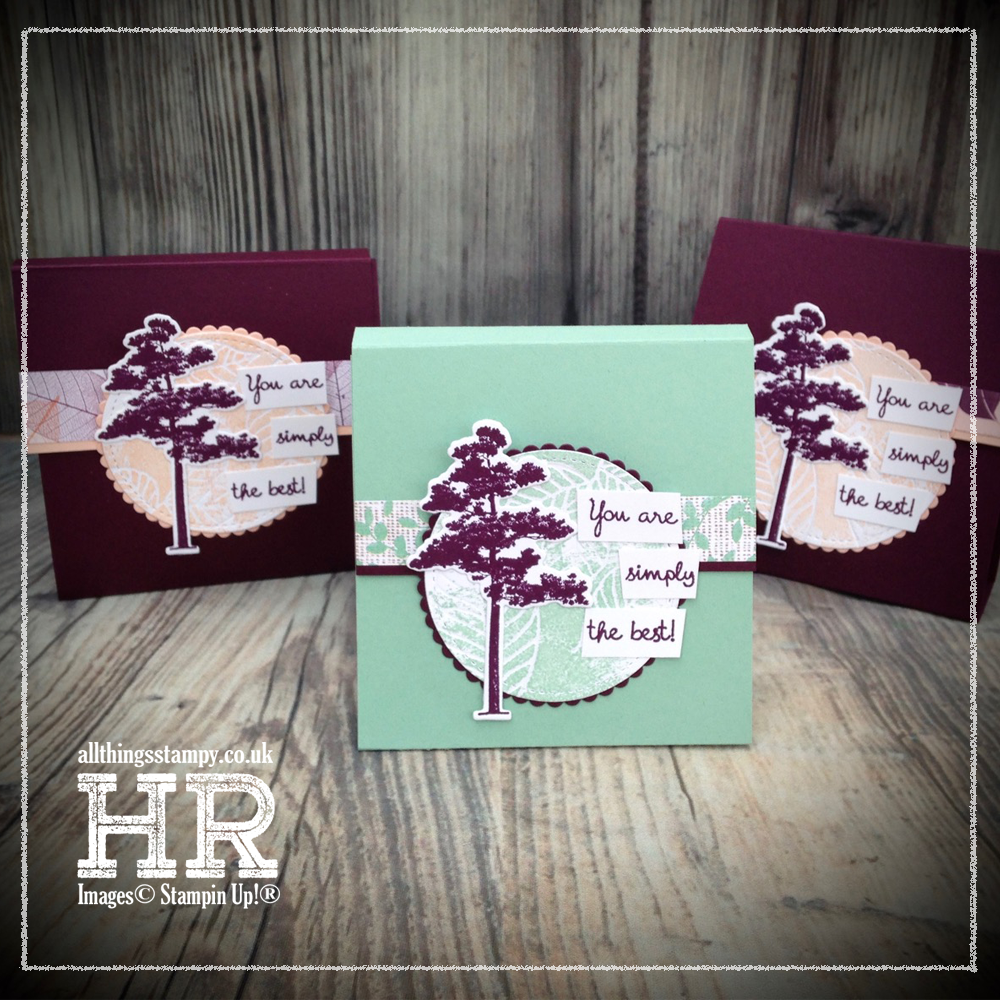
Tutorial: Rooted in Nature teabag holder


Every month I like to honour and reward my team members who have gone above and beyond. for my first level team members, there are rewards for promotions, achievements and for simply selling more than they did in the previous month.

For my extended team, I also send out three “random rewards” which are little handmade gifts to three people chosen at random (the only qualification is that they have placed an order during the month).


This month I sent out these cute teabag holders, inspired by a gift from my downline Stampy Sue and shown on Monday in this post. Inside are three little envelopes, each containing an individually wrapped teabag - plastic-free of course!

But before I show you how to make these, here’s a close-up of the front. For the circle panel, I embossed using the clever leaf embossing dies from the Rooted in Nature bundle. Then I stamped on top using the Artisan Textures stamp set, for a rustic look. 


Here are the measurements... you should be able to see a larger image if you click on it.

Once you’ve made the outer, as shown above, you simply make three little envelopes using the Envelope Punch Board. I’m turning to inches for these as it’s easier... 

They are made from 5.5" squares
The first score line is at 2 3/4"
Then simply proceed as normal, turning the DSP 90º anticlockwise to make the envelope.

These are then stuck inside - onto the green M shape in the diagram above. 


Finally, decorate the front, making sure you leave the top section of your decorative panel without adhesive, so the front flap can slide in and out easily. 

Hope you like it - and have fun!

The small print

This is my personal blog and my sole responsibility as an Independent Stampin' Up!® demonstrator. All images are © Stampin' Up!® All content including photographs, projects and text are © Helen Read, unless otherwise stated. Please feel free to copy my ideas for your personal use and inspiration - if you are a SU demonstrator you may use these ideas for your events but please give credit where it is due. Please do not use my ideas for monetary gain, competitions or publication. The images on this blog - including blog buttons - should not be copied and used elsewhere on the internet or on CDs.