Showing posts with label Field of Flowers. Show all posts

Friday, 7 August 2020

Field of Flowers on a brick wall

Field of Flowers Stampin Up Helen Read Allthingsstampy

The Field of Flowers bundle is new and beautiful and is a great way to use up all of those watercoloured backgrounds that I have a tendency to hoard.

Field of Flowers Stampin Up Helen Read Allthingsstampy

Here I’ve used it with the Brick & Mortar 3D embossing folder, embossing Whisper White cardstock to provide a stark contrast. A few flowers punched out with the Confetti Flowers Border Punch add splashes of random colour.

Field of Flowers Stampin Up Helen Read Allthingsstampy

Field of Flowers Stampin Up Helen Read Allthingsstampy


I’d like to say this was a pre-planned card with sound design principles at its heart but really I just cobbled it together with some leftover pieces. Turned out okay, though, didn’t it?

Field of Flowers Stampin Up Helen Read Allthingsstampy
Creating watercoloured backgrounds is fun, but they don't always turn out how you want. However they turn out, my tip is to save them for another day. They always look different when you’ve had a sleep, and they may just go perfectly with another project, another time.


Monday, 13 July 2020

8+ card ideas using Stampin' Up!®'s Field of Flowers

Stampin up Field of Flowers card ideas allthingsstampy helen read

Following my cardmaking class on Saturday, using the Stampin' Up!® stamp set Field of Flowers, I have a mega post for you today.

Due to an absence of commonsense, I ended up offering eight cards in two hours, which was stretching the bounds of possibility a little but I think most people managed almost all of the cards in what turned into a three-hour session.

This was all held remotely via Zoom so we could keep safe, and everyone had their own Field of Flowers stamp set to play with, and stamp in their chosen colours. The Confetti Flowers Border Punch was offered as an optional extra.

As the elderly members of my family are running out of birthday cards and have been threatened with Dire Consequences if they go shopping, I decided to switch up the greetings for the cards I made during the session, so I can replenish their supplies.

You’ll notice I've used the silver foil-edged cards for this session; I don’t usually use retired Stampin' Up!® products but I these were such a bargain in May that I couldn't resist stocking up to keep class costs down. However, maybe I should have stocked up more because the class proved so popular that I ended up leaving myself short!

Stampin up Field of Flowers card ideas allthingsstampy helen read

I kept the card layers largely neutral – Misty Moonlight, Night of Navy and a splash of Bumblebee – so people could add their own inks without clashing. While I made the initial samples in a wide variety of colours to show people different options, my personal choice of colours for the session was Granny Apple Green, Magenta Madness, Misty Moonlight, Bumblebee and Coastal Cabana. Bright and cheerful!

Stampin up Field of Flowers card ideas allthingsstampy helen read

First card of the day was this one – as it was the most complicated. It uses a piece of the gorgeous
In Good Taste Designer Series Paper which goes with everything. I showed the project using the flowers punched out separately but not all guests had this option as the Confettie Flowers Border Punch was an add-on to the class.
If you don't have the Confetti Flowers Border Punch, when you’re stamping with Field of Flowers I suggest you use a paler green such as Pear Pizzazz, Mint Macaron or Soft Sea Foam for the grass and leaves. Then use a stronger colour for your flowers so they stand out. If you're using the punch, then anything goes!
 
 Stampin up Field of Flowers card ideas allthingsstampy helen read

Just changing one colour can give your project a whole new look. This is created using the One-Sheet Wonder technique but I swapped out the Misty Moonlight from my original sample on the left to use Coastal Cabana during the class. I think I prefer the darker version though, what about you?

Stampin up Field of Flowers card ideas allthingsstampy helen read

A simpler version of this same card is to stick to just one colour – Magenta Madness – to stamp tiny flowers all over your background. Because there are several flowers on one stamp, this is really quick to make.

Stampin up Field of Flowers card ideas allthingsstampy helen read

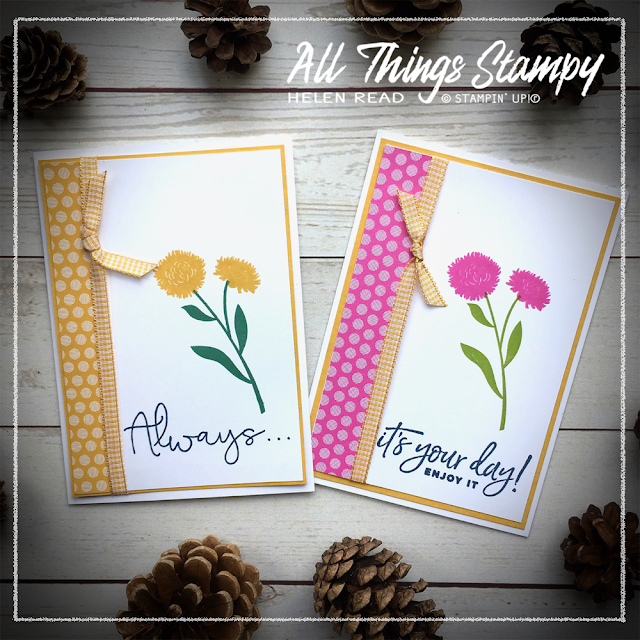
Another card I changed during the class was this one. I couldn’t find my strip of Bumblebee Designer Series Paper so thought (wrongly, as it happened) I must have run out and changed it to Magenta Madness. I hardly dare admit this but Magenta Madness is beginning to grow on me...

Stampin up Field of Flowers card ideas allthingsstampy helen read

A classic triptych design. You can do this in one of two ways; stamp the whole piece and cut it into three. Or cut it up first and stamp afterwards. I tried both and decided that the best route would be to stamp the grass and flowers while it's still in one piece (a bit of careful lining up is required), then add dragonflies once it's sliced up. Can you spot the not-so-deliberate ‘mistake’? I added an afterthought dragonfly in the wrong colour!

Need a small piece of cardstock but don't have the right shade? I created this Coastal Cabana strip by pressing a piece of Whisper White into an ink pad.

Stampin up Field of Flowers card ideas allthingsstampy helen read

When you’re making eight cards in a morning, you need at least one Simple Stamping project! And this one could hardly be simpler; just stamps, ink and one of our fabulous Whisper White Notecards & Envelopes. I use these All The Time, they’re just so handy to have.

Stampin up Field of Flowers card ideas allthingsstampy helen read

Field of Flowers is such a versatile stamp set. You can make subtle, tasteful, classy cards with it... or embrace the Brights! I've used Magenta Madness, Granny Apple Green, Bumblebee and Bermuda Bay and popped up a single flower to add interest.

Stampin up Field of Flowers card ideas allthingsstampy helen read

And finally, here’s the original version of the Bumblebee card you see in the first picture. Just a simple strip stamped with grass and flowers, to show someone you’re thinking of them.

I hope you’ve enjoyed this foray in to a Field of Flowers and will consider adding this beautiful set to your shopping list. You can buy the set from my website here. And if you add the Confetti Flowers Border Punch on, too, you’ll save 10%!


Tuesday, 30 June 2020

Pride 2020 blog hop: Sponged rainbow cards


Crafting is for everyone, so I am delighted to take part in this Pride 2020 blog hop. This international hop by Stampin’ Up!® demonstrators is designed to show support for crafters (and non-crafters) in the LGBTQ+ community, as well as showing off some beautiful, colourful projects.


We crafters love colour, so what better opportunity to stamp a rainbow? From one sponged piece of cardstock, I made two very different projects. It all began with a piece of Whisper White cardstock which I sponged in rainbow colours. I used, from top, Real Red, Pumpkin Pie, Daffodil Delight, Granny Apple Green, Bermuda Bay, Pacific Point and Gorgeous Grape.

Even though I only really needed the outer edges for this frame, which I die-cut using the Stitched Rectangles Framelits, I tried to keep the sponging nice and even across the whole panel, as I knew I could use the centre for another project.


My next step was to use the Stamparatus to stamp this rainbow greeting from Happiest of Birthdays. I love this set because I really needed a BIG greeting and this one is simple and straight to the point. 

Using sponge daubers, I built up the image line by line, stamping in between each colour to see where I needed to ink next. The Stamparatus means you can hit the mark every single time (although read on for a fine example of this not being true, LOL). 

After a couple of attempts, I settled on stamping on this In Good Taste Designer Series Paper to give the background a little texture... or at least the appearance of texture. I had some excess at the red end, so use this to punch a little heart using the Dog Builder punch. It’s all mounted onto a piece of Whisper White embossed using the Brick & Mortar 3D Embossing Folder.


To use the centre piece, I knew I wanted to do something a little different, so splashed the sponged piece with some water to create this lovely effect. I use this technique a lot as it can represent lots of different things, such as snow or stars on a dark blue background. In this context, I think they look a little like seedheads blowing in the wind.

Now to the stamping and, armed with my trusty Stamparatus, what could possibly go wrong? The cardstock could slip when you’re not looking, that’s what! This is how I ended up with this double grass effect. Not what I intended but I don’t hate it, so I left it on the card. It’s stamped with the new Field of Flowers stamp set, which I just love for creating silhouettes on arty backgrounds. I do love playing around with fun background techniques!

Again, it’s mounted on the Brick & Mortar 3D Embossing Folder (an old favourite but new to my craft room so it’s getting a lot of love) with just a hint of a black border.

I hope you like my Pride 2020 projects – please enjoy your trip around the world as you look at the other projects here:


Friday, 12 June 2020

Silhouette stamping with Field of Flowers


Field of Flowers: have you seen this new stamp set yet? I think it’s absolutely gorgeous and will be running a class with it next month. Here I’ve stamped onto beautiful watercoloured backgrounds, which really shows off the rich silhouettes.


The best way to stamp onto watercolour paper is to use the Stamparatus so you can stamp in the same spot multiple times to get the richest, darkest image.


The small print

This is my personal blog and my sole responsibility as an Independent Stampin' Up!® demonstrator. All images are © Stampin' Up!® All content including photographs, projects and text are © Helen Read, unless otherwise stated. Please feel free to copy my ideas for your personal use and inspiration - if you are a SU demonstrator you may use these ideas for your events but please give credit where it is due. Please do not use my ideas for monetary gain, competitions or publication. The images on this blog - including blog buttons - should not be copied and used elsewhere on the internet or on CDs.