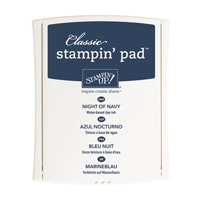
Showing posts with label Emerald Envy. Show all posts

Friday, 4 May 2018

Tailored Tag Punch and True Gentleman Paper - Masculine Workshop


Today I am showcasing the projects we made at my last Hygge Night, which was a Masculine Workshop.

I know many people struggle with masculine projects so I try to do at least one event on this theme each year, usually in time for Father’s Day.  

We used the True Gentleman Designer Series Paper and the co-ordinating Tailored Tag Punch, combining them with other stamp sets, including Birthday Wishes For You, which you can see here...


... and Guy Greetings which you can see below on this joy-fold card. The nice thing about Guy Greetings is that it has all the men in your life covered, so those who don’t need a Father’s Day card could easily switch this to make another birthday card.


The Tailored Tag punch is pretty versatile; we sliced it in half and inverted the shapes to create a funky bow tie for this box...


This is one of the silver gable boxes from the Spring/Summer catalogue, carefully dismantled and turned inside out!

And for another Tailored Tag punch trick, how about this?


For more tips and tricks like this, please like and follow my Facebook page!

Wednesday, 18 April 2018

Retiring product focus: Pick a Pattern Suite


I know this wasn’t one of the most popular stamp sets in the 2017-18 catalogue but it was one of my favourites as it is so much fun. I love the little dinosaur and the Designer Series Paper is fab.

So it will soon be farewell to Pieces & Patterns and the Pick a Pattern Designer Series Paper. Not to mention the Emerald Envy cardstock that features in the DSP, the Stylized Birthday single stamp on the card on the left and the ribbon from both cards!


To create the main focal points on both of these cards I used a mixture of clear embossing powder and glitter. For the one above I “smooshed” some ink onto some wet watercolour paper and allowed it to dry. Next I stamped and heat embossed Happy Birthday in white, then covered the whole lot with clear embossing powder mixed with a little Dazzling Diamonds glitter and heat set it.


This one is the same principle but without the watercolouring. I simply stamped and embossed in white onto Tranquil Tide cardstock then covered the whole lot in clear embossing powder mixed with a little glitter. It’s a good way of stopping it from going everywhere!

Wednesday, 31 January 2018

Peeping Panda


I CASED this project from a similar one by a lady called Nichol Spoor, whose creation was made with non-Stampin’ Up!® stamps. It seems pandas are a trend so are cropping up all over the craft world.

I teamed the Party Pandas (Sale-a-Bration stamp set) with the leaves from Pop of Paradise to give him a tropical hideaway. I inked the leaf stamps in a pale green, then sponged some darker green around the edges. Lemon Lime Twist with Emerald Envy, then Emerald Envy with Tranquil Tide.

Some sparkly black ribbon finishes it off.

Wednesday, 26 July 2017

Happy Birthday Thinlits graffiti card


I never thought I’d have so much fun with this Happy Birthday die. I was only borrowing it from my friend Kelly, but now it’s on my list of must-haves.

I particularly like watercolouring a background and then cutting it out to create a multi-coloured greeting. Here I ’ve used Lemon Lime Twist and Emerald Envy.

It tops a graffiti-style card inspired by Julie Kettlewell.  I’ve used a bunch of stamp sets... In The City, Marquee Messages and Five For All. I wish I could say the card was appreciated but, as it was for a teenage boy, I think the money inside may have been of more interest!

Wednesday, 12 July 2017

Pieces & Patterns film strip


Sometimes I’m a little slow on the uptake and it took me a while to realise that this funky black and white DSP would be perfect to create a film strip effect. I overlaid a strip of Basic Black cardstock and then topped it with some pieces of this really cut and fun DSP from the same pack. Love the effect... and the camera image from the co-ordinating Pieces & Patterns stamp set is just perfect to finish it off.

This film strip concept would be great for scrapbooking, too, as you could put photos in the spaces.

But isn’t this DSP with the little rabbit cute? Oh... just seen the snail. Don’t like it any more.

Wednesday, 21 June 2017

Daisy Delight with the smoosh technique


This was my first time trying the “smoosh” technique and, naturally, I was instantly hooked. Anything that creates a watercolour effect is usually a hit with me!

I found the instructions on Patty Bennett’s blog but, in brief, you simply wet a piece of watercolour paper, then use a clear block as a stamp... ie stamp the block onto your pad and then “smoosh” it around the wet cardstock. Repeat with a second and even third colour.

For these thank you cards, I used Lemon Lime Twist and Emerald Envy to make a gorgeous colourful green background. I then die-cut them using the Stitched Shapes Framelits Dies, stamped a greeting (from Pieces & Patterns) in Tranquil Tide, inking the stamp with a marker as I only wanted part of it, and added a punched daisy from Daisy Delight. These were supposed to be quick cards, but they didn’t turn out that way!


Wednesday, 24 May 2017

Sneak peek: Pieces & Patterns


I’ve said it before, I’ll say it again: How cute is this little dinosaur? For this card, I made a mask from a post-it note so I could enable the T Rex to write with his tiny hands - I just hope he doesn’t drop the pencil as he’ll never be able to pick it up again. 

I enjoyed making this card so much, that I had another go, with a pencil-themed variation and the perfect greeting from Crafting Forever. This Designer Series Paper goes perfectly with this sentiment, doesn’t it?


Monday, 15 May 2017

Mix It Up Monday - 2015-17 finale and new catty sneak peek


It’s the last project of this round of Mix It Up Monday today, as I come to the end of the 2016-18 set of In Color charts. And, at the risk of putting my neck out, I’m patting myself on the back for making a project with all 50 colour colour combinations… even the horrible ones!

For this project, I finally have my pre-order so am introducing a stamp set I know you’re going to love because it will speak to us all. It’s called Crafting Forever and features these paintbrushes, some scissors (they even look like our paper snips!), a rubber stamp of course, some pens and fun sayings. As the mother of an artist and friend of many writers, as well as crafters of course, I can see this set getting a lot of use in this house!

The brick wall was an afterthought, as you can probably tell. So I made myself a smaller “plate” from thick chipboard, so I could emboss just part of the image. I impress myself sometimes. 


Colour-wise, I’m not a big fan of this combo – it seems a little dated to me. But I’m not going to let it get to me because now I can move on to the next set of In Color charts, which I will be publishing on my blog next Monday. Exciting times, eh?


Monday, 1 May 2017

Mix It Up Monday: Sneak Peek - This Little Piggy


You are going to LOVE this new stamp set from the brand new catalogue. It’s called This Little Piggy and features four cute pig images with fun sayings to match. One of my downlines was lucky enough to win this set at the OnStage demonstrator event in Amsterdam, and she kindly let me have a play with it at the weekend. 


So, with Mix It Up Monday and the last few remaining colour combination from my In Color charts in mind, I stamped my image in Basic Gray so that I could colour it when I got home. In retrospect, stamping it onto Pink Pirouette cardstock would have made my life easier as my ink pad is very old and tired now and I’ve never got round to reinking it. Perhaps I’ll add a reinker to my order tomorrow, when I send for my own pre-order products and new catalogues. It’s such an exciting time of year and I can’t wait to get my hands on new goodies.


If you want to be the first to order new products, you too can become a demonstrator. Sign up from 2nd-31st May (that’s tomorrow, not today!) and not only can you choose your kit from the fabulous range of pre-order products which are not available to the public until 1st June, but you will get EIGHT copies of the brand new catalogue to share with your friends. You’ll also get eight copies of the current catalogue, so you can start sharing products and taking orders straight away. 


Monday, 6 March 2017

Mix It Up Monday: Bookcase Builder


Mix It Up Monday is back with an Emerald Envy colour combination from my In Color charts. I’ve used the fabulous Bookcase Builder stamp set to create a birthday card and matching wine label for a friend. 


The colour combination was a little tricky. It seems that Calypso Coral and Watermelon Wonder are a lot closer to each other than they first appear!


The bunting stamp is quite ingenious. I was wondering why there were two stamps, almost identical but of different sizes. Then it hit me: you use them together but in different colours. I’d already made the wine tag by the time I worked that out!


I introduced a few other sets to create these projects: Birthday Bright for some smaller bunting; Tasty Trucks and Barnyard Babies for some subtle ‘happy birthday’ greetings.  The In Color enamel shapes in Emerald Envy added the finishing touches.  

Friday, 24 February 2017

Bookcase Builder Clean and Simple card


This is my new favourite stamp set – and it’s one which has been overlooked by many people, I fear... if the lack of samples on Pinterest is anything to go by.

I love reading so was drawn to this from the start, but resisted in favour of the bundles. I finally caved in last week and took delivery of Bookcase Builder.

I also took the plunge and did the unthinkable...

I confess I struggle with some of the sentiment stamps provided by SU and many of mine lie unused. This time, though, I was brave. I knew I’d use a simple “Thank you” a whole lot more than “Thank you for being my friend” so I took the plunge and separated the words. It wasn’t as easy as you’d think but it went smoothly and now I have the perfect “Thank you” stamp... and can add “for being a friend” to the clear block as and when I need to.

The card above is going to this month’s hostess, Tracey, while her guests get the smaller versions, below. Hope they like them – none of them has ordered the set yet, so at least it will be something new to show them!


Monday, 30 January 2017

Mix It Up Monday: Inside the Lines DSP


A simple project this week as we’ve all been under the weather this weekend, so I made this yesterday and then retreated to the settee with a poorly daughter and an opportunistic black cat. 

If you like colouring, you’ll love the new Inside the Lines Designer Series Paper. It’s part of the Sale-a-Bration promotion, which means you can, if you wish, choose it FREE with a £45 order.

It’s perfect for a colour challenge, as you can make it any colour you wish. So I thought I’d give it a go for this week’s Mix It Up Monday project, using another colour combination from my In Color charts.


This is a bright and cheery colour combination, which uses two of the latest set of In Colors; Emerald Envy and (my favourite) Dapper Denim. The Daffodil Delight IS there, it’s just not easy to see in the photo. The Stylized Birthday stamp makes the greeting the focus, and goes with just about everything, making it a useful addition to your stamp collection.  


Friday, 23 December 2016

Festive llama banner


You know when you have a million and one things to do and should be crossing something off your list not adding to it? Isn’t this always the moment you have an “amazing” idea that you simply must carry out? That’s what happened this week.


Inspired by a beautiful pop-up llama/alpaca Christmas card, I just had to make a festive llama banner to send back in return.

And this is the result. A string of behatted llamas with some festive bling in between. I wanted to make pompoms but didn’ t have the time or resources, so compromised with some punched shapes instead.


The llamas are backed with a plain die-cut to sandwich the Baker’s Twine, and the stamped circles are backed with another one the same, just in case they flip around. The pompoms on the hats are carefully trimmed from the Whisper White pompom trim. Some of them are a bit ropey but needs must!

Ok, I’m off to hand it over, reluctantly... (wish I’d made two!)

Monday, 19 December 2016

Mix It Up Monday: Beautiful You


This stamp set is causing a stir as everybody wants it! It’s from the new Spring/Summer catalogue and is called Beautiful You. I kept things really simple as I’m a bit crafted out at the moment. 

I just stamped the image in black then stamped with the paint stroke to colour it in – it’s very simple… and perfect for today’s Mix It Up Monday project using another colour combination from my In Color charts


Wednesday, 28 September 2016

Marquee Messages birthday gift tag


It was birthday time in my Virtual Hostess Club again this month. My club ladies commit to spending a minimum of £15 a month for 10 months of the year and, as a thank you, I give them a Stampin’ Up! gift in their birthday month. This time it was the turn of Mandy, although I’m sorry to say I didn’t manage to make her a matching card as I was feeling poorly. But I did wrap the present by creating a box using the grid paper to make a template. It came together quite well, I thought. And I found a new use for Marquee Messages: to make a funky retro gift tag. 

Monday, 5 September 2016

Mix It Up Monday: Emerald Envy with Jolly Friends


It’s Mix It Up Monday again and time for another project made with a colour combination from my latest set of In Color charts. For this project, I used the brand new set, Jolly Friends, with the co-ordinating Jolly Hat punch. I have to  confess I wasn’t that keen on this elf but I am warming to him - I love the colours and the fact that there’s even a tiny stamp to create his rosy cheeks. 

I CASEd the design from this project by Diana Gibbs. Diana has used the moose from the set, which is actually the reason I ordered it, so I thought I’d mix things up a bit. I love the way she’s rounded the corners and added some doodling - inspired!


The small print

This is my personal blog and my sole responsibility as an Independent Stampin' Up!® demonstrator. All images are © Stampin' Up!® All content including photographs, projects and text are © Helen Read, unless otherwise stated. Please feel free to copy my ideas for your personal use and inspiration - if you are a SU demonstrator you may use these ideas for your events but please give credit where it is due. Please do not use my ideas for monetary gain, competitions or publication. The images on this blog - including blog buttons - should not be copied and used elsewhere on the internet or on CDs.