Sorry I can't update the blog right now. Please find me on Facebook

Showing posts with label Glitter. Show all posts

Wednesday, 18 April 2018

Retiring product focus: Pick a Pattern Suite


I know this wasn’t one of the most popular stamp sets in the 2017-18 catalogue but it was one of my favourites as it is so much fun. I love the little dinosaur and the Designer Series Paper is fab.

So it will soon be farewell to Pieces & Patterns and the Pick a Pattern Designer Series Paper. Not to mention the Emerald Envy cardstock that features in the DSP, the Stylized Birthday single stamp on the card on the left and the ribbon from both cards!
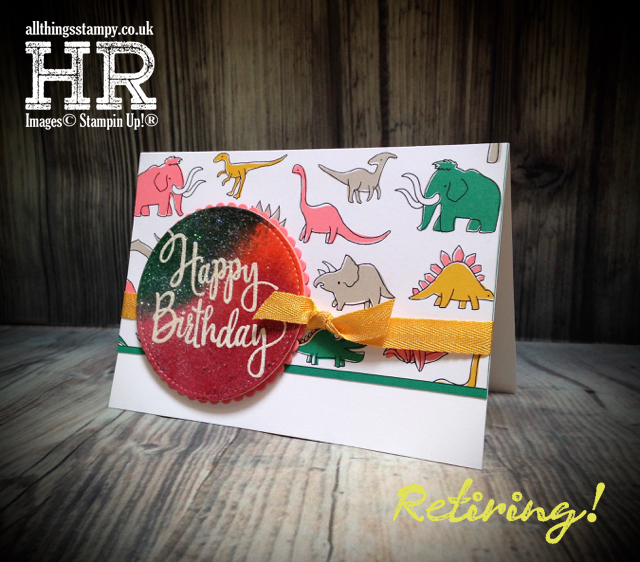

To create the main focal points on both of these cards I used a mixture of clear embossing powder and glitter. For the one above I “smooshed” some ink onto some wet watercolour paper and allowed it to dry. Next I stamped and heat embossed Happy Birthday in white, then covered the whole lot with clear embossing powder mixed with a little Dazzling Diamonds glitter and heat set it.


This one is the same principle but without the watercolouring. I simply stamped and embossed in white onto Tranquil Tide cardstock then covered the whole lot in clear embossing powder mixed with a little glitter. It’s a good way of stopping it from going everywhere!

Friday, 20 October 2017

Two black cats and a sparkly sun


Perfect for a wedding card, anniversary, Valentine, or just to say hello to a friend. This is another of the projects from my Caturday Live event.

To create the shiny sun background, we began with the 'smoosh technique' on some watercolour paper. This is how...

  1. Spritz a piece of watercolour paper with water
  2. Take one of your clear stamping blocks and press into an ink pad, then 'smoosh' it onto the wet paper
  3. Take a clean, dry block and repeat with another colour
  4. Allow to dry (or speed up with the heat gun) then die-cut your circle
  5. Ink it all over with Versamark and then emboss with a mixture of clear embossing powder and Dazzling Diamonds glitter. 
The result is a no-mess glitter effect. Hurrah!


Wednesday, 19 July 2017

Glittery embossing on Happy Birthday Thinlits


How’s this for a different look with the same stamp set? For this project, I took inspiration from another Artisan Design Team demonstrator (aim high, that’s what I always say), Paula Dobson. It was her gift bag which inspired me to create this funky card; the black really makes the colours pop.

We made this card at last week’s Crafty Friday event, which is a really relaxed class where we often try different techniques. This was actually the only card we made in the session, because there were many steps.

For the greeting, we began by painting some watercolour paper with bright colours – I used Melon Mambo and Lemon Lime Twist. When this was dry, we die-cut it using the Happy Birthday Thinlits die. It looked pretty fab, and you could leave it there, but we were having too much fun to stop, so decided to do some glittery embossing  on top.


We Versamarked the whole piece and added a mix of embossing powder and Dazzling Diamonds glitter to create a shiny and sparkly effect. It looks really cool. If you do this, keep your mix made up ready – I use about 60% embossing powder, 40% glitter (roughly!) but be prepared to keep topping up with embossing powder, as the glitter will begin to take over.

The background is stamped in Craft Whisper White ink and, in the absence of ribbon, I added a flower which was stamped on the leftover piece of watercolour paper. Ooh, that would have looked nice embossed, too.

Monday, 9 November 2015

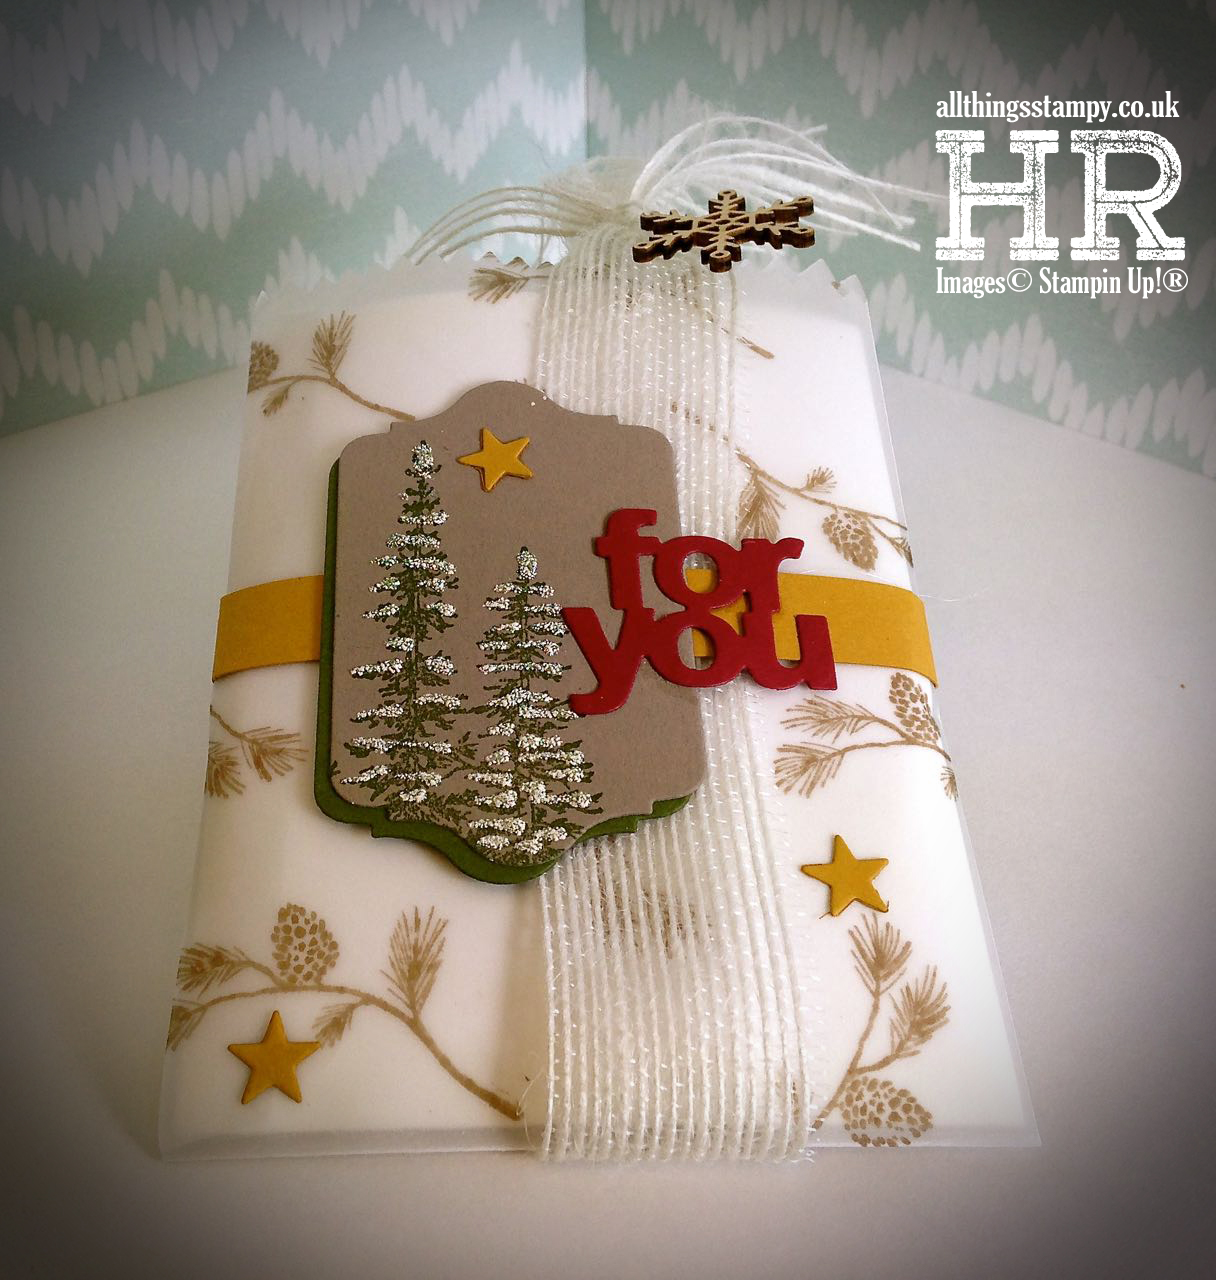
Wonderland Vellum Mini Treat Bag


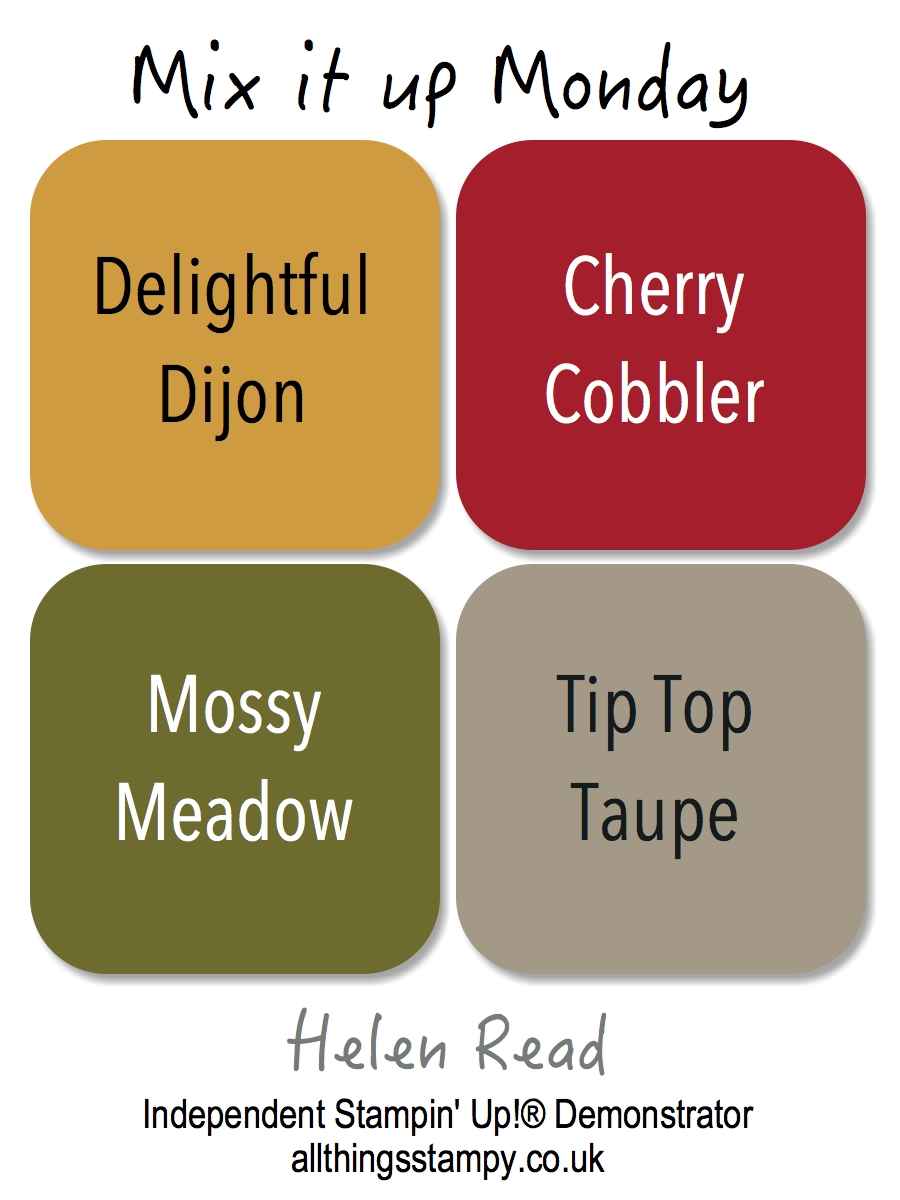
It’s Mix It Up Monday again, when I create a project using a colour combination from my In Color charts. Here’s the project I planned to show you last week… before I realised that it would no longer be a surprise for the ladies at Friday night’s workshop (the ones who look at my blog, anyway!).


Vellum was one of the themes of the workshop so I began by die-cutting the Mini Treat Bag then stamping pine cones all over it. The biggest problem with vellum is your choice of adhesive; everything is visible through it, although I discovered when making this bag that the new Fine-Tip Glue Pen is ideal as the adhesive is clear. You’ll still see it, but not as much. 

Here’s a tip when using your Fine-Tip Glue Pen for the first time: remove the lid completely and take off the seal… otherwise no matter how hard you squeeze, the glue won’t come out! Once you are in, remember to replace the cap between uses to prevent the tip from clogging. 

To keep the contents a secret (it was a roll of ribbon for the hostess) I lined the bag with a piece of Whisper White cardstock, folded at the bottom and left open at the top. It’s wrapped with a simple belly band of Delightful Dijon and decorated with some beautiful Wonderland trees. These are embellished using a tip I picked up at Monica Gale’s retreat the other week; you apply some Tombow adhesive then sprinkle a mix of Dazzling Diamonds glitter and white embossing powder on top, before heat setting very gently to keep the “puffiness”.

It’s finished off with some white jute ribbon (I removed a couple of strands to make it narrower, then used them to tie around the top) and a snowflake. The greeting and stars are die-cut from the same set that makes the bag, which makes it excellent value. 


Tuesday, 14 April 2015

15 Stampin' Up!® products you can used for Mixed Media projects


Yes you CAN use SU products for mixed media, as I’ve been enjoying finding out lately. I decided to make a list of some of the items you can use. I bet you already have loads of these, so what are you waiting for? Get messy!

Monday, 26 April 2010

Happy engagement

We were delighted – and quite surprised - to hear recently that a friend is to be married, so of course a card was in order. I can never understand why engagement and wedding cards are so frilly and girly – because 50 per cent of those involved are men. So this has a bit of subtle bling and some champagne – because surely champagne is always welcome.

You may have noticed that a lot of my cards recently use retiring colours. Yes, I’ve decided to use them up as much as possible but the weird thing is, most of these cards were made before the Colour Renovation announcement.

I’d realised that there were some colours I hardly ever used, so I decided to make more effort with them. And guess what? All of those colours are on the retiring list! So it seems I am a typical SU customer and do generally stick to the most popular colours which, of course, are surviving the Renovation.

Stamps: Cheers to You, Happy Everything
Cardstock: Taken with Teal, Whisper White
Ink: Taken with Teal, Basic Black
Accessories: Watercolour Wonder™ crayons, blender pens, Crystal Effects®, Dazzling Diamonds glitter

All products by Stampin' Up! ®

Monday, 21 December 2009

A card for Kate

I should be showing you all my leftover Christmas projects that I’ve not posted on my blog yet but that means getting the camera out. I’ll photograph them later – at least it’s nice and bright with all this SNOW! Isn’t it exciting having a white Christmas... assuming you’re sharing the snow, that is!

Anyway, I said there was another glittery chipboard card in the offing and here it is. Check out the groovy Designer Series Paper – it’s from the Kaleidoscope pack and it’s so very, very lovely. Not as acid-looking as it appears in the catalogue. I’ve teamed it here with a hint of Tempting Turquoise, a card base of Rose Red and a panel of Kraft, doodled around the edges with the white gel pen.

Cardstock: Rose Red, Tempting Turquoise, Kraft
Paper: Kaleidoscope
Ink: Versamark
Accessories: Stitched Grosgrain Ribbon - Rose Red, chipboard letters, Fine Cosmo glitter, Heat & Stick powder, heat tool, corner rounder

All products by Stampin' Up! Please email me to order a catalogue, or click the link on the right to view it online.

Monday, 7 December 2009

The joy of glittery chipboard

Yet more glittery chipboard (and I still have another one to come!). This was actually the first card I made using my new glitter, I just haven’t got round to showing you yet.

I stamped the swirl from Season of Joy all over the Elegant Eggplant panel in Versamark then sprinkled Heat & Stick Powder over the top and heated it. Sprinkled Fine Cosmo glitter over that and heated again. Same technique for the chipboard – sparkly, isn’t it?

Stamps: Season of Joy
Cardstock: Rose Red, Elegant Eggplant, Whisper White
Paper: Patterns – Perfect Plum
Ink: Versamark®
Accessories: On Board Chipboard letters, Stitched Grosgrain Ribbon - Rose Red, Scallop Edge Punch, Heat & Stick Powder, Fine Cosmo Glitter, Corner Rounder

All products by Stampin' Up!® Please email me to order a catalogue, or click the link on the right to view it online.

Saturday, 5 December 2009

Emma's card using my FREE punch

I am a bit hooked on glittery chipboard at the moment; here’s another card I made for a teenager called... well you can guess what she’s called, I suppose.

I used a selection of chipboard letters from both current and retirerd On Board collections – it’s much easier to find the letters you need if you’re willing to mix fonts! I pressed each letter into my Versamark® pad and then covered with Heat & Stick powder. Heated it to melt the powder then sprinkled on the glitter and heated again gently to set. Bits still do fall off but it’s not as bad as it could be.

Check out the two new (to me) punches! Spiral Punch on the right and the Tag Punch on the left. The spiral punch was part of my Christmas Extravaganza order, which meant that the Tag Punch was FREE! Click here to find out how you can get your free punch, then contact me as soon as possible to place your order if you want it to arrive before Christmas.

Stamps: Hello Again
Cardstock: Gable Green, Taken with Teal, Whisper White
Ink: Gable Green, Versamark
Accessories: On Board Chipboard letters, Fine Cosmo Glitter, Heat & Stick Powder, Tag Punch, Spiral Punch, ¼” Grosgrain Ribbon - Whisper White, Rhinestone Brads – Circle Ice

All products by Stampin' Up! Please email me to order a catalogue, or click the link on the right to view it online.

Tuesday, 1 December 2009

Girly and glittery

This was the final project at my glitter class last week – and it’s the most “in your face”, glitter-wise. This uses the French Filigree background stamp which is just gorgeous stamped onto Rose Red cardstock. It’s stamped in Versamark then Heat & Stick powder applied, heated until melted and then Fine Cosmo glitter applied and heated again. The effect is almost like flocked wallpaper – although a whole lot more sparkly!

The flower is beautiful, too – this is from the Pretties kit, withi some Felt Flowers layered on top and topped with a rhinestone brad.

Thanks so much to Kirsten Brown, a US Stampin’ Up!® demonstrator for the idea!

Stamps: French Filigree
Cardstock: Old Olive, Bravo Burgundy, Rose Red
Ink: Versamark
Accessories: Pretties Kit, Felt Flowers, Rhinestone Brads, 5/8” Grosgrain Ribbon - Regal Rose, Fine Cosmo Glitter, Heat & Stick powder

All products by Stampin' Up! Please email me to order a catalogue, or click the link on the right to view it online.

Sunday, 29 November 2009

Yes, more glitter...

Another project from Monday’s glitter class – this time using Sticky Cuts. These are 12x12 sheets of die-cut images made from the same stuff as Sticky Strip. So they’re REALLY sticky and you can apply embossing powder (yes, you can heat them), glitter, fun flock or tiny beads.

We stamped the flower from Hello Again. We didn’t bother masking as the flower head was completely covered by the Sticky Cuts flower. Then we peeled away the large part – the petals – leaving behind the circle in the centre. Next we applied glitter and heated gently to set. Once this was done we peeled the backing (fronting?) from the centre circle and applied glitter in a different colour and heated again.

The Certainly Celery panel is stamped repeatedly with flowers from the Simply Said stamp set. We positioned the brads using the mat pack, although some of us had them closer together, some had them farther apart and one person (that would be me) completely forgot about the brads until it was too late and everything was stuck down!

Stamps: Hello Again, Simply Said
Cardstock: Perfect Plum, So Saffron, Whisper White, Lavender Lace, Certainly Celery
Ink: Certainly Celery
Accessories: ½” Striped Grosgrain Ribbon – So Saffron, Sticky Cuts, Fine Cosmo Glitter, Silver Brads

All products by Stampin' Up! Please email me to order a catalogue, or click the link on the right to view it online.

Friday, 27 November 2009

Dazzling trees

This was voted the favourite project at my glitter class on Monday – not surprisingly as it uses that ever-popular stamp set, Lovely as a Tree.

Not sure if you can see the glitter on it but we used Dazzling Diamonds to highlight parts of the image such as the snow on the ground and a few of the branches. Subtle, but dazzling! We did this by “drawing” on the image with the Two-Way Glue Pen then spooning glitter over the top, tapping off the excess back into the pot (I use those plastic Chinese takeaway pots to store the glitter).

And I finally cracked open the Hodgepodge Hardware. It’s really beautiful and falls into the “too pretty to use” category. Must stop hoarding nice things as it’s completely pointless.

Stamps: Lovely as a Tree, Fresh Cuts
Cardstock: Bashful Blue, Brocade Blue, Whisper White
Paper: Patterns - Bashful Blue
Ink: Brocade Blue
Accessories: Stampin’ Glitter – Dazzling Diamonds, Mat Pack, Paper Piercing Tool, Hodgepodge Hardware® - Stylised Silver, 5/8” Grosgrain Ribbon - Brocade Blue

All products by Stampin' Up! Please email me to order a catalogue, or click the link on the right to view it online.

Thursday, 26 November 2009

A glittery hi

Fine Cosmo glitter... £12.95. Heat & Stick Powder... £3.25. Cat’s bottom covered in glitter... priceless.

Yes it was my glitter class on Monday night and I’ve only just managed to get rid of all (ok, most) of the glitter from the floor. Despite the tribulations of being in my house for the class, I think everyone had a good time.

This is one of the cards we made; another which uses Neutral cardstock – but you simply can’t beat Kraft. Do you know we now sell it in a single colour pack of 12x12? Very handy for scrapbooking but equally useful if you’re a huge fan of Kraft!

To create this glitter effect, take some chipboard and press into your Versamark pad. Sprinkle with Heat & Stick Powder (I keep mine in a plastic pot so can dip the chipboard in and out easily) then heat until the powder has melted. Sprinkle (or dip) with glitter – in this case it’s Fine Cosmo Celery for the letters and Fine Cosmo Turquoise for the heart. Then heat again to set.

The stamping is done with Versamark, too – it really is a useful pad to have around.

Stamps: Hello Again
Cardstock: Kraft, Taken with Teal, Certainly Celery, Whisper White
Ink: Versamark
Accessories: ¼” Grosgrain Ribbon - Certainly Celery, Fine Cosmo Glitter (Celery and Turquoise), Heat & Stick Powder, Heat Tool, Scallop Edge punch

All products by Stampin' Up! Please email me to order a catalogue, or click the link on the right to view it online.

Thursday, 19 November 2009

A glitter class sneak peek

A sneak preview for those who are attending my Glitterati Class on Monday... I initially rejected this card because I thought it was too dull-looking for a Christmas card but I kept coming back to it. I think that, not being a glittery sort of person, I am drawn to the subtlety of the neutrals to offset the bling.

But is the black too gloomy? I was thinking of switching to Night of Navy but have cut up the black now – I decided I like how striking it is next to the Sahara Sand.

To create this glitter effect, stamp the snowflake in Versamark then cover with Heat & Stick Powder. Tap off the excess and then heat with your heat tool. A hairdryer will not do, sorry – it will just blow the powder away and not be hot enough. When the powder has melted, cover with glitter and tap off the excess. Heat again lightly to set.

Reliable sources tell me that the Embossing Buddy will prevent any stray glitter from sticking to your paper but mine is due to arrive today so I’ll have to let you know my views when I’ve tried it.

The ribbon is something I’ve seen everywhere but never tried. It didn’t sit as flat as I’d have liked but some of the samples I’ve seen involve stitching and that’s never going to happen in this house. So I put a strip of Sticky Strip along the card and stuck the ribbon to that, pleating it as I went along.

Stamps: Snowburst, Basic Phrases
Cardstock: Sahara Sand, Basic Black, Brocade Blue, Whisper White
Ink: Basic Black, Versamark
Accessories: Heat & Stick Powder, Fine Cosmo glitter (Light Blue), Heat Tool, Stamp-a-ma-jig, 5/8” Grosgrain Ribbon – Brocade Blue, Stampin’ Dimensionals

All products by Stampin' Up! Please email me to order a catalogue, or click the link on the right to view it online.

The small print

This is my personal blog and my sole responsibility as an Independent Stampin' Up!® demonstrator. All images are © Stampin' Up!® All content including photographs, projects and text are © Helen Read, unless otherwise stated. Please feel free to copy my ideas for your personal use and inspiration - if you are a SU demonstrator you may use these ideas for your events but please give credit where it is due. Please do not use my ideas for monetary gain, competitions or publication. The images on this blog - including blog buttons - should not be copied and used elsewhere on the internet or on CDs.