Showing posts with label Journals. Show all posts

Tuesday, 1 October 2024

14 ideas for Winterly Tree Tops – including a scrapbook page

Winterly Tree Tops Nests of Winter Stampin Up card ideas
 

Are you looking for ideas for the hugely versatile Nests of Winter Suite from Stampin’ Up!® This fabulous Suite includes the Winterly Tree Tops stamps and dies bundle, which was the basis for my Autumn Craft Day here in Derbyshire at the weekend.

Read on for 14 ideas for projects using the Winterly Tree Tops bundle and Nests of Winter Designer Series Paper.

Tuesday, 28 November 2023

Three projects using Stampin’ Up!® Winter Meadow Designer Series Paper

Stampin Up UK Winter Meadow ideas

The recent Starter Kit offer attracted lots of people into my Stampin’ Up!® team, so I thought it was time to send them a proper welcome pack. 
 
I wanted to use the gorgeous Winter Meadow Designer Series Paper because I love it so much. Happily, this is now back in stock in the Europe warehouse and even more happily, this item will be carrying over beyond the end of the year.

I didn’t have a lot of this paper to spare, especially when making multiples, but my three projects show how a little paper can go a long way... and in the end, thanks to frugal cutting, I even had some leftovers. 
 

Tuesday, 24 January 2023

Dainty Delight projects – and a spring craft day in Derbyshire

Dainty Delight Stampin' Up card idea

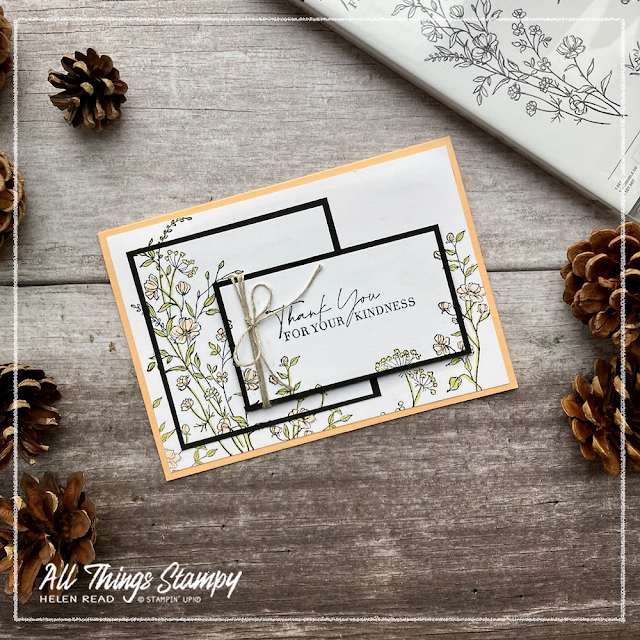
I am really loving the Dainty Delight bundle and Dainty Flowers Sale-a-Bration Designer Series Paper from Stampin’ Up!®.

I often say that I don’t like flower stamps but it’s not really true; I don’t like most flower stamps. The big, blowsy flowers that are so popular with crafters everywhere do nothing for me at all, but I really love delicate wildflowers that remind me of our British countryside. And seed heads – they are a favourite.

Tuesday, 14 June 2022

Vintage-inspired Tea Boutique projects

Stampin Up Cup of Tea Boutique

Stampin’ Up!® products are not just for cardmaking and my customers had asked if they could decorate a notebook at our all-day Craft-Tea Day Out on Saturday.

I aim to please so came up with this lovely vintage-inspired design using the Cup of Tea Bundle and Tea Boutique Designer Series Paper. I wanted to show the versatility of the Tea Boutique paper by highlighting the more subtle designs on the reverse.

Monday, 6 April 2020

Make a journal with the Magnolia Lane Suite


These Magnolia Lane Designer Series Papers are beautiful but I have resisted them until now. And now they are perfect for me as a bulk pack is available, meaning I can offer this project as a kit in the post!

I will be holding this via Zoom, which means you can keep safe, Keep Calm & Craft On. You'll receive everything you need in the post to make this journal from scratch. From scratch, I tell you!

Priority will be given to existing customers and previous class attendees as places are limited. After that, open to anyone in the UK. Get in touch if you'd like more info!

The main thing to remember when making a journal from scratch is not to add the inside cover until absolutely everything you need is on the outside! Full tutorial is exclusive to those who join the class, but you can see something similar in my 12-year-old tutorial here


Wednesday, 27 March 2019

Bloom by Bloom Journal


Saturday was my Spring All-Day Craft Event and we had a lovely, relaxing time creating projects using the Bloom by Bloom stamp set.

Everyone received the stamp set in their kit and brought along their own ink pads, so they could stamp merrily away without having to leave their seats.

There were two separate classes, with lunch provided in between.

One of the afternoon projects was a one-sheet wonder, which allowed guests to use their own colours combinations... as long as they included Daffodil Delight and Night of Navy. They made four cards (coming soon!) and this lovely cheery journal.

Some of the products in their kit were Butterfly Elements, so they could sprinkle these liberally across their projects, and some Grapefruit Grove and Lovely Lipstick Foil Sheets, so they could choose which went with their colour scheme the best. Here I've used Lovely Lipstick as I love the way it pops.


http://helenread.stampinup.net

Monday, 2 March 2015

All-Day Craftathon projects: Butterfly journal


Phew, what a day Saturday was! It was a totally crafty, fun day, with lots of laughs, cake and creativity. It was lovely to see everyone, including some brand new people, and I hope everybody had a good time. 

This was our first project of the day; an A4 journal which we decorated in an uncharacteristically girly manner, using some fun techniques. The Irresistibly Yours DSP is a joy to work with and you can colour it in many ways. I settled on sponging for practicality and speed… plus it gives you a lovely soft effect, allowing the colours to blend into each other. 

On top of this, we stencilled some textured hearts, using homemade texture paste (two parts cornflour, one part cheap white glue, one part cheap white paint). 

The binding is created using strips of cotton tape, slightly overlapping. This covers the rather drab grey of the original journal. 

Not a quick project - by the end, we were already running an hour behind! - but a pretty one nonetheless. 

Wednesday, 23 October 2013

Epic Day envelope album


Today is my downline Donna’s birthday but I can’t show you her card, because I promised to show you the envelope album from my Epic Day of Crafting – and here it is.

I’ve shown this fab project to lots of people – many of whom have assumed that you can buy these books from Stampin’ Up!® But no, it’s made entirely from scratch. The covers are made from chipboard covered in Designer Series Paper, and the pages are made from envelopes, joined together and decorated.  It’s closed together with very slim magnets. It’s very ingenious.

The design is adapted from one I made on Monica Gale’s Paperie Treat and she kindly gave me permission to use it at my workshop. Everyone loved it! And I loved how some people used different papers from the pack to create a totally different look to the project. 

Stamps: Off the Grid, Morning Post Alphabet, various others as required
Cardstock: Crumb Cake, Very Vanilla, Gumball Green, Calypso Coral, Early Espresso, Vellum
Paper: Epic Day
Ink: Basic Gray, Crumb Cake, Early Espresso
Accessories: Autumn Leaves die, Polka Dots embossing folder, Woodgrain embossing folder,  Naturals buttons, Linen Thread, Cute Clips, Crochet Trim, border punches, Apothecary Accents framelits

Meanwhile, happy birthday, Donna! 

Monday, 5 August 2013

Simply Pressed Clay and Gingham Garden


Talking of clay, which we were, on Wednesday… here’s another project using it, this time with the flower moulds. I coloured the clay using Melon Mambo ink and foolishly didn’t use gloves, resulting in a bit of a “Lady Macbeth” moment. Well, I say “moment” – the staining didn’t go for a couple of days… not quite as long as the Basic Black, but long enough!

The notepad is just something that I’ve been hoarding for years.  I think it came into work as part of a press pack. Bizarrely, it had a couple of pages about the company and the rest was conveniently blank. It was just crying out to be altered, so I covered the front and back with Gingham Garden DSP and then embellished with a bit of washi tape and some clay flowers.

I must put more ribbons down the side – I made this before we could order any of the new ribbons, so it’s a bit sparse!

Stamps: Happy Day
Cardstock: Whisper White, Island Indigo
Paper: Gingham Garden
Ink: Island Indigo
Accessories: Gingham Garden Washi Tape, Simply Pressed Clay, Melon Mambo reinker, Stitched Grosgrain – Whisper White, Daffodil Delight

Wednesday, 15 May 2013

By The Tide masculine fishing journal


Inspired by the projects on Monica’s retreat, I came home and decided to be a bit more adventurous with my crafting, steering away from cards, cards, cards.
 
One of the first things I made was this decorated journal. I decided to decorate it using By the Tide and Comfort Café papers so that I could display it at my Father’s Day class this weekend, and will be offering a similar project as a class in the future, using brand new products from the new Annual Catalogue, which goes live on 2nd July.

I decorated the front and inside covers but still have to do the back as I ran out of Comfort Café paper in this design. Bit frustrating when I have seven packs of the stuff all packed up and ready for Saturday’s class, LOL!

The fish are stamped in Soft Suede, then coloured in using ink pads and blender pens. Finally, they are covered in a layer of Crystal Effects® for a shiny, fishy finish. They are popped up in the centre and glued down around the edges (although they keep escaping!).  Thanks to French demonstrator Cécile Ortiz for the inspiration (sorry no time to find actual link).

This is one of the options for the ladies on Saturday, when they create their By the Tide Father’s Day card.

The edges of the Very Vanilla cardstock are brayered a little, using Summer Starfruit ink. As is the DSP strip behind the word “NOTES”. This paper is Summer Starfruit on Very Vanilla and it was a bit harsh for the front, so I brayered all over it using Summer Starfruit. I like it!

Stamps: By The Tide
Cardstock: Midnight Muse, Very Vanilla
Paper: Comfort Café DSP
Ink: Summer Starfruit, Soft Suede, Cajun Craze, Midnight Muse, Crumb Cake
Accessories: Naturals buttons, Linen Thread, Scallop Edge Circle Punch, Crystal Effects®, Bigz Alphabet Dies

All products by Stampin' Up!® 

Sunday, 6 January 2013

Vintage journal... and a sneak peek


Ooh, this is a project and a half, isn’t it? Not one for when you’re in a hurry or on a tight budget... but if you’ve got it, use it, that’s my motto when it comes to craft supplies. Can you spot any sneak peek items on this journal or do you need a clue?

There’s actually only one sneak peek image on there, and it’s from a Sale-A-Bration set called Feeling Sentimental. It’s the penny farthing on the top right, which I’ve stamped on to Fan Fair DSP. The typewriter at the bottom is not a stamp at all; it’s printed on the Fan Fair DSP, so I just tore a piece out and sponged around the edges. The tape measure and the “hello” also come from this pack of DSP. The key is stamped using Artistic Etchings.

There’s quite a bit of sponging on this project, including on the label panel, which is cut out using the Apothecary Accents dies and embossed using Lacy Brocade, before being sponged with some Sahara Sand and Soft Suede ink, and Champagne Mist Shimmer Paint for a touch of glamour.

What else is on there? Ah yes, that lovely DSP in the background. This is fab, fab, fab – it’s a speciality DSP called Natural Composition and it’s embossed. So you get a kraft-coloured background with a clear embossed image, in this case woodgrain. To make it stand out more, I brayered the whole piece in Soft Suede, then wiped the embossed areas clean.

Stamps: Feeling Sentimental (SAB), Artistic Etchings
Cardstock: Very Vanilla, Crumb Cake
Paper: Fan Fair, First Edition, Natural Composition
Ink: Cherry Cobbler, Soft Suede, Sahara Sand
Accessories: Apothecary Accents Dies, Typeset Alphabet dies, Blossom punch, Itty Bitty Punches, Naturals Designer Buttons, Linen Thread, Basic Pearls, Crochet Trim, Champagne Mist Shimmer Paint

All products by Stampin’ Up!®

Tuesday, 19 April 2011

Botanical journal


When I saw the beautiful papers in the Botanical Gazette collection, I just knew I’d have to cover another journal. The only question was: which sheet to use?

Eventually, after much wrangling, I settled on this one – and decided to let the paper do most of the talking. All I added was a couple of strips of torn cardstock, some extravagantly ruffled ribbon and a flower embellishment.

To create this flower, I die-cut it from Cherry Cobbler and then punched a hole in the centre using a 1” circle punch. I then snipped towards the centre between two of the petals. I soaked the flower with water and then scrunched it up, opening it out and kind of pleating it to make it look more natural. It sounds like a lot of work but it wasn’t, honest.

Top tip: I may have said this before but it bears repeating... if you have the spiral punch, punch it through a scrap of cardstock and carry it around with you in your purse. When you see cheap notebooks on sale, you can then hold the cardstock up to the spiral binding to see if it matches. Many of them do.

Stamps: Sense of Time, Tiny Tags
Cardstock: Early Espresso, Old Olive, Cherry Cobbler, Very Vanilla
Paper: Botanical Gazette
Ink: Cherry Cobbler
Accessories: 1 ¾” circle punch, 1” circle punch, spiral punch, Fun Flowers die, Big Shot, basic rhinestones, wide striped Grosgrain Ribbon – Old Olive, taffeta ribbon – Old Olive, art journal

All products by Stampin’ Up!®

Friday, 12 November 2010

Team gifts for Convention

I’ve starved you of stamping projects lately, I know, so here’s one I made earlier...  these are the gifts I made for my team members who joined me at Convention. There is actually a fourth gift not shown here – it was for Kelly, who couldn’t make it at the last minute due to illness. As I’ve not seen her since I got back, I can’t show you until she’s seen it herself, it wouldn’t be right.

So, what did I make? Typically, I left everything to the last minute so didn’t have time to order SU journals, so I bought some notepads which had rather convenient Kraft covers. Not quite Crumb Cake but near enough for my needs.

I couldn’t possibly decorate them all the same, especially after making 50 swap cards, so I stuck to the same colours, three stamps sets and got to work.

The pens were from WHSmith if I remember correctly – I decorated them to match the pads by slipping a tiny roll of Designer Series Paper inside.

And the little boxes are really cute. They each contain two tiny bars of Green & Blacks chocolate. I have a bit of a confession about that, so may as well come clean. There was enough chocolate in the pack I bought to give each person three little bars. But, well... Green & Blacks is my most favourite chocolate ever (top choice is slightly darker than milk, second choice is milk, don’t like the dark – just in case you’re thinking of buying me a present, LOL!), so I decided that it wouldn’t hurt if I helped out a little! Oops.

The box is a simple matchbox style – just a Basic Black tray with Newsprint Designer Series Paper wrapped around it. Tied with ribbon and decorated with Jewellery tags and the Tiny Tags stamp set.

The bags were from my stash, as were the tags. I could have made my own tags but it was getting REALLY late by this time!

Stamps: Tiny Tags, Artistic Etchings, Vintage Vogue
Cardstock: Basic Black, Cherry Cobbler, Very Vanilla
Paper: Newsprint
Ink: Basic Black, Cherry Cobbler, Crumb Cake
Punches: Scallop Circle Punch, Boho Blossoms Punch, 1 ¼” circle punch,  Jewellery Tag
Ribbons: ¼” Taffeta – Basic Black, Very Vanilla, 1/8” taffeta– Basic Black
Other accessories: Champagne Mist shimmer paint, Basic Pearls, Clear rhinestone brads, Paper Piercer, Mat pack

All products by Stampin' Up!®

Wednesday, 20 October 2010

Travel journal


Oooh, I know I shouldn’t say it myself, but I really do love this! It would make a perfect travel journal (if you were going to France) or just a really cool notebook.

It’s one of our On Board journals, which come in plain chipboard, ripe for decoration. I covered the front and back with Newsprint Designer Series Paper, using the Spiral Punch. Can’t remember if I’ve told you how to do this, so here’s how:

  1. Cut your Designer Series Paper (DSP) to size. You can either fold it round the edges or, more simply, cut it to the exact size of the journal.
  2. Offer it up to the journal, holding it exactly in place.
  3. With a pencil, mark the position of the centre hole for the ring-binding. It doesn’t have to be the centre hole but let’s say it does to make life easier.
  4. Using scissors, cut a small slit where your pencil mark is.
  5. Holding your spiral punch upside-down, you’ll notice a little notch. Push this notch into the slit you have cut and punch.
  6. Using the notch to line up the punch, keep punching along the edge of your paper. Keep checking against the journal to make sure you don’t punch too many holes.
  7. When you’ve reached the end, turn the paper over.
  8. Now push the notch into the centre hole and start punching from the centre towards the opposite edge. Again, check that you don’t punch a hole too many.
  9. With your holes punched, you can spread adhesive all over the journal cover. Tombow Multi is brilliant for this, although I use the Two-Way Glue pen to get in the little gaps between the metal ring-binding. Make sure you go up to all the edges.
  10. Now you can sand the edges with sandpaper or an emery board to make them blend into the chipboard and give it a lovely distressed feel. 
Repeat the whole process if you want to cover the back and inside covers of the journal.

Stamps: Artistic Etchings
Cardstock: Cherry Cobbler, Basic Black, Very Vanilla
Paper: Newsprint
Ink: Basic Black, Crumb Cake
Accessories: Boho Blossoms Punch, Clear Rhinestone Brads,  Spiral Punch. Ribbons: Wide Striped Grosgrain Ribbon - Basic Black, ¼” Grosgrain Ribbon - Very Vanilla, 5/8” Grosgrain Ribbon - Very Vanilla, 1/8” Taffeta Ribbon - Basic Black

All products by Stampin’ Up!®

Tuesday, 27 July 2010

Owl journal


Another mini journal for a teaching assistant, made in exactly the same way as the previous one, although you notice that the owl fits inside the 1 3/8” circle punch, which makes life easier.

Stamps: Fox & Friends
Cardstock: Pink Passion, Summer Sun, Whisper White, Tempting Turquoise
Paper: Kaleidoscope
Ink: Tempting Turquoise
Accessories: Scallop Edge Punch, Scallop Circle Punch, Striped Grosgrain Ribbon – So Saffon, ¼” Grosgrain Ribbon - Tempting Turquoise and Whisper White

All products by Stampin’ Up!®

Monday, 26 July 2010

Teacher gift journal


Here’s a little journal for one of the teaching assistants. It’s just cereal box (two layers for each cover) covered in Designer Series Paper, with a piece of Almost Amethyst cardstock on the insides to cover any joins. The pages are index cards, which make very quick and easy journaling pages! It’s all put together with my Bind-it-All, which I dusted off for the occasion!

The fox is punched out using the 1 ¾” circle punch, which is our largest circle punch. However, you can mat this using two round tabs punched with the... you guessed it... Round Tab Punch. Simply layer them at right angles to each other and hope nobody sees the join!

By the way, all these teacher gift photos look a bit fuzzy to me. I'm not sure what I did differently but I apologise. Too late to retake them all now, obviously! 

Stamps: Fox & Friends
Cardstock: Whisper White, Almost Amethyst, So Saffron
Paper: Tea Party
Ink: Almost Amethyst
Accessories: Scallop Edge Punch, 1¾” circle punch, Round Tab Punch, Striped Grosgrain Ribbon – So Saffron, Whisper White satin ribbon, Whisper White Grosgrain Ribbon

All products by Stampin’ Up!®

Thursday, 3 June 2010

Covered notepad


I’m steadily visiting all the local Wilko branches to collect up enough of these little notepads to use in a class because they’re so cute and easy to cover using the spiral punch.  Here I’ve just added a strip of ribbon and some fab hand-stitched felt flowers.

Paper: Sweet Pea Paper Stack
Accessories: Satin ribbon – Old Olive, Sweet Pea Stitched Felt

All products by Stampin' Up! ®

Monday, 10 May 2010

Covering a notepad using the Spiral Punch

How cute is this? It’s a cheap notepad from Wilko which I’ve covered with the help of the spiral punch. Surprisingly easy, once you’ve worked out how to do it!


How to do it?

Cut a piece of paper or cardstock the same size as the notebook cover. Offer it up to the spiral binding and mark the centre wire with a pencil.

Using scissors, cut a small slit at this point. On your spiral punch there’s a little metal noggin to help guide your punching – push this into the slit and punch.  Using the guide, move the punch along and punch again, continuing until you get to the end (watch out if the wire binding on your notepad doesn’t go all the way to the end or you’ll end up with an unnecessary punched hole).

Turn your cardstock over and repeat up to the other edge. Thanks to Amanda for solving this little punching conundrum for me!

The punch does, of course, fit the Stampin’ Up!® On Board journal but if you want something smaller, check out stationery shops, Wilko etc. In my purse I keep a scrap of cardstock punched with the Spiral Punch so that I can offer this up to any notepad when I’m out and see if it will fit. 


Cardstock: Taken with Teal, Rose Red, Pretty in Pink, Chocolate Chip
Paper: Sweet Pea Paper Stack
Accessories: Boho Blossoms punch, Two-Step Bird punch, Spiral punch, Rich Regals brads, Stitched Grosgrain Ribbon - Rose Red, Stampin’ Write Journaller

All products by Stampin' Up! ®

Friday, 30 April 2010

Cover a journal - it's a hoot!

How cute is this owl? And what a fab journal, even if I do say so myself! I had a spot of bother covering this journal but I know what I’m doing now so the next one will be much, much easier. If you’d like to cover one of these journals (although not necessarily with an owl), please get in touch as I’m currently trying to rally enough people for a class.

Cardstock: Chocolate Chip, So Saffron
Paper: Sweet Pea Paper Stack
Ink: Close to Cocoa, Chocolate Chip
Accessories: So Tweet Chipboard, On Board journal, 5/8” Grosgrain Ribbon - Chocolate Chip, ¾” circle punch

All products by Stampin' Up! ®

Tuesday, 2 February 2010

Chipbird journal

You may or may not have noticed from the pink logo on the left that I am now a member of a Design Team! Shocking, eh?

The Design Team is over on In Love With Stamping and I have to come up with several projects every month for six months. How very scary.

One of the first challenges was to produce something using the colour combination Old Olive (hurray!), Close to Cocoa, Bordering Blue and either Whisper White or Very Vanilla.

So, as I needed a last-minute gift (is there any other kind with me?), I made this journal.

To get the chipboard bird this lovely Bordering Blue, I first inked it with Whisper White craft ink all over, then heat set it. Next I inked it with Bordering Blue ink - to do this, it's safer to use a brayer, just in case the craft ink isn't fully dry. You don't want it to contaminate your Bordering Blue ink pad! (Ask me how I know.) The wing used the same method but Brocade Blue ink and the bird's eye is simply inked with a black marker.

Next I took a gamble and pressed the whole lot into my Versamark pad. To be honest, my Versamark is so old and grubby that it doesn't matter but it didn't seem to make it any worse. Then I used clear embossing powder to give it this lovely sheen. I used several layers - if you work quickly you can sprinkle new powder on before the previous layer has set and it saves having to add new Versamark.

To make the journal itself, I used this method mainly because, by the time I'd added all my layers, the cover wouldn't fit in my Bind-it-All!

Why not check out the other Design Team creations in the gallery, here?

Stamps: Pocket Silhouettes
Cardstock: Very Vanilla, textured Bordering Blue, Close to Cocoa (inside)
Paper: Spiced Cider
Ink: Whisper White, Bordering Blue, Brocade Blue, Close to Cocoa
Accessories: 5/8" Grosgrain ribbon - Old Olive, 1/5" Grosgrain ribbon - Chocolate Chip, Stampin' Write journaller, clear embossing powder, heat gun, So Tweet Chipboard

All products by Stampin' Up!®

The small print

This is my personal blog and my sole responsibility as an Independent Stampin' Up!® demonstrator. All images are © Stampin' Up!® All content including photographs, projects and text are © Helen Read, unless otherwise stated. Please feel free to copy my ideas for your personal use and inspiration - if you are a SU demonstrator you may use these ideas for your events but please give credit where it is due. Please do not use my ideas for monetary gain, competitions or publication. The images on this blog - including blog buttons - should not be copied and used elsewhere on the internet or on CDs.