Showing posts with label stampin up. Show all posts

Thursday, 28 January 2021

Flowering Cactus Product Medley blog hop and free tutorial

Flowering Cactus Stampin Up

I’m excited to be taking part in another blog hop with talented Stampin’ Up!® demonstrators from around the world. 

Flowering Cactus blog hop Stampin Up

This time we are focusing our attentions on the Flowering Cactus Product Medley. I have overlooked these product medleys in the past as they are quite the investment at £65. But, as lockdown continues (forever and ever and ever!), I’ve started looking at different ways of using products in my Zoom-based classes. And the refill kits are perfect. 

Flowering Cactus Stampin Up

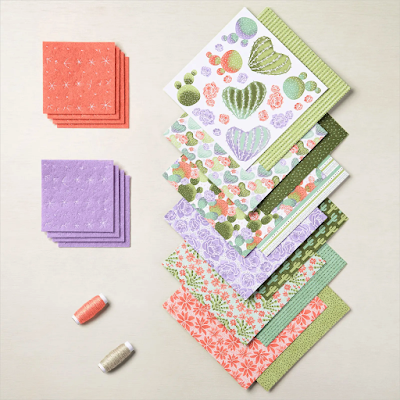
This Flowering Cactus Product Medley refill is just £33 and can be split into two, four or even eight, depending on the price level of a class. For my Crafty Friday class in February, where we only make two cards, I have split the kit into eight so everyone will get one sheet of each 6x6 Designer Series Paper design. This includes an ever-so-handy sheet of large images (the one you see on the top in the pic above) which can be cut out to create focal points for your cards; all you need to add are card bases, some Basic White cardstock and some greeting stamps.

If you repeated these designs to use the whole pack, you’d have enough to make 40 cards! 

Flowering Cactus Stampin Up

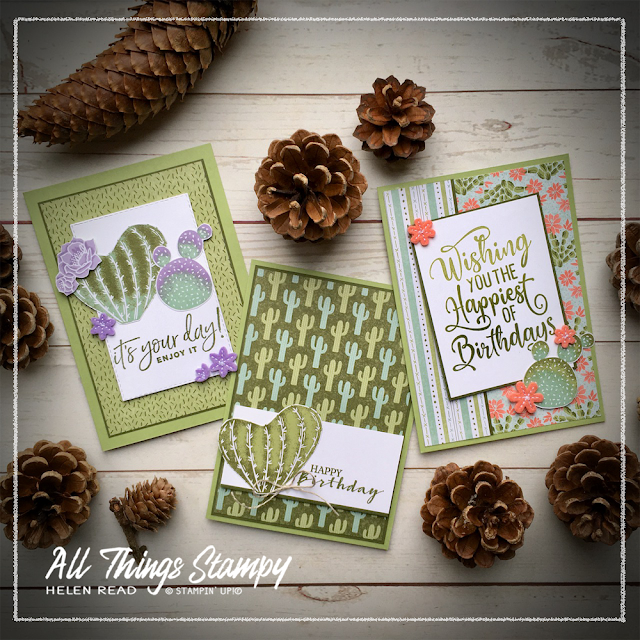
This card is a simple M-fold design, and I really do mean simple because I just don’t have the patience or skill for proper fancy folds. 

Flowering Cactus Stampin Up

It starts with a card base created by cutting the card in half lengthways. Then you take a quarter sheet of card, score along the short edge to create a flap which you use to attach to the main body of the card, then score the remainder in half to create the front of the M.

Confused? Check out my tutorial here

Flowering Cactus Stampin Up

Flowering Cactus Stampin Up

This patchwork card was intended as one of the Crafty Friday projects in February but I've had second thoughts about that as it was quite fiddly to get everything to line up. But if you were making it at home it would be a great way to use up any little leftover pieces.


Want to have a go at this patchwork card but can’t be bothered with the measurements? Why not butt all the pieces up together on some scrap paper, stick them down and then cut out your card front shape? Sounds much easier!


Flowering Cactus Stampin Up

Here I’ve used one of my favourite and most-used stamp sets, Happiest of Birthdays, which I've inked up with three shades of green; Pear Pizzazz, Old Olive and Mossy Meadow. You can do this in several ways but I like to use the Stamparatus to ink up each area separately and then stamp, knowing that I’ll hit the right spot each time.

Flowering Cactus Stampin Up


I wanted to include a masculine card in the batch so made this using all greens and just a small bow in Linen Thread. Quick and simple but I’m sorry, I like to divert my energies into cards for the most appreciative recipients!

Flowering Cactus Stampin Up

This was the final card I made from my designated 1/8th of the refill kit but turned out to be one of my favourites. I love the Highland Heather accents which give you a gorgeous, gentle colour combination with the Pear Pizzazz, Old Olive and Mint Macaron. 

Flowering Cactus Stampin Up

I hope you've been inspired to take another look at our different refill kits as there really are so many ways you can use our products. Especially when we can't meet up in person (SO jealous of Australia and New Zealand!), these kits provide a fun way to hold and attend classes when everyone doesn’t have the stamp set. 

Now please take a trip around to world to see what other fabulous projects have been made by amazing Stampin’ Up!® demonstrators...


Flowering Cactus Stampin Up

This Flowering Cactus Product Medley Suite will allow you to make dozens of fabulous card. If you live in the UK and would like to order the Suite, the refill kit or any other Stampin’ Up!® products, please visit my store and, if you use the host code YK2NNMYW, I’ll send you a little thank you gift in February! 

To make it easy for you, please shop using this link (opens in new window)

Does your wish list come to more than £99? Please get in touch and I will help you get more for your money and unlock discounts all year round.  Please message me via my website.


Wednesday, 15 July 2020

Have you earned your Bonus Days Coupons yet?

Stampin Up Bonus Days coupon allthingsstampy special offer discount coupon

Have you earned your Bonus Days Coupons yet? This is a great summer promotion which is well worth taking advantage of.

Here’s what you need to know:
  • For every £45 you spend (before shipping) between now and 3rd August, you will receive an email coupon for £4.50 to spend between 4th and 31st August. 
  • You earn a £4.50 coupon for every £45 you spend with no upper limit.
  • You can earn and spend them via my store or by ordering directly through me.
  • Your coupon will be emailed to you so make sure your email address is up-to-date, either in the store or in my records.
  • The email will arrive shortly after you place the order, so if it doesn't, please check your junk mail then get in touch and I'll chase it up.
  • Hang onto your codes!
If you don’t have an email address and would like to order through me, you can still earn and redeem coupons through me.

Stampin Up Bonus Days coupon allthingsstampy special offer discount coupon

Monday, 13 July 2020

8+ card ideas using Stampin' Up!®'s Field of Flowers

Stampin up Field of Flowers card ideas allthingsstampy helen read

Following my cardmaking class on Saturday, using the Stampin' Up!® stamp set Field of Flowers, I have a mega post for you today.

Due to an absence of commonsense, I ended up offering eight cards in two hours, which was stretching the bounds of possibility a little but I think most people managed almost all of the cards in what turned into a three-hour session.

This was all held remotely via Zoom so we could keep safe, and everyone had their own Field of Flowers stamp set to play with, and stamp in their chosen colours. The Confetti Flowers Border Punch was offered as an optional extra.

As the elderly members of my family are running out of birthday cards and have been threatened with Dire Consequences if they go shopping, I decided to switch up the greetings for the cards I made during the session, so I can replenish their supplies.

You’ll notice I've used the silver foil-edged cards for this session; I don’t usually use retired Stampin' Up!® products but I these were such a bargain in May that I couldn't resist stocking up to keep class costs down. However, maybe I should have stocked up more because the class proved so popular that I ended up leaving myself short!

Stampin up Field of Flowers card ideas allthingsstampy helen read

I kept the card layers largely neutral – Misty Moonlight, Night of Navy and a splash of Bumblebee – so people could add their own inks without clashing. While I made the initial samples in a wide variety of colours to show people different options, my personal choice of colours for the session was Granny Apple Green, Magenta Madness, Misty Moonlight, Bumblebee and Coastal Cabana. Bright and cheerful!

Stampin up Field of Flowers card ideas allthingsstampy helen read

First card of the day was this one – as it was the most complicated. It uses a piece of the gorgeous
In Good Taste Designer Series Paper which goes with everything. I showed the project using the flowers punched out separately but not all guests had this option as the Confettie Flowers Border Punch was an add-on to the class.
If you don't have the Confetti Flowers Border Punch, when you’re stamping with Field of Flowers I suggest you use a paler green such as Pear Pizzazz, Mint Macaron or Soft Sea Foam for the grass and leaves. Then use a stronger colour for your flowers so they stand out. If you're using the punch, then anything goes!
 
 Stampin up Field of Flowers card ideas allthingsstampy helen read

Just changing one colour can give your project a whole new look. This is created using the One-Sheet Wonder technique but I swapped out the Misty Moonlight from my original sample on the left to use Coastal Cabana during the class. I think I prefer the darker version though, what about you?

Stampin up Field of Flowers card ideas allthingsstampy helen read

A simpler version of this same card is to stick to just one colour – Magenta Madness – to stamp tiny flowers all over your background. Because there are several flowers on one stamp, this is really quick to make.

Stampin up Field of Flowers card ideas allthingsstampy helen read

Another card I changed during the class was this one. I couldn’t find my strip of Bumblebee Designer Series Paper so thought (wrongly, as it happened) I must have run out and changed it to Magenta Madness. I hardly dare admit this but Magenta Madness is beginning to grow on me...

Stampin up Field of Flowers card ideas allthingsstampy helen read

A classic triptych design. You can do this in one of two ways; stamp the whole piece and cut it into three. Or cut it up first and stamp afterwards. I tried both and decided that the best route would be to stamp the grass and flowers while it's still in one piece (a bit of careful lining up is required), then add dragonflies once it's sliced up. Can you spot the not-so-deliberate ‘mistake’? I added an afterthought dragonfly in the wrong colour!

Need a small piece of cardstock but don't have the right shade? I created this Coastal Cabana strip by pressing a piece of Whisper White into an ink pad.

Stampin up Field of Flowers card ideas allthingsstampy helen read

When you’re making eight cards in a morning, you need at least one Simple Stamping project! And this one could hardly be simpler; just stamps, ink and one of our fabulous Whisper White Notecards & Envelopes. I use these All The Time, they’re just so handy to have.

Stampin up Field of Flowers card ideas allthingsstampy helen read

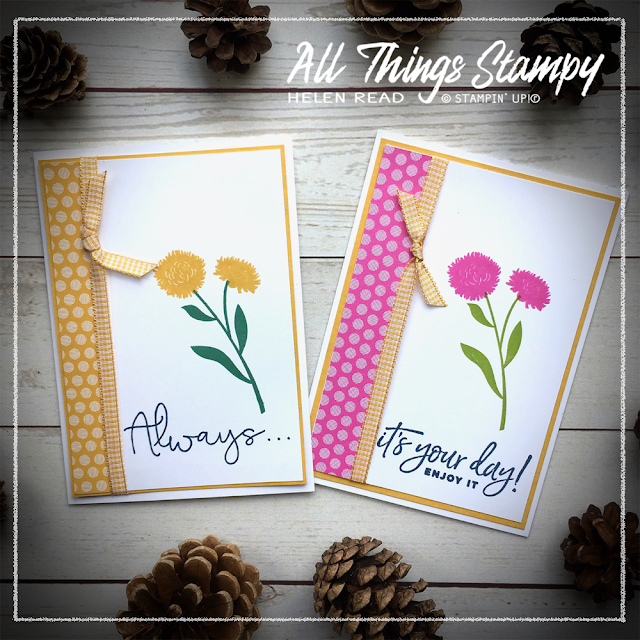
Field of Flowers is such a versatile stamp set. You can make subtle, tasteful, classy cards with it... or embrace the Brights! I've used Magenta Madness, Granny Apple Green, Bumblebee and Bermuda Bay and popped up a single flower to add interest.

Stampin up Field of Flowers card ideas allthingsstampy helen read

And finally, here’s the original version of the Bumblebee card you see in the first picture. Just a simple strip stamped with grass and flowers, to show someone you’re thinking of them.

I hope you’ve enjoyed this foray in to a Field of Flowers and will consider adding this beautiful set to your shopping list. You can buy the set from my website here. And if you add the Confetti Flowers Border Punch on, too, you’ll save 10%!


Thursday, 11 June 2015

Glittery cupcake tag with Sprinkles of Life


Watch out, there’s glitter on this card! Now that’s not something you see very often at All Things Stampy! But somehow, this cute little tag was just crying out for a touch of glimmer, so I used Dazzling Details on the icing. 

This stamp set is going to be so popular because, as I’ve already mentioned, it’s really versatile. Here I’ve gone for a cupcake, cutting out the cake and candles myself, and using the punch for the icing. 

What about the dots? They were created with a pencil rubber used as a stamp. 

Am sulking a bit today because my parcel didn’t come. Am quite cross with UPS for changing their systems without telling anyone but am trying not to dwell on it. Am too busy to stamp at the moment anyway, so perhaps it’s a good thing. (Who am I trying to kid?)


Tuesday, 9 June 2015

Awesomely Artistic with new In Colors


Initially, I wasn’t keen on the In Colors and, on my first few looks through the catalogue, I didn’t look at this stamp set twice. You know what’s coming next, don’t you? I have completed my U-turn on the In Colors and now love them all… and this stamp set is currently winging its way to me from Frankfurt and should arrive tomorrow!

So how did I come to make this card if I don’t have this set yet? It was the Make & Take at the Stampin’ Up!® Regionals in Telford. Needless to say, mine went a bit “different” … apart from anything else, I stuck it down wonky, but we were using Fast Fuse and there’s no shifting that stuff!

I think this set will be perfect for the Mixed Media projects I tackle occasionally, and can’t wait to try it out. 

The small print

This is my personal blog and my sole responsibility as an Independent Stampin' Up!® demonstrator. All images are © Stampin' Up!® All content including photographs, projects and text are © Helen Read, unless otherwise stated. Please feel free to copy my ideas for your personal use and inspiration - if you are a SU demonstrator you may use these ideas for your events but please give credit where it is due. Please do not use my ideas for monetary gain, competitions or publication. The images on this blog - including blog buttons - should not be copied and used elsewhere on the internet or on CDs.