Showing posts with label gift tags. Show all posts

Tuesday, 29 November 2022

Traditional Christmas Stampin’ Up!® projects using Christmas Season stamps


Christmas Season Stampin Up! card ideas

When it comes to Christmas cards, you cannot beat the traditional Stampin’ Up!® colours of Garden Green and Real Red.

Today I have two Christmas projects which use these fabulously festive colours and the gorgeous Christmas Season stamp set, while showing a couple of fun tips to take your projects to the next level. 

Tuesday, 14 December 2021

Last-minute Christmas gift projects – with free tutorial


It’s around about this time of year that I begin to lose interest in Christmas projects and get anxious to start crafting with my new Stampin’ Up!® supplies. But there are still Christmas gifts, decorations and more to be made so for my penultimate craft class of the year we made a gift card holder and a couple of packages for tiny gifts. 
 
All of these projects can be made from one sheet of Stampin’ Up!® Painted Christmas Designer Series Paper (or any other designs of your choice). 
 
 
We 
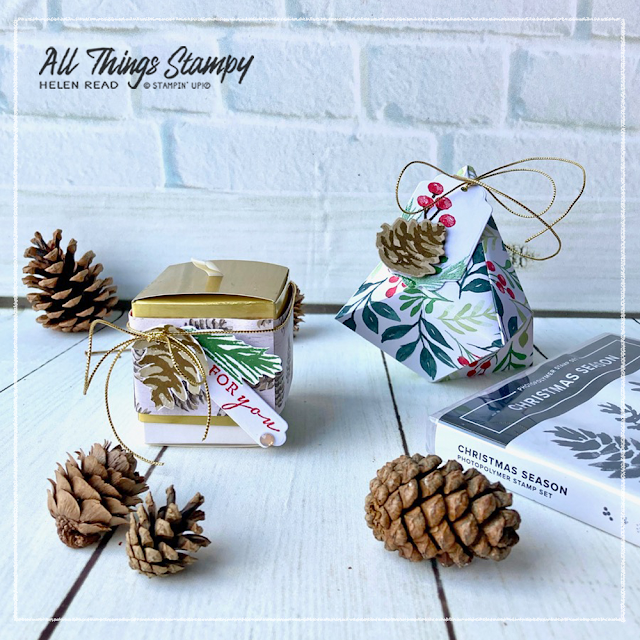
began by making the bauble/gift holder which can be made from any size square but I went with 7" (17.8cm) to allow enough leftovers to fit the gift card holder.

This is far simpler than it looks and requires no cutting, measuring or special tools. I used this tutorial by Aussie demonstrator Fiona Bradley
 
 
The only thing I changed from Fiona’s tutorial was to punch my corner holes after the first two folds – it’s way easier to do this when the paper is still flat. Punch through both layers when the paper is folded corner to corner, then repeat on the other two corners. 
 
We held our baubles together using Simply Elegant Trim and decorated with a gift tag made with the Seasonal Labels Dies and coordinating Christmas Season stamp set. 
 

The card is a square one made to fit some 13cm (5") envelopes from my stash. All the pieces of Designer Series Paper you need can be cut out of the remaining sheet you used for the bauble.
 
 
 Make sure any decorations you add to the front of the small square don’t overhang on the left or this will make the card difficult to open.  


Inside the right flap you can stick a piece of Designer Series Paper and there is just enough room for a credit card-sized gift card... if you don’t apply adhesive on the right hand side. 


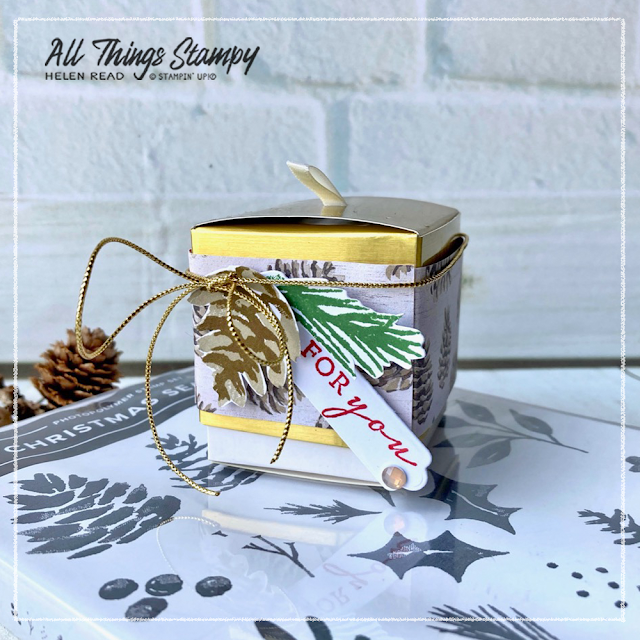
With our leftover pieces we decorated these little Simply Classic Treat Boxes, which are ideal for table gifts or for packaging something small such as jewellery. You could even hang them on the Christmas tree filled with chocolates.
 
There wasn't a long enough strip of Designer Series Paper left to go around the whole box so I cut two 3.5cm wide strips and joined them. Once the gold trim and decorations are added you can’t see the joins.

I hope these projects have inspired you to make some last-minute festive packaging. They are a great way to use up any leftovers – and don’t feel you have to hoard this pack of paper as it is only going into hibernation. The Painted Christmas Designer Series Paper will not be available from 4th January but will return in July 2022. 

The Christmas Season stamp set and Seasonal Labels Dies are both carrying over into the new year, although will not be available as a bundle from 4th January. So if you want to make your 10% saving, I suggest you order before then. They have proved to be my most-used Christmas stamps this year and the dies will prove useful all year round.

Want to craft with beautiful projects like these? If you’re in the UK, please head on over to my store to shop. If you use the host code TFBG2JJB before the end of December, I will send you a thank you gift next month.


Does your wish list come to more than £99? Please get in touch and I will help you get more for your money and unlock discounts all year round.  


Wednesday, 29 November 2017

Merry Music rosette star


I saw this project on the Stampin’ Up!® Facebook page and thought it would be a great way to use up my surplus of Merry Music Designer Series Paper (you get 24 sheets in a pack!).

I made one of these for each of the ladies attending my Merry Star class, to decorate their kit bags.

The star is simple to make and the instructions are here. They're in German on the printable sheet but in English in the post. Here are my additional tips:

1. Stick to centimetres - if you try to convert it to imperial, you will run out of paper with these instructions.

2. Make one so you know how it works; I found drawing cut lines on the back of the DSP helpful.

3. Attach the two pieces of DSP together before you start concertina folding.

4. Hot glue really is the best for holding the rosette to a disc of cardstock, although strong tape could work too. When using hot glue, don't be tempted to blob a little in the centre of your disc as this won't do the job - you need a circle of glue with a hole in the middle. You'll see why!

5. When you've succesfully make one star, cut and score the pieces for a second star but don't assemble it - you can use this for further stars with no more drawing of diagonal lines; just fold and follow.

Have fun!


Wednesday, 8 November 2017

Hearts Come Home Crafty Friday projects


Crafty Friday was a packed one last week, so it was a challenge getting this card – more complex than our usual Crafty Friday projects – completed in time.

It’s inspired by the hugely talented Sandi MacIver, who created this beautiful project. For this CASEd version, I watercoloured the houses and trees but decided for Crafty Friday to switch to Whisper White cardstock and colouring with the new Stampin’ Blends for speed. I loved how everybody’s project turned out differently, so am kicking myself that I forgot to photograph them.

For the border, we mounted the Merry Music paper onto some cardstock and then cut out the centre to create a frame. But the middle bit wasn’t wasted, oh no...


We cut this into two 2" strips to create some cute matching tags. (I only managed one, hence the photo!)

Monday, 27 February 2017

All-Day Craftathon: Window Shopping workshop


I thought I’d skip Mix It Up Monday this week in favour of showing you what we made at the All-Day Craftathon at the weekend. The day was split into three classes, beginning with this one featuring the Window Shopping Bundle.

All the guests received the Window Shopping stamp set in their kit, which is tremendously versatile; in fact we used it in every class throughout the day. 
We began by making this fun box. It’s a slight variation on the hexagon box as it opens at the side, Pac-Man style...


You do this by cutting and reassembling the box pieces as shown below, then joining the two halves together at the side. You can download a tutorial here. 


Three tags go inside, using a tiny strip of the gorgeous Succulent Garden Designer Series Paper, which featured in all three workshops throughout the day.

And there’s a matching card, too. This is made simply by sponging colour onto the front of the card base, then overlaying the die-cut piece. Simple but effective.


This completed our morning activities, so we paused for a buffet lunch before moving on to the second class, which I’ll show you tomorrow...


Thursday, 17 November 2016

Merry Mice gift tags


Due to lack of time, I don’t really do commissions... but when a friend asked me to make her some boxes and tags, I felt that as I was only working two days a week, I could easily take it on.

What I hadn’t banked on was having my hours suddenly upped to four days a week, which was great... but meant that time was short for the box project.

I haven’t shown the full extent of the project here, partly because I used some retired products and partly because I forgot to photograph them. The challenge was to make four large boxes, and eight smaller ones. Naturally, I used the Gift Box Punch Board... my measuring skills aren’t up to making identical projects without it.

Painting the mice was the best bit for me as I do love watercolouring. These are the tags for the larger boxes; my Stitched Shape Framelits arrived in the nick of time, although not soon enough for me to die-cut the watercoloured layer.

Merry Mice are currently on offer at just £11.75 for the clear-mount set, or £15.75 for wood-mount. Click here to see all the products on offer throughout November

Stitched Shape Framelits are a brand new product, released early ahead of next summer’s Annual Catalogue. You can buy them now but don’t worry, they will be available after the end of the month, too. They’re perfect for Christmas tags, though, so you probably won’t want to wait.

The small print

This is my personal blog and my sole responsibility as an Independent Stampin' Up!® demonstrator. All images are © Stampin' Up!® All content including photographs, projects and text are © Helen Read, unless otherwise stated. Please feel free to copy my ideas for your personal use and inspiration - if you are a SU demonstrator you may use these ideas for your events but please give credit where it is due. Please do not use my ideas for monetary gain, competitions or publication. The images on this blog - including blog buttons - should not be copied and used elsewhere on the internet or on CDs.