When it comes to Christmas cards, you cannot beat the traditional Stampin’ Up!® colours of Garden Green and Real Red.
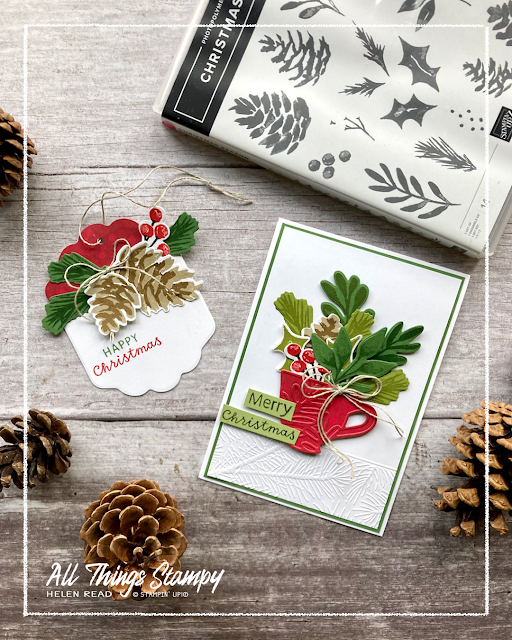
Today I have two Christmas projects which use these fabulously festive colours and the gorgeous Christmas Season stamp set, while showing a couple of fun tips to take your projects to the next level.
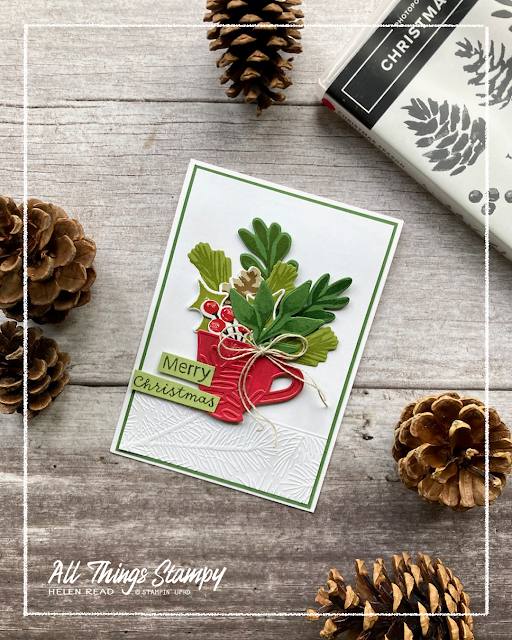
First up is this Christmas card which pairs two sets of Stampin’ Up!® dies which you may not have considered putting together. I happened to see the Cup of Tea stamp set next to Christmas Season on the shelf (I organise alphabetically) and had the idea to fill one of the cups with lots of festive foliage.
In the end I didn’t need the Cup of Tea stamps set, just the Teacup Dies, which I used to create a red cup from Boughs of Holly Designer Series Paper.
I stamped and die-cut lots of different leaves, using Garden Green ink and Old Olive ink on cardstock of the same colour, as well as stamping some on white to give it a lift.
The cup is popped up on Stampin’ Dimensionals so I could poke the leaves in the top. The double bow is created from linen thread and simply stuck on with a Glue Dot.
Where’s the fun technique I promised you? Take a look at the bottom strip. I embossed just a section of the white cardstock using one of the Stampin’ Up!® Wintry 3D Embossing Folders. This looked pretty fab as it was but to give it an extra lift, I then turned the cardstock over to score a line at the top of the embossed section, scoring from behind to create a raised line. I really like this technique and plan to use it lots more!
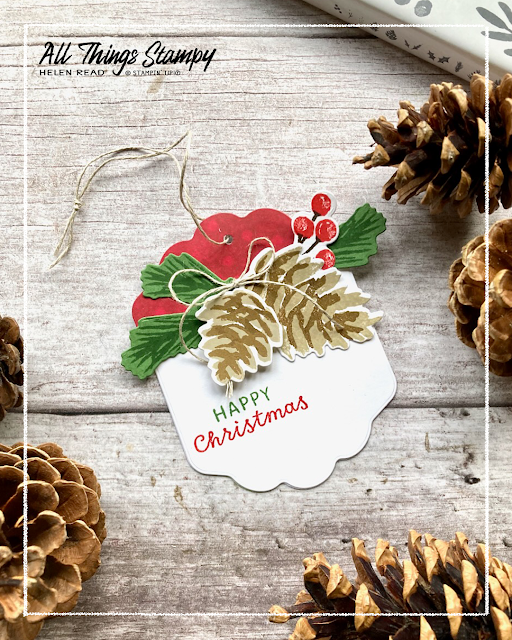
For my second project, I created a festive folding tag to match my card.
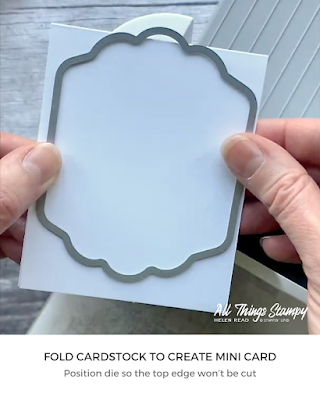
It’s easy to use any of your tag dies to create a folding tag. All you have to do is fold your cardstock first, then position your die so that it overlaps the folded edge. Die-cut your shape – I used the Seasonal Labels Dies from Stampin’ Up!® – to create your folding tag.
You can leave your tag as it is or, if you prefer, you can then disguise the flat side created by the fold. To do this, die-cut the shape again from Designer Series Paper – I used Boughs of Holly again – and trim it down. Use this trimmed piece to position on the front of the tag, to complete the shape and hide the folded edge.
Now you have a folded tag which you can decorate as you wish.
Once again I used the Christmas Season stamp set and Seasonal Labels Dies to create a lovely little cluster of pine cones and berries. I have a bit of thing for pine cones, as you can probably tell – they form the backdrop to all of my Stampin’ Up!® projects.
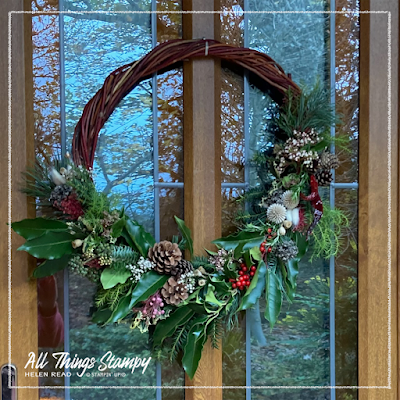
Finally, as we’re talking about Christmas foliage, please indulge me while I show off the Christmas wreath I made at a workshop on Saturday. People assume that because I make cards that something like this would come naturally to me but nothing could be further from the truth, so I’m quite proud of this.
If you like the look of any of the products you see here and would like to order, please
visit my store and, if you use the new December 2022 host code MDYHAHQF, I’ll send you a thank you gift in January.



.png)
.png)
.png)



No comments:
Post a Comment
Thank you so much for taking the time to comment.