Today I want to show you some fun effects you can create with ink. These
cards are all created with the Harvest Meadow Suite and some simpe
techniques.
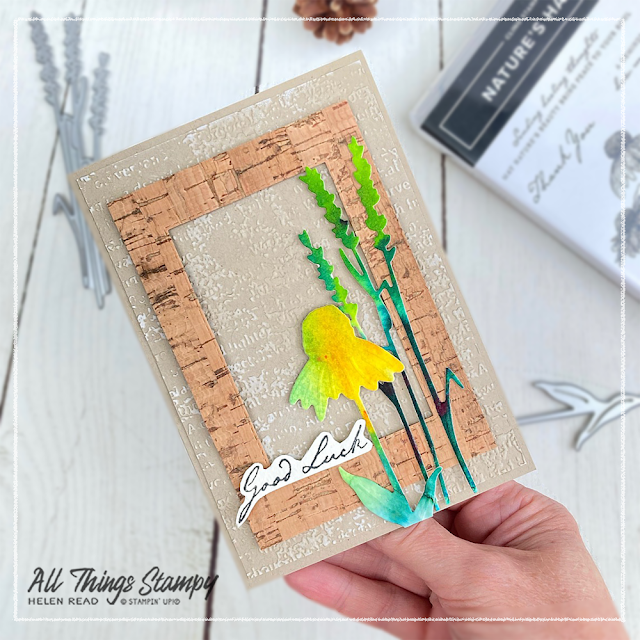
The first card is heavily inspired by the one on page 54 of the current Stampin’ Up!® Mini Catalogue.
I
love creating watercolour backgrounds and often get carried away,
making more than I need. Sometimes they don’t look like I want them to
so I store all of these extras for future craft sessions. It was in
this stash that I found this colourful yellow piece with some lovely
rich greens which I thought would be perfect for the project.
I
mounted the flowers onto a border created with Stitched Rectangles Dies
and the beautiful Cork Speciality Paper, which is absolutely gorgeous.
It’s a little pricey at £7 for two 12x12 sheets but a little goes a long
way – for instance, the piece I cut out of the centre here will give me
accents for three or four more projects.
The background of the card is embossed using the Timeworn Type 3D embossing folder, then swiped with Whisper White Craft Ink to make the embossed areas stand out a little more. I'm really happy with the way it turned out and if you'll forgive me blowing my own trumpet for a moment, I think I prefer my version to the one in the catalogue!
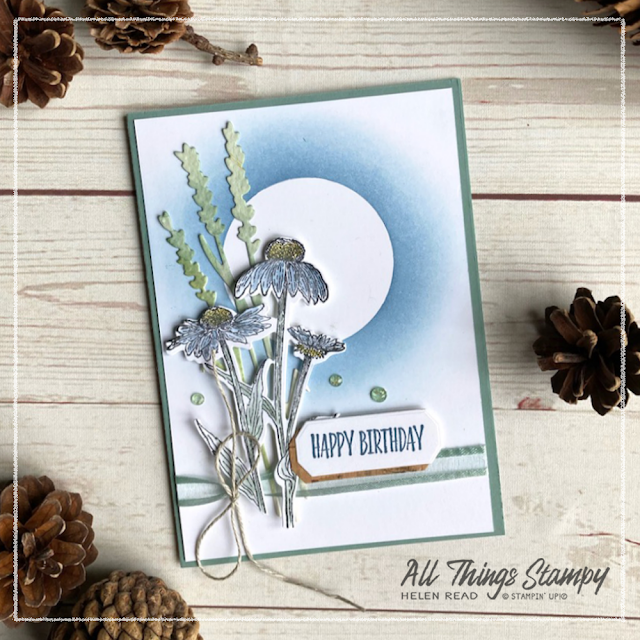
The next two cards are really simple to create using our lovely Blending Brushes. All I did was swirl the ink with the brush in the centre of the card, in a circular motion, to create this soft oval of colour. The trick here is to keep going – most people give up too early and end up with wishy-washy, uneven colour.
Once I was happy with the colour saturation, I splashed a little water over the top. This is one of my favourite techniques and I love how it turns out. Bigger drops equals bigger splashes (I know, who knew, right?) so start small if you're not feeling confident.

These blended backgrounds provide a stunning backdrop for the crisp white die-cut flowers and grasses.
You can cut your die-cut shapes up further. There are only two stems on the grasses on these cards because I trimmed one off to provide more balance.
If you are in the UK and would like to order, please To order these or any other current Stampin’ Up!® products from my store, please shop using this link


No comments:
Post a Comment
Thank you so much for taking the time to comment.