This Evergreen Forest 3D Embossing Folder delivers SO much more than it seems
to at first glance. Yes, it looks great when used on green cardstock,
and super-classy when used on crisp white cardstock but stop! Why not
have a bit of fun with it?
I saw these beautiful designs by Barry and Jay at Mitosu Crafts and couldn’t resist having a go myself. It’s just a simple case of embossing then sponging on some colour.
For the blue card, I used Seaside Spray, Misty Moonlight and just a hint of Night of Navy in the corners.
For the purple version, I used Highland Heather, Gorgeous Grape and just a hint of Blackberry Bliss in the corners and at the base.
Next I
took some diluted Whisper White Craft Ink (about 1:1) and, using a small
paintbrush, spattered it across the sponged sections. And they’re
finished off with some Adhesive-Backed Snowflakes which I absolutely
adore.
The Foam Adhesive Sheets are ideal when die-cutting this tree. It may feel a bit fiddly to press out but that’s because the die may not have gone all the way through to the backing sheet, but if you peel the tree out carefully it will be perfectly fine. And it looks so much more professional without all those fiddly little bits of cut-up Stampin’ Dimensional on the back.
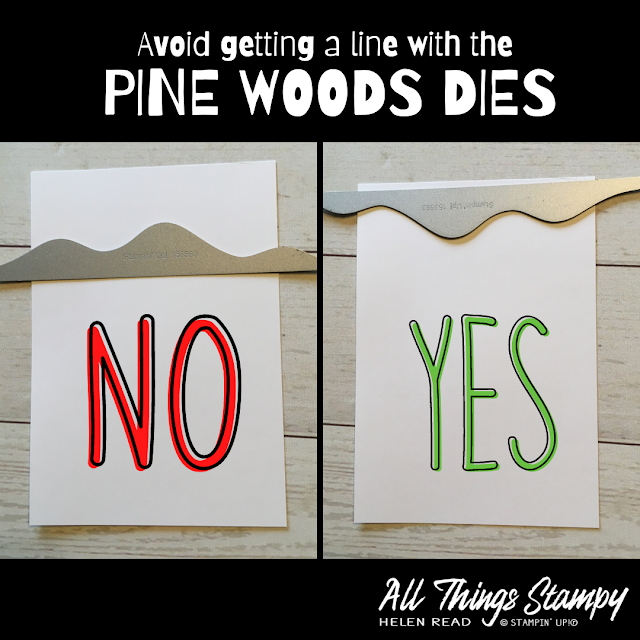
When I was cutting the snowy hill using these dies, I kept getting an unsightly embossed line where the edge of the die had been. Then I had a light-bulb moment and realised I was using them upside-down. Use them as I have done in the pic on the right, and the embossed line will be on the piece you discard (unless you wish to trim it off and have a smaller hill for another project).
So what do you think? Are you going to have a go at sponging this gorgeous embossing folder? Which colours do you prefer?


Gorgeous.....love both of them.
ReplyDeleteThank you!
DeleteBeautiful cards. I love that embossing folder.
ReplyDeleteMe too! It's stunning left in white, too
Delete