As soon as I saw the gorgeous In the Moment stamp set, I knew I wanted
to run a class with it. In fact, I am running not one but three different classes
with it, as I transition into my new system of showcasing a stamp set
each month.
My first event was a fun evening on Zoom combining
this fab set with the technique of paper piecing and beautiful
Expressions in Ink Designer Series Paper (which is retiring and I
believe has now sold out).
Tuesday, 26 April 2022
Four ideas for In the Moment stamp set
Tuesday, 19 April 2022
Card design basics using On the Horizon
As a Stampin’ Up!® demonstrator, I’m often told that card design is a
struggle and some people can only get results they are happy with by
copying. Well I’m here to help!
In today’s blog post – and on my Facebook and Instagram posts all week – I will be sharing foolproof tips for
designing cards, along with sketches, colour coordination and even a
little bit of maths.
Tuesday, 12 April 2022
LOTS of card ideas using Memories & More cards
Tuesday, 5 April 2022
Simply Succulents Flowerpot Pocket Card (with tutorial)
Sometimes it’s fun to revisit old designs with newer Stampin’ Up!® stamp sets and this is exactly what I did for my Crafty Friday class this month, by making a flowerpot pocket card using the Simply Succulents stamp set.
Tuesday, 29 March 2022
50+ projects showcasing 10 retiring Stampin’ Up!® stamp sets!
It’s retiring time! Stampin’ Up!® is having a massive clearout of the warehouse to make way for brand new craft products! This means hundreds of products – stamp sets, punches, dies, papers, ink pads, ribbons, embellishments and more – are on the last chance list, many of them reduced by up to 50%.
Tuesday, 22 March 2022
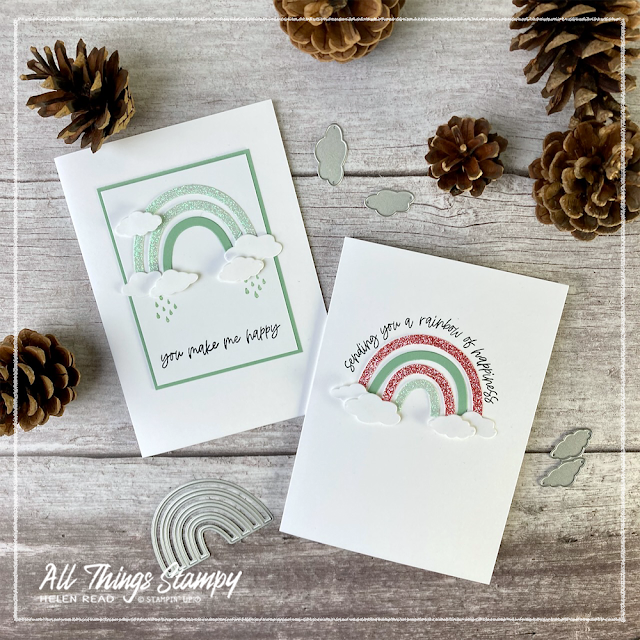
Sparkly rainbows using Rainbow of Happiness bundle
We all need more rainbows and glitz in our lives, don’t we? And I love the addition of this Summer Shimmer paper to create these subtle yet glamorous rainbows using the Rainbow of Happiness bundle from Stampin’ Up!®
Tuesday, 15 March 2022
13 projects using the Grassy Grove bundle from Stampin’ Up!®
As a Stampin’ Up! UK demonstrator, I get to see new products early, so
I’ve been lusting after this Grassy Grove bundle since way back in
December.
Finally I can show them off – so here are 12 projects using the Grassy Grove stamp set and Grove Dies. I haven’t included tutorials – please appreciate that these projects were exclusively created for the guests at my event. Nevertheless, I hope you love them as much as I do!
We began with this light-up card, which fits in a standard postage mailing box and will send in the UK as a Large Letter. This is the project I had in mind from the moment I laid my eyes on the Grassy Grove bundle.
I’ve used tiny fairy lights within a box, covered in vellum and surrounded by white cardstock die cut with Grove Dies.
Inside the box is a background of Designer Series Paper. Check out the video to see how it looks simply by changing the colour of this paper. The yellow really makes it glow with a lovely sunset-like warmth.
Our second project was this fancy fold which is so easy to make. Again, simply changing the Designer Series Paper can give the card a completely different look.
This is a really simple fun fold which is simply made from two card bases. One is cut slightly smaller and inserted into the first with the fold on the right. So, as you can see in the video, you just open the card as normal to reveal the next layer, then open the ‘backwards’ card to reveal the message inside.
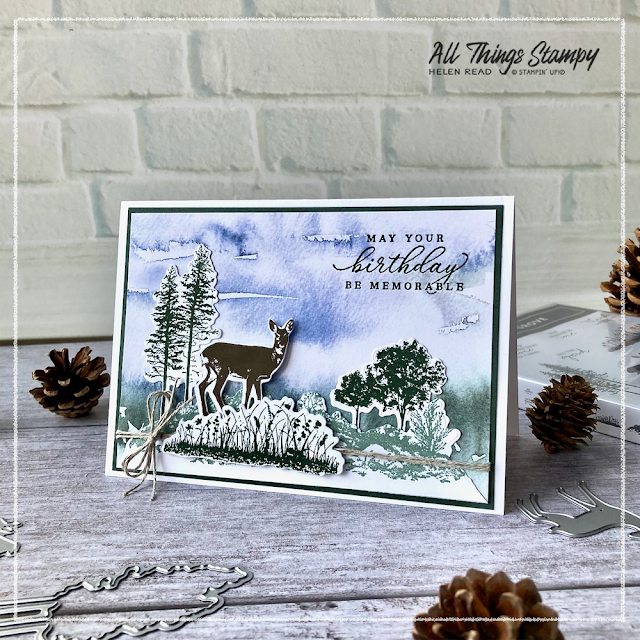
The deer are die cut from Designer Series Paper and sponged/brushed with ink to darken the silhouettes. This meant everyone could make their deer match their projects, without me having to send out lots of scraps of different coloured cardstock.
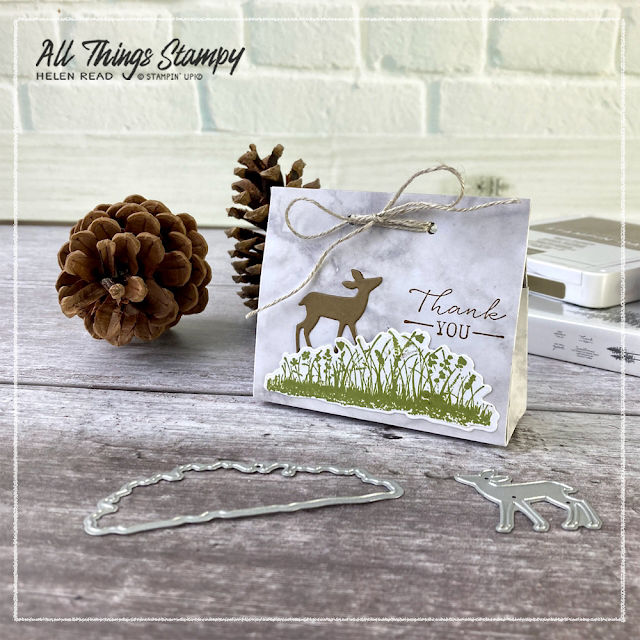
As well as their stamps, dies, craft supplies and snacks for the day, I also sent everyone a bar of natural vegan guest soap, so they would have something to pack into this little gift bag. The bag is made from a single sheet of 6"x6" Designer Series Paper, which we decorated using stamps and die-cut shapes from our bundle. These would make ideal table favours for any special occasion.
The Grassy Grove bundle is perfect for creating “scene” cards like this one. I used a sheet of Designer Series Paper as a background then overlaid the various elements on top.
I’ve stamped these in Old Olive and Mossy Meadow, two of
my favourite greens, with a Soft Suede deer, all finished off with some
linen thread.
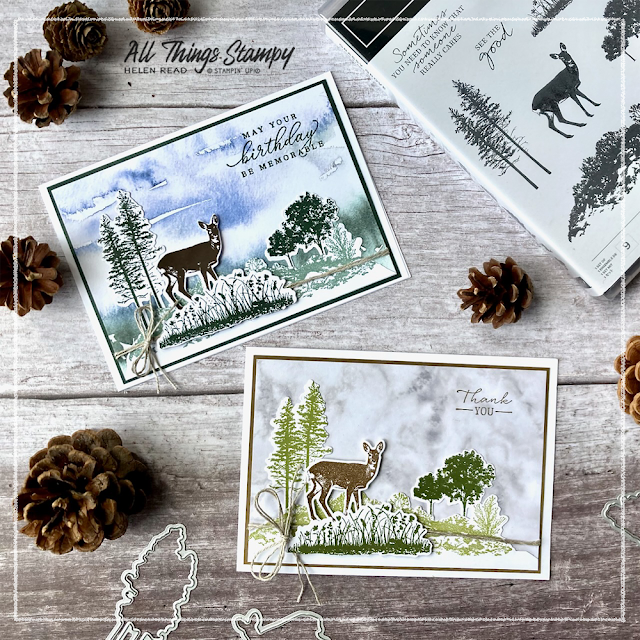
To mix things up a little, I made another version of this card using New Horizons Designer Series Paper. This wasn’t available when I was planning my projects, but I have it now and don’t like making the same card twice so created this one on the day.
This time I have stamped in Soft Succulent, Evening Evergreen and Early Espresso, for a much bolder look. Here they are together... for comparison.
Whatever events I run, I always start with the most complicated projects and work my way down to the simplest. This means we get the difficult crafting out of the way early on and can relax into the day. It also means if anyone has to dash off early, they have had help on hand for the challenging bits and can finish off their projects unaided.
So the next few projects are nice and simple, so everyone could chat and craft at the same time.
This is actually a variation of this Christmas card I made last December – and I don’t think anyone noticed!
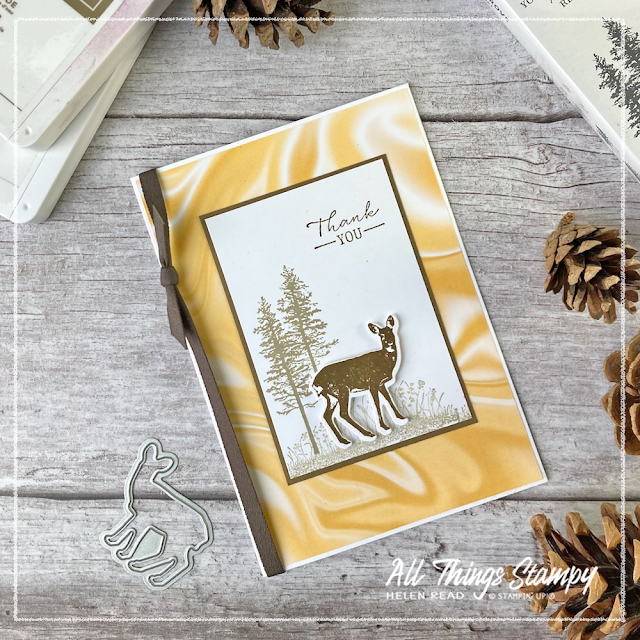
This is the version from the class, using Simply Marbleous paper in So Saffron and Bumblebee. I’ve stamped in Crumb Cake, stamping off for the grass to make it paler.
And this is my alternative version, using New Horizons paper. I’ve covered the whole card front using the paper as this is my favourite way to use DSP at the moment, and stamped using Soft Succulent, Crumb Cake and Soft Suede.
A simpler version is this card, with no die cutting at all, just stamping...
This would be really quick to turn out, especially if you used the Stamparatus for the grasses and deer, and just stamped the trees freehand.
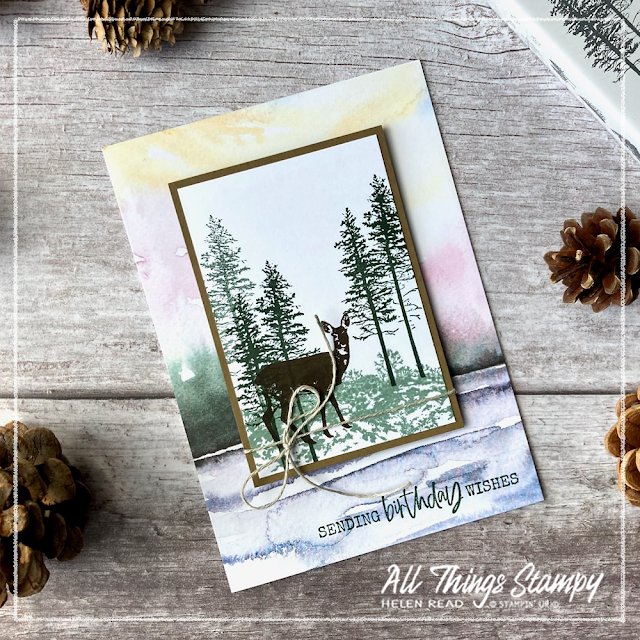
I particularly love the alternative version here, using New Horizons paper and stamping in Soft Succulent, Evening Evergreen and Early Espresso. The greeting comes from Wildlife Wonder and makes this the ideal masculine birthday card.
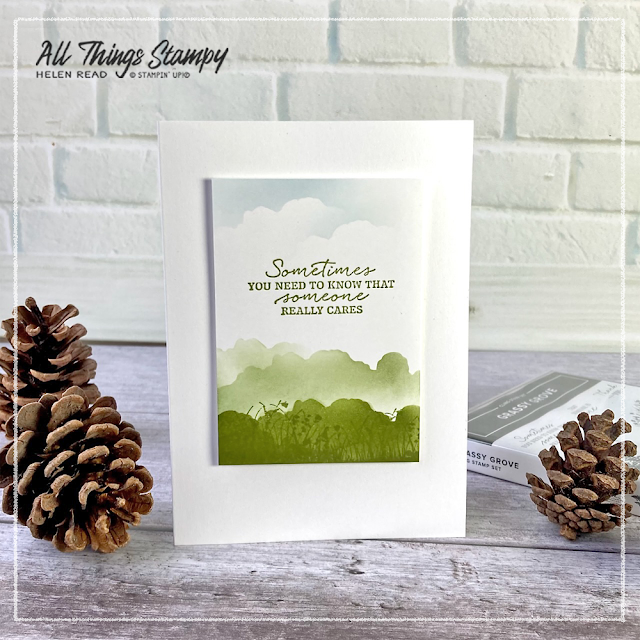
You don’t have to use deer on your projects all the time though; this really simple card uses one of the die-cut shapes as a mask to create layers of greenery at the bottom of the panel, which are over-stamped with grasses.
The clouds are created by using the template, that’s the piece of cardstock left behind after die cutting. This is again used as a mask with some very light brushing of Pool Party to evoke the sky.
Finally, here’s one I made earlier... another Grassy Grove project using New Horizons Designer Series Paper to show just how perfect these products go together.
I hope you have enjoyed my Grassy Grove projects and are inspired to make your own. While the Simply Marbleous paper is no longer available as it was a Sale-a-Bration freebie, I highly recommend the New Horizons Designer Series Paper to coordinate with this bundle and many other products you are sure to have in your craft stash.
If you are in the UK and would like to order these or any other products, please
visit my store and, if you use the current host code UDVDUXFH, I’ll send you a thank you gift in the following month.
Tuesday, 8 March 2022
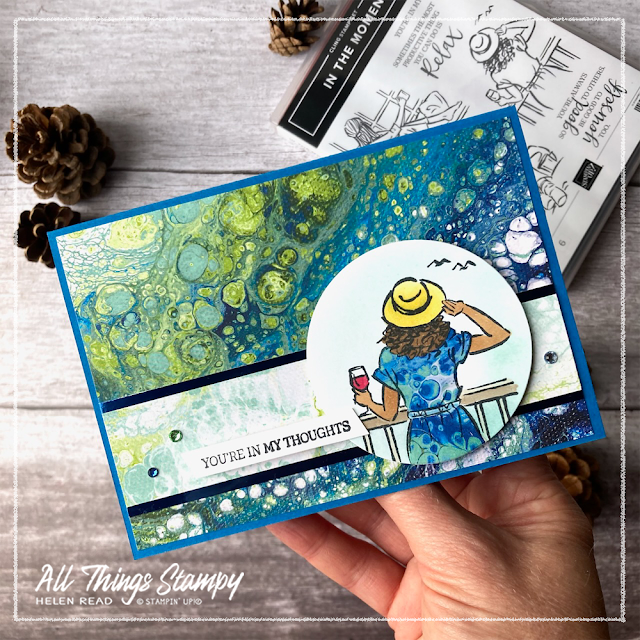
In the Moment meets Waves of the Ocean for International Women’s Day
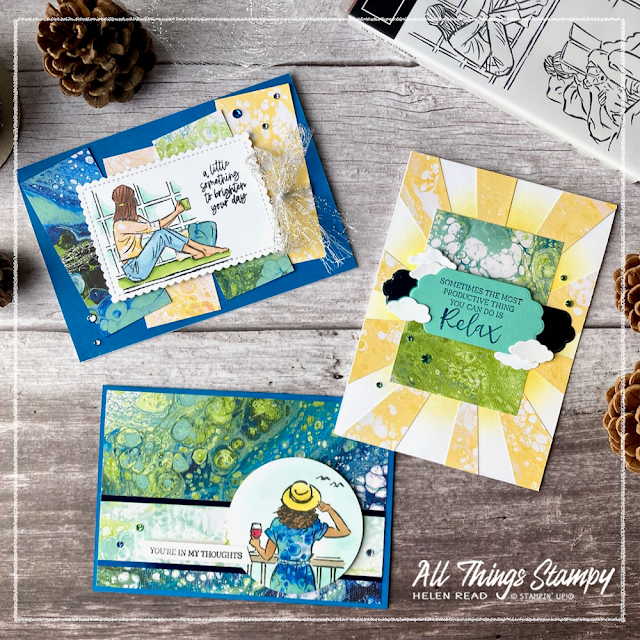
When you planned to use the In the Moment stamp set to celebrate International Women’s Day but you also want to show off your new Waves of the Ocean Designer Series Paper... THIS is what you come up with.
I love the marble patterns of this gorgeous paper in its rich blues on one side and tropical pastels on the reverse. Naturally, as someone who frequently shuns pastel shades, I am drawn to the richer colours so used this stunning green and blue piece as the background to this card.
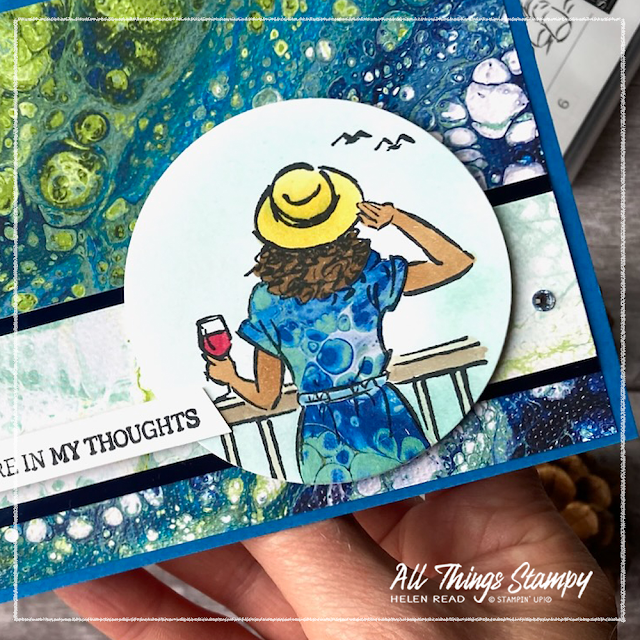
Rich Blue Foils (another new product only available while supplies last) add some shine to the horizontal strip and the image is cut out using Layering Circle Dies to break up the hard lines.
I’ve coloured the image using a combination of Stampin’ Blends, including some of our new Natural Tones, and paper piecing. This is a simple technique which means you stamp the image again on to Designer Series Paper and cut out the shapes. Here I’ve cut out the shape of the dress and overlaid it onto the first stamped image; I love how this gives the dress a really natural look of printed fabric.
This is one of three images of women in relaxed poses in the beautiful In The Moment stamp set, available to Stampin' Up!® UK customers in the current Jan-June Mini Catalogue, is perfect for creating cards for all the fabulous women in your life.
Waves of the Ocean is a new pack of Designer Series Paper which is only available while supplies last. The designs were created by Stampin’ Up!® artists who look like they’re having lots of fun in this video. This beautiful patterned paper is designed to coordinate with our new Waves of Inspiration stamp set and die bundle which is an early release ahead of the upcoming Stampin’ Up!® Annual Catalogue. However, it is versatile enough to work well with lots of other stamp sets, such as In the Moment as I’ve used here.
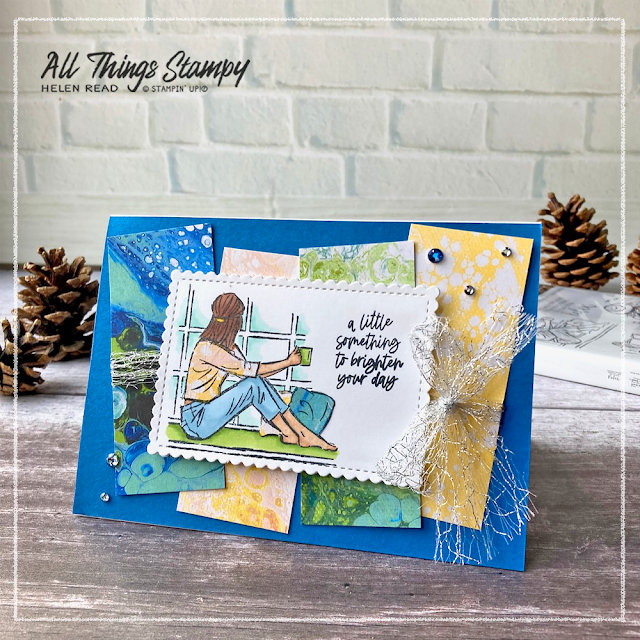
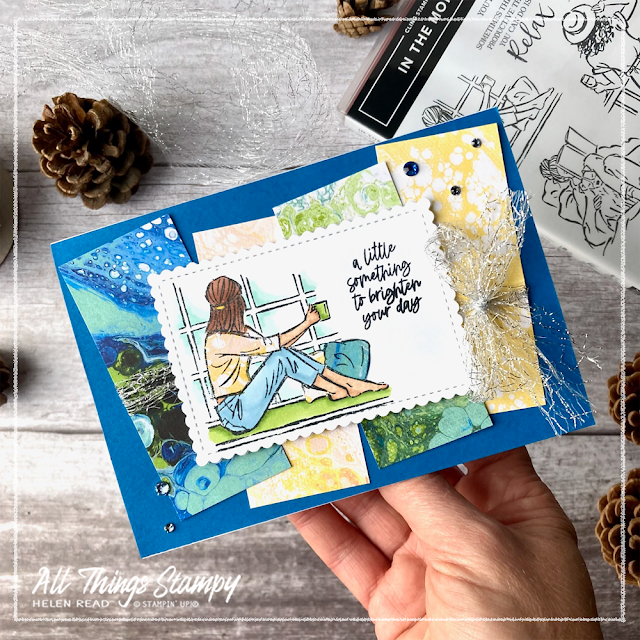
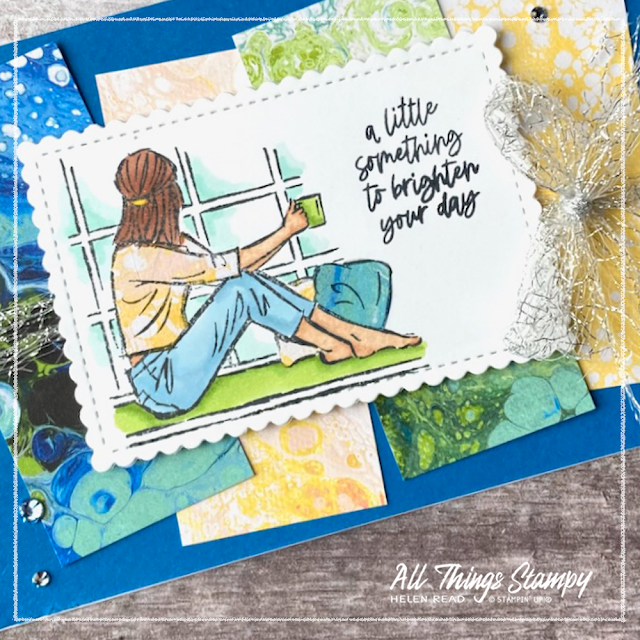
For my second card I used the image from In the Moment of the lady sitting on the window seat enjoying a cuppa and a look at the view. I’ve cut this one out using Stitched So Sweetly Dies, which left the perfect space for this sentiment from the Rainbow of Happiness stamp set.
To show off as several designs of patterned paper from Waves of the Ocean, I cut strips and overlapped them at jaunty angles. I finished off with some silver Metallic Mesh Ribbon and Rhinestone Waves Basic Jewels (trust me, there’s nothing basic about these!).
I’ve used the paper piecing technique again here, adding pattern to the T-shirt and cushions to link the main image to the background designs.
If you want to know where all those tiny pieces of Waves of the Ocean Designer Series Paper came from for the paper piecing, take a look at this card, which goes in a very different direction...
It’s a variation on the card on the Stampin’ Up!® website, which looks like this:
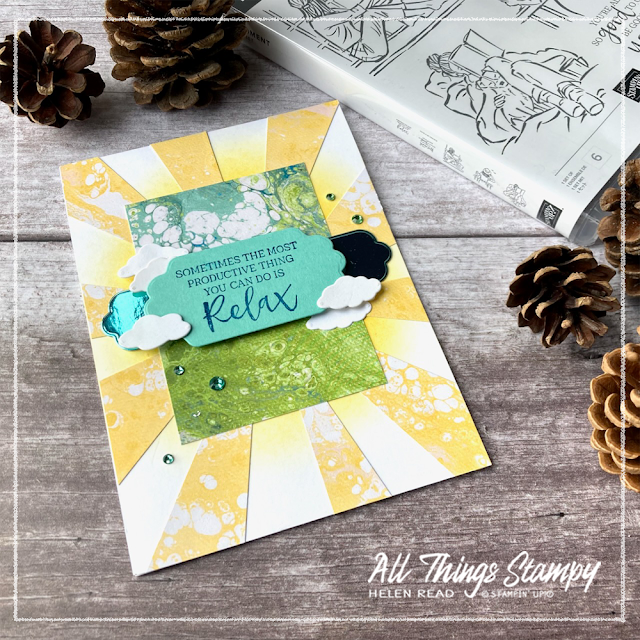
My version uses the same paper pattern, with the blending brush behind, but I don’t have the Waves of Inspiration bundle so I compromised by using Seasonal Labels dies and the small clouds from the Brilliant Rainbow dies. The greeting comes from In The Moment.
The starburst pattern is created by making a starburst mask (or drawing lightly in pencil directly onto your patterned paper if you’re feeling brave). I explain how to do this in this blog post.
This created lots of scraps of paper which I retained for the paper piecing you see above, to reduce waste.
I hope you like my In the Moment/Waves of the Ocean cards for International Women’s Day and are inspired to create your own. If you are a crafter in the UK and would like to order any of the products you see here, you can
order at any time, day or night, via my
Stampin’ Up! store. If you do this and use the March host code UDVDUXFH I will send you a thank you gift next month. Plus I will donate 10% of the purchase price (excluding shipping) to the British Red Cross Ukrainian Crisis Fund.
Tuesday, 1 March 2022
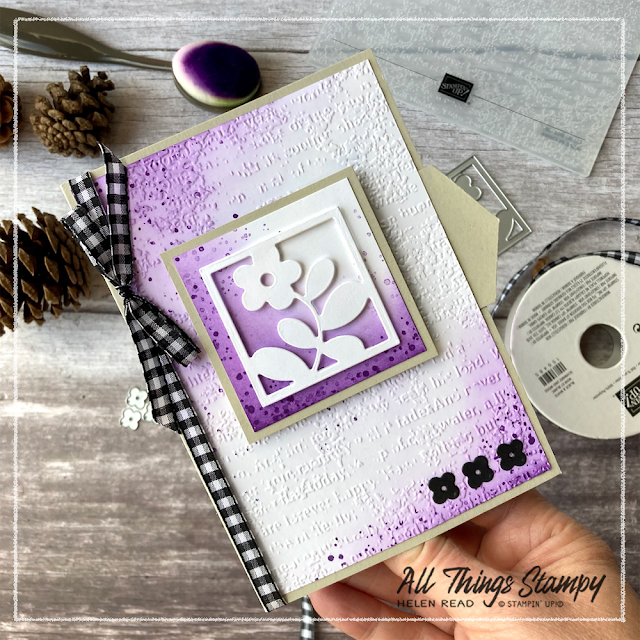
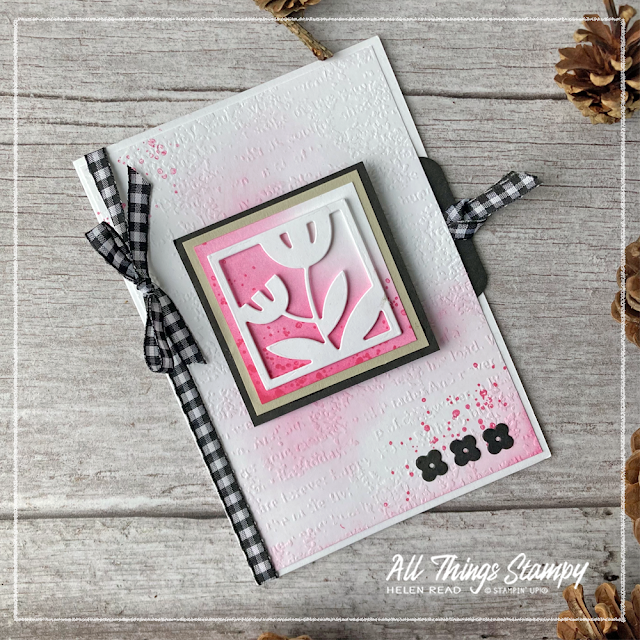
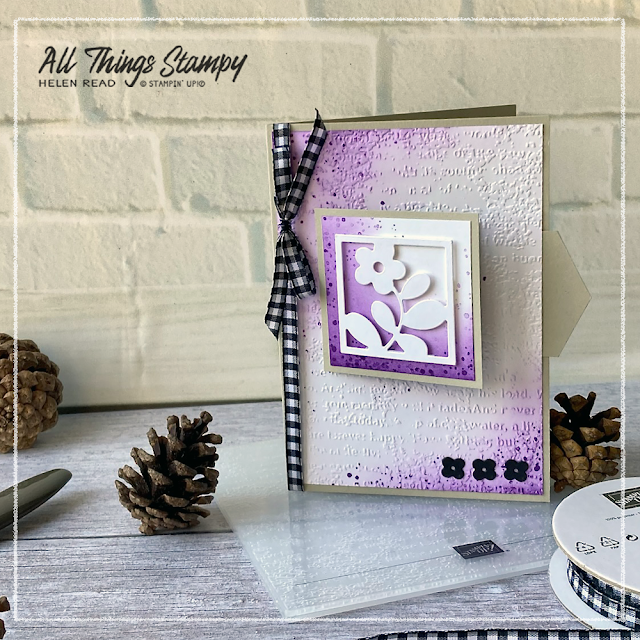
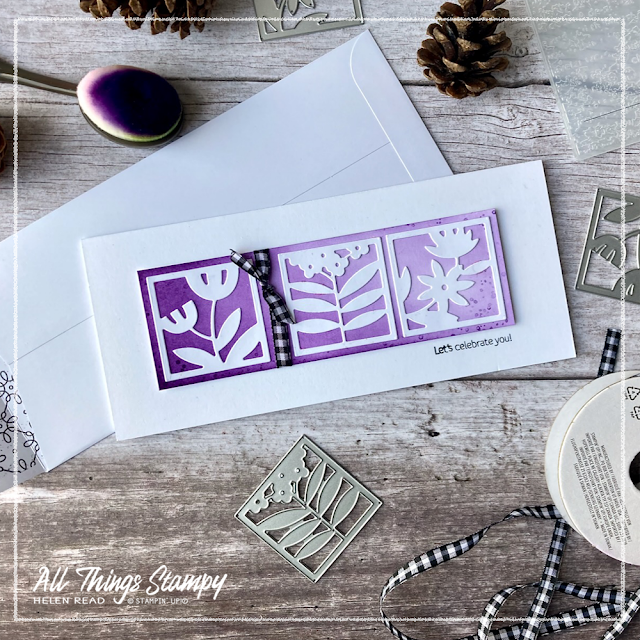
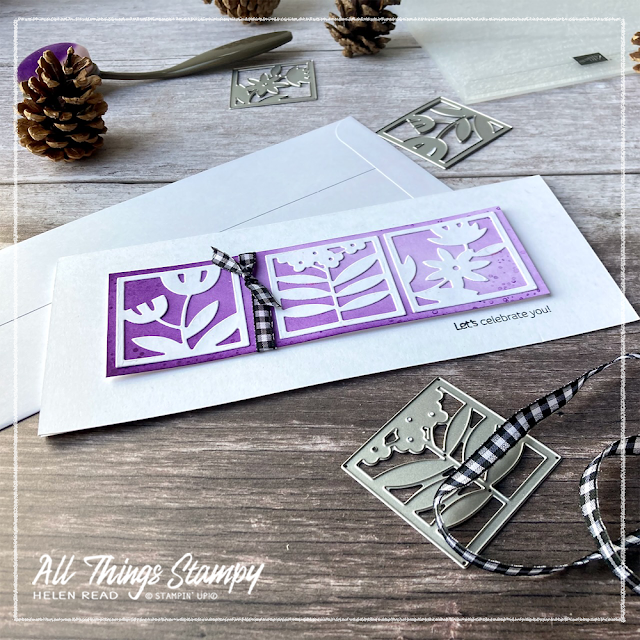
Floral Squares Dies fancy fold and slimline cards
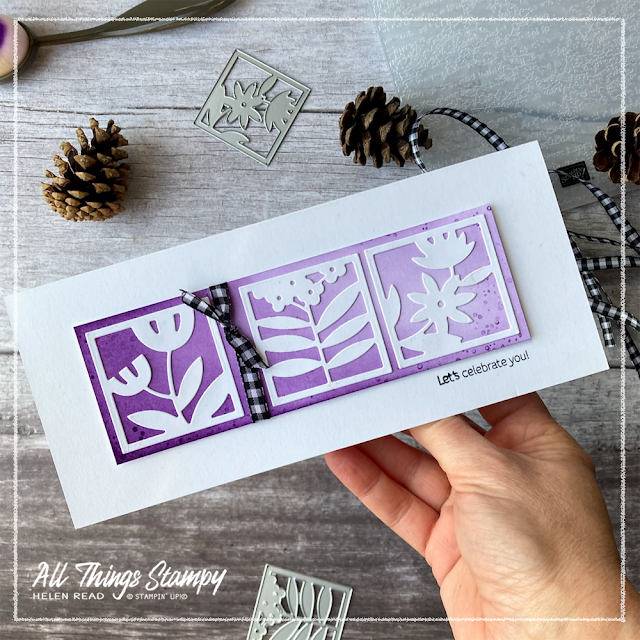
Our second card was much more straightforward and uses our new Stampin’ Up!® Slimline Envelopes. Slimline cards are really on trend right now so these envelopes are a welcome addition to our collection.
I’d love to know what you think. Do you prefer the pink or the purple? Will you have a go at this fun fancy fold card, or will the simpler slimline card be on your to do list instead?
Monday, 21 February 2022
Zero Waste Friends of the Forest project – and tips for reducing waste
Reducing waste and minimising our impact on the planet is a big passion of mine and my Stampin’ Up! UK customers – so I thought I’d make a theme of it for my social media posts this week with projects and tips all week long. Please visit my Facebook page or Instagram to get the full experience!
The starting point for this themed week is my very first Instagram Hop, on the theme of Zero Waste. Please visit my Instagram page to find the others in the hop.
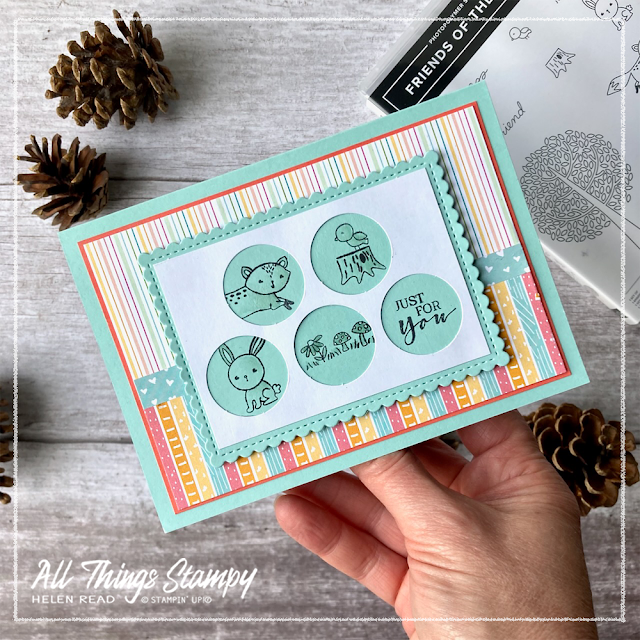
There’s a bit of a back story to my hop project. I went away last weekend and took the Light the Candles Kit with me for some relaxing crafting. I love these kits as you don’t have to think! And everything gets used, with very little waste.
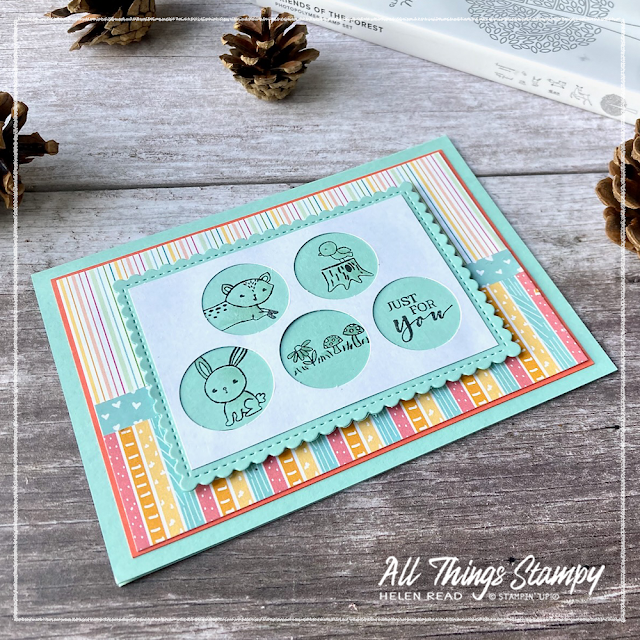
However, there was a small amount of paper waste left over once I’d completed the kit and just as I was about to put it into the recycling bag, I had an idea for this Zero Waste project.
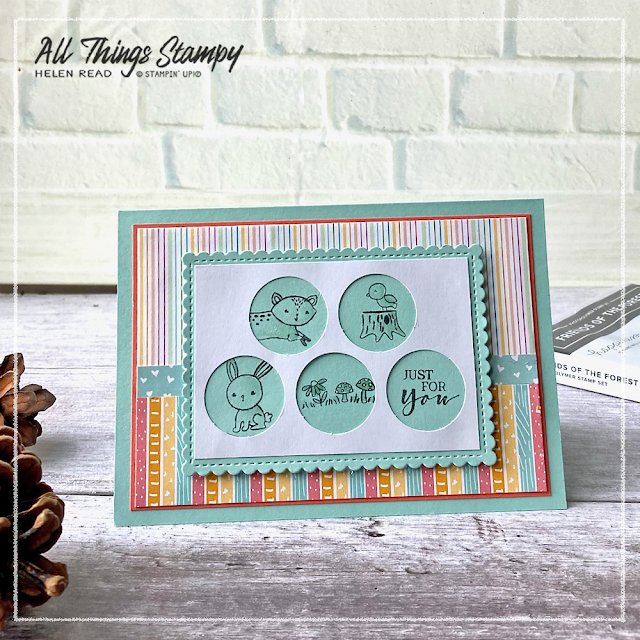
I searched through my stamp collection to find Friends of the Forest; the little creatures are just the right size to peep through the circles.
I didn’t want to stamp them onto white as I
knew the white wouldn’t match the paper from the kit but I thought Pool
Party (one of my favourite colours) was a nice compromise here and goes well with Sunshine &
Rainbows Designer Series Paper, a Sale-a-Bration product which is free
with a £45 order until the end of February.
Originally I had
planned to stamp the images directly onto the back panel but that was
never going to work as they would overlap. To save making more waste by
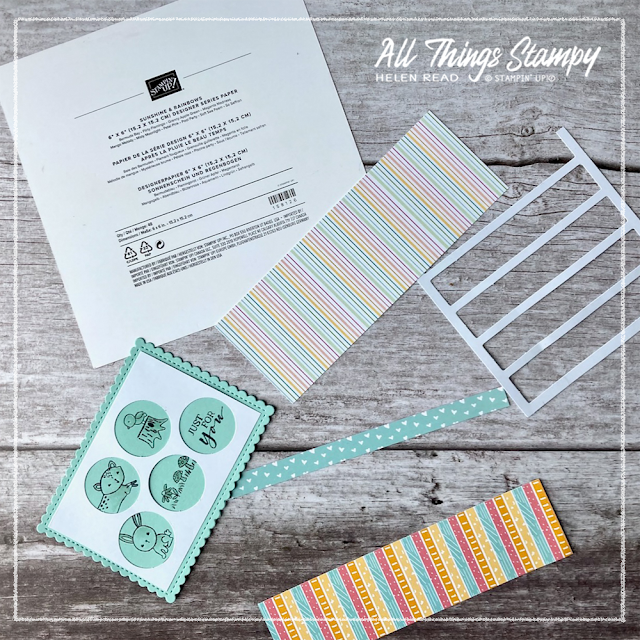
trying this several times, I stamped each animal onto a small piece of
Pool Party card so it could be positioned accurately with no overlapping
ink. However, these were all taken from my scraps box.
I also used scraps of Sunshine & Rainbows Designer Series Paper for the background. I managed to find pieces which were almost the right size so hardly had to trim these at all. In another attempt to reduce waste, I mounted these onto the backing piece from the DSP pack, then cut it to size before adding to the card.
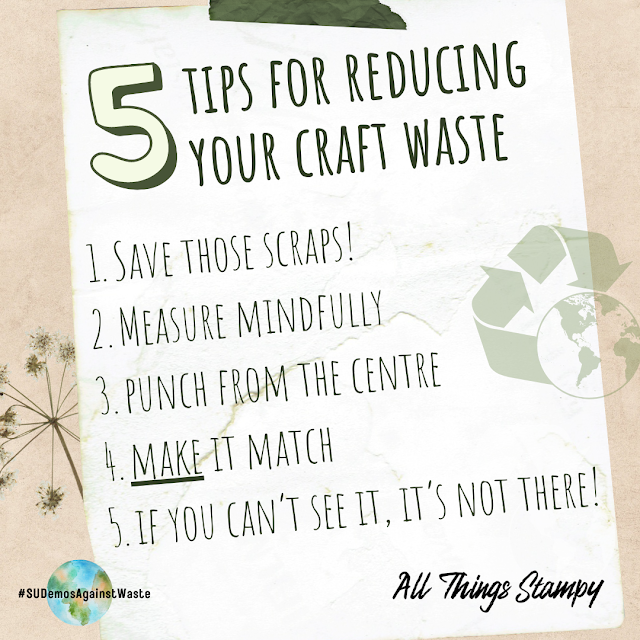
Here are some great tips for reducing waste when you craft:
1.
Save those scraps! Narrow strips are good for stamping greetings.
Smaller scraps can be used to make tiny punched shapes for confetti or
embellishments.
2. Measure mindfully. When creating multiples of
a project, think how you can cut your cardstock up into equal pieces to
avoid waste. With A4 cardstock, this could be 7cm x 9.9cm layers which
mean you get nine equal shapes from one sheet.
3. It’s in our
nature to die-cut and punch shapes up to the edge of a piece of
cardstock to avoid waste... but you can actually avoid waste by cutting
from the centre, as this means you can use the leftover piece as a
layer.
4. Have Designer Series Paper you don’t love, or which
doesn’t go with your project? Stamp on it, sponge it, colour it – you
can MAKE it match.
5. Finally, remember: if you can’t see it,
it’s not there. Cut out centres of cardstock layers and use on another
project. Don’t wrap ribbon all the way around layers or cards; just tape
it behind where you can’t see.
If you love any of the products
you see here and are in the UK, please consider shopping at my online
store as every order helps to support my small business. As a thank you, if you use the February 2022 host code 2FYQAK7T, I’ll send you a thank you gift in the following month.