Showing posts with label Pool Party. Show all posts

Monday, 21 February 2022

Zero Waste Friends of the Forest project – and tips for reducing waste

Stampin up uk Friends of the Forest

Reducing waste and minimising our impact on the planet is a big passion of mine and my Stampin’ Up! UK customers – so I thought I’d make a theme of it for my social media posts this week with projects and tips all week long. Please visit my Facebook page or Instagram to get the full experience!

The starting point for this themed week is my very first Instagram Hop, on the theme of Zero Waste. Please visit my Instagram page to find the others in the hop. 

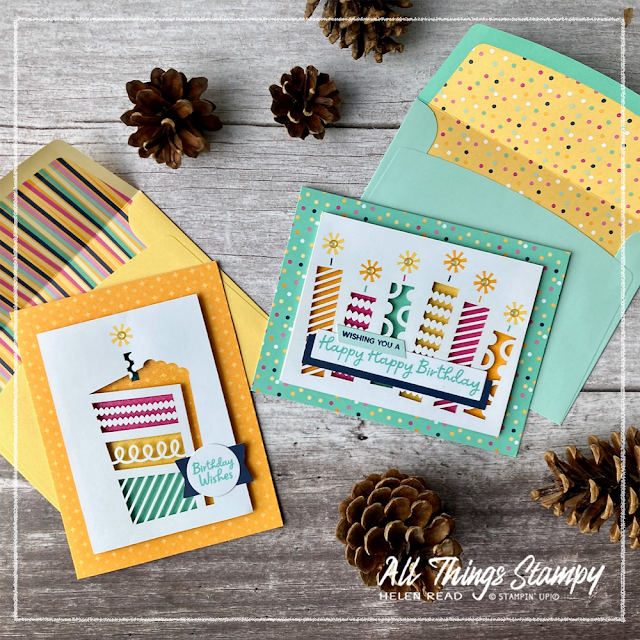
There’s a bit of a back story to my hop project. I went away last weekend and took the Light the Candles Kit with me for some relaxing crafting. I love these kits as you don’t have to think! And everything gets used, with very little waste. 

Stampin up uk Light the Candles card kit
 

However, there was a small amount of paper waste left over once I’d completed the kit and just as I was about to put it into the recycling bag, I had an idea for this Zero Waste project. 

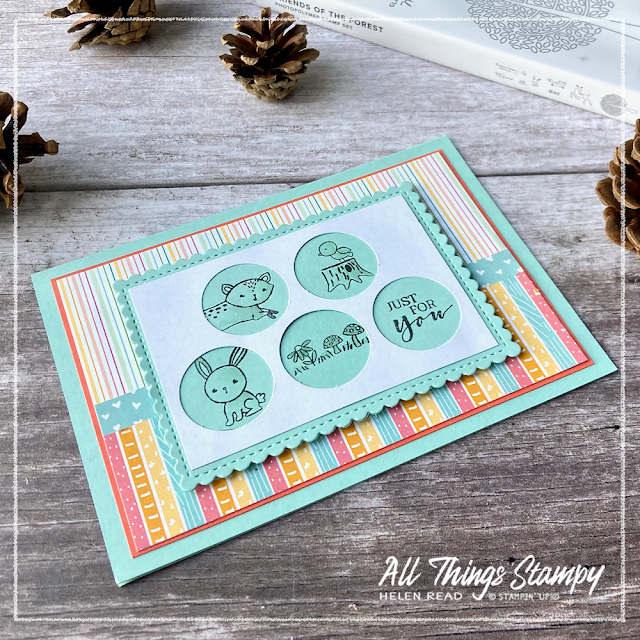
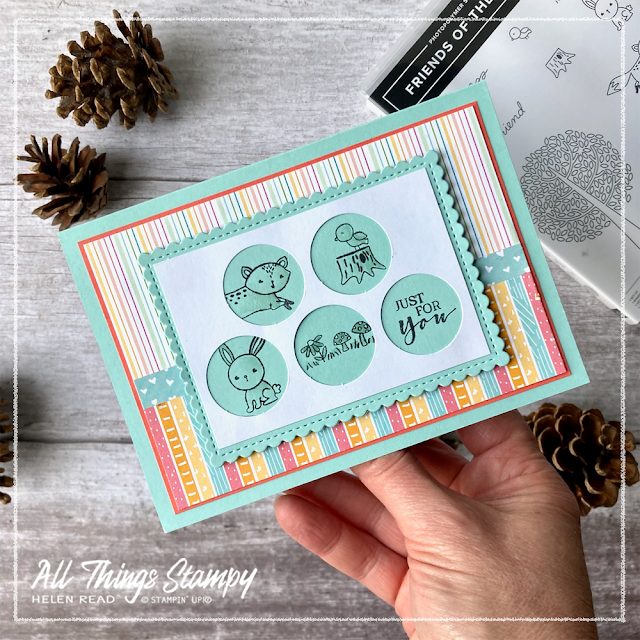
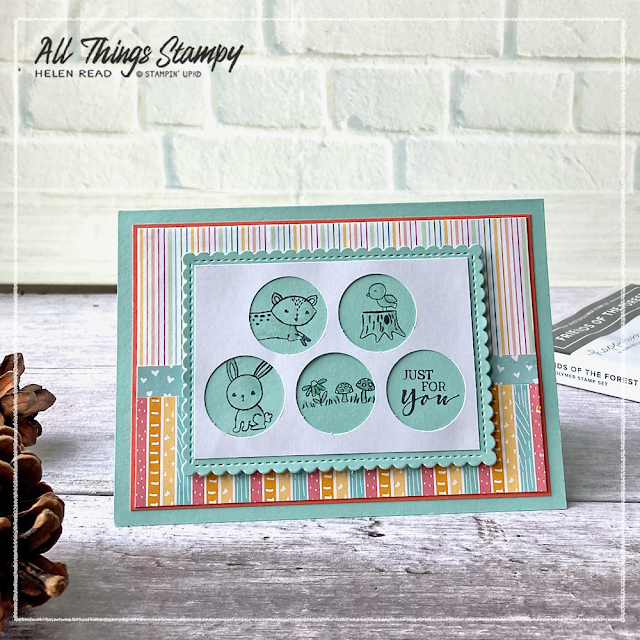
I searched through my stamp collection to find Friends of the Forest; the little creatures are just the right size to peep through the circles. 

Stampin up uk Friends of the Forest 

I didn’t want to stamp them onto white as I knew the white wouldn’t match the paper from the kit but I thought Pool Party (one of my favourite colours) was a nice compromise here and goes well with Sunshine & Rainbows Designer Series Paper, a Sale-a-Bration product which is free with a £45 order until the end of February.

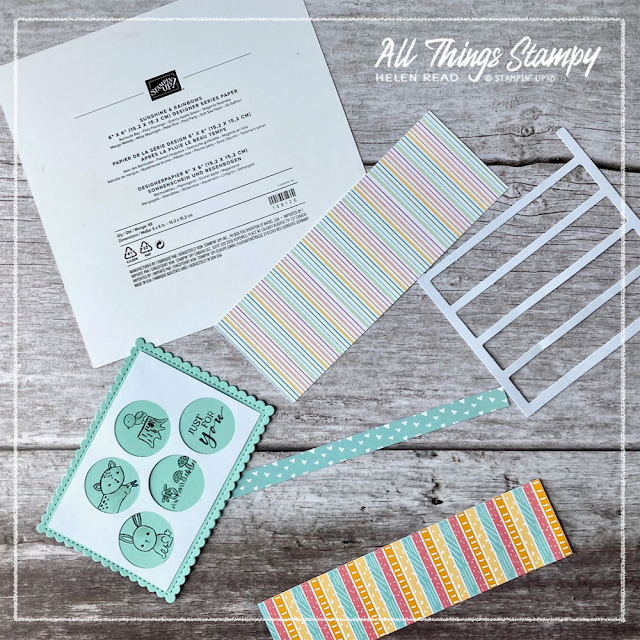
Originally I had planned to stamp the images directly onto the back panel but that was never going to work as they would overlap. To save making more waste by trying this several times, I stamped each animal onto a small piece of Pool Party card so it could be positioned accurately with no overlapping ink. However, these were all taken from my scraps box. 

Stampin up uk Friends of the Forest 

I also used scraps of Sunshine & Rainbows Designer Series Paper for the background. I managed to find pieces which were almost the right size so hardly had to trim these at all. In another attempt to reduce waste, I mounted these onto the backing piece from the DSP pack, then cut it to size before adding to the card. 

Stampin up uk Friends of the Forest

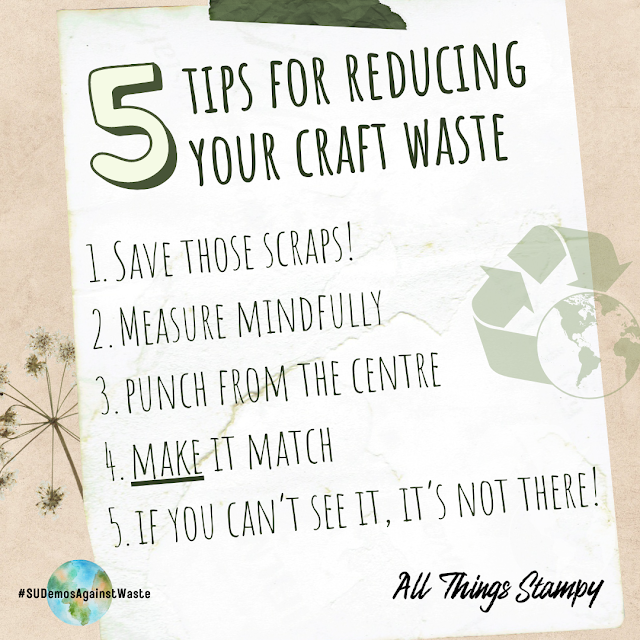
Here are some great tips for reducing waste when you craft:

1. Save those scraps! Narrow strips are good for stamping greetings. Smaller scraps can be used to make tiny punched shapes for confetti or embellishments.

2. Measure mindfully. When creating multiples of a project, think how you can cut your cardstock up into equal pieces to avoid waste. With A4 cardstock, this could be 7cm x 9.9cm layers which mean you get nine equal shapes from one sheet.

3. It’s in our nature to die-cut and punch shapes up to the edge of a piece of cardstock to avoid waste... but you can actually avoid waste by cutting from the centre, as this means you can use the leftover piece as a layer.

4. Have Designer Series Paper you don’t love, or which doesn’t go with your project? Stamp on it, sponge it, colour it – you can MAKE it match.

5. Finally, remember: if you can’t see it, it’s not there. Cut out centres of cardstock layers and use on another project. Don’t wrap ribbon all the way around layers or cards; just tape it behind where you can’t see. 
Stampin up uk tips for reducing waste
 

If you love any of the products you see here and are in the UK, please consider shopping at my online store as every order helps to support my small business. As a thank you, if you use the February 2022 host code 2FYQAK7T, I’ll send you a thank you gift in the following month.


Does your wish list come to more than £99? Please get in touch and I will help you get more for your money and unlock discounts all year round.  


Monday, 6 January 2020

Painted Poppies simple desk calendar


A simple calendar which fits inside a standard envelope so you can post it as a card. Perfect for those January birthdays.


It’s simply half a sheet of A4, cut lengthways, with a bracket inside. There are no set measurements, really. I think this one was 10cm wide (just needs to be slightly narrower than the card itself) and about 8cm, scored at the 4cm point, then again at 1cm from each side. Fold it into a W shape and attach the narrowed strips to the inside of the card using double-sided tape.

I made a card on the same theme, too...


To colour the leaves, take the small splatter stamp inked in Old Olive and, starting at the base of the leaf, stamp repeatedly towards the tip of the leaf, without reinking. This gives you a lovely graduated effect.


Monday, 11 November 2019


If you love Waterfront, you’ll also love Snow Front. And if you’re thinking “I have Waterfront so don’t need Snow Front as well,” then I’m afraid you’re very much mistaken as the two sets complement each other perfectly.

This was one of my Crafty Friday projects this week; the ladies could choose to make one of these designs or go their own way. Everyone made a fabulous card and was surprised at how easy it was!

I love the watercolour effect this stamp set produces, thanks to the different tones within each stamp. And I love its versatility, too; as well as Christmas, it would be great for birthdays, masculine cards, sympathy cards and much more. Trees are very much appreciated in our family so I can see it getting lots of use for birthdays!

The snowy hills on the left card are made by sponging Pool Party above a piece of torn scrap paper. My tip is to stamp the trees first, then add the hills. 

Bonus tip: When creating a scene with stamp such as Snow Front or Waterfront, it’s a good idea to practise on a piece of scrap card or grid paper first, until you are happy with the arrangement of images. 


Friday, 15 February 2019

Video tutorial: three ways to dye your own ribbon


This spring-like card showcases a variety of products from the Spring/Summer catalogue, including the fabulous Stitched Rectangle Framelits - which stitch outside AND inside the cut line. As you can see above, this creates a really lovely frame.

I’ve added my flowers and leaves from the Well Written Framelits set (it’s not just words!) and finished off with a Pool Party ribbon, which brings me to the reason for this project...

The pastel ribbons from the Sale-a-Bration brochure have proved so popular – staggeringly so – that they are now all gone and won’t be available again. But this needn’t be an issue... as you can easily make your own using supplies you are sure to have in your craft stash.

Watch the video below to see how...


Friday, 11 January 2019

Bloom by Bloom one-sheet wonder


A one-sheet wonder was just the ticket to create a big batch of these for my team. My tip for a one-sheet wonder is this: Start with the largest stamps in the palest colours, and work your way down to the smallest stamps in the lightest colours. You can then use the tiny stamps to fill in any gaps and balance out the colours to they are relatively evenly distributed.

This is the Bloom by Bloom stamp set and I love its bold imagery. Even if you’re not keen on bright colours, don't dismiss this set as it looks fab in subtles, too!


The small print

This is my personal blog and my sole responsibility as an independent creator and craft coach. All content including photographs, projects and text are © Helen Read, unless otherwise stated. Please feel free to copy my ideas for your personal use and inspiration. Please do not use my ideas for monetary gain, competitions or publication. The images on this blog - including blog buttons - should not be copied and used elsewhere on the internet or on electronic files for sale or otherwise.