Sorry I can't update the blog right now. Please find me on Facebook

Showing posts with label Best Birds. Show all posts

Monday, 6 May 2019

Bird boxes made with retiring Gift Bag Punch Board


Way back in November I thought I was being organised by buying Christmas gifts for my stamping club ladies. And then I was laid low with the lurgy... for weeks.

All of a sudden it’s spring and I realised I still hadn't given them their gifts, so I gathered together some retiring products and made these cute little boxes, each containing a bottle of Copper Shimmer Paint. What was particularly galling is that by the time they received the gifts, the paint was on the Clearance Rack and half the price. Doh!


The boxes are made using the retiring Gift Bag Punch Board; instead of making it to the instructions, I scored at the "Side 2" point every time, to make a square-based box. For the flap, I cut a separate strip, punched and scored at Side 2 repeatedly, then used the score lines to cut down... so the rounded flap that is normally the base becomes a front flap to finish off the box. Make sense? Didn't think so, sorry.


Other retiring products featured here include the Best Birds stamp set and co-ordinating dies, Nature’s Poem Designer Series Paper, Fresh Fig and Powder Pink cardstock. Get them while you can... if you still can!

Monday, 12 November 2018

Centre Stage and team notebooks with Tin Tile and copper


Over the weekend it was the BIG event of the Stampin’ Up!® year... OnStage! We hold these twice a year, exclusively for demonstrators, but this was the BIG one because it’s the 30th anniversary of Stampin’ Up!®

I was there, with a group of team members, and I have some more news about the event below. 

But first I would like to share with you the gifts I made for my team... a monogrammed notebook with on-trend copper accents.


I used the Tin Tile embossing folder (because I love it), which I swiped with copper shimmer paint for a verdigris look. They are finished off with a copper monogram, some leaves from Rooted in Nature, a flower from Best Birds, some Rich Razzleberry velvet trim, copper thread and a wooden heart, sponged in copper shimmer paint. Oh yes, I used circle dies and the Artisan Textures stamp set, too.

Yes, they are product heavy – but there’s no need to hold back when creating for fellow demonstrators!


This one is a little different, as I have a man in my team, so I created a more masculine look for his notebook. I also used both initials as the “I” on its own looked a little lost.

The main event was held on Saturday, but on Friday evening there is an even more exclusive event, for demonstrators who reach certain sales and recruiting levels. This is called Centre Stage and they really treat us well at these events. We had an incredible four-course meal, some sneak peeks about the coming announcements and some great gifts. Take a look...


If you’d like to find out how you can enjoy exclusive demonstrator events, I’d love to talk to you about joining my growing team. The best thing about being a demonstrator is being able to do it YOUR way... whether that means holding classes and events, or running an online business, or simply stamping with friends. There's room for all of us!

Please click here if you’d like to arrange a no-obligation chat or, if you already know you’re ready to take the plunge, you can join my friendly team here.


Wednesday, 16 May 2018

Celebrating 10 years with the new Rooted in Nature stamp set


How amazing is this? My downline Tracey has just celebrated her 10th anniversary as a Stampin’ Up!® demonstrator. Tracey joined not long after I did, and I’m so happy she chose me as her upline. I remember her sitting in my kitchen, testing out the rubber stamps and being really impressed by the quality. It’s fantastic that she’s stuck around for so long. Congratulations, Tracey!

To help her celebrate, I sent her a gift and this card, which uses one of my favourite new stamp sets, Rooted in Nature. I teamed it with the Hardwood background stamp and the new Artisan Textures stamp set to distress the edges.

Some flowers from Best Birds give the project a pop of colour, and the Champagne Foil die-cut word adds some celebratory bling.

Monday, 22 January 2018

Mix It Up Monday: Best Birds and Tree Rings


I was in Ikea last weekend – twice, for my sins – and I saw some of their Christmas ginger biscuits on sale for 50p. I just knew they had potential so grabbed a couple of packs. 

My hunch that they would fit in the mini pizza boxes was correct, although they do need twisting a little, so I decorated a box and made a matching card for Mix It Up Monday, using a Fresh Fig combination from my In Color charts. 


I promise you there is Blushing Bride on there; I used it with my blender pens to colour in the flowers. Admittedly it is a little obscured by the Rose Red on top, but you know how I feel about pink!

For a tip on using background stamps, please head over to my Facebook page for a short video. It’s a fab tip, although I say so myself, and will save you both time AND money. Can’t say fairer than that!


Wednesday, 13 December 2017

Merry Music rosette Christmas tree ornament


I spent Saturday really getting into the Christmas spirit, crafting with some of my stamping friends... all but one of whom I met through Stampin’ Up!®. Our brief was to bring a simple project for everyone to make so, to speed things up, I did a lot of prep for this Christmas tree ornament before I went. 

For instance, at home I used some rubbing alcohol with several drops of Crumb Cake reinker in it to spray the Merry Music Designer Series Paper and give it a softer, “aged look. I did the same to the silver glimmer paper, to tone it down a little. 

I also die-cut all the pieces, including the birds... well, I confess I opened my Best Birds stamp set and discovered a pile of stamped and die-cut birds in there. I knew they’d come in handy eventually!  


If you didn’t want to hang this on your Christmas tree, you could use it as a gift tag on a special present.


Please note the instructions are in centimetres but they do not convert to inches.
If you need instructions in inches, I suggest you search “Stampin’ Up! rosette tutorial” and work from there. 


Friday, 22 September 2017

Best Birds gift and card combo


A gift for one of my club members – she has two slots in the club, so gets a double present, which meant I could give her a stamp set from her wish list. Love how the In Colors go together beautifully for this project, which gave the Best Birds bundle a rare outing.


Wednesday, 30 August 2017

Sneak peek: Spooky Cat owl birthday card


It’s birthday season – from last week until the middle of September it’s just birthday, birthday, birthday. There’s even a run of four or five on consecutive days. And, in most cases, I can’t just root around for a card in the samples box. For instance, I don’t have an 18th birthday card lying around, so made this one specially, using a number of stamp sets:

  • Spooky Cat – as part of my mission to prove that it’s good for more than just Halloween
  • Number of Years – perfect for those age cards
  • Best Birds – so the owl doesn’t fall off his perch
  • Labeler Alphabet – for the inside greeting. 


Friday, 30 June 2017

Butterfly Basics bundle pop-up card


A pink card? With a butterfly on it? No, do not adjust your sets... I stepped out of my comfort zone for this one, as I was making a card for a very girlie friend. And I’m happy to report that it was very much appreciated - she loved it.

I was completely at a loss when faced with the Butterfly Basics stamp set - told you I was out of my comfort zone - but thankfully, this project by Julie Davison came to the rescue. Thanks for the inspiration, Julie!


Monday, 24 October 2016

Mix It Up Monday: Best Birds


We had a busy weekend with visitors and a trip to Matlock Bath Illuminations, so I’m keeping things simple again, with another white card. 


Yes, it’s Mix It Up Monday again and time for another project made with a colour combination from my latest set of In Color charts.  this time I'm using Sweet Sugarplum again, but teaming with with an unusually neutral palette (for me), with not one but two shades of grey. Grey isn’t my favourite colour so this was a bit of a struggle but I think it paid off, even if my card design isn’t particularly original. 


Blender Pens
[102845]
£9.00

Monday, 12 September 2016

Mix It Up Monday: Best Birds


It’s Mix It Up Monday again and time for another project made with a colour combination from my latest set of In Color charts

This wasn’t a particularly easy challenge… purely because, as I discovered, I have no Chocolate Chip cardstock whatsoever. Since Early Espresso was introduced into the range, I’m afraid I lost my love for Chocolate Chip and it rarely sees the light of day. 

So this card, which I intended to have a Chocolate Chip layer to break up the two pinks, has now taken a slightly different turn. Three stamp sets are used here, but it’s not a limited supply challenge, it’s a colour challenge!


Thursday, 18 August 2016

Best Birds negative die-cutting


No sneak peek today I’m afraid but I do have (what I think is) a quite exciting project to show you. 

I was playing around with “negatives” – the bits left behind after die-cutting, and wondered what I could make by planning the negatives carefully. The result was this card. I can’t pretend it was quick. I can’t pretend it was easy. As for whether it was worth it, I’ll let you decide. 

I backed the birdy piece with a sheet of Serene Scenery DSP. It’s a photograph of the sky, which is quite apt for the images, and shows the different shades of blue behind the birds quite well, too. 


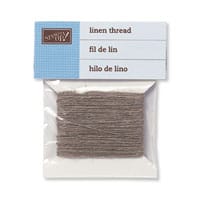
Linen Thread
[104199]
£4.25


Wednesday, 27 July 2016

Best Birds seed boxes


This is another of the projects from my Best Birds workshop. It’s a really simple box with lid, with an aperture to allow you to see the contents: a cello bag full of black pumpkin seeds for the birds. We’re big bird-feeders in this house and my husband was really excited to see a nuthatch in the garden the other week. Sadly I was out and missed it as we’ve been waiting 23 years!

Anyway, back to the box: the base and the lid are each made from a sheet of 6x6; the base is Kraft, while the lid is Serene Scenery DSP (which I absolutely love). the Kraft is scored at 1in from each side, the DSP is scored at 2.5cm from each side. The very slight difference in the two measurements should allow the lid to fit snugly. 

The aperture is created using the old-style circle dies as I don’t yet have the new ones, but I’ve linked to the new ones below as those are they ones which are available. But any size circle will do; you just can’t do it with a punch though, as it won’t reach that far. 

To get the circle in the centre, we drew diagonal lines, corner to corner, with a pencil on the reverse side, so the cross in the middle allowed us to centre the die. 

I made two samples so I had one to show each table and so the ladies could choose which one to make, using whichever sheet of DSP they preferred, as they had one of each design to play with. It’s all held together with that old favourite, linen thread. 


The small print

This is my personal blog and my sole responsibility as an Independent Stampin' Up!® demonstrator. All images are © Stampin' Up!® All content including photographs, projects and text are © Helen Read, unless otherwise stated. Please feel free to copy my ideas for your personal use and inspiration - if you are a SU demonstrator you may use these ideas for your events but please give credit where it is due. Please do not use my ideas for monetary gain, competitions or publication. The images on this blog - including blog buttons - should not be copied and used elsewhere on the internet or on CDs.