Showing posts with label Copper Foil Sheets. Show all posts

Monday, 28 October 2019

Peaceful Boughs Christmas ornament in gold pizza box


I do love a woodland theme... and particularly a woodland-themed Christmas ornament, so it wouldn't be the festive season without one of these making its way into my craft classes!

I bought some MDF hearts from eBay, painted them white and then set to crafting by stamping them with the Birch Background stamp and Peaceful Boughs.

I embossed the boughs with clear embossing powder on top of the Mossy Meadow (hurrah for the Stamparatus!) and, because the Crumb Cake Birch image still wasn't quite dry that picked up some of the powder, too. I call this a happy accident! There's even a hint of glitter!

The box is die-cut (look out for the missing piece coming soon!) and given a window sheet insert which is stamped in Whisper White ink and heat set, then we wrapped our ornaments in stamped black tissue paper ready to give as a lovely handcrafted gift.

I don't like glitter because it can end up in our oceans but still have quite a bit left so I now only use it when mixed with glue or embossing powder. Here I mixed it with the clear embossing powder to stop it from going astray. It adds a touch of glitz to an otherwise quite understated project. 
 

Wednesday, 2 October 2019

Rusty old cogs with Garage Gears dies


I've wanted to have a play with these cogs for a long time but couldn't justify getting the whole bundle - and this is one case where three of the dies just wouldn't work well without the co-ordinating stamps.

Downline to the rescue again! One of my team members, Ian, kindly die-cut some cogs for me so I could make this card for a cyclist friend's birthday.

I used a really fun technique which was demonstrated by Kim Fee at OnStage Birmingham last November; the technique stuck with me and I've been eager to try it.

You start with a cog - mine was made from Crumb Cake cardstock - and sponge in your chosen colours. I used Early Espresso, Copper and Cajun Craze. As you go along, you add some Versamark and clear embossing powder, then brush some off, randomly. Repeat and you get this lovely rusty effect.


The cogs can be cut apart if you’re careful. The small cog looked a little ropy when I detached it from the main die-cut, so I simply hid the ropey bits behind the greeting. Nobody will know unless you’re like me and tell them!

And I've said it before but don't feel bound to stick to Suites and products designed to co-ordinate with each other. For the background of this card I used an image from Countdown to Christmas – you wouldn't know it was a Christmas stamp set. 


Monday, 25 February 2019

Home to Roost copper tin and cards


At my Hygge Night last Friday, we made this lovely tin of cards inspired by the Sale-a-Bration brochure. I’ve been looking for a reason to use these Copper Tea Tins, and this was it. 

For the samples, I used the Grapefruit Grove foil from the Sale-a-Bration brochure, but gave the guests Copper Foil, too, so they could choose. It has been run through the Big Shot using the Tin Tile Embossing Folder.


The tin is stamped with Versamark ink then embossed with clear embossing powder to create this lovely subtle effect.


The cockerel is coloured with Stampin’ Blends. I used Old Olive (light and dark), Night of Navy (dark), Calypso Coral (light and dark), Crumb Cake (light and dark), Daffodil Delight (dark) and Cherry Cobbler (light).


For the cards, I used four different dies from the Stitched Shapes Framelits set, so they could all be run through the Big Shot together, to save time.

This is a gorgeous stamp set which is one of my favourites from this year’s Sale-a-Bration collection. You can earn it FREE with a £45 order... if you’re in the UK, just click here to start shopping!


Monday, 12 November 2018

Centre Stage and team notebooks with Tin Tile and copper


Over the weekend it was the BIG event of the Stampin’ Up!® year... OnStage! We hold these twice a year, exclusively for demonstrators, but this was the BIG one because it’s the 30th anniversary of Stampin’ Up!®

I was there, with a group of team members, and I have some more news about the event below. 

But first I would like to share with you the gifts I made for my team... a monogrammed notebook with on-trend copper accents.


I used the Tin Tile embossing folder (because I love it), which I swiped with copper shimmer paint for a verdigris look. They are finished off with a copper monogram, some leaves from Rooted in Nature, a flower from Best Birds, some Rich Razzleberry velvet trim, copper thread and a wooden heart, sponged in copper shimmer paint. Oh yes, I used circle dies and the Artisan Textures stamp set, too.

Yes, they are product heavy – but there’s no need to hold back when creating for fellow demonstrators!


This one is a little different, as I have a man in my team, so I created a more masculine look for his notebook. I also used both initials as the “I” on its own looked a little lost.

The main event was held on Saturday, but on Friday evening there is an even more exclusive event, for demonstrators who reach certain sales and recruiting levels. This is called Centre Stage and they really treat us well at these events. We had an incredible four-course meal, some sneak peeks about the coming announcements and some great gifts. Take a look...


If you’d like to find out how you can enjoy exclusive demonstrator events, I’d love to talk to you about joining my growing team. The best thing about being a demonstrator is being able to do it YOUR way... whether that means holding classes and events, or running an online business, or simply stamping with friends. There's room for all of us!

Please click here if you’d like to arrange a no-obligation chat or, if you already know you’re ready to take the plunge, you can join my friendly team here.


Friday, 9 November 2018

Winter Woods log slice ornament


I can’t stop using the Winter Woods stamp set but was trying to find something completely different for the Crafty Friday ladies this month.

Eventually I returned to that old favourite, the log slice ornament, which proved so popular last year.  We stamped our pine trees, and stamped off for a paler image, in Mossy Meadow, directly onto the slices of wood (eBay, since you ask).

It’s decorated with a Merry Merlot greeting, on a strip of copper foil, and embellished with some stamped pine cones and sprigs, along with die-cut snowflakes and some copper rhinestones.

Yes, I said copper rhinestones.

“But...”

Yes I know we don’t sell copper rhinestones. But you can make them REALLY easily simply by colouring in our normal rhinestones with a Calypso Coral Stampin’ Blend. Magic, eh?

Oh and finally... much, much later for some of the ladies, we added some embossing paste to create snowy branches. This has to be done later as if the ink isn’t fully dry, it is absorbed into the paste, creating a muddy mess of yellow snow. And there ain’t nobody who likes yellow snow.  An alternative is to seal the ink before applying the paste. That worked, too.


Friday, 14 September 2018

Detailed Deer pillow boxes


At first glance, a relatively simple project, but there are a couple of things worth pointing out. The first is that I have only just spotted these gorgeous pillow boxes in the Annual Catalogue - how did I miss them?

They make gift-giving really easy, as they're already fabulous, so you don’t need to do much to them to make your little gifts look amazing.


Secondly, have you noticed the lovely burnished oval? This is created with the amazing new Tin Tile Embossing Folder which I've used on Early Espresso cardstock and then swiped over with our new Bright Copper Shimmer Paint. 

We had shimmer paint in the catalogue before, back in the day when this blog was all fields, and I’m so happy to see it return. I was even happier to see we now have it in on-trend copper! 

I’ve filled these pillow boxes with little treats for some of my team members. Hope they like them!


Monday, 3 September 2018

A celebration in Bermuda Bay


This card was heavily inspired by Yana Smakula and I just knew the Bermuda Bay would be perfect for my friend and downline Kelly.

I brayered the whole piece from top to bottom using Coastal Cabana and Bermuda Bay (Kelly’s favourite SU colour), then embossed in copper using the spots from Dragonfly Dreams. I couldn’t find any word stamps in my collection which were big enough to stand out in the centre of the project, so die-cut the “celebrate” from copper foil instead. 

Some of the leaves are cut from the Delightfully Detailed laser-cut DSP, while others are die-cut using the Tropical Thinlits.  Hope she liked it!


Wednesday, 15 August 2018

Delightfully Detailed cards in minutes


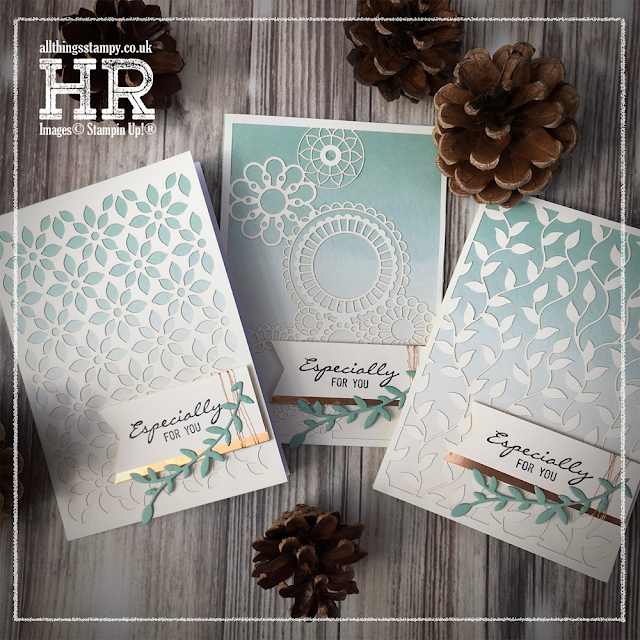
Honouring my team achievers this month was easy with the Delightfully Detailed Notecards and Envelopes and matching laser-cut paper. Some copper elements and a die-cut sprig from Botanical Tags provide the finishing touches. Scroll down for more designs...


Friday, 3 November 2017

Painted Harvest with Woodland Embossing Folder


I love the clean crispness of this card, which I blatantly CASEd from the talented Monica Gale. The Woodland Embossing Folder has been around for a while now but it always worth adding to your craft supplies if you don’t already have it.

I used a splash of copper foil below the greeting and echoed this with my very last piece of copper trim. Might have to get some more...


SaveSave

Wednesday, 4 October 2017

Carols of Christmas projects


There are some gorgeous products in the Autumn/Winter catalogue this year, and these lovely cards showcase just a couple of them, including the Carols of Christmas bundle and the Merry Music Designer Series Paper. One of the great things about the paper is that you get 24 sheets in a pack, which means you’ll have plenty for ALL your Christmas projects!

This was one of the projects from my All-Day Autumn Craftathon recently – there are two designs so people can choose how to use the products themselves. Love the splash of copper!

Monday, 2 October 2017

Mix It Up Monday: Hearts Come Home


Feeling festive? I hope so, as today’s project uses the Hearts Come Home bundle and some shiny copper embossing. 


I rose to the Mix It Up Monday challenge by die-cutting the image twice - once in Tranquil Tide and once in Cherry Cobbler - then pieced the trees together. There’s also some Copper Foil behind the house windows and some lovely copper embossing. For more colour combos, please see my In Color charts.


Monday, 14 August 2017

Mix It Up Monday: Tranquil Tide with Vintage Leaves


Tranquil Tide goes brilliantly with copper, so I placed some Copper Foil behind this die-cut piece to create a contrasting border for this Mix It Up Monday project. 

The dies are in the new Card Front Builder set, which is an Autumn/Winter catalogue product available a month early. It’s part of the festive Carols of Christmas bundle but there’s not reason you can’t use it all year round. 

What I like about the border stamps is that it only die-cuts one end, so you cut one end and then run it through the Big Shot again to cut the other. This means it fits our card sizes in the UK as well as those in the US, which are proportioned slightly differently. 


For autumn (which I’m afraid to say is looming large), there’s no finer stamp set than Vintage Leaves and this is a pretty good colour combo, too, if I say so myself. It comes from my In Color charts, which feature 50 colour combos using the latest In Colors. 

I sponged the top image in Cajun Craze and Early Espresso onto Very Vanilla, with leaves die-cut from the two colours of cardstock in the background. That’s it, quite a simple card, topped off with a greeting from Better Together (a must-have, in my opinion). 


Friday, 13 January 2017

Desktop Calendar with Detailed Dragonfly Thinlits


These Detailed Dragonfly Thinlits just cry out for copper foil, I think. They were the finishing touch of this very simple project we created at my Christmas Hygge Night.

The calendar is really easy to make; just half a sheet of A4 (cut lengthways) scored at 10.5cm, 13.5cm, 16.5cm and 27cm. Fold this piece to create the stand-up bit then decorate as desired.

It was such a happy accident that the curved sprig from Foxy Friends fit the shape perfectly!

We added a little pocket for a notepad (I have LOADS of these notepads; they must have been a bargain!) and a calendar tab. We were going to add a pen but I couldn’t find them in time – but the craft room is tidy now so no more excuses!


Wednesday, 11 January 2017

Detailed Dragonfly gift bag


A bit of coppery bling for the depths of winter... guaranteed to brighten up the darkest day. I created this gift bag using the Gift Bag Punch Board for my friend and downline Alison, who unfortunately has her birthday on Christmas Day. I thought the dragonfly hinted at brighter, sunnier days to come... and also made for a really quick and easy project in the busy days running up to Christmas! A little glimpse of Emerald Envy really stands out from the copper, I think.


Wednesday, 7 December 2016

Pretty Pines gift voucher pouch


Yes, I’m playing catch-up. The Garden Green project shown here was designed by my friend and helper Kelly for my last Hygge Night, where we created a wreath and a gift pouch. When a customer requested two gift vouchers, I decided to make a similar pouch in Cherry Cobbler (mainly because I’d run out of Garden Green).

I really love both projects, but have always been a sucker for Cherry Cobbler. It’s created using the Envelope Punch Board; just pick any size and then cut a simple strip of cardstock to wrap around it to seal. As long as you only stick your embellishments to the Crumb Cake strip, it will slide on and off so you can access the voucher inside.


The small print

This is my personal blog and my sole responsibility as an Independent Stampin' Up!® demonstrator. All images are © Stampin' Up!® All content including photographs, projects and text are © Helen Read, unless otherwise stated. Please feel free to copy my ideas for your personal use and inspiration - if you are a SU demonstrator you may use these ideas for your events but please give credit where it is due. Please do not use my ideas for monetary gain, competitions or publication. The images on this blog - including blog buttons - should not be copied and used elsewhere on the internet or on CDs.