Wednesday, 30 September 2020

In The Pines meets Pinewood Planks for Christmas

 In the Pines stampin up
I promised you more In The Pines bundle projects and here they are... this time with a Crumb Cake and Pinewood Planks vibe.

The stars of the show here are the Pine Woods Dies; in fact, the only stamps I've used from the In The Pines stamp set are the very handy Season’s Greetings and the tiny snow stamp.

In the Pines stampin up

For the landscape card, I die-cut some “hills” and three trees using the Pine Woods Dies. The small pine cones come from the Winter Woods stamp set. Unfortunately, I don’t have the coordinating In The Woods dies so had to fussy-cut them out. My fussy-cutting isn’t the most precise, as you can see!

The two Crumb Cake trees were sponged lightly with Crumb Cake ink to make them stand out a little more from the background.


In the Pines stampin up

For the portrait card, I slipped some In Good Taste Designer Series Paper behind the tree. It’s a little lost in the photo but I like the effect so plan to return to this design using a stronger contrast. I didn’t have any of those lovely Red Rhinestone Basic Jewels, but I am a crafter so I compromised... I used our standard Rhinestones and coloured them using a Poppy Parade Stampin’ Blend alcohol marker.

In the Pines stampin up

If you want to cut an aperture and emboss your cardstock, make sure you do the cutting first. If you do it the other way round, the act of cutting will squash your embossing.

That’s all for today but please come back on Saturday at 4pm for a World Card Making Day blog hop!


Monday, 28 September 2020

Forest bathing with In The Pines

In The Pines Stampin Up ideas

In The Pines is a bundle with my name all over it. There are few places I’d rather be than among trees.

In Japan, shinrin yoku is the art of forest bathing and recognised for its benefits on people’s physical and mental health. This isn't new-age nonsense; far from it. There are very good reasons behind it, so are you ready for some science?

Studies have shown that being among trees can not only improve your concentration and memory, but reduce your blood pressure and lower levels of cortisol, the stress hormone. On top of this, trees and plants emit phytoncides, which have antibacterial and anti-fungal properties, helping us to fight disease.

If those aren’t good enough reasons to get out into the woods, then I don’t know what is. I love to go for countryside walks but am always drawn to the trees; in lockdown, when we weren't supposed to drive anywhere for leisure, I managed to work out a four-mile walk which took me through little woodlands, although they were no substitute for ancient woodlands and my favourite Scottish pine forests. 

The pine forests of Scotland – particularly Abernethy Forest in the Cairngorms – were the inspiration for these projects using In The Pines stamp set and the Pine Woods Dies. Expect more where these came from...

In The Pines Stampin Up ideas

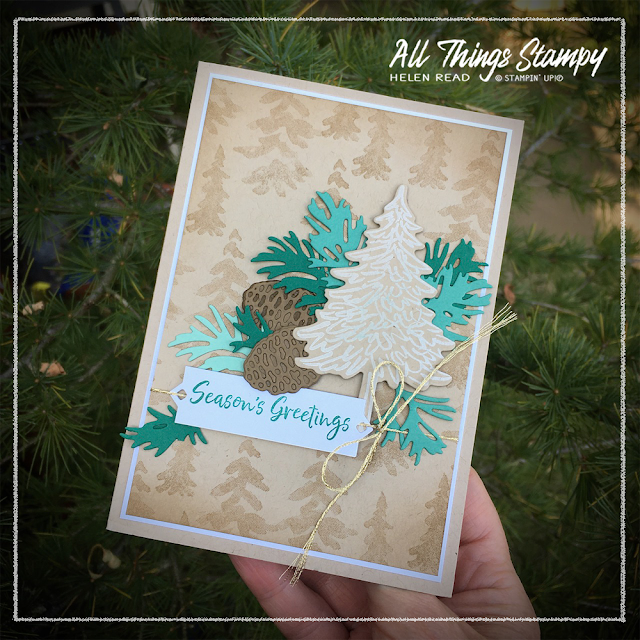
This project uses the Beautiful Boughs dies, too. As you can imagine, I have a whole section of craft room dedicated to tree-themed products! The back pine cone was sponged in Soft Suede before the top layer was stuck on. I’d already made the first one so went with it. I like how only some of the “bits” have come out; I like the look of some still remaining so left them there. Easier, too!

In The Pines Stampin Up ideas

I stamped the main tree image in Whisper White Craft ink onto Crumb Cake and cut it out using the Pine Woods Dies. To make the label, I cut it using the Beautiful Boughs dies then trimmed it down to make it slimmer. The gold trim is from the Forever Greenery Suite.

In The Pines Stampin Up ideas

This is a simpler card which uses just the In The Pines stamp set, along with the Tasteful Labels dies, although any label dies or a punch would do a similar job.  The trees felt a little lost on the stark white background, so I gave it some depth by sponging around the top and bottom using Mint Macaron and just a hint of Pretty Peacock. 

In The Pines Stampin Up ideas

In The Pines Stampin Up ideas

This card is actually not inspired by Scotland but by Lea Wood nature reserve near Cromford. There's a little patch of Scots Pines at the top; if you stand in the centre and look up, you see this effect. This is a fascinating phenomenon called ‘crown shyness’ where trees avoid their branches touching each other. Not all trees do it and nobody really knows why. But don’t say I never tell you anything!

In The Pines Stampin Up ideas


Thursday, 24 September 2020

When card kits give you lemons... stamp with them!

Simply Citrus Kit stampin up

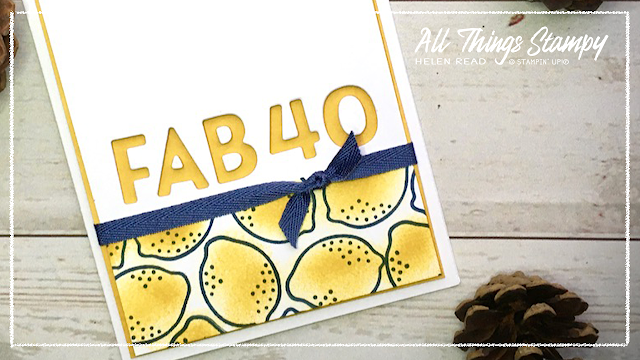
This lemon stamp is really cute... and you’ll find it in the Simply Citrus Card Kit I showcased on Monday. Here I’ve use it to make a 40th birthday card for a (young) friend. The rough colouring effecct is achieved with a sponge dauber; I simply sponged inside the lemons, not worrying too much if I went over the lines.

Simply Citrus Card Kit Stampin' Up

Yep, once that kit is completed, you can stamp to your heart’s content with the fab little stamp set that’s included. I have used it loads since completing my kit – the sentiments are really pretty and useful, too. 
 

Simply Citrus Kit stampin up

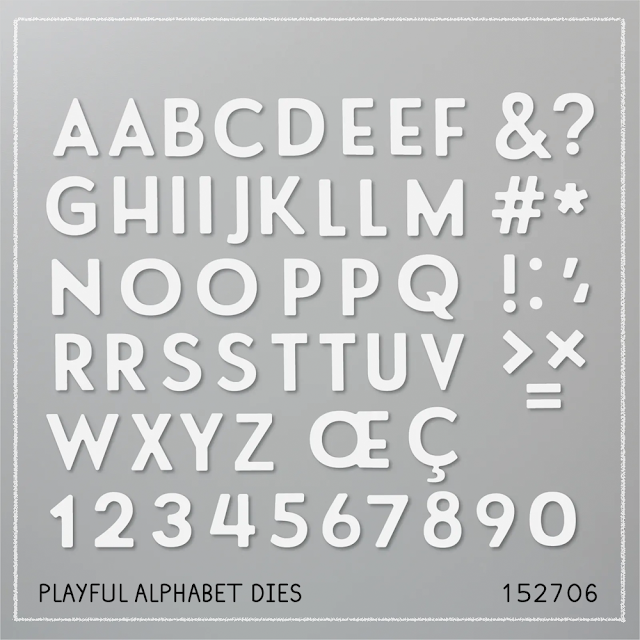
For this 40th birthday card, I’ve combined it with the Playful Alphabet dies, which are quite frankly, a must-have in my opinion. And I don’t say that lightly. 

Simply Citrus Kit stampin up

Simply Citrus Kit stampin up
I masked the line to stamp below using sticky notes. Sometimes the line doesn’t turn out quite as crisp as you'd like – and this is where the Misty Moonlight ribbon comes in!
 
 
Simply Citrus Card Kit Stampin' Up


Tuesday, 22 September 2020

24-hour stamp set - 15% off selected stamps

Stampin Up stamp sale flash 24-hour

Big news! We have a 24-hour stamp sale tomorrow (Wednesday), featuring dozens of stamp sets!

Key facts:

  • The sale will begin at 11pm on Tuesday, 22nd September
  • The sale will end at 10.59pm on Wednesday, 23rd September: but please don’t leave it to the last minute!
  • 15% off selected cling and photopolymer stamps. 

You can check out the full range of discounted stamps at my store in the dedicated “Stamp Sale” section. Don’t look yet as it won’t be there until 11pm today (Tuesday). 

How to order

You can order via my store here. Please use the host code CMAQSJD7 and I will send you a thank you gift. (Don’t use it if you spend more than £150 as you will lose your Host Rewards). 

If you prefer, you can contact me before 6pm and I will order for you. Please use your usual method of contact or, if you haven’t shopped with me before, please use the email address at the top of this page. I’d love to hear from you!

Want to see which sets will be reduced? Please note the below list is for Europe only; discounted sets may vary in other markets. 

Stampin Up stamp sale flash 24-hour

Stampin Up stamp sale flash 24-hour

Stampin Up stamp sale flash 24-hour

Stampin Up stamp sale flash 24-hour

Stampin Up stamp sale flash 24-hour

Stampin Up stamp sale flash 24-hour

Stampin Up stamp sale flash 24-hour

Stampin Up stamp sale flash 24-hour

Stampin Up stamp sale flash 24-hour

Stampin Up stamp sale flash 24-hour

Stampin Up stamp sale flash 24-hour

Stampin Up stamp sale flash 24-hour

Stampin Up stamp sale flash 24-hour

Stampin Up stamp sale flash 24-hour

Stampin Up stamp sale flash 24-hour
 
For prices, please refer to the website. Discounts will show from 11pm.

Monday, 21 September 2020

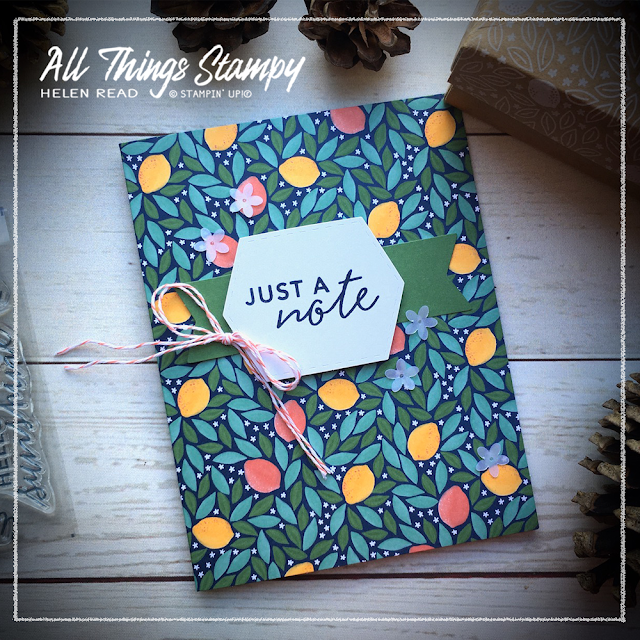
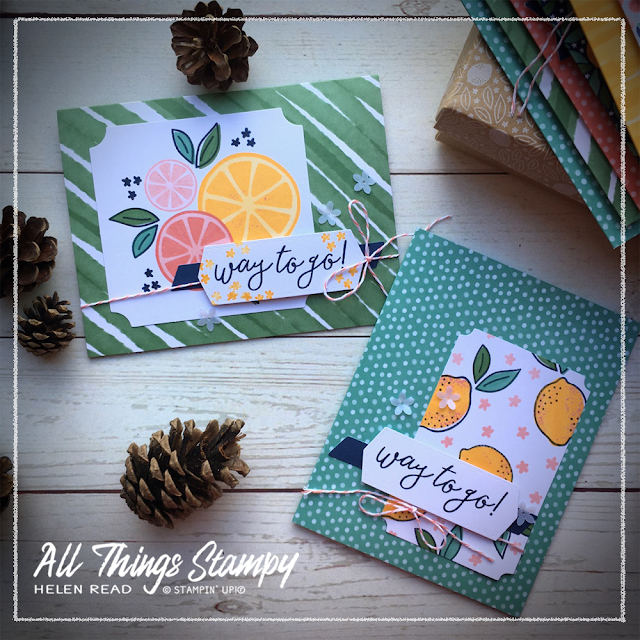
Feeling fruity? Check out my Simply Citrus projects

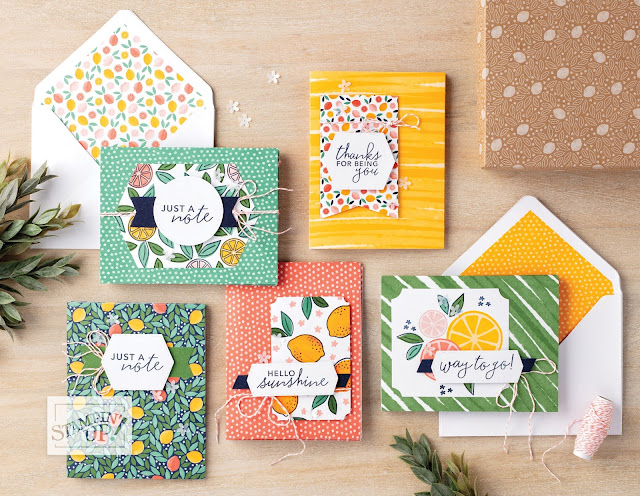
Simply Citrus Card Kit Stampin Up

When Stampin’ Up!® first launched project kits, I was sceptical. We are crafters and therefore we like to create, right? But of course, as is so often the case, I was entirely wrong and ended up doing a massive U-turn.

Now I’m a huge fan of our kits, for various reasons. They are ideal for:

✂️ Experienced crafters in a hurry (no prep!)
✂️ Taking on holiday, when space is tight
✂️ Relaxed crafting with friends
✂️ Crafting with children
✂️ Introducing crafting to newbies
✂️ Gifts

So when I went on holiday this summer, I made sure to pack a craft kit and I chose this one, the Simply Citrus Card Kit.

Simply Citrus Card Kit Stampin Up

This is a great kit to take because absolutely everything is included; even the ink pad and clear block. This makes is the ideal kit to gift to a friend who doesn't have the luxury of craft supplies, as they can get started straight away without any additional purchases. 

Simply Citrus Card Kit Stampin Up

You can make the projects up exactly to the kit, or mix and match as I have done here. 

Simply Citrus Card Kit Stampin Up

Simply Citrus Card Kit Stampin Up

Simply Citrus Card Kit Stampin Up

And because you get a stamp set, you can make more projects when you’ve used all your consumables - more on that later in the week.

Simply Citrus Card Kit Stampin Up

Simply Citrus Card Kit Stampin Up


Thursday, 17 September 2020

Blog hop: Gilded Autumn projects


Would I like to take part in a blog hop showcasing the Gilded Autumn Suite? Yes please! This is my favourite suite from the August-December Mini Catalogue; I love autumn and love woodlands so both the colours and the images speak to me. And what were they saying? “Buy me!” of course.
 
 
These projects were made for my Crafty Friday event this month – waste not, want not! We made two cards; a W-fold card and an aperture card.

My classes are still taking place via Zoom so I’m having to provide creative ways of supplying kits which guests can add to with their own stamp sets. This time I was tardy so didn’t have time to order their optional extras of stamps and punches ahead of time so they had the unenviable task of fussy-cutting all those leaves and acorns out. I didn’t – I used the punches, which fit the images on the Gilded Autumn Designer Series Paper perfectly. 


We began with this W-fold card, decorating the front with some strategically placed Gilded Autumn Designer Series Paper and punched out images using the Autumn Punch Pack.

I used this large greeting from Happiest of Birthdays, stamping it in Mint Macaron and Early Espresso for a bit of variety. You can do this using the Stamparatus, or sponges, or simply by winging it with two ink pads. Just remember to start with the paler colour first, so you don’t cross-contaminate. 


Inside, it’s a simple case of adding some squares to a strip of cardstock, which you score in quarters. If you wish, you can download the class instructions here.


I’d sized the squares inside to fit the Stitched Shapes Dies, as I know almost all of my customers have those. But if they didn’t – or didn’t want to die-cut – they could cut them to size using a paper trimmer. I like the addition of a few popped up coloured leaves and acorns to embellish the metallic papers. 


I made two versions; one as a sample ahead of the class, then I changed things up a little on the day. Mainly because, although I am quite disorganised, even I don’t need to stockpile belated birthday cards! 


After the class I decided to go a step further by decorating the envelopes with some leftover strips of Designer Series Paper. This is simply a case of applying adhesive to the envelope flap, sticking it to the DSP and cutting around it carefully with scissors. 


Our second card was a simple aperture card – and the beauty of this is that you can cut any aperture in the front, depending on the dies or punches you have. 

Again, I changed the greeting on the day of the class to make a birthday card. I have lots of autumn birthdays so won’t struggle to find a suitable recipient. 
 

Cut the inside piece and hold it in place without sticking, then stamp the greeting through the aperture. This allows you to get it in position, while still giving you the opportunity to turn it over and have another go if it doesn’t stamp exactly how you planned.

I hope you have enjoyed these projects and are inspired to take a closer look at this gorgeous product suite. For more inspiration, please visit the other blogs in the hop here:


The small print

This is my personal blog and my sole responsibility as an Independent Stampin' Up!® demonstrator. All images are © Stampin' Up!® All content including photographs, projects and text are © Helen Read, unless otherwise stated. Please feel free to copy my ideas for your personal use and inspiration - if you are a SU demonstrator you may use these ideas for your events but please give credit where it is due. Please do not use my ideas for monetary gain, competitions or publication. The images on this blog - including blog buttons - should not be copied and used elsewhere on the internet or on CDs.