Showing posts with label dragonflies. Show all posts

Thursday, 25 February 2021

Dandy Garden Suite: Garden Wishes or Dragonfly Garden - Part Two

Dandy Dragonfly Garden Wishes Stampin Up
 
Part two of my Dandy Garden Day projects features this little box of notecards. This set above shows the box and cards made using the Dragonfly Wishes bundle. 

Dandy Dragonfly Garden Wishes Stampin Up

However, once again I made samples using both the Garden Wishes and Dragonfly Garden bundles, and again guests could use the Designer Series Paper to add their dragonflies or bees, if their stamp set didn't feature the one they wanted. As you can see from the image above, I cut out the bee from Dandy Garden Designer Series Paper, even though there is one featured in the stamp set. 

We used Dandy Garden DSP to cover the box, just applying paper to the top, front and back. 
 
Wet adhesive such as Tombow is best when covering these Mini Paper Pumpkin Boxes as it gives you that all-important “wiggle room”. If you apply the DSP all while the box is flat, the paper will stretch so assemble the box first then apply adhesive to the top only, leaving DSP hanging over the front to cover the flap with about 5mm (3/16”) on each side and the bottom edge. 
 
Only when the top is stuck should you add adhesive to the front and back panels, then carefully smooth the paper around to adhere.

 
Dandy Dragonfly Garden Wishes Stampin Up

The first of our cards to go inside was arguably the most complex, although even this is not too fiddly. We stamped our tallest image on a white panel, popped this up onto the note card, showing a strip of co-ordinating DSP to the right. Then it's finished off with a dragonfly (stamped or cut from the paper), a greeting and a ladybird. 
 

The Ladybug Trinkets are hollow so the best way to stick them down is using Mini Glue Dots. Don’t have any Mini Glue Dots? (Why not, they’re amazing!) You could use a small piece of double-sided tape, but it will be fiddly!

Dandy Dragonfly Garden Wishes Stampin Up

This Designer Series Paper is too beautiful to hide so these cards show it off by making it a feature of both the cards and the envelopes.

Covering the envelope flap is really easy but be warned: 6x6" DSP is only wide enough to cover the flaps of a notecard envelope, not our standard C6. 

 Simply apply adhesive all over the envelope flap then, making sure you have the pattern the right way up (if that matters with your chosen design), stick the full piece of DSP to the flap, butting it up neatly to the fold. Then turn it over and cut it out freehand, using scissors. 

Dandy Dragonfly Garden Wishes Stampin Up

These cards are scaled right back but are no less striking for their simplicity. The card on the left features dandelions stamped onto separate cardstock and cut out with the dies. ‘Hello’ looked a bit lost on its own so I stamped it three times. 

The card on the right has its flowers stamped directly onto the notecard, with a popped up dragonfly cut out from the DSP. 

Dandy Dragonfly Garden Wishes Stampin Up
 

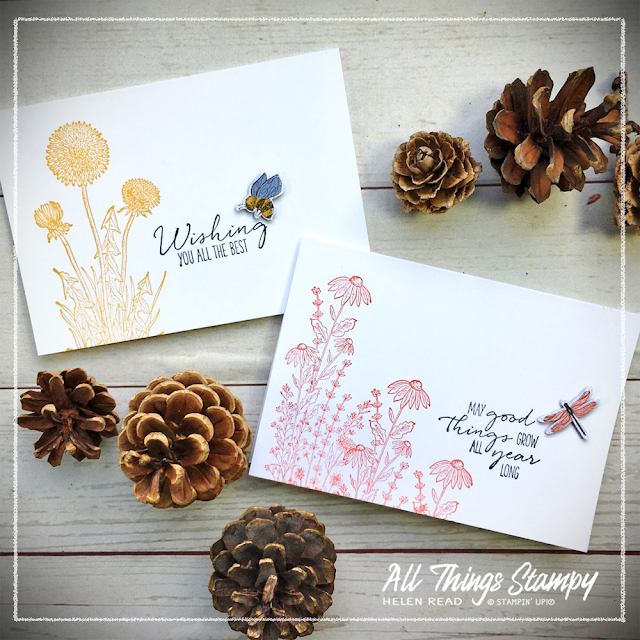
Even simpler are these two note cards, with no colouring, just the image stamped in a colour directly onto the card. In both cases, the inset is cut out from the DSP. Did you know the bee from the Dandy Wishes dies fits the DSP perfectly? So you can stamp and cut or just cut them out of the paper if you prefer.

Similarly, the Dragonflies Punch fits both the stamp set and the DSP. You can punch both the largest and medium dragonflies from the paper although not at the same time. You will need to rough cut them out first to avoid spoiling the surrounding dragonflies. 

Dandy Dragonfly Garden Wishes Stampin Up

Since the ladies shared their projects in our private customer group at the weekend, orders for one or both of these amazing bundles have been flooding in. If you would like to order any of the products you see here, remember the best time to do so is before the end of the month, as orders over £45 will qualify for a free Sale-a-Bration item. You can either contact me and I will place the order for you – if you are local you an even hop on to my order and save shipping costs – or shop via my store. If you use February host code D6PKN76U, I’ll send you a thank you gift in March!

 
Please do check you are shopping with me at the store, as if you leave and return, it may default to a different demonstrator and/or lose the host code.
 
And if you have any questions about ordering, or would like to know more about maximising the value by purchasing the Starter Kit, please message me using the details on my website.


Thursday, 18 June 2015

Awesomely Artistic watercoloured wash 2


Dragonflies: beautiful creatures which conjure up images of lazing by the river in a country idyll. 

Except you wouldn’t think that if you were a small insect. In fact, dragonflies are vicious predators, catching more than 95% of their prey, making them more successful than any of the big cats or sharks. In fact, don’t even bother Googling dragonflies to find out more as it will surely put you off this gorgeous stamp set. Let’s just pretend that dragonflies are simply pretty, shall we?

That’s the train of thought I was taking while making this card. Again, I began with a watercolour wash; I find when I’m watercolouring, it makes sense to create a few backgrounds at a time. This keeps you busy while waiting for the first one to dry, and means you have some in the bag ready for next time. This time I didn’t use the wet-on-wet technique and you can see the difference; the brush strokes are more evident. 

For some reason I decided to stamp a line of the burlap-style border along the bottom, but I didn’t like it so, before chopping it off, I tried creating a border. Turns out I do like that, which just goes to show there really are no “mistakes”. 

The tiny punched flower comes from the Tree Builder Punch. Not the cheapest way of making a tiny flower, but the punch is well worth it as it gives great value. 


Tuesday, 16 June 2015

Awesomely Artistic watercoloured background


I predict that this stamp set – Awesomely Artistic – will be really popular, so get yours ordered now ahead of the rush!

It’s a little like Kinda Eclectic, in that it has a bit of everything, allowing for a vast variety of card designs, and opportunities to play with collage-style projects. 

Here I’ve watercoloured the background, using ink refills and a wet-on-wet technique (where you wet the watercolour paper first, then apply ink with a wet paintbrush. Once it was dry, I stamped the leaves to create a border, using the Stamp-a-ma-jig for accuracy. And also because I accidentally ordered a wood-mount set - doh! I coloured the leaves using a blender pen and the ink pad lid, then stamped and stamped off using the splatter stamp which comes with the set. The dragonfly is stamped in Blackberry Bliss and cut out (yay me!) and the words come from a separate set, as I wanted something bigger than the “Friend” which comes with Awesomely Artistic. Finally, I added a touch of Crumb Cake around the paper to define the edges. 

Quite chuffed with this one actually, hope you like it!

The small print

This is my personal blog and my sole responsibility as an Independent Stampin' Up!® demonstrator. All images are © Stampin' Up!® All content including photographs, projects and text are © Helen Read, unless otherwise stated. Please feel free to copy my ideas for your personal use and inspiration - if you are a SU demonstrator you may use these ideas for your events but please give credit where it is due. Please do not use my ideas for monetary gain, competitions or publication. The images on this blog - including blog buttons - should not be copied and used elsewhere on the internet or on CDs.