Stampin’ Up’s new Annual Catalogue goes live to customers TODAY and you are in for a real treat!
Order your Stampin’ Up!® UK catalogue here
One of the stand-out suites in the catalogue is the Fresh As A Daisy Suite and I have a little hint of it here in today’s projects, which use the Cheerful Daisies stamp set. I made this for this week’s Crafty Friday online class; I don’t usually post projects ahead of classes but I'm sure the ladies won’t mind.
The subject for this month is Faux Tiles; a simple technique which looks really effective. Even if you’re familiar with this technique, do read on as I have some great tips to share with you today.
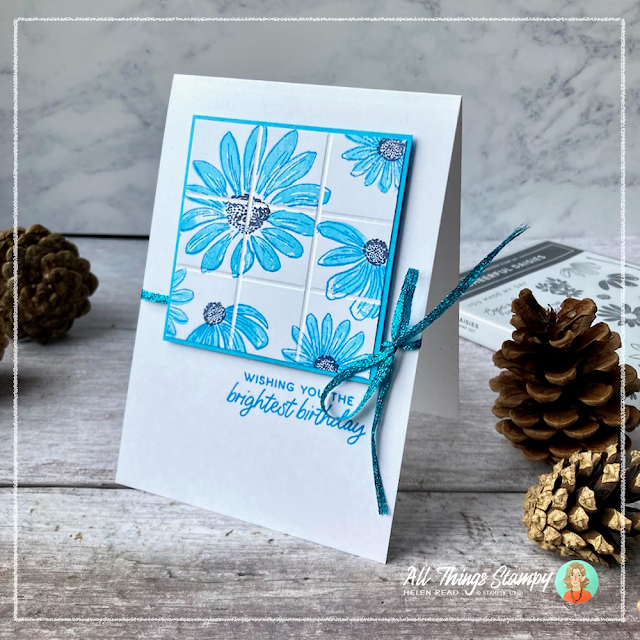
It’s this simple: you score a grid on your white cardstock before stamping. Then, stamping on the debossed side (with the raised ridges on the back of the cardstock) you get unstamped areas in the valleys, leaving a visible white grid.
This is the first time I have tried this technique and, while it is very straightforward, there were a few tricks I learned along the way. Remember: I make mistakes so you don’t have to!
Lesson one: The main thing is not to press too hard when you’re stamping. If you do, the ink will go into the grooves and you’ll lose that grid effect. I was using the Cheerful Daisies stamp set, which is a two-step stamp set so I had to be extra careful as I was stamping every image twice – once for the main body of the petals in Tahitian Tide and again for the outline in Azure Afternoon.
Lesson two: To avoid ink seepage, I used a plastic spoon to push the ink down into the pad before stamping. This is a great tip if you have an especially juicy ink pad, as I was; my Tahitian Tide ink pad is still very juicy (I’m not a turquoise gal) and this was the first outing for my Azure Afternoon ink pad.
Lesson three: If you can, use the Simply Scored tool rather than a paper trimmer, as this makes getting an even grid much easier. I also learned that the larger end of my stylus provided the biggest and deepest grooves, which made it easier not to get the ink in the grooves.
Lesson four: My final lesson was that perfection is very difficult to achieve and, as long as you have the overall effect of a white grid, then all is well. Nobody is going to look that closely!
For this first card I scored 7.5cm (3") square of Basic White cardstock at 2.5cm (1") intervals to create the grid. Then I stamped all over in Tahitian Tide, using the solid images from my new Cheerful Daisies stamp set. Next I carefully stamped on top using the outline images from Cheerful Daisies and Azure Afternoon ink.
You can of course stamp the outlines first – play around and see what works best for you. Don’t worry too much about positioning the stamps perfectly; I quite like the offset look for a change.
Finally I added the flower centres using Night of Navy ink.
The panel is mounted onto Tahitian Tide cardstock – I’m still being very careful with my Azure Afternoon supplies. Also I know the ladies attending my online class can’t possibly have an Azure Afternoon ink pad just yet, so I wanted to stick to something they may have.
The card folds at the top, which means it’s easy to tie a piece of ribbon around the width. I still do this in two pieces; one around the card, secured underneath the main panel with tape. Then a second piece tied i a bow. This is much easier than trying to get the tension right.
Holding my square panel in position, I stamped the greeting, which also comes from the Cheerful Daisies stamp set. This avoids any ink transferring onto the main panel, and also avoids stamping on an uneven surface. Only once this was stamped did I add the panel, popping it up on Dimensionals.
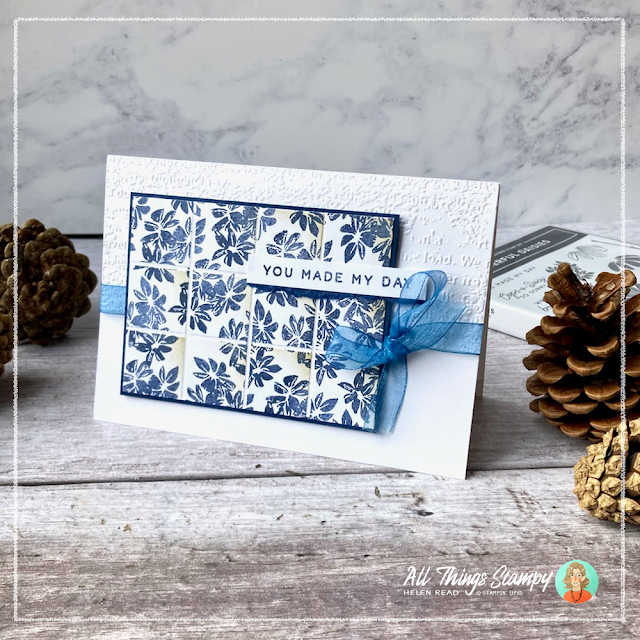
For the second card, I kept to a more muted colour scheme. Tempting though it was to go wild with my new colours, I used good old Night of Navy as I know the ladies attending the class will have this colour ink pad.
I used a slightly larger piece of cardstock; 10cm (4") x 7.5cm (3"), again scored at 2.5cm (1") intervals to create a grid.
This time I used the small flower cluster from the Cheerful Daisies stamp set, stamping all over the panel, as much as possible. To step it up a little, I masked each section and added some Crumb Cake ink, trying to keep to the bottom and left of each square. This didn’t quite work but but hey, we’re not aiming for perfection here!
I used the Timeworn Type Embossing Folder to add interest to the card front. Just in case you were wondering how I’d embossed part of the card front, I didn’t. Although partial embossing IS doable, why make life difficult? I simply embossed emboss a separate panel of Basic White cardstock and stuck it on top.
Here comes another tip... I didn’t have any Night of Navy ribbon, certainly not enough to send out to a full class. But I did have some Pool Party ribbon, which has now retired but hadn’t at the time of making. So I used my Light Night of Navy Stampin’ Blend (alcohol marker) to dye the ribbon to match.
You can use Stampin’ Write markers (which are water based) or ink refills or even your ink pads to dye ribbon but if you use anything water-based, it will take a lot longer to dry, so do factor that in.
The ribbon doesn’t go all the way around the card this time, oh no. It goes around the embossed layer and is attached at the back, hidden away. Again the bow is a second piece of ribbon, which is much easier to tie. Why make life difficult for yourself?
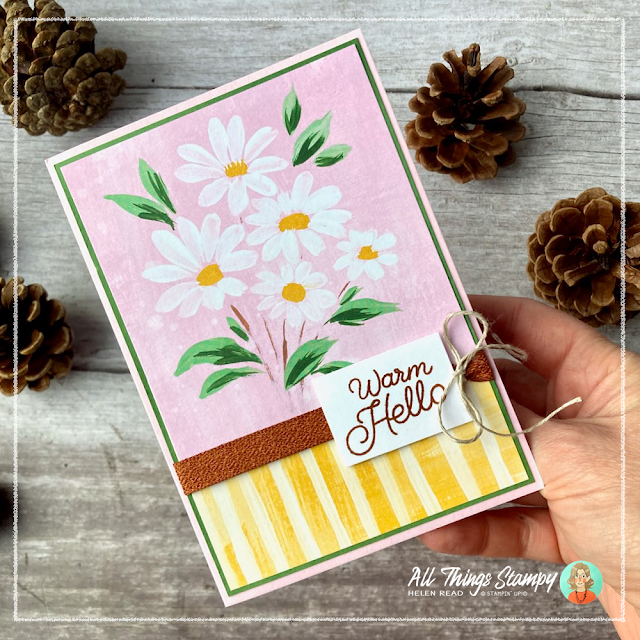
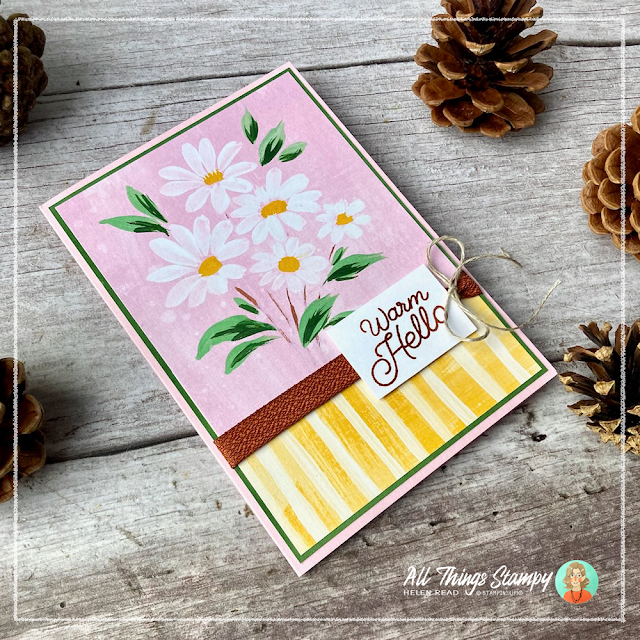
And how about a bonus project? This one doesn’t use the Cheerful Daisies stamp set at all but the coordinating Fresh as a Daisy 12"x12" Designer Series Paper. One of the designs (you get two of each) features rectangular panels which are so easy to cut out and turn into really quick cards.
This is two of the panels, with the join covered by a length of Copper Clay ribbon. Bubble Bath, Lemon Lolly, Garden Green and Copper Clay is not a colour combo I’d have thought of myself but I think it works well here.
I hope you like my projects using the Cheerful Daisies stamp set. If you are in the UK and would like a new Stampin' Up!® catalogue, please order here and I will get one in the post to you ASAP.


No comments:
Post a Comment
Thank you so much for taking the time to comment.