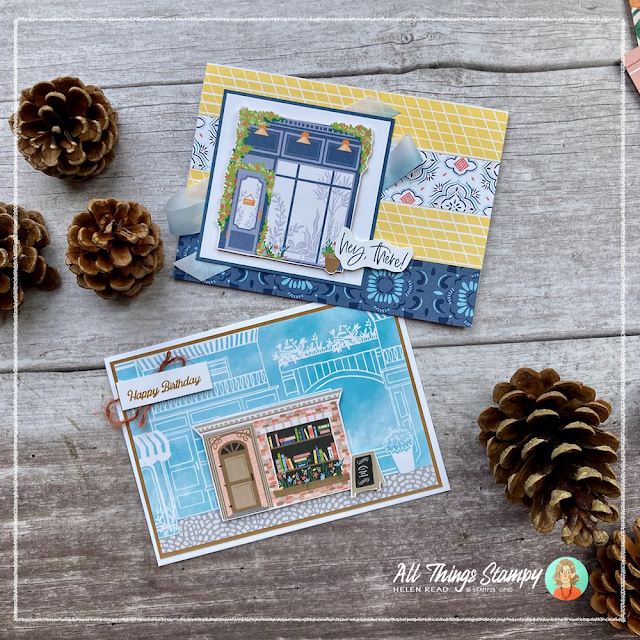
Want to save some money? Check out these projects using Les Shoppes Designer Series Paper. Both of them focus on Les Shoppes Designer Series Paper, and you can use any greeting stamps to finish them off.
I’ve said it before, I’ll say it again... thanks to the the fab designs of our Stampin’ Up!® Designer Series Paper packs, you don’t always need to buy the coordinating stamp set.
Naturally, there are pros and cons, so these tips may help.
Buy just the Stampin’ Up!® Designer Series Paper if you:
- love the look of the designs but only want to make a few projects for certain people.
- aren’t sure if the stamp set is for you – Designer Series Paper gives you a taste of the images to try before you invest. You can even share a pack with a friend as you get two of each sheet.
- don’t have a lot of colouring equipment or simply don’t like colouring.
- want to make really quick and easy cards.
Invest in the Let’s Go Shopping stamp set if you:
- love it!
- love making personalised cards. Using the Let’s Go Shopping stamp set, you can create lots of different variations of the different shops and cafés.
- love colouring or experimenting with other techniques.
- know you will get lots of use out of the images and want to make multiple projects.
- have already purchased Les Shoppes Designer Series Paper and now want more from the designs.
I was having a lazy afternoon so loved making these cards using Les Shoppes Designer Series Paper.
For this stylish street scene I began by selecting a bookshop from the Designer Series Paper with the large images. Next I chose a section of the blue Designer Series Paper which had a shop of more or less the same size and shape and cut it so it featured in the centre.
I trimmed the Balmy Blue paper to the base of the shops, so they would sit nicely on the paving stones pattern and mounted both pieces onto some Pecan Pie cardstock.
I popped up the bookshop and the chalkboard sign, then added some Stampin’ Up!® Copper Clay jute trim and a greeting.
Tip: Sometimes the Jute Trim is a little thick and heavy for your project – but if you untwist it, you can separate the three strands for a lighter touch.
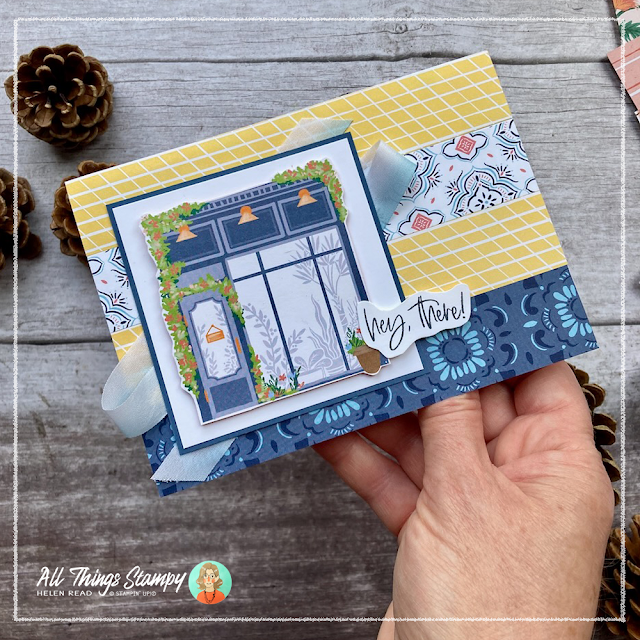
For my second Les Shoppes card I wanted to show off more of the fun tiled designs, so cut some strips of paper to cover my whole card front. I didn’t worry about the width of the strips; measurements aren’t my thing.
I cut out this lovely florist’s shop from the paper and popped it up onto a square of white cardstock, layered onto some Misty Moonlight.
I create a zigzag of Balmy Blue and White Variegated Ribbon from Stampin’ Up!® and stuck this down using double-sided tape, then mounted the image panel on top.
Finally, I stamped “Hey, There!” from Charming Sentiments (also Stampin’ Up!®) and cut this out freehand, to create a sort of bubble.
Both of these cards were really quick and easy to make, and I had a great time because the patterns and the shops are all really fun to work with.
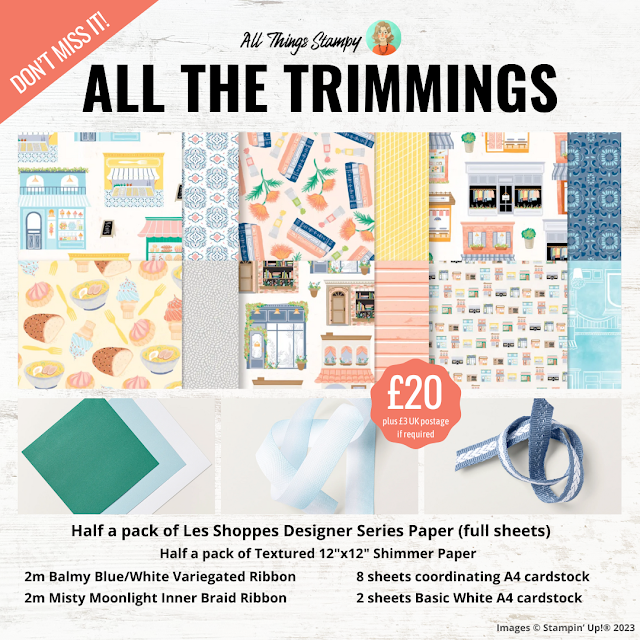
If you’d like to try Les Shoppes Designer Series Paper and live in the UK, a really great way to get your hands on a little bit of everything is to try my All The Trimmings Kit of the Month.
This includes half a pack of paper, plus coordinating Stampin’ Up!® cardstock, speciality paper and ribbon to match, as well as a PDF of project ideas. I can post this out to anywhere in the UK.


Really fun cards that you created! Thank you for sharing!
ReplyDelete