Do you like creating your own watercoloured backgrounds for your Stampin' Up!® cards? It's one of my favourite things to do and I have some fall-back techniques I return to, time after time.
One of these is the ‘smoosh’ technique, which is probably the easiest way to create an authentic watercoloured background using your stamping supplies.
All you need is a clear acrylic block (any size), ink pads and some watercolour paper.
1. Begin by wetting your watercolour paper all over. I spritz mine but if you don’t have a spritzer, you can just run it under the tap.
2. Press your block directly onto your ink pad, then apply it directly to the wet paper. ‘Smoosh’ it around a little to spread the ink.
3. Dry the block then repeat in a second colour.
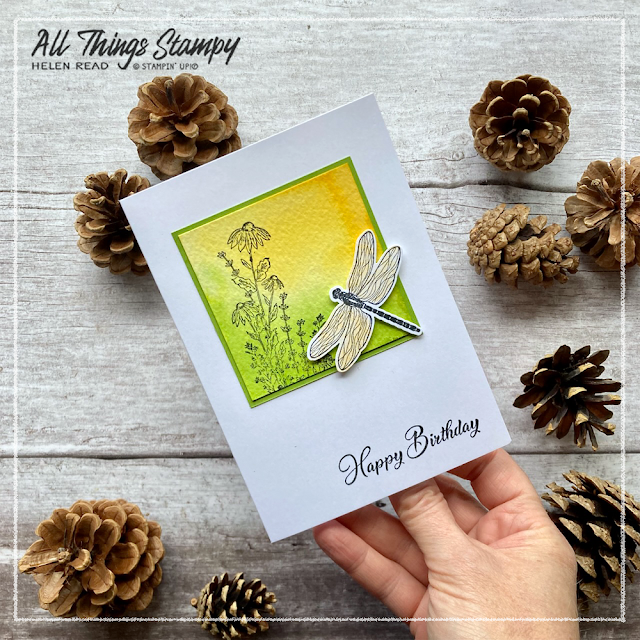
I used this technique to create this clean and simple dragonfly card. I created the watercolour background using Granny Apple Green and Tahitian Tide inks and the smoosh technique.
Once this was fully dry – which was just a few minutes on a sunny windowsill – I could stamp on top using that lovely long flower stamp from the Dragonfly Garden stamp set.
I stamped the dragonfly onto a separate piece of paper, punched it out using the Dragonflies Builder Punch and popped it up on top.
Then it was simply a case of mounting the watercolour paper on to a Granny Apple Green cardstock panel, attaching it to a Thick Basic White card base and finishing off with a stamped greeting from Go To Greetings.
When you’re making fun watercolour backgrounds like this, I always think it’s a good idea to make several, partly because it’s fun but also because while you are making more, your first efforts will be drying. You probably already know I don’t like waste so much prefer to use a bit of solar power to dry my watercolouring than plug in a heat gun.
So I switched colours slightly and used Mango Melody with Granny Apple Green for my second card in this style.
The second technique I wheeled out recently is clear block stamping. This is an oldie but goodie but it seems lots of people didn’t know about it because my Instagram reel demonstrating this technique has gone viral! I don’t actually know what constitutes viral but I honestly never thought I would produce a video that had 1.9million views, so I’m calling it viral!
For this technique you do need a water spritzer (or plant mister) but you don’t need watercolour paper; it actually works better on good old Basic White.
The panel you create is the same shape as the clear block so choose carefully.
1. Press one end/side into an ink pad, then turn it round and press the other end/side into a different ink pad. Try to get the colours as close together as possible without overlapping.
2. Spritz the block liberally with water but not so much that the water drips off. I gave mine about 4 squirts with a Stampin’ Spritzer.
3. Press this block onto your Basic White cardstock and leave it there for a few seconds to allow the water to soak in to the paper.
4. Lift to reveal your faux watercolour background. Allow this to dry fully before stamping on top.
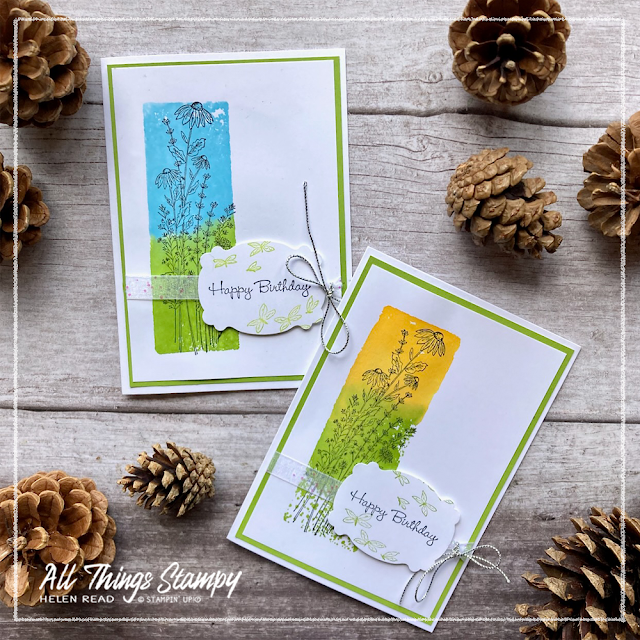
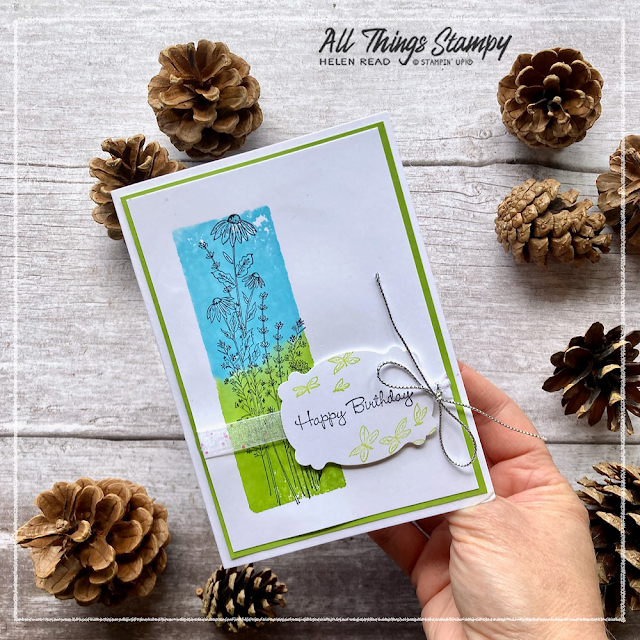
I created my cards using the same colours again; Tahitian Tide and Granny Apple Green, then Mango Melody with Granny Apple Green.
For each card, I mounted this white panel on to some Granny Apple Green cardstock, then wrapped some White Glittered Organdy Ribbon around the front, securing at the back with tape.
I finished it off with a stamped label punched with the Lasting Label Punch, decorated with a few stamped Granny Apple Green butterflies. The greeting is from Go-To Greetings and the butterflies are from Dragonfly Garden.
I hope you like these two watercolour techniques and give them both a go. If you would like to order any of the products you see here – or indeed any Stampin’ Up!® products, if you are in the UK I would love to help you. And if you spend £45 or more during August, you can choose from a great selection of free gifts.
There’s a new host code for August, which is XCCS4UHD. Use this if your order is less than £150 and I will send you a thank you gift next month. Don’t use it if you spend more than £150 as you will be entitled to choose your own rewards at the checkout.
Does
your wish list come to more than £99? Please get in touch and I will
help you get more for your money and unlock discounts all year round.


No comments:
Post a Comment
Thank you so much for taking the time to comment.