I’m very busy this week, prepping for an all-day Stampin’ Up!® craft event here in Derbyshire on Saturday. This event has a Let’s Set Sail theme and guests have preselected their projects... within reason, that is.
Out of three kits – cards, scrapbooking and home décor – they have chosen to make two and interestingly every single person has chosen cards.
Everyone will be using the Let’s Set Sail bundle and some have chosen to include the stamp set and/or the bundle (which includes the Sailboat Builder Punch) in their kits.
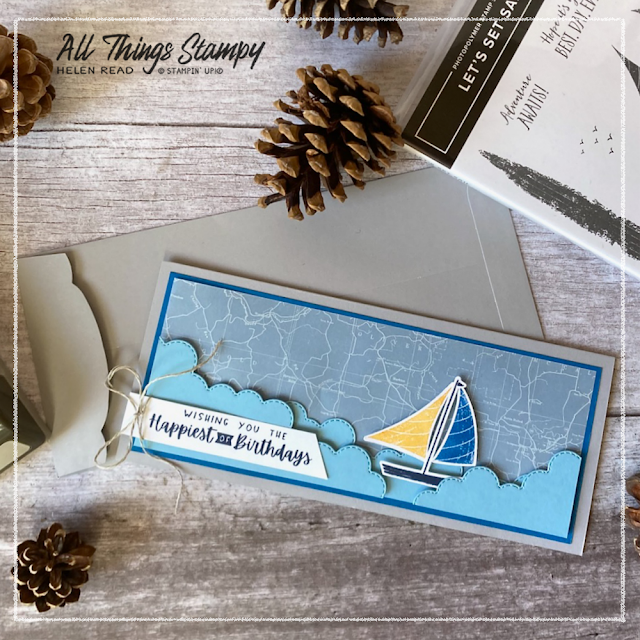
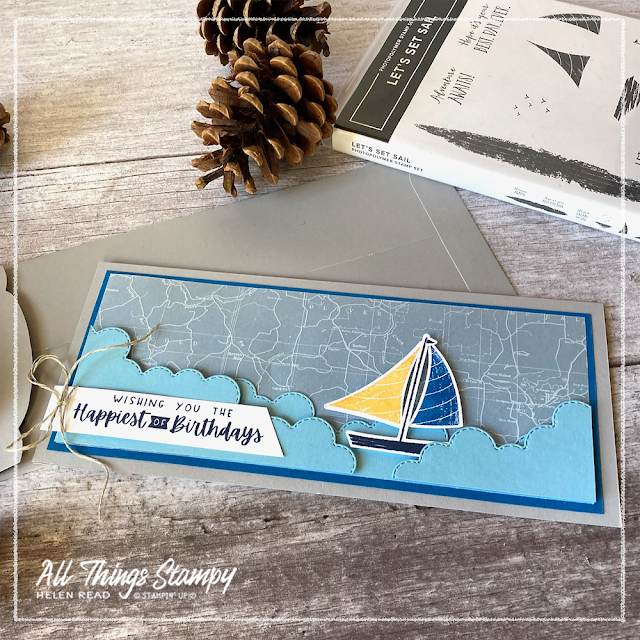
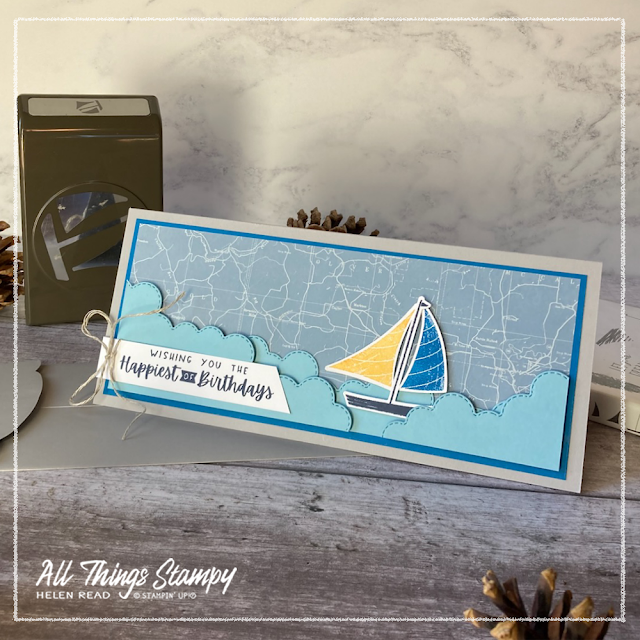
In today’s blog post I have two slimline cards using the Let’s Set Sail bundle, along with Basic Border Dies to create waves, and Vellum Layering Designs to create a map background. I will also share tips for lining up your stamps with your punch, and for sticking vellum so it won’t show.
First up is this slimline portrait card featuring white waves created with Basic Border Dies. These fabulous dies have been on my wish list for absolutely ages but I have only just got round to adding them to my order. I love that the borders they create are stitched, which makes them look extra classy.
Most of the cards I have made with the Let’s Set Sail stamp set have only featured one boat but the extra height of the slimline card allows space for a second one bobbing around among the waves.
As a background, I used one of the map patterns from Vellum Layering Designs; this introduced a nautical element (even though the map is of land, it still hints at travel) and softens the Pacific Point beneath.
Here’s a tip for sticking down the vellum. Behind the waves and boat anything goes. You won’t see the adhesive here so use whatever you like. The top section is just loose and so far it isn’t going anywhere, even on the portrait card. If you wanted to secure it, you could use a tiny amount of Tombow Multi-purpose Adhesive but spread it so thinly that it’s almost gone. If you don’t have a latex allergy, you can do this with your finger.
The landscape card features Balmy Blue waves, again created with Basic Border Dies. The background is once again created using a map from Vellum Layering Designs, overlaid onto Pacific Point cardstock.
These are all fairly neutral nautical colours, so I have added splashes of colour using Real Red and Daffodil Delight ink.
It’s really easy to match your stamping to the Sailboat Builder Punch. Here’s how:
1. Feed a piece of cardstock all the way into the punch, and punch it out.
2. Lay the template flat on to your work surface and carefully piece each stamp into the holes you have created.
3. Line up the block with the bottom edge of the cardstock and pick up all three stamps in one go.
4. You should now be able to stamp all three images and punch them out perfectly.
The Let’s Set Sail stamp set comes with some useful sentiments but I wanted to mix things up a little so both these cards have birthday greetings from different stamp sets. The portrait card uses Go-To Greetings, one of the most useful sets I think we have ever had at Stampin’ Up!®. The landscape card uses Charming Sentiments. Both sets have greetings for lots of different occasions.
Both of these cards fit into Slimline Envelopes from Stampin’ Up!® These come in Smoky Slate (used here), Soft Succulent and Basic White. Eagle-eyed attendees at this Let’s Set Sail craft event will notice that the Smoky Slate cards and Vellum Layering Designs are left over from the last all-day event I held back in June!
If you are interested in any of these products, it is well worth knowing that if you ordered the Let’s Set Sail bundle, some Slimline Envelopes and any ink pad, you would qualify for a FREE Sale-a-Bration item, as long as you order before the end of August 2022. In fact, don’t let me tell you what to buy – you can order anything you like and as long as it comes to £45 before shipping costs, you will earn a fab free gift.
Plus, if you use the host code XCCS4UHD, I’ll send you a thank you gift next month.
Does
your wish list come to more than £99? Please get in touch and I will
help you get more for your money and unlock discounts all year round.


No comments:
Post a Comment
Thank you so much for taking the time to comment.