Showing posts with label Window sheets. Show all posts

Friday, 2 January 2015

Celebrate your Big Day with lots of stripes... and cake


You know how some cards are really quick … you step back from the project and think “wow! I can’t believe that came together so easily!” 

This isn’t one of those. But it was fun to make and I am happy with the idea in principle, even though I would do it differently next time. 

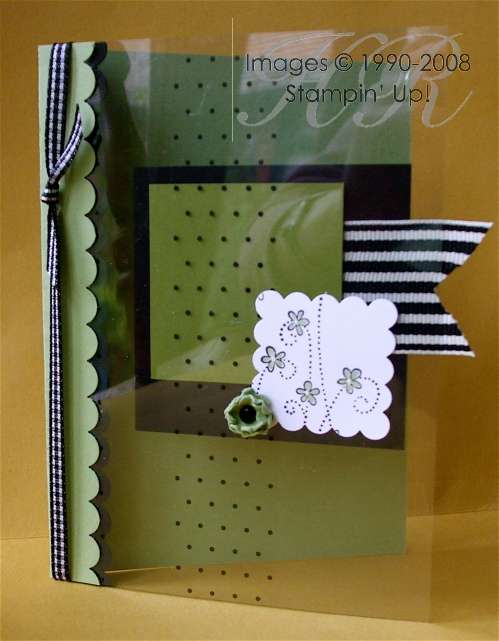
It all begins with a piece of the Irresistibly Yours Designer Series Paper, which is FREE with a £45 order during Sale-a-Bration (begins 6th January). There are six patterns in this pack, all glossy white on white, which opens up a whole world of possibilities!

I couldn’t resist having a go at this fun rainbow effect, which involved seven ink pads, seven sponge daubers and almost a whole pad of sticky notes. What would I do differently? I’d make sure the centre of the image was coloured in yellow and orange, ie the paler shades, so that the main image showed up more clearly.

I stamped the images in Black Stazon which brings me to a note about Stazon and photopolymer.  My Big Day stamp set (the words and the cake) is rubber, so all is fine, but the balloons are from my From The Herd stamp set, which is photopolymer. 

Stazon WILL stain your photopolymer stamps which, quite frankly, I don’t care much about. But you must remember that if you clean your photopolymer stamps with Stazon cleaner, you need to clean them again to get the Stazon cleaner off them, otherwise it will damage them. Make sense?

Anyway, back to the card. The greeting is stamped onto a Window Sheet, and I’ve coloured behind it with  a Chalk Marker … the same one I used to draw the dots around the label image. 


Friday, 10 October 2014

White Christmas window sheet card


Sorry for the lack of posts lately; as you probably guessed, I’m still not feeling 100%, which is now getting very boring after two weeks. It was only supposed to be a cold!
Anyway, having not stamped anything for ages, I’m relieved to say that there are still some projects waiting to appear, including this one, which didn’t make the cut for my Christmas Workshop the other week. I put it on display and it was really popular… but it was just a bit too complicated for a stamp-a-stack and I know my ladies don’t like to be rushed!

It’s based on the gorgeous framed picture on page 31 of the Autumn/Winter catalogue but I framed my image using the versatile Ovals Framelits. As you can’t tell from the picture, these are the layers, from the bottom up…
  • Coastal Cabana card base
  • White cardstock, masked with a piece of scrap paper and sponged using Soft Sky ink
  • Car and tree stamped on white cardstock and cut out - as the stamp set is photopolymer, you can do this in one piece
  • Window sheet, stamped using White Stazon
  • Coastal Cabana card, with oval cut out
  • Greeting


Tuesday, 29 June 2010

A surprising discovery


So... this is a bit of an odd one, isn’t it? My challenge was to use Old Olive (hurrah!), Certainly Celery, Basic Black with the option of Whisper White or Very Vanilla. I decided to use a window sheet from the fabulous Night & Day Designer Series Paper Pack. You get two 12x12 spotty window sheets, which is rather exciting.

Merrily creating, I was stopped in my track when I noticed I had got some adhesive on the window sheet. But undaunted, I grabbed my StazOn® remover, which was sure to shift it. It did of course... but it also removed the spots! Never mind, I thought, I will have a half spotty, half plain front... until I managed to get some stray StazOn® remover on the so-called spotty side. So I ploughed on and made this card with a spotty strip down the front. No mistakes in rubber stamping, remember!

The important thing when using Window Sheets, or acetate of any kind, is that you don’t want any adhesives to show, so only apply it where you are going to cover it up on the other side, too. So the Certainly Celery scalloped strip is stuck on the front, with a slightly larger Basic Black scalloped strip on the inside, to sandwich the window sheet and hide the glue.

The flower embellishment is a tiny version of the one made with the Scallop Circle Punch – only this time I used the Boho Blossoms punch and only three layers of cardstock. Cute!

Stamps: Simply Said
Cardstock: Certainly Celery, Old Olive, Basic Black, Whisper White
Paper: Window Sheet from Night & Day DSP
Ink: Basic Black, Certainly Celery (to colour flowers)
Accessories: Scallop Edge Punch, Scallop Square Punch, Boho Blossoms Punch, black brad, wide striped Grosgrain Ribbon - Basic Black, black gingham ribbon, blender pens, white gel pen

All products by Stampin' Up!®

Wednesday, 23 June 2010

Window sheets - a clear choice for crafters (groan)


First things first: I thought I'd posted this card but can't find it - please tip me off if it's already been published!

And secondly, is anyone else having trouble staying logged into Blogger? It's driving me up the wall, having to log in several times a day. 

Now back to the card... you can make really special cards with Window Sheets – and these spotty sheets from the Night & Day Designer Series Paper pack are really special.

The important thing to remember is to keep the adhesives hidden – so I stuck my Basic Black layer on the front of the card, and the Barely Banana layer on the inside. I did a similar thing on the inside, with a panel on the back, so that there is somewhere to write.

I coloured this beautiful image using ink pad lids and blender pens.

Stamps: Bloomin’ With Beauty
Cardstock: Barely Banana, Basic Black, Whisper White
Paper: Night & Day
Ink: Basic Black, Barely Banana, Certainly Celery, Apricot Appeal           
Accessories: Black gingham ribbon, blender pens

All products by Stampin' Up!®

The small print

This is my personal blog and my sole responsibility as an Independent Stampin' Up!® demonstrator. All images are © Stampin' Up!® All content including photographs, projects and text are © Helen Read, unless otherwise stated. Please feel free to copy my ideas for your personal use and inspiration - if you are a SU demonstrator you may use these ideas for your events but please give credit where it is due. Please do not use my ideas for monetary gain, competitions or publication. The images on this blog - including blog buttons - should not be copied and used elsewhere on the internet or on CDs.