Sale-a-Bration is a wonderful time of year for Stampin’ Up!® fans as we can earn lots of gorgeous free products.
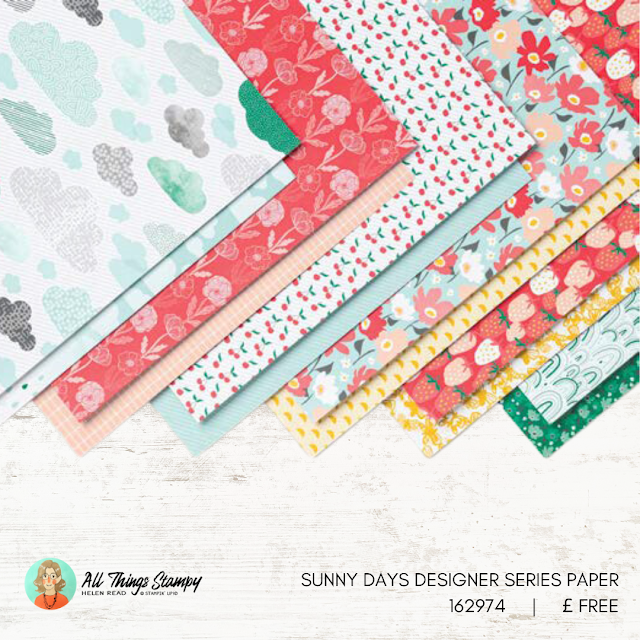
One of them is this pack of Sunny Days Designer Series Paper, which I've used here to create six REALLY simple cards which anyone can make with no special equipment.
All I have used here is some Thick Basic White cardstock, Basic Black cardstock for layering, some Stampin’ Up!® greeting stamps, a paper trimmer and some ribbon.
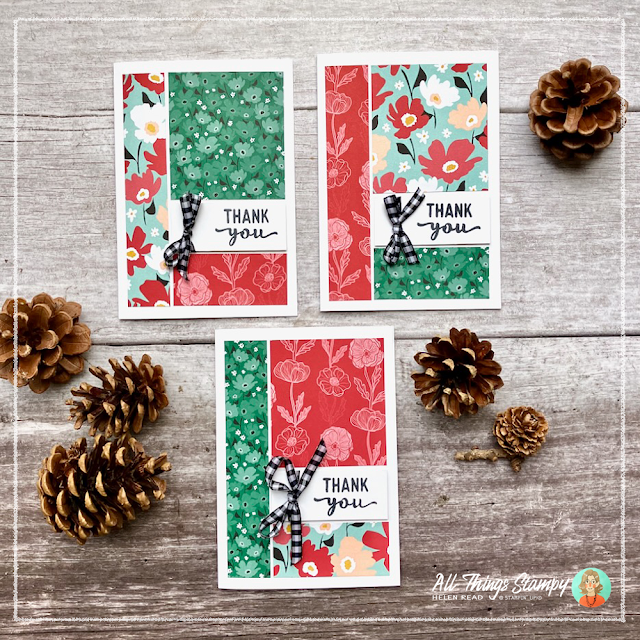
This set is my favourite because you can make three cards in one go, simply by cutting up three coordinating designs of Sunny Days Designer Series Paper and mixing up the pieces.
The following measurements are for an A6 card made by folding a piece of A5 cardstock in half. They are in metric because, well, don’t start me off but we switched to metric in this country in 1972 and I have never been taught the imperial system.
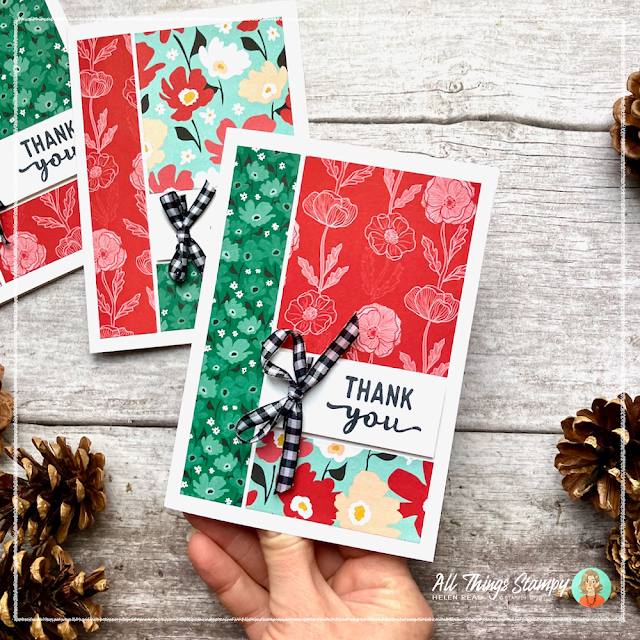
So, begin with three pieces of Sunny Days Designer Series Paper measuring 9.1cm x 13.5cm. Cut a 2.5cm strip from the left, then cut the remaining piece into 6.6cm x 7.3cm and 6.6cm x 3cm. You’ll have a piece left over – it’s up to you what you do with that.
Now mix them up and stick them to the card fronts, leaving a gap for a greeting. You can either stamp this directly onto the card or do what I’ve done here and stamp a piece of white cardstock measuring 6.6cm x 2.8cm.
To finish off, I’ve tied some of my favourite black and white gingham Stampin’ Up!® ribbon around the greeting label and popped it up in the gap.
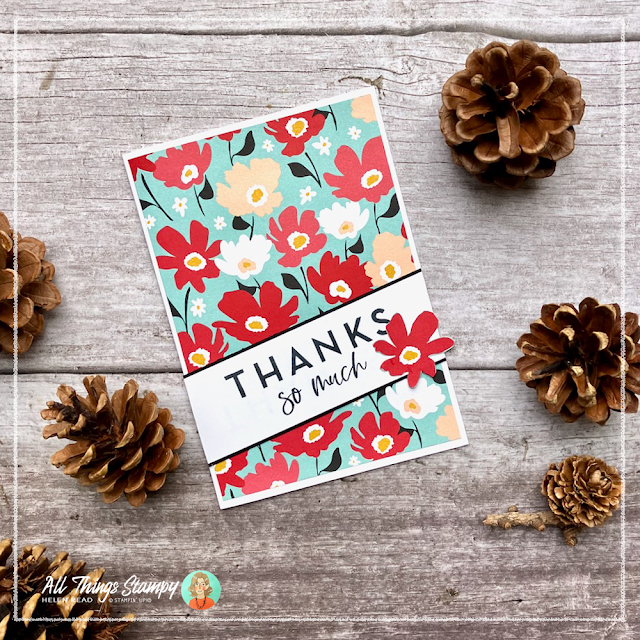
My second design using Sunny Days Designer Series Paper is also pretty simple. I’ve cut a piece to fit the card front, then stamped an oversized strip of white cardstock with a large greeting, which I've layered onto some black cardstock.
I stuck this flat to the card front at an angle, then trimmed off the sides using scissors. To finish off, I cut out one of the large flowers and added this for interest.
This strawberry card goes right back to basis, and is ideal if you need lots of cards in a hurry. It’s simply a square of Sunny Days Designer Series Paper layered onto a slightly larger square of Basic Black Stampin’ Up!® cardstock, popped up on a white card base, with a greeting stamped beneath. Cardmaking does NOT have to be difficult!
Finally, this is a slightly trickier card, purely because it requires some careful paper trimmer action. I began with a 10cm x 14.3cm piece of Sunny Days Designer Series Paper and cut out the centre, 2.5cm from each edge, using my Stampin’ Up!® paper trimmer.
The remaining frame is stuck directly to the card front. Then I mounted the centre piece onto a slightly larger piece of Basic Black cardstock then popped it up on the centre.
The greeting is stamped on a strip of cardstock and the ends are flagged using scissors.
I hope you like my really EASY Sunny Days Designer Series Paper cards and are inspired to make your own. These are just a few of the designs I will be using at a Use-Up Saturday event which was supposed to take place just over a week ago but has had to be postponed due to our old nemesis, Covid.
Remember, you can only earn this fabulous paper until the end of February, so make sure you don’t miss out!


.png)


No comments:
Post a Comment
Thank you so much for taking the time to comment.