One of the most intriguing bundles in the new January-April Stampin’ Up!® Mini Catalogue is Hooray for Surprises.
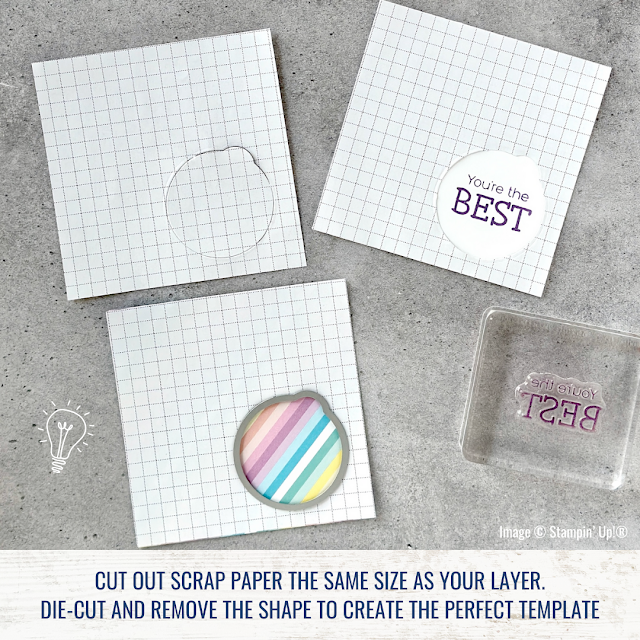
This is a fun stamp set in its own right but the real innovation comes from the coordinating Hooray for Surprises dies. As you can see from the image, there are four dies in the set with little notches around the shapes. Two are circles with a tab, one is a heart with a tab and the one at the bottom is a scalloped strip with a tab.
These allow you to make clever perforated elements for interactive cards; pull the tab to open and reveal an image or message behind.
To be clear: once you have pulled that tab and opened the card, that's it. It's a one-way trip. This makes it important to get the positioning of the inside message right.
You can do this easily by creating a template.
- Cut a piece of scrap paper the same size as the layer you want to die-cut.
- Die-cut your shape in the desired position.
- Remove the perforated section to leave the aperature then position this on top of your cardstock layer and stamp inside.
- To get the die in the same position, line up your template and cardstock layer, then reposition the die within the aperture before running both through the die-cutting machine.
You can reuse the template as long as you are using layers of the same size. Once you switch to a different-sized layer, you will need to create a new template.
I have made several cards using the fab Hooray for Surprises bundle, in preparation for my upcoming Spring Craft Day in Derbyshire. Please follow my Facebook page or subscribe to my newsletter to be alerted when registration opens. It will be soon but I have some maths to do first!
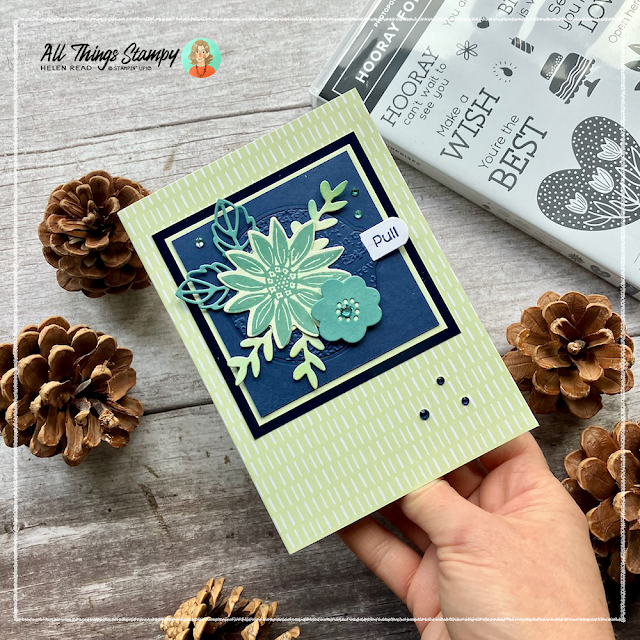
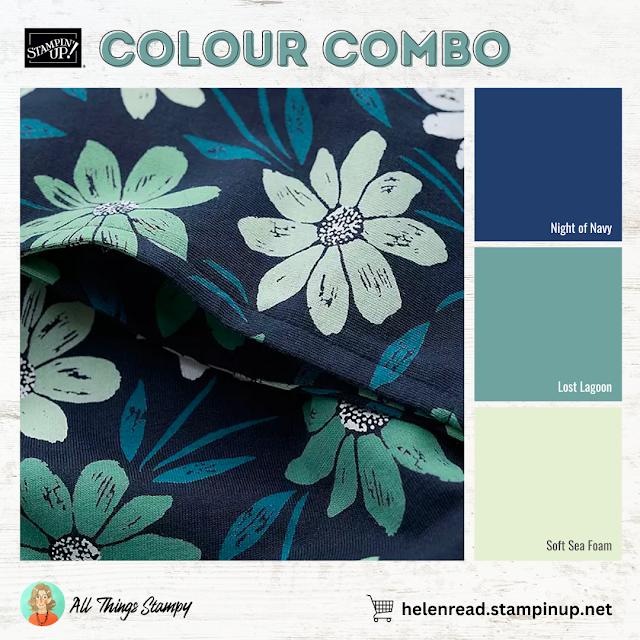
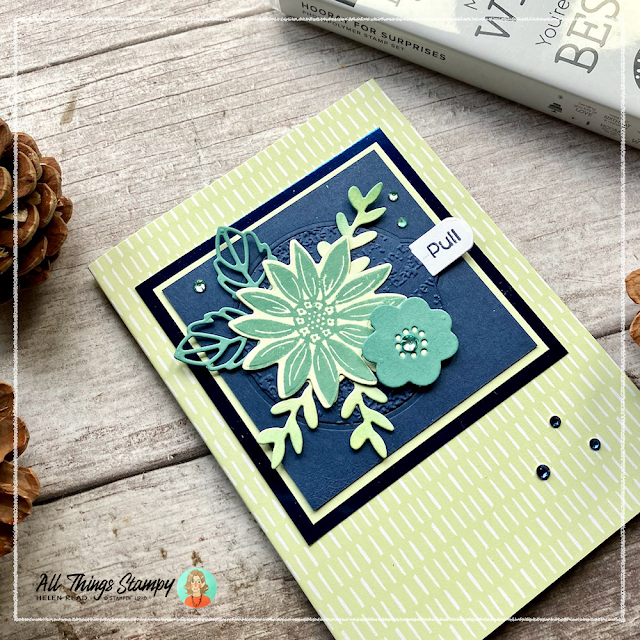
This serene green and blue card was made for a friend’s 60th birthday, and based on one of her favourite Seasalt dresses. I noticed the dress had very similar flowers to the Hooray for Surprises stamp, and the colours were Night of Navy, Lost Lagoon and Soft Sea Foam. These proved the perfect inspiration for her card.
I covered the card base using Subtles Designer Series Paper in Soft Sea Foam then layered up my interactive piece using die-cut elements in Lost Lagoon and Soft Sea Foam. To tone things down a little I stamped onto Soft Sea Foam cardstock in Lost Lagoon. The leaves are die-cut from Soft Sea Foam and then gently coloured with Lost Lagoon using a Blending Brush.
I did use some retired stock here as it was too perfect not to. I found some old foil sheets in Blueberry Bushel and some old embellishments in shades of blue and green, so these added a touch of glitz.
The “reveal” is a die-cut 60th birthday wish.
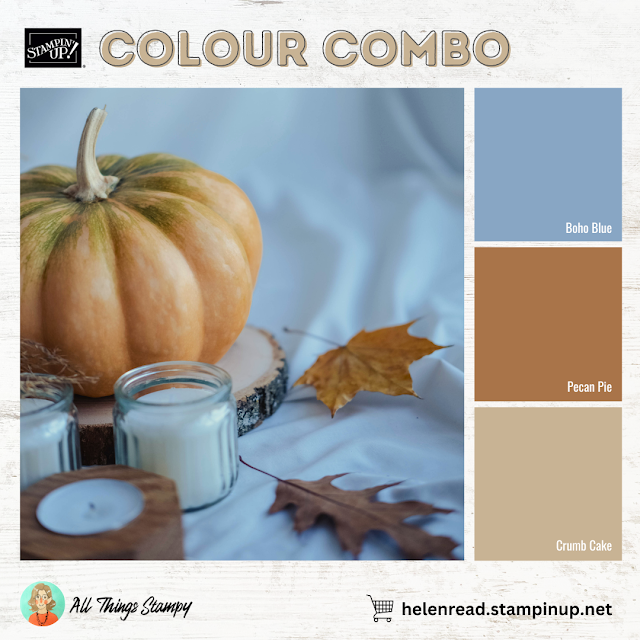
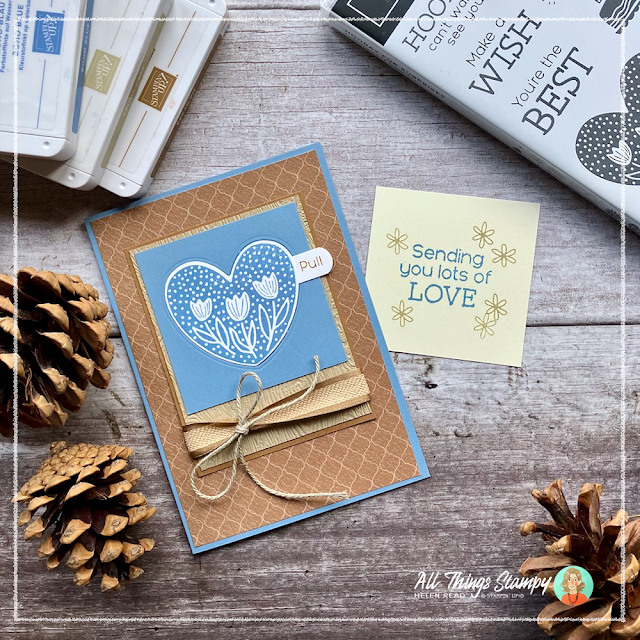
The second Hooray for Surprises card I want to show you is in a colour combination I showed on Facebook a couple of weeks ago.
It was inspired by the three packs of Stampin’ Up!® cardstock I was ordering. Boho Blue, Pecan Pie and Crumb Cake were the packs I needed and lined up in my online basket, I realised they made a gorgeous combo.
I was challenged to make a card so here is one using the Hooray for Surprises bundle and a background of Flight & Airy Designer Series Paper (FREE with a £45 order during Sale-a-Bration).
This time I remembered to stamp a second piece to show you what will be revealed when the tab is pulled.
You’ll notice that for both Hooray for Surprises cards, I have created an additional tab next to the heart. The heart die does include a tab but to make it more obvious – and make space for the word “pull”, I added an extra one. This is sandwiched between two layers of cardstock.
On this card, the Pull tab is sandwiched between the stamped white heart and the Boho Blue heart below.
I hope you like my Hooray for Surprises cards. If you can get to Derbyshire and are thirsty for more inspiration for this fabulous bundle, please subscribe to my newsletter for details of my upcoming class. It’s on Saturday 9th March and registration will be opening very soon.






Gorgeous cards, Helen. I love the designs and colour combos and thank you for the template tip. This bundle wasn't on my wish list, but it is now :-)
ReplyDelete