Today I want to show you how to use a really fun – albeit unpredictable and a bit messy – technique which I showcased at last week’s Crafty Friday online class.
In 2023, my Crafty Friday online classes will each month focus on a different technique using Stampin’ Up!® products – and the great news is that because it’s online, you can attend from anywhere in the UK.
Both I and the crafters who attend are really enjoying revisiting old techniques and trying some new ones. So far we have tried Triple-Time Stamping, Stampin’ Up!® Blending Brushes and this month the focus was on mirror and reflection techniques.
The key piece of equipment for the reflection technique is a Silicone Craft Sheet from Stampin’ Up!®.
I find it’s useful to have two of these; one for glue and one for reflection and mirror techniques. That way the one you stamp on won’t get any uneven patches from glue residue you’ve missed when cleaning.
I also used a Stampin’ Spritzer from Stampin’ Up!® to apply a fine water mist to my silicone craft sheet. The key when making a reflection card is to remember that most of the time, reflections are indistinct, so misting the image really helps.
I know what you may be thinking; why haven’t I used the Stamparatus? Yes this fabulous piece of Stampin’ Up!® kit makes the technique very easy but in these times of financial hardship, I am trying to keep my techniques classes as accessible as possible.
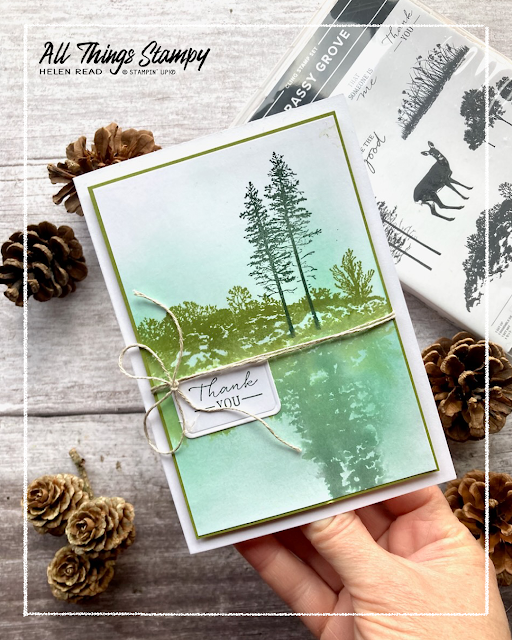
I used the Grassy Grove Stampin’ Up!® stamp set as I think the trees and foliage are perfect for this technique, but one lady made a fabulous card using a dandelion stamp, so give it a go with whatever you have.
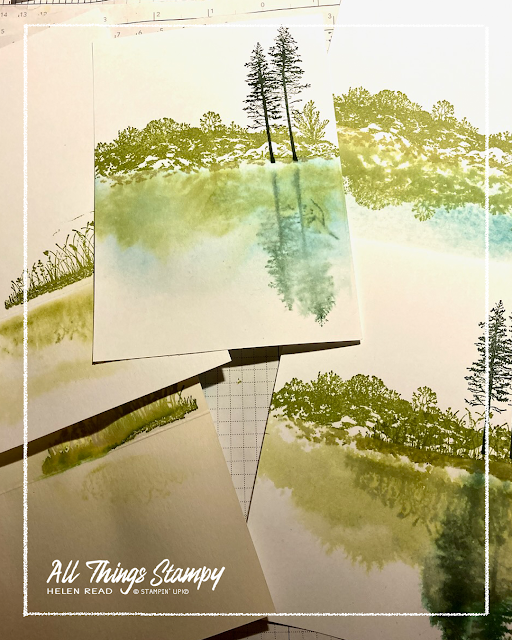
As for paper, again use what you have and don’t be afraid to try different types of cardstock. The card you see here is made using Basic White from Stampin’ Up!® but I also tried Stampin’ Up!® Shimmer White and some watercolour paper. As you can see, I did have quite a few goes before “mastering” the technique!
Ok let’s go for it! When you’re ready, begin by stamping onto the cardstock. I stamped the grassy mound in Old Olive and trees in Evening Evergreen.
Next stamp the grassy mound onto the silicone craft sheet. To mirror the stamp positioning of the trees, overlay the craft sheet onto the cardstock. It's translucent so you can position the grassy mounds exactly on top of each other, and see where to stamp the trees.
As I mentioned above, a reflection needs to be indistinct and after much experimentation I found that the “stamping off” technique removed just enough ink to make the image paler. Of course you can’t stamp off using a silicone craft sheet – but you can get the same results by overlaying a piece of grid or scrap paper on top and gently swiping to lift up some ink.
With the same arrangement of images now stamped on the silicone craft sheet and some ink lifted off, it’s time to spritz lightly with water. You want to get it wet enough so the ink forms small beads but not so wet that it starts running when you lift up the mat.
Very carefully lift the silicone craft sheet and flip it over onto the stamped cardstock, positioning it so the images almost touch but don’t overlap.
This next stage is very important: don’t rub the silicone craft sheet flat, however tempting that may be. And don’t move it; leave it for a few minutes for the ink to soak into the cardstock.
When you do lift the silicone craft sheet up, there may be some wet patches remaining. If so, dab these gently with a tissue.
Allow the cardstock to dry fully before doing anything else. Adding any ink to damp cardstock will result in smudging.
Once your stamped image is fully dry you can apply some blue sky and water using Stampin’ Up!® Blending Brushes, a brayer or a sponge.
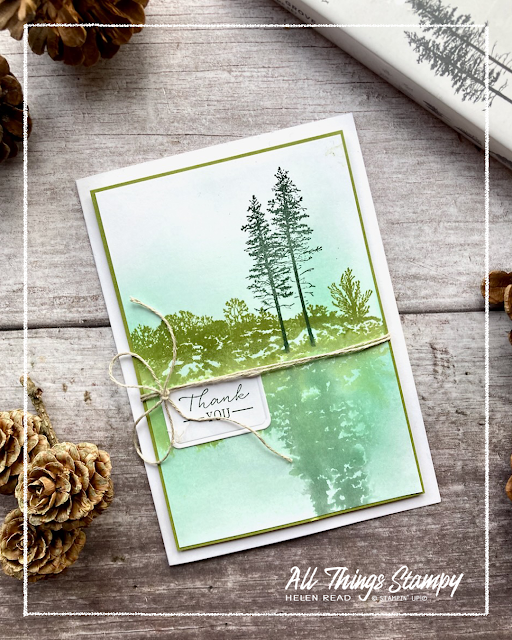
I added a little Pool Party to the sky, then a lot of Pool Party to the water. For the sky, I used my Blending Brush as I normally do; in a circular motion, gradually building up colour and moving outwards for paler areas.
However, for the water area, I swiped my Blending Brush from side to side, horizontally. This didn’t make a huge difference but does give a very slight impression of the water flowing.
When assembling the card, I found that any gap between the two images could be marked with some linen thread, providing a definite water line while not detracting too much from the main image.
I hope you like my reflection card and are inspired to have a go at making your own. If you are in the UK and would like to join in our next Stampin’ Up!® technique class, please do visit my Facebook page for all the latest info – and give me a follow to stay up to date.


.png)
.png)
.png)
.png)
.png)


No comments:
Post a Comment
Thank you so much for taking the time to comment.