Do you want to know how to save money on your Stampin’ Up!® projects? I
am here to help you get the most out of everything you buy, and already
own.
As the cost of living crisis deepens worldwide and, it
seems, particularly here in the UK, I want you to know that I’ve got
your back. I have lots of ideas to help you make your Stampin’ Up!®
supplies stretch further, based on years of being a frugal crafter who
hates waste and wants to save the planet.
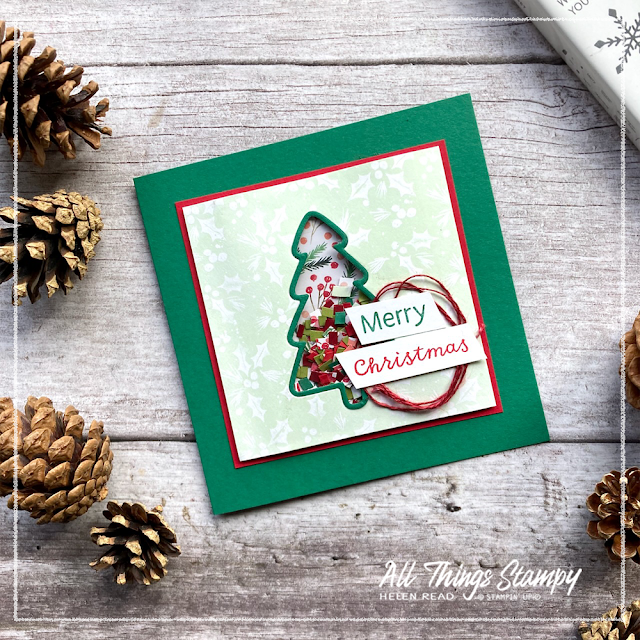
Today I want to show you my zero waste shaker card and matching tags. Other than the card base itself, everything you see here is made from scraps of Stampin’ Up! cardstock and Designer Series Paper, leftovers from other projects or kits, or actual waste.
1. I gathered up some offcuts of cardstock
and Designer Series Paper; I had a pack of Painted Christmas Designer
Series Paper which has almost all gone, so I used that as my starting
point.
2. For the shaker pieces, I cut some scraps of cardstock and Designer Series Paper – and I mean really small scraps that I couldn’t really use for anything else – into narrow strips. I didn’t measure, I just winged it.
3. Then I used my scissors to cut them into small pieces.
Fringing scissors would make the job quicker if you have them but it
really didn’t take that long at all – and you don’t need as many pieces
as you think. I put these into my small cello bag... except I
didn’t buy my cello bag; I used one which once contained a pack of small
embellishments. I save all of these bags as I know I can reuse them for
packing kits or for storing small items such as die-cut shapes.
4. To make the card, using the Soft Sea Foam holly design, I trimmed the paper
down to a square then die-cut the tree from the Spruced Up bundle in
the centre. As these clever dies produce the tree shape and an outline, I
cut another one from a scrap of Shaded Spruce cardstock too. This gave
me the window for the front of my shaker.
I firmly sealed the bag of shaker pieces before attaching
it to the back of the holly design. Once this was done I could add the
Shaded Spruce tree border – it’s not an outline in this case but an
inline, which I stuck directly to the bag.
Next I used Stampin’
Dimensionals – in fact, I trimmed the edge pieces with scissors to make a
long foam border – to attach this layer to a slightly larger Real Red
square, creating the basic shaker.
To complete this frugal Stampin’ Up!® shaker card, I mounted this panel onto a Shaded Spruce square card base and finished off with some twine I had left over from an old kit, and a hand-cut greeting stamped using the Spruced Up stamp set.
Inside, I lined the card with some white cardstock and a narrow strip of leftover Designer Series Paper.
If you’ve been counting, you’ll have worked out that I now had several die-cut trees left over. To be precise; a solid Shaded Spruce tree, plus both the solid tree and outline in the Soft Sea Foam holly design.
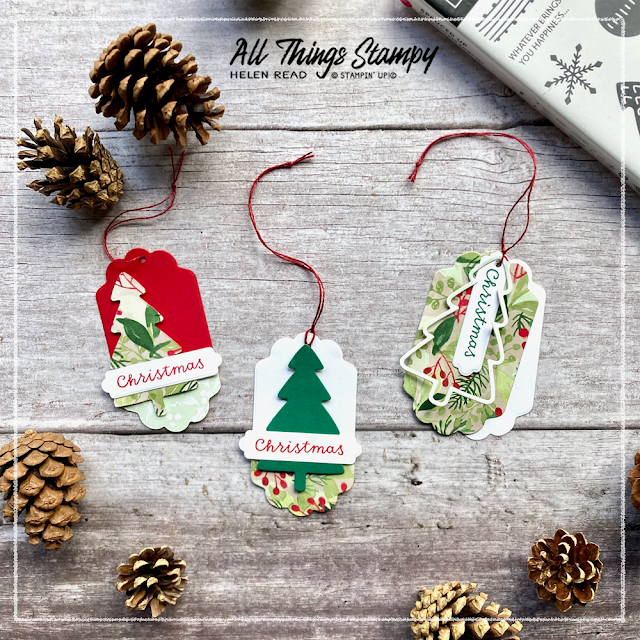
Using these and some more cardstock scraps, I made a set of three tags. I die-cut the tags using Seasonal Labels Dies and stamped on the back using the “To: From” stamp from the Spruced Up stamp set.
From another scrap of Painted Christmas Designer Series Paper I managed to get a full tag shape plus two incomplete shapes which I used to decorate the bottoms of two of my tags. They look different here because I used both sides of the paper to show off both designs.
I stuck one of
these to the bottom of a Real Red tag then, for contrast, flipped over
the Soft Sea Foam holly tree to show the bolder design. A stamped
greeting label and a piece of that leftover red twine was all I needed
to complete the tag.
The second tag is Basic White cardstock
with a piece of Painted Christmas Designer Series Paper stuck to the
bottom. The solid Shaded Spruce tree and a stamped label finish this one
off.
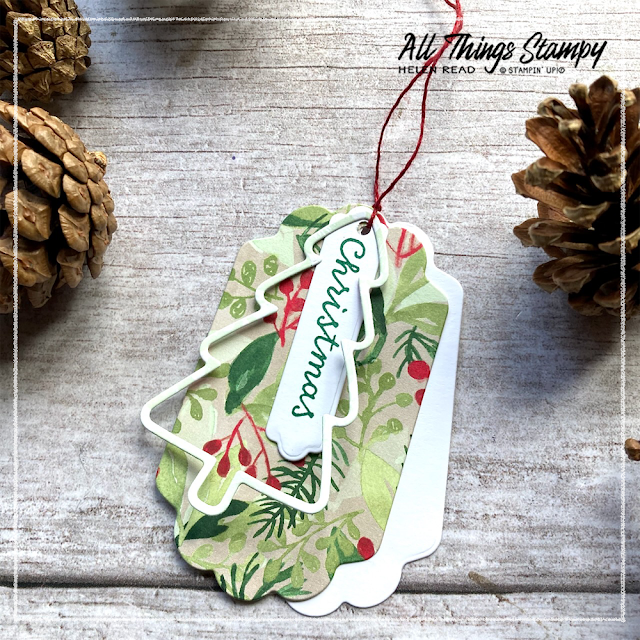
And for the third tag, I doubled up, using the Painted Christmas Designer Series Paper label on top of the white, with the outline tree and stamped tag all held together loosely with twine.
Other than the card base itself, everything you see here is made from scraps of Stampin’ Up! cardstock and Designer Series Paper, leftovers from other projects or kits, or actual waste.
Using your scraps wisely you can really stretch your Stampin’ Up!® supplies to make a vast number of projects. Start today by saving any scraps, no matter how small, and keeping your packaging. You never know when it may come in handy.
These eco-friendly habits I have been developing for years are now being embraced by more and more people, as they strive to save money. I firmly believe it’s especially important to continue to enjoy your hobby when times are tough, so over the coming months I will be sharing lots of tips to help you make your craft supplies go further, so please keep coming back and, for maximum tips, please follow me on Facebook and Instagram as not everything makes it to the blog.
Together we can get through this!
If you are in the UK and would like to order any craft supplies, please
visit my store and, if you use the October 2022 host code 2CVP6XFF, I’ll send you a thank you gift in the following month.


No comments:
Post a Comment
Thank you so much for taking the time to comment.