Monday, 31 May 2010

Dashing through the mist


Here I’ve inked Dasher with Close to Cocoa. I wiped his antlers clean again and then inked them with a Ruby Red marker.

He looks a little fuzzy because I got a bit carried away misting with shimmer paint. I’ve made a mist using this method on Monica’s blog.

Stamps: Dasher, Tiny Tags
Cardstock: Close to Cocoa, Ruby Red, Very Vanilla, Bridesmaid Designer Series Paper
Ink: Close to Cocoa, Old Olive
Accessories: Ruby Red Marker, Satin Ribbon – Old Olive, Shimmer Paint – Champagne Mist.

All products by Stampin' Up! ®

Saturday, 29 May 2010

Simple Vintage Vogue card

Only a few days of May left, so only a few days left to

a) order a bundle featuring products in the new colours

and 

b) enter my competition to win a fabulous prize!

To make sure you don't miss out, send me an email over the weekend. 

Here is a very simple card, using the gorgeous new Vintage Vogue stamp set.  The Very Vanilla panel is stamped off in Rose Red and Brocade Blue to give a paler shade – that’s when you stamp on scrap paper first to remove some of the ink. The main flower is stamped in Rose Red, cut out and then I applied Champagne Mist shimmer paint to the tips of the petals using a sponge dauber. A Brocade Blue button and some silver thread complete the flower.

Stamps: Vintage Vogue
Cardstock: Brocade Blue, Rose Red, Very Vanilla
Ink: Rose Red, Brocade Blue
Accessories: 5/8” Grosgrain Ribbon - Brocade Blue, Rich Regals buttons, silver cord

All products by Stampin' Up! ®

Thursday, 27 May 2010

Sweet gift wallet


This was the second project from the My Sweet Pea class. It was a lovely evening – a bit hot for me, but very relaxed... until we realised what the time was and had to hurry the final project!

This is a wallet which you can use to give gifts of cheques, tickets, money, gift vouchers etc. It’s very easy, just two scores to create the card, and a strip of cardstock to go around it.

However, don’t try to measure and score the belly band to fit as it will end up too loose or too tight. Your best method is to take the strip of cardstock and, hold one end on the front and bend it around the Old Olive card. Then, holding the Designer Series Paper strip over the top, repeat. Make sure the strips are just long enough to overlap very slightly and you can join them with tape – just make sure the tape doesn’t touch the Old Olive card and your belly band will still slide off. The join will be covered with your embellishment.

Stamps: My Sweet Pea, Tiny Tags, Sweet Stitches wheel
Cardstock: Old Olive, Soft Suede, Whisper White
Paper: Sweet Pea Designer Series Paper stack
Ink: Old Olive, Soft Suede, Pumpkin Pie
Accessories: 1 ¼” circle punch, 1 3/8” circle punch, Scallop Circle Punch, ¾” circle punch, scallop edge punch, Wheel guide

All products by Stampin' Up!®

Tuesday, 25 May 2010

Razzleberry pouch


Last night was the My Sweet Pea class – can’t tell you how it went as I’m typing this on Monday afternoon. Sorry to spoil the illusion!

This was one of our projects. I thought it was time everyone got their hands on gorgeous Rich Razzleberry cardstock and ink... not to mention that beautiful polka dot ribbon!

You don’t need a template to make these, honest – just wing it! This is a 9cm x 21cm of Rich Razzleberry, so you can get three from a sheet of A4. Measure 9.5cm from each end and score along the width. Fold and you have the beginnings of a little pouch.

To make the handle, punch a 1 ¼” circle from Old Olive cardstock, leaving plenty of room around it. Put the punched circle to one side and then put the piece with the hole in into a 1 ¾” circle punch. Line it up by eye and punch again.  You can use the Old Olive circle that you put to one side to line up on the Rich Razzleberry pouch, so that you can punch a semi-circle in the centre of the top edge. Repeat on the other side, then stick the Old Olive ring down using the Two-Way glue pen.

The flowers were inspired by a card by Stampin’ Up!® demonstrator called Elaine.
  
Stamps: My Sweet Pea
Cardstock: Rich Razzleberry, Old Olive,
Ink:  Rich Razzleberry, Old Olive, Pretty in Pink 
Accessories: Polka Dot Ribbon – Rich Razzleberry, Scallop Edge Punch, 1 ¼” circle punch, 1 ¾” circle punch, small flat cello bags (inside)

All products by Stampin’ Up!®

Sunday, 23 May 2010

It's time to hit the beach


This glorious, summery weather has inspired me to create a beach scene. I’m loving my brayer at the moment so I thought I’d have a go at something a little more ambitious than previously.

With the help of Michelle Zindorf – widely regarded as the Queen of Brayering in the stamping world – I made this beach scene. I used Michelle’s scene as inspiration, then went my own way for the rest of the card.

These instructions only tell you how to create the main image panel as the rest is pretty self-explanatory. For tips on brayering, see this earlier post. 

I’m not sure if you can tell from the photo but I started by stamping a few shells in Versamark on the left, to see if the ghosting technique would work with a delicate outline image. It has left a very (very!) subtle hint of underwater shells.

I brayered a piece of Very Vanilla cardstock from the corners – one corner was Tempting Turquoise, the opposite was a combination of Creamy Caramel and More Mustard.

I stamped a selection of shells from the Seaside stamp set, turning them round for variety. They were coloured with blender pens and markers, although blender pens and inkpads or Watercolour Wonder™ crayons would work just as well. To add some highlights, just as Michelle did, I used the white gel pen. Wasn’t so keen on this on the bottom right shell so have brayered a little over the top, to tone it down.

Next I used the speckly stamp from Bird on a Branch – this set is worth the money for this little stamp alone – and added some speckles around the edges of the cardstock. More Mustard and Close to Cocoa on the right; Taken with Teal (didn’t show up much) and Night of Navy on the left.

To add the “surf”, I battled with the Whisper White ink pad and the speckly stamp for ages before I actually read Michelle’s tutorial and discovered that she’d done this with the gel pen. Doh!

Finally, I give it a little spritz with my Champagne Mist shimmer paint spray.  It’s very subtle – fact, in this light, I can’t even see it. I really wanted to drop water onto it to see if it would create a wet look, but I chickened out! Maybe next time...

I love the look of this card – I’ve always been a sucker for seaside-themed cards... well, everything seaside-y really.  I’m already planning my next version. I want more beach and less sea and will maybe experiment with some masking fluid (if I still have some).

Stamps: Seaside, Bird on a Branch, Tiny Tags
Cardstock: Kraft (soon to be called Crumb Cake), More Mustard, Night of Navy textured, Very Vanilla
Ink: Tempting Turquoise, Taken with Teal, Night of Navy, Creamy Caramel, Close to Cocoa, Basic Gray, Versamark
Accessories: Markers - Ruby Red, Close to Cocoa; Medium Jewelry Tag punch, Linen Thread, ¼” Grosgrain Ribbon - More Mustard, Champagne Mist shimmer paint, white gel pen, brayer

All products by Stampin' Up!®

Saturday, 22 May 2010

Felt flowers


One of the many perks of being a demonstrator is the access to projects that we get, both through the demonstrator website and through the monthly Impressions newsletter. This was one of those ideas – I simply adapted it slightly so I could use the stamp and ribbon that I already have.

These are the beautiful hand-stitched felt flowers in the new Mini catalogue – I’ve used four pieces here. You can layer them with Tombow adhesive but you have to be patient and wait for it to dry. This is where I’ve been going wrong – I’m so impatient that I’ve been pulling them apart to see if they’re stuck before they’re ready. 

Stamps: Hello Again
Cardstock: Pretty in Pink. Chocolate Chip, Whisper White
Ink: Old Olive
Accessories: Mat Pack, Paper Piercer, Stitched Grosgrain Ribbon - Rose Red, Sweet Pea Stitched Felt

All products by Stampin' Up! ®

Thursday, 20 May 2010

Cottage Wall Mini Album


Here’s a really fun and easy-to-make mini album, which starts with a single sheet of 12x12. I’ve used the rather fabulous Cottage Wall papers, which are only available while stocks last – they won’t be in the new catalogue in October because they feature Orchid Opulence, which is one of the retiring colours.

For the flowers on the front and back, I used the Rock and Roll technique, which is very simple. You ink your stamp and then, using a darker ink pad, roll the edges of the rubber stamp on the ink pad. It is described in your techniques booklet, and also here on the Stampin' Up!® website. 

I’ve also used Rich Razzleberry cardstock, which – and I cannot stress this enough – is gorgeous. In fact, there are lots of lovely new products featured here but you can see that from the recipe at the bottom of this post. Meanwhile, here is how to make this rather exciting album.

  1. Take a sheet of 12x12 cardstock and score vertically, down the centre, at 6”.
  2. Score horizontally at 4” intervals, ie at 4” and 8” from the top.
  3. You will now have six panels. With the sheet laid out so that the six panels are landscape, cut along the top right scoreline, to the centre. Repeat with the bottom left scoreline.
  4. Now to fold the album: take the bottom left panel and fold it over to the right.
  5. The bottom panel is now double-thickness. Fold this up.
  6. The bottom right panel is now triple-thickness. Fold this over to the left.
  7. Fold this quadruple thickness panel up.
  8. Now close.

It really is much, much easier to do than to read about it, so take a sheet of 12x12 and have a go! You could also make a smaller one from A4 – just score down the middle as before, and make your horizontal scorelines/cuts at thirds.

Tip: Before you start decorating your album, number the pages and mark which way is up with a pencil. This will make life a lot easier.


I've put arrows on the pictures to show you how to open the album – basically the same process but in reverse. The faces have been blurred to protect the innocent (and the not so innocent!). They are just some very informal shots from the wedding – how fortuitous that the men and boys were wearing Orchid Opulence ties!


Stamps: Vintage Vogue, Tiny Tags, Totally Tabs
Cardstock: Old Olive, Rich Razzleberry, Orchid Opulence, Whisper White
Paper: Cottage Wall
Ink: Old Olive, Orchid Opulence, Rich Razzleberry
Accessories: Eyelet Border Punch, Word Window Punch, Round Tab Punch, Silver brad, Polka Dot ribbon – Rich Razzleberry


All products by Stampin' Up!®


Wednesday, 19 May 2010

More ghostly goings-on


Finally, for our last project at the brayering class, we tried the ghosting technique, which I described here. This time we also had a go at using two different colour inks – which I have only done on the green sample, here. I brayered Sage Shadow from the top edge and Handsome Hunter from the bottom edge. It takes a surprisingly long time to reach the middle!

I’m afraid I rushed these samples and you can see what happens when you combine So Saffron ink with a dirty brayer.

Stamps: Best Wishes & More
Cardstock: Whisper White, Barely Banana,  More Mustard,  Lavender Lace, Elegant Eggplant, So Saffron, Handsome Hunter
Ink: So Saffron, More Mustard, Sage Shadow,  Handsome Hunter, Lavender Lace, Elegant Eggplant Versamark
Accessories: ¼” Grosgrain Ribbon - Whisper White, Scallop Edge Punch

All products by Stampin' Up!®

Tuesday, 18 May 2010

Monochromatic mountains and moons


Next in the brayering class we stepped things up a little by creating a graduated background, working with masks.

We punched a circle from a sticky note and stuck it on a square of Whisper White. Next we brayered a background: at the bottom edge and starting off the cardstock, brayer back and forth, all the while gradually moving across towards the opposite edge of the cardstock. Reink when necessary and carry on, still starting off the edge of the cardstock on your scrap paper.

When you get a reasonable amount of ink at the bottom edge of your cardstock, you can start your brayering on the cardstock, still working your way to the opposite side.

Once we were happy with our pale background, we tore a wiggly edge on another sticky note to represent mountains and added that to the cardstock, with the mountain edge facing the bottom. Brayer again, still starting at the bottom edge and working your way towards the sticky note mask. Keep repeating until you are happy with the depth of colour – you want a reasonable contrast between mountains and sky, but not too dark.

Finally, we removed the mountain mask and made another one, which was stuck lower down. Again, starting at the bottom edge, brayer again, building up the colour until you are satisfied with the look.

All masks were removed and then we stamped over the top. We used Autumn Days but Pocket Silhouettes would work just as well. In fact, it was a set of Pocket Silhouettes cards by Dorset demonstrator Jo D which inspired these cards and also gave me the idea to do the cards in three different colourways. So thanks, Jo!

Stamps: Autumn Days
Cardstock: Whisper White, Lavender Lace, Elegant Eggplant, Sage Shadow, Handsome Hunter, Barely Banana, More Mustard
Ink: Lavender Lace, Elegant Eggplant, Sage Shadow, Handsome Hunter, Barely Banana, So Saffron, More Mustard
Accessories: Brayer, ¼” Grosgrain Ribbon - Whisper White, 1 ¼” circle punch

All products by Stampin' Up!®

Monday, 17 May 2010

Brayer basics


For my brayering class, I knew that we’d all need the ink pads for long periods, so I split the group into three – the yellow team, green team and purple team. Each team made three cards in their colours so that they wouldn’t have to keep cleaning the brayer and would get an ink pad between two or three people.

Sounds simple? Factor in the good-natured squabbling about which cards are nicest and who wants to sit next to whom, not to mention the cries of “I’m in green team and all my packs are yellow”... and that’s a good 15 minutes gone!

But we stayed on track for the rest of the session and everyone produced wonderful brayered effects. This was our first card, which was really just to familiarise ourselves with the brayer. All we did was take a piece of Night & Day Designer Series Paper, which is all black and white, as you probably know. By brayering over the top, we changed the colour to match our cards.

Stamps:  Bird on a Branch
Cardstock: Basic Black, Whisper White, Barely Banana, Sage Shadow, Lavender Lace
Paper: Night & Day
Ink: Basic Black, Barely Banana, Sage Shadow, Lavender Lace
Accessories: Stamp-a-ma-jig®, Brayer

All products by Stampin' Up!®

Sunday, 16 May 2010

Ghostly goings-on

Yesterday was my brayer class and I hope I convinced the ladies who came along that it’s time to get their brayers out of their boxes and start using them!

We made three simple brayered cards – this wasn’t one of them but this was one of the techniques we used. This is “ghosting” and it’s very simple.

You stamp an image with Versamark® and then brayer over the top. That’s it.

The Versamark resists the ink – but not completely, which is how you end up with these “ghostly” images, which are paler than the ink around them. You don’t need to let it dry, it works straight away.

To brayer the cardstock, always work on a flat surface with a piece of scrap paper underneath your project. Ink your brayer by rolling it in one direction repeatedly on your ink pad – not back and forth.

Starting OFF your project on the scrap paper, brayer back and forth on your cardstock, gradually working in from the edge of the cardstock. Repeat... and repeat. When you start to get a colour build-up at the edge of your cardstock, you can start brayering ON the cardstock and gradually you will build up the colour.

Here are some more brayering tips:

• Always store your brayer on its plastic guard– if you store it rubber down, you could end up with dents in the rubber
• Roll the brayer over the ink pad in the same direction – lift and roll again.
• Get lots of ink on the brayer
• Don’t rest your finger on top of the brayer like you would a wheel handle as this applies too much pressure
• Always start brayering off the edge of your project to remove some of the ink and avoid lines
• Use lots of scrap paper under your project
• Make sure your surface is flat as any lumps and bumps will show through (think brass rubbing!)
• Roll the brayer back and forth over the project, reinking when necessary
• Smooth cardstock such as Whisper White and Very Vanilla, or glossy cardstock work best
• Colours will appear much more intense than with stamping so use paler inks for a subtle effect

Stamps: Best Wishes & More
Cardstock: Barely Banana, Whisper White, Lavender Lace
Paper: Vellum
Ink: So Saffron, Sage Shadow, Lavender Lace, Handsome Hunter, Versamark
Accessories: White eyelet, ¼” Grosgrain Ribbon - Whisper White, Eyelet border punch, Oval punch

All products by Stampin' Up!®

Friday, 14 May 2010

Look at these lovely new colours!

These new colours are absolutely yummy! I’m loving Rich Razzleberry – it’s so, er, rich! Melon Mambo is fresh and fruity. And Soft Suede is  a lovely, gentle brown.

And the ribbon is absolutely fabulous. I’ve made some of these little sample rings to give to the ladies at my class tomorrow – bit of a chore cutting out all those flowers so some of them are a bit rough but it will show them how the new colours look stamped on Whisper White and on cardstock of the same colour.

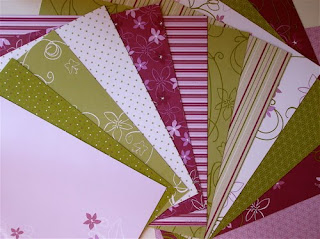
And take a look at the papers! These are 6x6 sheets cut from the full sheet of 12x12 - as usual, you get two sheets of six double-sided designs, so 12 sheets in total. I love them – not least because there’s Old Olive in there. And Old Olive with Certainly Celery, too!

For future reference, the colours in these Cottage Wall Papers are: Rich Razzleberry, Orchid Opulence, Old Olive, Certainly Celery, Whisper White.

Want it all? Don’t forget I have some bundles on offer so you can get a little bit of everything at a great price!

Stamps: Vintage Vogue
Cardstock: Rich Razzleberry, Soft Suede, Melon Mambo, Whisper White
Ink: Rich Razzleberry, Soft Suede, Melon Mambo
Accessories: Scallop Oval Punch, Polka Dot Grosgrain Ribbon - Rich Razzleberry, Soft Suede, Melon Mambo

All products by Stampin' Up!® 

Thursday, 13 May 2010

Froggy went a-punching

This is a really fun project. These are the new Treat Cups from page 9 of the Mini catalogue. They are self-adhesive but if you don’t want your card to be destroyed when the recipient opens their sweets, create a slider behind it so you can pull it out and “dispense”.

You can make all manner of animals using punches – I’m going to set a date for a class to create punched animals, so keep an eye on the events page for details. It will be a Saturday morning as I know several people would like to bring their children (age 10+).

I love the Jelly Belly Jelly Bean pick ’n’ mix in the posh chocolate shop in Ambleside. It’s perfect for matching up your jelly beans to Stampin’ Up! colours. These are kiwi flavour. Fortunately I’m not keen on them, which is why there were plenty for my frogs!

These are the punches you need to make this frog:

Body: 1 ¾” circle
Head and legs: Large oval
Feet: Boho Blossoms
Eyes: ¾” circle, ½” circle, ¼” circle

Stamps: One of a Kind, Autumn Days
Cardstock: Real Red, Tempting Turquoise, Whisper White, Green Galore
Ink: Gable Green, Real Red, Tempting Turquoise, Green Galore
Accessories: Treat Cups, Stampin’ Write Journaller, corner rounder, 1 ¼” circle punch (inside, to dispense sweets), plus punches as listed above.

All products by Stampin' Up! ®

Wednesday, 12 May 2010

Flower handbag card

My new colour products have arrived and they are simply gorgeous. I haven't had chance to make anything with them yet - apart from a little something for those who are coming to my brayer class this Saturday - but I'll photograph the products as soon as I am around in daylight. You'll definitely be wanting my new product bundles when you see how fantastic they are!

Back to today's project...

At my Mini Catalogue launch, I demonstrated how to make this paper flower – I’ve explained on here before, click here for details.

This card is an old favourite – in fact, I found the card base at the bottom of my Soft Subtles scraps box and thought I’d use it before it’s too late. Yes, Barely Banana – and Lavender Lace – are both on the retiring list so if you love it, get it while you still can.

Oh, the card – to make this shape of card, simply fold a piece of A5 cardstock in half as normal, then measure 1” in from each end along the crease and mark with a dot. Cut from the dot, diagonally down to the corner where the card opens, then repeat on the other side. I made a couple of holes with the Crop-A-Dile™ to thread the ribbon through, which is simply knotted on the inside. It’s quite bulky so probably one for hand-delivering unless you have a padded envelope and are willing to pay the extra postage.

Stamps: Bird on a Branch
Cardstock: Barely Banana, Lavender Lace, Whisper White
Ink: Lavender Lace
Accessories: Scallop Circle Punch, Striped Grosgrain Ribbon – So Saffron, Scallop Edge Punch

All products by Stampin' Up! ®

Monday, 10 May 2010

Covering a notepad using the Spiral Punch

How cute is this? It’s a cheap notepad from Wilko which I’ve covered with the help of the spiral punch. Surprisingly easy, once you’ve worked out how to do it!


How to do it?

Cut a piece of paper or cardstock the same size as the notebook cover. Offer it up to the spiral binding and mark the centre wire with a pencil.

Using scissors, cut a small slit at this point. On your spiral punch there’s a little metal noggin to help guide your punching – push this into the slit and punch.  Using the guide, move the punch along and punch again, continuing until you get to the end (watch out if the wire binding on your notepad doesn’t go all the way to the end or you’ll end up with an unnecessary punched hole).

Turn your cardstock over and repeat up to the other edge. Thanks to Amanda for solving this little punching conundrum for me!

The punch does, of course, fit the Stampin’ Up!® On Board journal but if you want something smaller, check out stationery shops, Wilko etc. In my purse I keep a scrap of cardstock punched with the Spiral Punch so that I can offer this up to any notepad when I’m out and see if it will fit. 


Cardstock: Taken with Teal, Rose Red, Pretty in Pink, Chocolate Chip
Paper: Sweet Pea Paper Stack
Accessories: Boho Blossoms punch, Two-Step Bird punch, Spiral punch, Rich Regals brads, Stitched Grosgrain Ribbon - Rose Red, Stampin’ Write Journaller

All products by Stampin' Up! ®

Saturday, 8 May 2010

Dashing through the wind and rain

Keen blog-hoppers may already be familiar with Dasher, which has been a really popular stamp over in America and Canada. Now he’s here at last, in our new Mini catalogue.

There are a couple of things I need to tell you about this card so this will be a long one but it’s my birthday, so indulge me.

First of all I must thank Emma who very kindly stepped in and sent me a few rhinestone brads when I realised I didn’t have enough small red ones left. Stampin’ Up! Demonstrators are a lovely bunch who are always willing to help each other out and I’m very grateful.

Now I must explain why I’m showing you a Christmas card in the middle of spring, albeit on a windy, rainy and rather wintry day. I did a party recently for another Helen, who is a big Christmas cardmaker! She already has quite a stack of them handmade and ready to go. Very impressive!

I knew she’d love Dasher so I demoed this card at her party. It looks quite complicated – and does demonstrate quite a few techniques – but it’s quite simple really, when you break it down.

First I took a piece of Night & Day Designer Series Paper. This is the black and white pack from the Mini catalogue. It’s gorgeous and elegant ... and so versatile because you can make it any colour you like. I brayered over the piece using Real Red ink to create this striking black and red pattern. I put that aside to dry as it does take quite a while, due to the large amount of ink used.

Next I inked Dasher with Basic Black ink and then, using a sponge dauber, applied Champagne Mist shimmer paint on top of the ink just to his antlers. One dip in the lid of the paint is enough, so you don’t have to contaminate your paint with black ink. This allows the black to show through a little but gives the antlers a lovely shimmer. I mounted this on Basic Black and Real Red layers.

I made three pencil marks on the antlers, to show me where the punch the holes for the brads. I used the Crop-A-Dile™ for this because, with these rhinestone brads, you do need quite a large hole.

The dried Designer Series Paper was mounted on a Very Vanilla card blank and the striped ribbon tied around. I’d cut my initial sheet of A4 Very Vanilla lengthways to create a card blank which opens at the side, to accommodate the ribbon. Otherwise you could add another layer under the paper and tie the ribbon around that. But don’t try it around just the paper as it will just buckle.

I used the gorgeous new Tiny Tags, stamped on Real Red, Very Vanilla and Basic Black cardstock to create little tags using the new Jewellery Tag punch. I used a needle to thread these onto Linen Thread and pass this through the already tied ribbon. (I tried placing it on the untied ribbon and tying it around it but it didn’t work out too well!)

Finally, I added Dasher to the card using Stampin’ Dimensionals to pop him up. This allows room for the backs of the brads.

I have to say, I LOVE this card!

Stamps: Dasher, Tiny Tags
Cardstock: Very Vanilla, Basic Black, Real Red
Paper: Night & Day
Ink: Real Red, Basic Black
Accessories: Wide Striped Grosgrain Ribbon - Basic Black, Linen Thread, Medium Jewelry Tag punch, Crop-A-Dile™, Rhinestone brads, Champagne Mist Shimmer Paint

All products by Stampin' Up!®

Friday, 7 May 2010

What is it with all these birds?

Brayering is a technique I’ve overlooked for many years. Now I’ve tried it, though, I really love it. You can get some really exciting effects.

To create this effect, I punched a 1” circle from a piece of scrap paper and stuck it to the Whisper White cardstock using temporary adhesive (Two-Way Glue Pen). I brayered the whole piece with Taken With Teal. I tore another scrap of paper to create a mask and brayered the bottom area again to create a darker effect.

We'll be using this stamp set at my brayering class on Saturday, 15th May.

After removing the masks, I stamped the two images in Basic Black. You can’t see on the photo but I’ve made the bird stand out more by applying Crystal Effects® over the top, spreading it out to the edges of the image with a cocktail stick.

To make Taken With Teal ribbon, I pressed some Whisper White ribbon into my ink pad, brayering over the top to get the ink to spread evenly. This did have to dry overnight but it means you can have ribbons in any colour you like!

Stamps: Bird on a Branch
Cardstock: So Saffron, Basic Black, Whisper White
Paper: Sweet Pea Paper Stack
Ink: Basic Black, Taken with Teal
Accessories: Eyelet Border Punch, ¼” Grosgrain Ribbon - Whisper White, Rhinestone brad, 1” circle punch, brayer

All products by Stampin' Up! ®

Thursday, 6 May 2010

Yet another bird card!

This is inspired by a card in a magazine I bought at the Hobbycraft Show in Birmingham. It was either a Simply Handmade or a Simply Cards magazine, sorry can’t remember. The trickiest bit was feeding the circle paper through the gap in the spotty paper. But I got there in the end.

Stamps: My Sweet Pea
Cardstock: Old Olive, Chocolate Chip, Whisper White
Paper: Sweet Pea paper stack
Ink: Rose Red, Old Olive
Accessories: Sweet Pea Stitched Felt, Satin Ribbon – Old Olive, Earth Elements and Neutrals Buttons, Earth Elements Buttons, Linen Thread, Chocolate Chip marker

All products by Stampin' Up! ®

Wednesday, 5 May 2010

Embossed bird

Easy peasy, lemon squeezy – and pretty effective, too. This bird is really striking when punched from vellum cardstock, which I’d already stamped using the Whisper White craft ink pad and embossed with clear embossing powder. I embossed the same flowers in white on some Whisper White cardstock, too, to create the wing. The Whisper White ink came out one last time to be stamped in the corners of the card base using the dotty stamp from Bird on a Branch.

Stamps: Bird on a Branch
Cardstock: Rose Red, Elegant Eggplant, Whisper White, Vellum cardstock
Ink: Whisper White
Accessories: Two-Step Bird Punch, Clear embossing powder

All products by Stampin' Up! ®

Monday, 3 May 2010

Making a big name for myself... one letter at a time

I’ve had this wooden letter H hanging around for several years – my Canadian cousin decorated it and gave it to me but it was beginning to look a little tatty so I thought it was time for a makeover. Please forgive the hideous paint job on the sides and back, I was in a rush (as usual) and couldn’t find any white paint so, rather ill-advisedly, used this ochre colour. Must get some white for its next revamp!

I placed the letter face down on the back of my chosen Designer Series Paper and drew around it. I used Tombow adhesive to stick it down and a nail file to sand the edges. Then it was just a case of adding that gorgeous punched bird and a piece of ribbon.

I quite like it (apart from the paint job) so does anyone know where I can get more of these letters? In England. Cheaply?

Cardstock: So Saffron, Chocolate Chip
Paper: Sweet Pea Paper Stack
Accessories: Two-Step Bird punch, ¼” Grosgrain Ribbon - Chocolate Chip

All products by Stampin' Up! ®

Saturday, 1 May 2010

New products and a prize!

The sun is shining and there’s some really exciting news from Stampin’ Up!® to herald the start of May! I’m so excited that I’ve added an extra special deal of my own – and a fabulous prize – to make the Bank Holiday weekend even more special.

11 new products
First, the Stampin’ Up! news... remember that Colour Renovation that everyone is talking about? In October the colours will be overhauled with lots of luscious new colours. Some of us – me included – will want it all on 1st October... but we don’t have to wait that long because Stampin’ Up! is giving us the opportunity to build up our collections gradually, by offering us three new colours right now. From today, you can buy 11 new products in Melon Mambo, Rich Razzleberry and Soft Suede! See the products by clicking here.

New product bundles
Now, for my special offer. I know you’ll want all the lovely new colours but might not want to commit to full packs straight away. So how about a bundle of new goodies? During May only, I’m offering two special kits – and the “plus” bundle has some freebies thrown in, too!

Fruity fun bundle:
4.5m Melon Mambo ½” Polka Dot Grosgrain Ribbon
4.5m Rich Razzleberry ½” Polka Dot Grosgrain Ribbon
4.5m Soft Suede ½” Polka Dot Grosgrain Ribbon
8 sheets A4 Melon Mambo cardstock
8 sheets A4 Rich Razzleberry cardstock
8 sheets A4 Soft Suede cardstock
12 6x6 pieces of Cottage Wall double-sided Designer Series Paper.
Cost: £16.20 including shipping to me. If your products need to be posted to you, this will be charged at cost.

Fruity fun plus bundle - all of the above plus:
Melon Mambo ink pad
Rich Razzleberry ink pad
Soft Suede ink pad
8 sheets A4 Whisper White cardstock
8 Whisper White C6 envelopes
Cost: £29.60 including shipping to me. If your products need to be posted to you, this will be charged at cost.

If you want to be one of the first to get their hands on the new colours, I will be placing my first new colour order on Bank Holiday Monday at 8pm. But don't worry if you're not ready by then as I will be ordering again later on and these bundles are available throughout May. Please note that these bundles are not available as part of an in-home workshop as the products need to come to me so that I can make up the kits.

Prize time!
Finally, who wants a prize? Because it’s somebody’s birthday in this house this month, I thought I’d share the joy by offering a fabulous prize. Not sure of the exact details just yet but there will be a stamp set, a roll of ribbon and some cardstock – I'll post a pic here in the next day or so.

How to win? You will earn a place in the prize draw for every £10 you spend on orders placed between 1st and 31st May 2010. At the beginning of June, I will draw a ticket at random and a fantastic prize will be heading their way to the lucky winner!

The small print

This is my personal blog and my sole responsibility as an Independent Stampin' Up!® demonstrator. All images are © Stampin' Up!® All content including photographs, projects and text are © Helen Read, unless otherwise stated. Please feel free to copy my ideas for your personal use and inspiration - if you are a SU demonstrator you may use these ideas for your events but please give credit where it is due. Please do not use my ideas for monetary gain, competitions or publication. The images on this blog - including blog buttons - should not be copied and used elsewhere on the internet or on CDs.