Sorry I can't update the blog right now. Please find me on Facebook

Showing posts with label Punch art. Show all posts

Monday, 24 November 2014

Supersized Santa punch art


This is a fun project, which I created for my club members as a little thank you this month. Each one contained a Viscount biscuit, precariously stuck down with Glue Dots as I have mislaid my Sticky Strip!

I CASEd the idea from a project by Brenda Quintana, whose Santas were smaller than mine. But those who know me will probably know that I struggle with fiddly little craft projects – they make me very irritable! So I super-sized the Santa with some different punches. You can see which ones I used from the info sheet below.  Santa’s rosy cheeks are created with a pencil rubber used as a stamp, then I finished it all off with some Chalk marker details and a tiny bit of glitter. 

PS: If you prefer to make delicate little Santas like Brenda and don’t know what a Peppermint Pattie looks like… here in the UK, Elizabeth Shaw after-dinner mints seem to be around the same size. 


Monday, 31 March 2014

Sale-a-Bration ends today! Don't miss out!


Today’s the day! The last opportunity to earn free Sale-a-Bration products for 2014. It’s always sad when a fabulous promotion like this comes to an end, especially because there’s always somebody who doesn’t realise the deadline has passsed and gets upset because they’ve missed out on a fabulous freebie!

So don’t be the one to miss out – if you want to earn a SAB freebie, please do head straight to my online shop to place your order. Make sure you do it before 10pm to be on the safe side – Stampin’ Up!® works one hour ahead of us as they are based in Germany. 


It’s also the last day to get extra craft supplies in your starter kit if you join the Stampin’ Up!® family of demonstrators. It really is a no-risk way of stating a crafting business; it costs just £99 and you’ll get £150 of craft supplies of your choice, as well as a business pack to get you started. You’ll earn a minimum of 20% commission (on the pre-VAT price) on every order, and you’ll quality for hostess benefits when applicable, too.

There are demonstrators who just do the occasional party or just sell to their friends… and there are demonstrator who work at it full-time, earning a healthy living. And, of course, there are many, many demonstrators in between. If this is something you could see yourself doing, why not give it a try – you really have nothing to lose, and you could be a member of my friendly team within the hour, just by clicking here.


Okay, about today’s projects... I showed these at Pat’s party on Friday evening to illustrate the versatility of the Cupcake Punch. It’s not just for cupcakes – here I’ve also made an ice cream (I handcut the cornet but you could use the Perfect Pennants Builder Punch) and a tiny handbag (with the addition of circle punches).

Product List
130297s
131174s
131289s
121807s
119246s
133521s


Finally, we have the bag, which I made using the technique I showed you yesterday. I added a few more supplies to this project; after all, it was my last chance to use my Petal Parade stamp set before I put it into storage, and Basic Black cardstock really makes this paper pop! The bag is the perfect size and shape for the note cards, which was almost like I’d planned it!

Product List
130297s
133602s
131175s
131176s
126991s
121688s
106549s
119869s
131210s
133521s

Wednesday, 13 June 2012

Did you pack your angry eyes?


The answer to yesterday’s little teaser was that I was dyeing some Baker’s Twine. Well done to Val for guessing correctly!

I used the plain white twine with reinkers. Just a few drops of reinker (Cherry Cobber and Always Artichoke) in a dish with a few more drops of water... probably a ratio of 1:10? I don’t know, I just winged it! Left them to soak until they were completely covered, then dragged them out, put them on some kitchen roll for a few seconds and then hung them up on our Sheila Maid, with some newspaper on the floor to catch any drips. 24 hours later and they are completely dry and ready to use in my (Nearly) No-Sew Fabric class on Saturday.

Think of the possibilities: Baker’s Twine (which costs next to nothing) in any color you like. You can even mix reinkers to create totally new shades.  You can buy reinkers in all our colours and there are loads of uses for them, not just reinking your pads.


So, to today’s project: a quick based on lots I’ve seen on the internet featuring an Angry Bird. Perfect for children, and those tricky teenagers because everyone loves Angry Birds. There are many more samples out there in blogland, some featuring different birds and those naughty pigs but I was in a hurry so kept it simple. Fun, eh? Teaser for today: name the film quoted in the title! 

This is what you need to punch:

1 ¾” circle in Real Red
1 ¾” circle in Whisper White (insert this into the punch again to create the chest)
½” circle x 2 for eyes
5-petal flower in Daffodil Delight for the beak (trim off one of the petals)
Boho Blossoms punch medium flower in Real Red for the tuft on his head (trim two petals and tilt behind the head)
 Curly Label punch in Basic Black: punch once and then punch the template to create the angry eyebrows
Boho Blossoms punch largest flower in Basic Black for the tail

Tear two different shades of green cardstock for the grass. And if you managed to get the Cupcake punch from the Spring Mini, you could create clouds, too!

Stamps: Party This Way
Cardstock: Real Red, Basic Black, Bashful Blue, Old Olive, Pear Pizzazz, Daffodil Delight
Ink: Basic Black
Punches: see above
Accessories: Stampin’ Write Journalling Pen

All products by Stampin’ Up!®

Tuesday, 22 March 2011

A monster creation


I cannot lay claim to this wonderful creation at all. It was made by Kelly during a morning’s craft session at my house. She said she was going to leave it behind for me to put on my blog but I insisted she took it home with her. Being a disorganised sort, I didn’t realise that she had left it behind until about six weeks after it was made!

Look at the way she has made the planets. The holes are made in a large circle with the Crop-A-Dile™ and overlaid on another circle of cardstock. But the smaller planet has an extra dimension in that there are three layers of cardstock. The bottom layer is a plain Daffodil Delight circle. The second layer is Real Red, punched with random holes. The top layer, in Tempting Turquoise, also has random holes. She has put them all together for quite a spectacular effect.

The alien is stamped on Daffodil Delight cardstock and cut out. The eye and tongue are stamped directly onto the yellow and also on white, cut out and overlaid.

Stamps: Make a Monster, Party This way
Cardstock: Daffodil Delight, Whisper White, Basic Black, Old Olive, Tempting Turquoise, Real Red
Ink: Whisper White, Tempting Turquoise, Basic Black
Accessories: 1 ¾” circle punch, Wide Oval punch, 1 ¼” circle punch

All products by Stampin’ Up!®            

Monday, 31 January 2011

Ladybird treat holders


This was another of the punch projects we made at my recent Punch Pals class. By the way, there are still lots of places on my forthcoming classes - I picked a duff date and lots of my regulars can't make it, so why not come along and try it? We're in the Amber Valley area, about 20 mins from Derby

I totally CASEd this from this project I found on the internet.

It’s a little favour box which you can fill with anything red – perfect for Valentine’s Day! As you can see, I haven’t got round to filling it yet. You pull the head out to reveal a circular hole at the back, so you can fill it and, of course, empty it again.

The body is made from two circles of about 2”. I used a die-cutting machine to make these but you could draw around a small cup or similar. In the centre of one of the circles, punch a 1 ¾” circle. To find the centre, I punched first from scrap paper and use this to stick on the larger circle as a template. This shows you exactly where to punch to create an even border.

In the other 2” circle, we punched a 1” circle from the centre. Again, we punched a 1” circle from scrap paper first and laid it on the large circle as a guide.

The head is a 1 ¼” circle of black cardstock. Next take the black cardstock you’ve left behind and punch a narrow crescent shape from it with the same circle punch. You can cut this in half to create two antennae.

The head is attached to a large tag punched in red. This is the loose part which pulls out.

The important thing to remember for this project is this: when you peel off the backing from the treat cup, you must leave some of the backing behind. The cup does not need to be stuck all the way round – there must be a gap for the head/tag piece to slide in and out.

Cardstock: Real Red, Basic Black, Whisper White
Punches: 1 ¾” circle, 1 ¼” circle, ¼” circle (retired)
Accessories: Sweet Treat Cup, Black journaling pen

All products by Stampin' Up!®

Tuesday, 18 January 2011

Roaring success?


Another of my internet finds when searching for inspiration for my Punch Pals class. I got the idea for this clever card from an American demonstrator called Tami White. Here’s her version. Honestly, I’d never have thought of using an upside-down heart to create a lion’s body all on my own! (I did, however, adapt the lion’s face to make him a bit more “fuzzy”)

The biggest trouble I had with this card was finding something small and yellow to fit inside. I could have sorted through a bag of M&Ms, Skittles or similar to find the yellow ones, but I was trying to cater for 12 people at my class and even I’m not that dedicated! I scoured the aisles of several supermarkets, as well as my beloved Home Bargains, and eventually settled on lemon bonbons.

I opened them at the class to discover, horror of horrors, that they were too big! I couldn’t even fit one in! So everyone took their card home to fill later. I gave up looking and used white chocolate chips in the end.

To get to said chips, you open the card to reveal a perforated section which you can poke your finger through to make a hole.  This will leave the front of the card unspoiled. We used the cutter kit, which has a perforation tool, but you could easily use your paper piercer to create dotted lines.

So, to the lion at last: his head is created with the Scallop Circle Punch. You attach the scallop circle to a piece of scrap paper and put it back into the punch, twisted slightly so you get this lovely rosette or, in this case, lion’s mane.

The ears are the wings from the bird punch. The face is the largest flower from Boho Blossoms, with one petal cut off. The middle flower from the same punch is punched in Pretty in Pink – you cut two petals off; one for the nose and one for the tongue.  The bird punch is used again to create the tail – it’s the branch with all but the end leaf cut off! Punch it again in brown to create the tail tip.  I do love this lion!

Cardstock: Daffodil Delight, Early Espresso, Crumb Cake, Whisper White, Pretty in Pink
Paper: Woodland Walk
Punches: Scallop Circle Punch, ½” circle, ¼” circle, Boho Blossoms, Bird, Scallop Trim Border, Large Heart
Accessories: Heart Treat Cup

All products by Stampin' Up! 

Friday, 14 January 2011

Punch pals from last weekend's class


As punch art isn’t usually my “thing”, for my class last weekend I had to go Googling for ideas. There are LOADS out there and some of them are spectacular. I’ve seen all the Sesame Street characters, Shrek and Donkey, people, and just about every animal possible. There were too many to choose from so all the class attendees received a handout giving them some more ideas to have a go at later. I’m pleased to report that Angela and Judie at least have had another go.

The pig crops up everywhere, but I know that I found the cat on another UK demonstrator’s blog. It’s Joanne again – she’s very talented, I know you’ll find lots of inspiration on her blog.

Cat
We made him in grey because all the class attendees received a black journaling pen but he’d look just as cute in Pumpkin Pie or Tangerine Tango, if you have a co-ordinating marker to use to decorate him.

It’s important to put the stripes on before you start assembling. The whiskers and eyes can be added at the end.

Basic Gray pieces
Body: 1¾” circle
Ears: 5-petal flower, two petals cut out
Feet: ¾” circle
Tail: Use the 1 ¾” circle again to punch the template left behind by the body

Whisper White pieces
Chest: 1 ¼” circle
Ears: 5-petal flower, two petals cut out – trim these a little smaller to overlay on the grey
Eyes: ¼” circle x 2
Muzzle: ½” circle

Pretty in Pink
Nose: Boho blossoms, two petals cut off together. OR one petal cut from the middle flower.

Pig
It was funny how everybody’s pig looked different, even though we used the same punches. It’s all in the eyes, I reckon.

Pretty in Pink pieces
Body: 1 ¾” circle
Head: 1 3/8” circle
Nose: ½” circle
Tail: ½” circle, cut in a spiral
Feet: Heart to Heart punch – the smallest heart
Ears: Heart to Heart punch – the largest heart

Whisper white
Eyes: ¼” circle (now retired)

All products by Stampin' Up!®

Sunday, 9 January 2011

Sarah and Percy and Bill


Yesterday was my first class of the year – and first of all I’d like to say a big THANK YOU to all the ladies who came along, had fun creating with me and, because my usual helper couldn’t be with me, even served the tea and coffee, washed up and tidied up at the end! It was like having magical elves!

I have updated the events page with some more classes, so be sure to take a look. And I promise I won't make you make the tea next time!

We jumped straight in at the deep end for this class with Punch Pals. It was a bit unusual because we didn’t use a single stamp – only punches! Ok, so this card has a greeting stamped on it, but we missed this out at the class as we were running out of time. And no wonder - because we made two cards, a little ladybird treat holder and a couple of other animals to be used on projects at home.

This was one of the cards. These owls are soooooo cute – and I have to hold my hands up here and say they were NOT my idea. As far as I know, they were the creation of Stampin’ Up!® Demonstrator Sarah Makin – you can see her version, here.

Kelly nicknamed these owls, "Sarah, Percy and Bill", after the characters in the gorgeous children's picture book, Owl Babies by Martin Waddell. It was one of my favourite books when our children were tiny, and I'm sure we still have it somewhere even now - it's definitely a keeper! 

These cute cardstock owls are really easy to make – you just punch a circle and then feed the circle into the Round Tab Punch and punch again to create the ears at the top. The feet are created by punching the largest flower with the Boho Blossoms punch then cutting it into quarters. You’ll get four feet from each flower.

The beak is one petal from the 5-petal flower punch – just offer it up to the edge of your cardstock scrap and you won’t waste anything! The eyelids are ½” circles, cut in half.

I only discovered this weekend that the ¼” circle punch that I’d used on so many of the projects has been retired! That completely passed me by. But you could use the circles created by the largest hole punch on the Crop-A-Dile as a substitute on this card.

Stamps: Basic Phrases
Cardstock: Pacific Point, Daffodil Delight, Whisper White, Basic Black
Ink: Pacific Point
Punches: Bird, 1 ¾” circle, 1 3/8” circle, ½” circle, Boho Blossoms, 5-Petal Flower, 1/4 “ circle, Modern Label

Friday, 26 November 2010

Get your birthday pants on!


Today is a friend from work’s Big Birthday so I hope she is wearing her birthday pants!

Birthday pants? Well, apparently in her family, it’s a tradition to have new pants for your birthday and she was telling us all about this when it was her son’s birthday a few weeks ago. It’s a tradition which she sees as perfectly normal (as we all do with our quirky family habits) but that everyone else in the office thought was downright weird, so we decided to surprise her at work yesterday with a special gift of some Really Big Pants, lovingly made by the office seamstress in vile brown and yellow checked fabric.

I also surprised her with a cheeky pink and red number featuring pom poms (her reaction is unprintable) and made her this card.

You open it up to reveal a line of colourful pants, all punched from the Greenhouse Gala Designer Series Paper using various circle punches. The striped pair was a little pale, so I brayered some Daffodil Delight ink over the top. The washing line was hand-drawn with a marker – scary, eh?

Here’s how to get the hole on the front of the card in the correct place.

  1. Decorate the inside of the card first. Yes, it feels weird to do it in that order but it works.
  2. Punch a circle from some scrap paper and apply a small amount of any adhesive to it.
  3. With adhesive side up, place it over the part of the image you want to show through to the front.
  4. Close the card. The circle will stick to the inside of the front of the card.
  5. Now you can use this circle as a guide to punch a hole in the front of the card. 
NB: Punches do not like going through more than one layer of card at once. They don’t mind one sheet of Designer Paper and a sheet of card, but not two sheets of card. So punch each layer separately.

Here’s how to get the scallop edging around the aperture:

  1. Punch 1 3/8” circle from a piece of Baja Breeze cardstock, leaving more space than usual around the edge.
  2. With the Scallop Circle Punch upside down, carefully position it over the hole so that it is nicely even, then punch again. Now you have a scallop circle with a hole in the middle which you can glue to the front of your card.
Stamps: Just Perfect Alphabet
Cardstock: Daffodil Delight, Pear Pizzazz, Baja Breeze, Whisper White
Paper: Greenhouse Gala
Ink: Baja Breeze, Daffodil Delight
Accessories: 1 3/8” circle punch, Scallop Circle Punch, Scallop Edge Punch, ¾” circle punch, 1 ¾” circle punch, Stampin’ Write Journalling Pen

All products by Stampin’ Up!®           
  
PS: A note for American readers who are not familiar with the British use of the word “pants”. Pants are what you call underwear, which you will no doubt have worked out by now from the picture. The word “pants” is also used as a general derogatory term. 

Monday, 27 September 2010

Pyramid card

Remember this fellow? The punched skull that my downline Kelly and I “invented”? I don’t think I ever showed you this card, which started it all. If I did, I apologise.

It started when I was brayering some of this fab Night & Day paper. It’s all black and white and very gorgeous. Like all the Designer Series Papers in the current catalogues, it is retiring at the end of September but as far as I know there is still some available if you want to place an order.

Anyway, I brayered it in So Saffron I think, then did another piece in Rich Razzleberry, which set us off on the “goth chic” route... hence the skull.

And then Kelly showed me how to make a pyramid card. They’re really easy, despite looking complicated. It is just a set of three squares, scored on the diagonal and assembled. Try it – you’ll be surprised at how easy it is. And take a look at Kelly's version, here

For instructions on making the punched skull, please click here.

Cardstock: Basic Black, Whisper White, So Saffron
Paper: Night & Day (retiring)
Ink: So Saffron
Accessories: 1 ¾” circle punch, large oval punch, boho blossoms punch, word window punch, rhinestone brads, Stampin’ Write journaling pen, Stampin’ Pastels

All products by Stampin’ Up!®

Monday, 7 June 2010

Make a punched skull - tutorial


Here’s how to make a rather cool punched skull which you can use to embellish a rock chick card for a teenage girl, a fun pirate card for a younger boy or – as someone pointed out to me as it never occurred to me – a Halloween project.  This idea is totally a team effort and it all began like this...

I was stamping with one of my downlines, Kelly (who is super-talented, by the way – visit here here) and showed her how I’d brayered some Night & Day paper to change the colour. She loved the look and commented that it looked quite “rock chick”. I said we should make a punched skull and so the creating began. I will show you the completed card tomorrow. 

You will need:

The following Stampin’ Up!® punches:
1 ¾” circle punch (a smaller one might work, too)
Large oval punch
1” circle punch
Boho Blossoms punch
Word Window punch (optional)
¼” circle punch (optional)

Other supplies
Whisper White or Confetti White cardstock
Basic Black cardstock
Stampin’ Write journaling pen
Rhinestone brads (optional)
Stampin’ Pastels
Sponge dauber

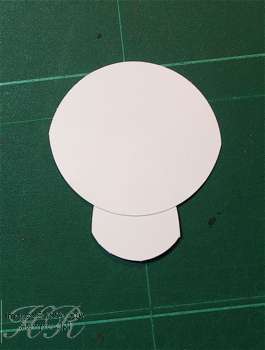
First punch a 1 ¾” circle from white cardstock. Stick the circle to a piece of scrap paper and punch again to remove a crescent shape.


You should have created this shape for the head.


Punch a large oval from white cardstock.  Now carefully feed one end of this oval into your 1” circle punch, to take off one of the pointed ends, as shown.


This is what you should have now. Discard the "crescent" shape. 


Attach the head piece and the shortened oval together to create the skull shape, as shown. 

Using your Stampin’ Pastels,  sponge some grey chalk around the top of the head to reduce the starkness.


Using the Boho Blossoms punch, punch out the middle-sized flower from black cardstock.  Trim down to just one petal to create the nose. Alternatively, you could draw the nose on freehand.


Doodle the mouth and some hatchings using the Stampin’ Write Basic Black journaling pen. 

For the eyes, you can punch ¼” circles from black cardstock or use rhinestone brads. If using rhinestone brads, as shown in the first picture of this post,  punch the holes with the Crop-A-Dile™ so that they sit flat. You will also need to pop up your  skull as they are quite bulky.


If you want crossbones, you can either cut two small strips of cardstock freehand or use the Word Window punch. Punch two Word Windows and then attach them to scrap paper and punch again, to create narrower strips.


With the Boho Blossoms punch, punch the smallest flower from white cardstock four times. Trim down to two petals, creating a heart shape. Attach these to the ends of your white strips.

And you're done! Aaaaaar!


The small print

This is my personal blog and my sole responsibility as an Independent Stampin' Up!® demonstrator. All images are © Stampin' Up!® All content including photographs, projects and text are © Helen Read, unless otherwise stated. Please feel free to copy my ideas for your personal use and inspiration - if you are a SU demonstrator you may use these ideas for your events but please give credit where it is due. Please do not use my ideas for monetary gain, competitions or publication. The images on this blog - including blog buttons - should not be copied and used elsewhere on the internet or on CDs.