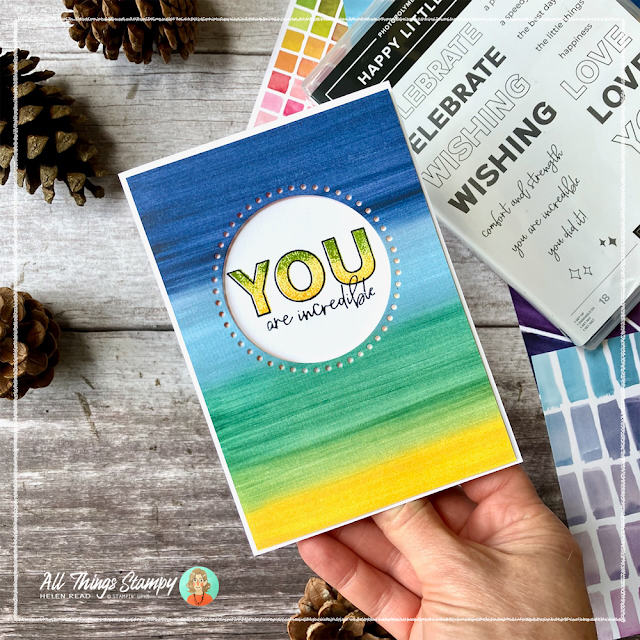
I don’t know about you but I love it when I can make two cards in one go, and this happened twice during a craft session with the STUNNING new Full of Life Designer Series Paper from Stampin’ Up!®
The paper had completely passed me by until a customer ordered it. Once I saw her pack, I knew I had to have my own... and plan an online class around it too.
Although there are no actual images on the paper, the designs really are Full of Life – full of rainbows of colour and geometric patterns.
I have used various Stampin’ Up!® stamps and dies to make these cards because my focus was on the Full of Life Designer Series Paper. There is a coordinating bundle called Friends for Life but I don't have this so wanted to see what else I could use.
My first card is a simple congratulations card using a piece of Full of Life Designer Series Paper with a colourful watercolour wash design. I die-cut a circle using Everyday Details Dies (a Stampin’ Up!® Online Exclusive), which leave a border detail on the outside of the circle too.
On a white panel behind this – if you’re brave you could stamp directly onto the card base – I stamped “YOU are incredible“ using the Online Exclusive stamp set called Happy Little Things. This is a fun two-step stamp set, so I stamped the outline of the word YOU in black, then coloured it by inking the solid YOU stamp in Crushed Curry, then adding some Old Olive using a sponge dauber.
I used many Mini Dimensionals to pop up the Designer Series Paper layer on this card, so it stood out from the stamped background.
This was my first twofer, as I realised the circle I’d cut out would make a fabulous background in its own right. The shades of blue lent themselves perfectly to a seascape so I stamped the yacht from Under The Moon, positioning it carefully where the darker blue turns to light.
For the background, I stamped the two cloud stamps from Under the Moon repeatedly in Balmy Blue.
The greeting is from Simply Said, a new must-have sentiment stamp set which will appeal to a British audience, as the words are plain and simple.
Next up is this fun border card, which uses one of the sheets of Full of Life Designer Series Paper featuring coloured squares. I carefully cut out a centre panel using my Stampin’ Up!® paper trimmer. This is quite tricky as there is not a very big gap between the squares. This created a colourful border which I mounted onto some Basic White cardstock embossed using the Timber 3D Embossing Folder from Stampin’ Up!®.
I don’t currently own any word dies but I do have some Ephemera Packs so I found the word Thanks and coloured it in Night of Navy by brayering it onto an ink pad. Once it had dried, I attached it at an angle using glue.
This is another twofer project, as I still had the panel of squares cut out from the centre of the previous card...
I mounted this onto another panel of Basic White cardstock embossed with the Timber 3D Embossing Folder, then finished off with some Pool Party ribbon which I mistakenly thought was still current (oops!) and a greeting panel. This sentiment is beautiful and comes from the Wildflower Designs stamp set from the new Stampin’ Up!® Annual Catalogue.
Next up is a very silly card featuring a strip of Full of Life Designer Series Paper featuring irregular circles. I carefully cut between the rows and then hand doodled some silly faces using a Basic Black Stampin’ Write Marker.
The greeting comes from the other must-have Stampin’ Up!® sentiment set, Sweetly Scripted. This is an Online Exclusive stamp set so don’t miss it because it’s gorgeous.
Finally I made my own version of one of the Stampin’ Up!® catalogue samples. I cut a piece of the sunburst design paper slightly smaller than the card front, then added a die-cut circle (Everyday Details Dies) stamped with Just a Note.
Sandwiched between this and the paper is some Pool Party ribbon (retired, sorry!) and some black die-cut leaves, created with Delicate Forest Dies.
I hope you are inspired by my Full of Life Designer Series Paper card projects and add this fabulous paper to your next Stampin’ Up!® order. It’s bright and cheerful, and perfect for any Pride Month projects you want to make to support your friends and family.


Love the doodled faces! Very clever :)
ReplyDelete