Are you looking for ideas for Stampin’ Up!®'s Circle Sayings stamp set and coordinating circle punch? You have come to the right place as I have 10 projects to show you.
I ran a Summer Craft Day recently and chose to focus on the Circle Sayings bundle because of its versatility. This fabulous stamp set has a variety of images and sentiments, making it suitable for lots of different occasions.
At my all-day in-person events, I provide comprehensive instructions so everyone can work at their own pace, creating projects in any order. Some people choose to omit the ones they are less keen on, and may make extras of the ones they like best. And because guests had lots of this Stampin’ Up!® Delightfully Eclectic Designer Series Paper to work with, they could change the patterns as much as they liked.
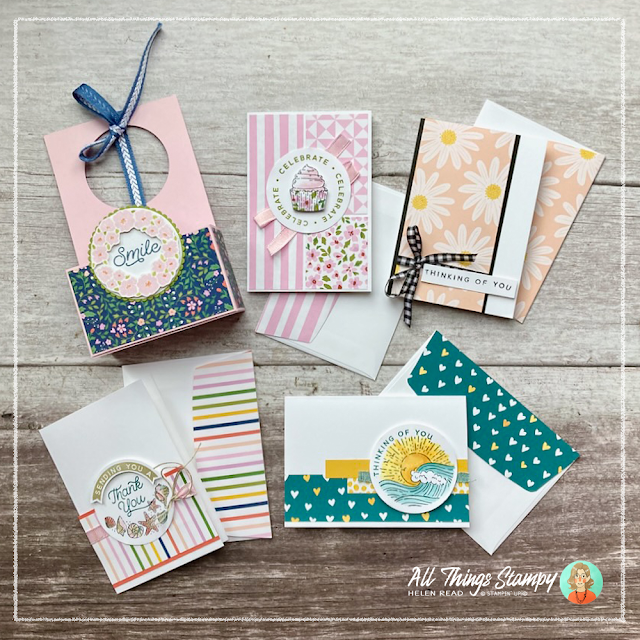
Over the course of a relaxing day we made five full-sized cards and a little carrier for four note cards, all using Stampin’ Up!® products.
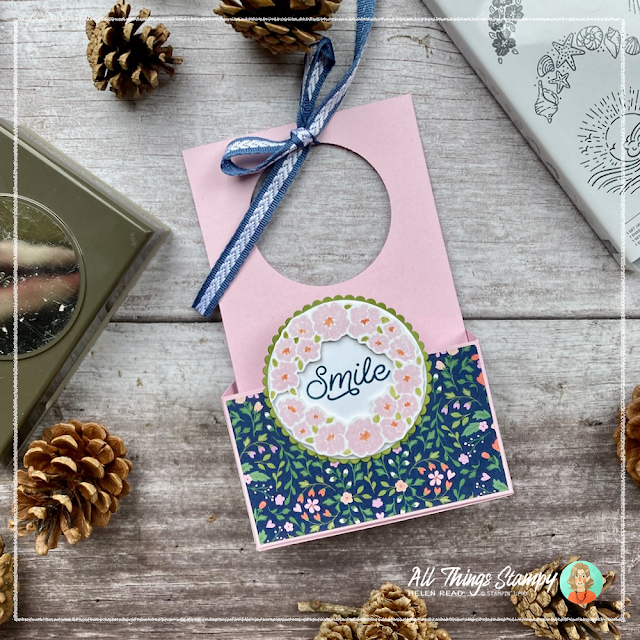
The carrier is very cute and is made up of two parts: the outer box and the inner piece which has a circle punched out of it by way of a handle.
I decorated mine with this beautiful Night of Navy-backed floral paper, to make the circle feature stand out. To decorate the circle I stamped the Circle Sayings flowers twice in Bubble Bath ink, then coloured on top using Cajun Craze and Old Olive. Bubble Bath is pale enough to take a darker colour on top without affecting it. I fussy-cut them botth and popped them up on a punched circle. For the scalloped backing, I dug out my old Layering Circles dies, which are just too useful not to keep.
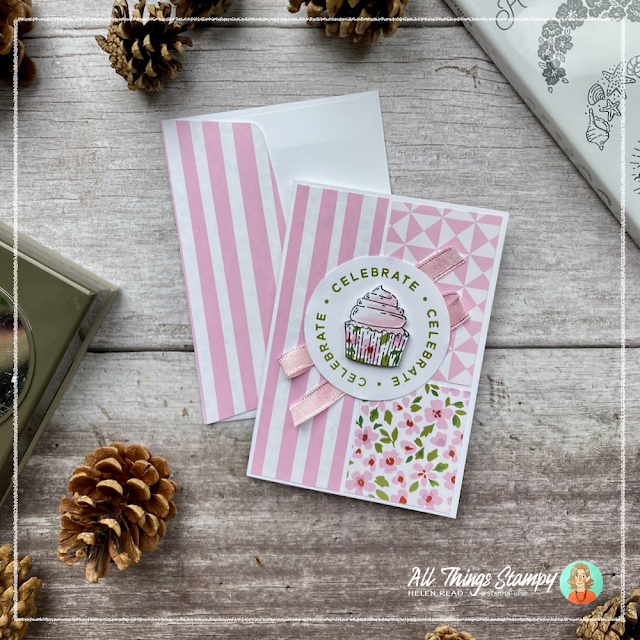
To fill the carrier, I created a variety of note cards. This little birthday card features a patchwork-type design of Designer Series Papers. The beauty of this card sketch is that you can use up any Stampin’ Up!® Designer Series Papers as you don’t need much and, as long as the colours are the same, any designs will go well together.
To create the cake, I stamped twice; once on white, colouring in just the icing, then again on the floral Designer Series Paper. I cut out the cake case from the DSP and stuck this on to the coloured-in piece to create this cute patterned cake case.
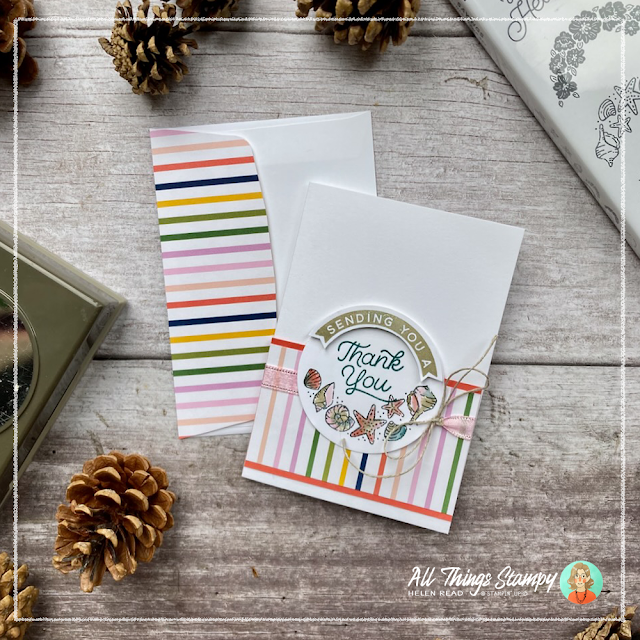
I thought these stripes went well with the beachy theme of the Circle Sayings shell image, and coloured my stamped shells to match, with the addition of Crumb Cake which is picked up again in the greeting arc. I cut out this curved greeting and popped it up, to add a little extra interest.
This sea-themed card features some Pretty Peacock Designer Series Paper which just happened to have the odd pink-coloured heart. I didn’t want pink on this card so coloured these in using Crushed Curry ink and a blender pen. I coloured a few more in, too.
I used the same inks to colour in the image, and stamped Thinking of You around the edge. It all fits within the Stampin’ Up!® 2-3/8" (6 cm) Circle Punch.
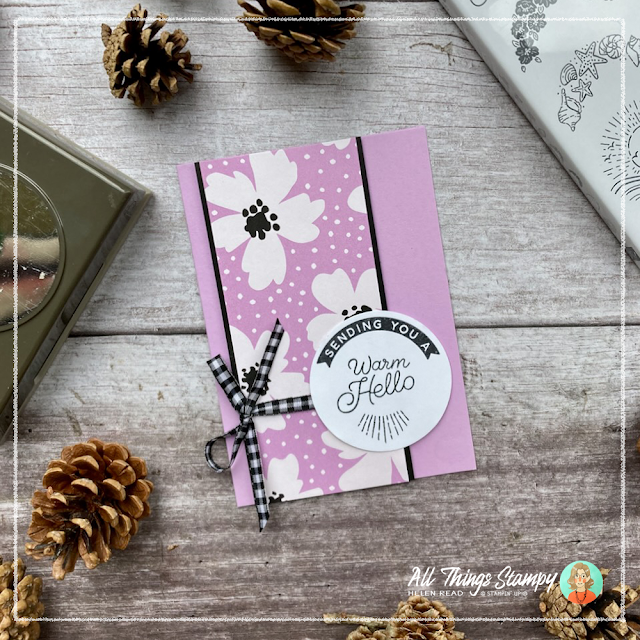
The last note card is a really simple design and one I return to frequently. The focus is one the Designer Series Paper so it’s ideal for large patterns like this daisy design. I’ve edge it with Basic Black – one of my favourite accent colours – and popped the panel up onto a notecard, with some of my favourite Stampin’ Up!® Black and White Gingham Ribbon.
The sneaky thing here is the Thinking of You greeting which I stamped using the curved stamp from Circle Sayings. Because it’s photopolymer, I could bend it (almost) straight on the block and stamp an (almost) straight greeting. No need if you have a suitable Stampin’ Up!® greeting to hand but if you want a little more versatility from your stamps, it’s a great tip.
As you can see, I covered the flap of all the notecard envelopes. This is so easy to do – just cut an oversized rectangle, stick it to the flap and carefully cut out with scissors.
Now onto the full-sized cards... and it makes sense to start with this one, which is similar to the daisy note card. This time I used this gorgeous Fresh Freesia floral design and, instead of a simple straight greeting, I stamped in black on a punched circle, using three stamps from the Circle Sayings set.
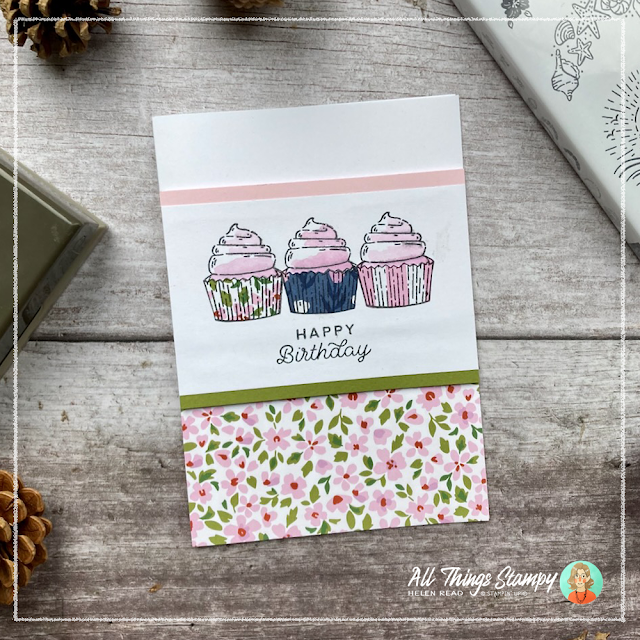
More paper piecing for this card, this time using various patterns from the Delightfully Eclectic Designer Series Paper pack to create a row of cakes. This card was heavily inspired by Emma Goddard, the Coastal Crafter but I added a Designer Series Paper panel at the bottom – we had a lot to use up, after all!
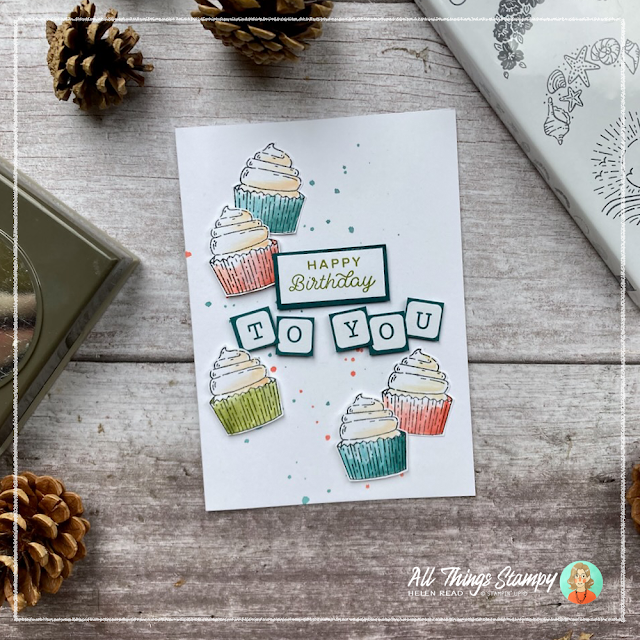
Sticking with the cake theme, this one features five cakes, all coloured and cut out, with some of them popped up. For this project, I took inspiration from some projects by Tammy Wilson. The background is spattered using ink mixed with water – this is another of my favourite techniques.
To create the greeting, I stamped Happy Birthday then cut out the tiled letters from the Designer Series Paper. Everyone had the option to change this to a different word or name, but I think everyone stuck with “To you”.
This card uses large panels of Delightfully Eclectic Designer Series Paper to create a background which echoes the Crushed Curry and Misty Moonlight of the coloured image.
To colour the image I stamped first in Crushed Curry and coloured in the sun with the same colour. I stamped on a second piece of white in Misty Moonlight and coloured in the sea, leaving the frothy surf white. I fussy cut this out, stuck it on top and punched them both out together.
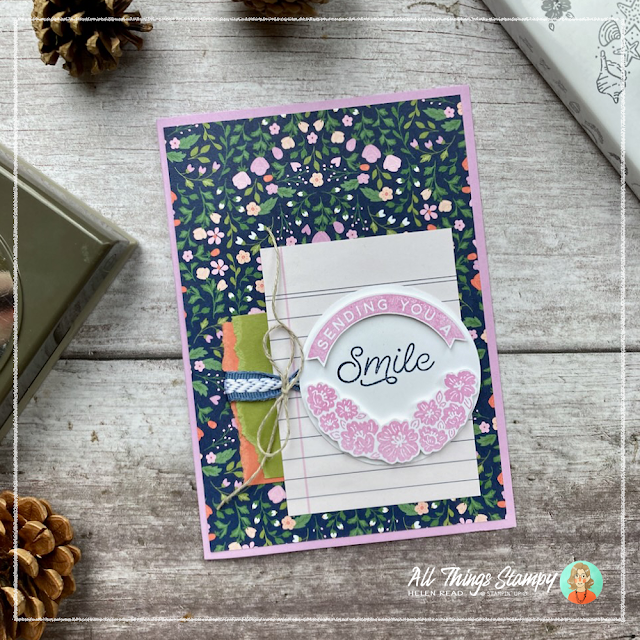
Finally, this card is inspired by a project on page 102 of the current Annual Catalogue. I changed the paper, the stamps, pretty much everything to be honest, but this was definitely my starting point.
I used some of that lovely dark Designer Series Paper as my background, then layered up some torn cardstock and a piece of Delightfully Eclectic Designer Series Paper which is printed like a notebook.
For the main element I stamped the flowers and greeting arc in Fresh Freesia, then cut them out and popped them up.
I hope you enjoy my Stampin’ Up!® Circle Sayings project ideas and are inspired to make your own. If you are in Derbyshire or near enough to travel, please save the date for my next All-Day Craft Day which will be on Saturday 11th November. Join my mailing list or follow me on Facebook to be kept updated.
Stop! Before you go, did you know you can save money on our Kits Collection this month? For the whole of August 2023 you can save up to 30% on kits.
Does
your wish list come to more than £99? Please get in touch and I will
help you get more for your money and unlock discounts all year round.





No comments:
Post a Comment
Thank you so much for taking the time to comment.