Showing posts with label Masking. Show all posts

Monday, 31 March 2025

Make this wow card using Musical Jamboree and Under the Moon - both retiring soon

Stampin Up UK card ideas Musical Jamboree

Do you combine your Stampin’ Up!® stamp sets? I’m always looking for perfect pairings, as I showed you last week by using Wildflower Designs with Elements of Text. (linkg - https://allthingsstampy.blogspot.com/2025/03/three-amazing-card-ideas-for-wildflower.html)

This time I want to show you how I combined two more Stampin’ Up!® stamp sets; Musical Jamboree (163616) and Under The Moon (163531), two fabulous sets which are both retiring very soon.

I think these sets go together beautifully as that wolf dog is clearly howling at the moon.

Tuesday, 13 August 2024

Masking techniques with Musical Jamboree stamp set from Stampin' Up!®

Stampin Up Musical Jamboree card ideas masking

When I saw the Musical Jamboree stamp set in the latest Stampin’ Up!® Annual Catalogue, I just had to have it because that wolf looks so much like my own dog.

So far I have made three cards using this fun stamp set, all of which you can see here.

Tuesday, 16 July 2024

Three fun stencil projects using Stampin Up’ Frosted Forest bundle with masks

Stampin Up Frosted Forest stamps masks stencils card ideas
 

Combining Stampin’ Up!® stamps and Frosted Forest masks (they’re stencils!) – opens up a world of creative possibilities.

I love the brand new range of Stampin’ Up!® Online exclusives and the stamp set which jumped straight out at me was of course Frosted Forest as I cannot resist any tree-themed craft products.

I love that the Frosted Forest bundle comes not just with a photopolymer stamp set and coordinating dies, but with a set of six fabulous masks, which I personally would call stencils.

I had a fun craft session creating projects with this gorgeous Frosted Forest bundle. Take a look at the three very different cards I made, then check out the rest of the Stampin’ Up!® Online Exclusives here:

Stampin’ Up!® Online Exclusives

Tuesday, 2 July 2024

A rainbow of colourful Wildflower Designs cards

Stampin Up Wildflower Designs masking blending brush ideas

I cannot get enough of Stampin’ Up!®’s Wildflower Designs stamp set at the moment!

This gorgeous stamp set lends itself perfectly to Blending Brush and masking techniques, so I had another play session with Wildflower Designs to create a set of colourful cards.

Tuesday, 11 June 2024

Enduring Beauty masks – floral card idea

Stampin Up Enduring Beauty mask card idea

One of the things I love about the new Stampin’ Up!® Annual Catalogue is the techniques pages.

These are perfect for building up your own craft skills and also lend themselves perfectly to classes. I recently held a Masterful Masking class, taking inspiration from pages 124 and 125 of the catalogue.

Tuesday, 16 April 2024

Sneak peek: three projects using Under the Moon, new Stampin' Up!® stamp set

Under the Moon Stampin Up card ideas

Are you ready for a sneak peek? Today I have three projects using the brand new Under the Moon and Simply Said Stampin’ Up!® stamp sets plus two tiny peeks of two new colours. These fab products will be released to customers on Wednesday 1st May.

Thursday, 8 October 2020

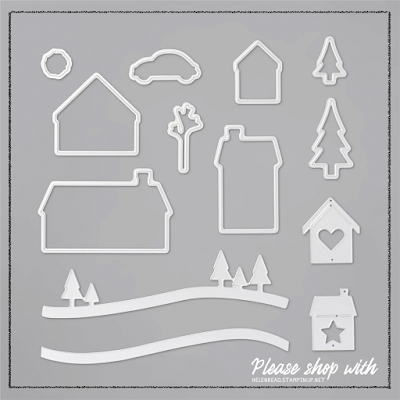
Home Together Dies masked moon card

Home Together Dies Stampin Up ideas

Just playing around with the Home Together dies and trying to come up with projects for tomorrow’s Crafty Friday event over Zoom. This is the one that got away.

To make this, I die-cut a circle (any circle will do) from a Post-It Note and stuck it to my card. I sponged around this mask using Pool Party ink. Then I simply built up the layers using die-cut hills and trees in Whisper White cardstock.

I finished off with a greeting from In The Pines in Misty Moonlight ink and some Pool Party ribbon to add shimmer and pick up the Pool Party around the moon.

No sticky notes in the house? Simply use thin copier paper and some Tombow Multipurpose Adhesive. Apply a few small dots on your circle and allow them to dry fully. This turns it into a temporary adhesive so you can remove the mask with care.

Home Together Dies Stampin Up ideas

 Take a look at some of the other fab projects you could make with these dies...

Home Together Dies Stampin Up ideas

Home Together Dies Stampin Up ideas


Monday, 8 June 2020

Creating beautiful backgrounds to show off your dies


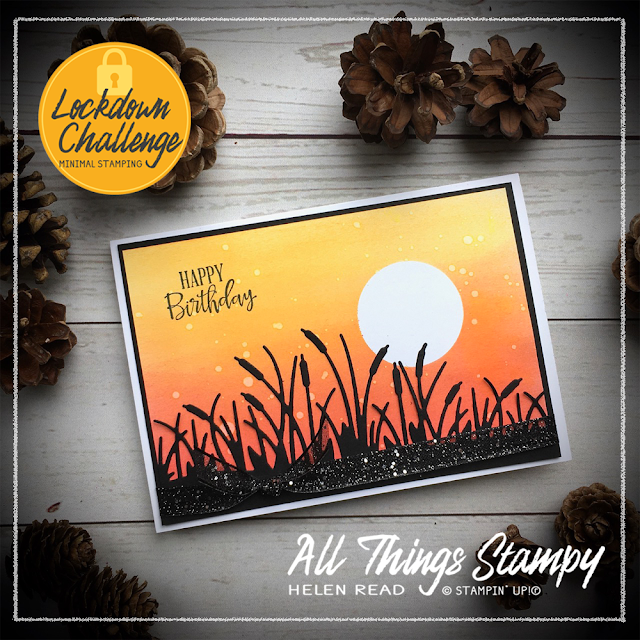
No new products today – just some great examples of how you can create beautiful projects where the die-cuts are the stars of the show.

I had fun creating backgrounds to show off the Friendly Silhouettes Dies. Let me walk you through them.

For these first two projects, I masked a circle using a punched/die-cut sticky note, then brayered the background using Crushed Curry and Poppy Parade ink pads. You could sponge, too – but if you do, make sure you sponge away from the centre of the mask or you could dislodge it.

For the top card, I then lightly splashed with water from a fine paintbrush. Allow to dry, then dab it dry with a tissue. This creates this lovely effect which can look like seed heads blowing on the breeze, fireflies, rain or, on a dark blue background, like snow. It’s such a simple effect and so versatile.


For this card, I brayered as before, but instead of splashing, I used that same very fine paintbrush to paint fine lines following the edge of the circle. With ideas clearly way above my station, I call this the Van Gogh technique.


For the third card, I took the leftover template from the bullrushes in the first card and used this as a mask. I sponged with Pumpkin Pie to create a background image, then removed the mask and brayered around the top edge of the card in Melon Mambo. The beauty of brayering is that you can give it a go in any colours and get some lovely effects.

Want to have a go at fun techniques like this? If you’re in the UK, why not talk to me about joining my remote classes?


Monday, 2 December 2019

Garden Goodness birthday card


In the recent stamp sale, I treated myself to the Garden Goodness stamp set... mainly so I could make this card for my daughter’s birthday.

I CASEd the idea from German demonstrator Jasmine Schulze, which made life easier! I love this stamp set and can't wait to get more time to create with it.

I stamped the image onto sticky notes to create a simple mask for the overlapping avocado effect. The greeting is heat embossed in white and cut out freehand for the fun on-trend look. Don't believe it's on-trend? Wait till you see the new Spring/Summer catalogue and Sale-a-Bration brochure!


When embossing in white, I always double up; I stamp in Whisper White and then use white embossing powder on top. Don't forget to use the embossing buddy first, to prevent any stray powder from sticking to your cardstock. 

Monday, 29 July 2019

Masked Seaside Notions seashells on clear block background


Stamping, masking, clear block stamping... this is a fun technique card which is easy to create and looks pretty effective (in my opinion).

Clear block stamping is a really fun technique; just ink up your block (you can use ink pads or water-based markers), then spritz with water before pressing onto your paper. Bizarrely, despite this being a faux watercolour technique, it works best with Whisper White cardstock rather than watercolour paper.
The shells are masked using sticky notes so that the images don't overlap. The secret here is to work from the front to the back, so you stamp the large shell first, mask it, then stamp the images 'behind' it. Another top tip is to retain your masks - keep them in the stamp box for future use, as this will save you time when you revisit the technique. 


Monday, 18 March 2019

By the Bay Week! Sponged seaside cottage


It’s By the Bay week here at All Things Stampy – a time to celebrate this gorgeous but oft-overlooked Sale-a-Bration stamp set with a new project every weekday. Some of you may have been put off by the thought of colouring that highly detailed main image, but here is a technique which makes it simple...

Thanks to this wonderful tutorial from Mitosu Crafts, I created this sponged image. I used slightly different colours, as I prefer the vivid Pacific Point to the dark and moody Night of Navy, and I added a red front door to make it pop.

I was showcasing the fabulous Stitched Rectangle Framelits, which can be used to make many more sizes of rectangle than the ones included in the pack. Here I used a die wider than the pouch to create the stitched effect just along the top and bottom of the image.


Inside the pouch is a pack of Old Olive Baker's Twine for the host – it’s one of her favourite colours.

I also showed this version, made into a card. This one uses the darker Night of Navy ink around the edges and, instead of creating the stars with a chalk marker, I spattered Frost White Shimmer Paint across the image and the whole card for a brighter, shinier effect. I actually prefer this but didn’t demo it as it takes quite a while to dry.

Big thanks to Barry and Jay for their tutorial!


http://helenread.stampinup.net

Friday, 24 November 2017

Stained glass technique with Stampin' Blends


This card shows the stained glass technique, which is really easy to do with some vellum and the new Stampin’ Blends alcohol markers.

For this technique I found that Memento Black ink took quite a long time to dry so, because the images so look fine in reverse, I used my Archival Black to stamp on the back of the vellum.

Normally Archival Black and Stampin' Blends don't work well together because they are both alcohol-based so the ink will run.  This is the usual rule of thumb...


But, because I stamped the outline image on the BACK of the vellum, I could colour the other side with no bleeding, and create a lovely stained glass effect.

The White Perfect Accent is also coloured with Stampin’ Blends, for perfect co-ordination.

Wednesday, 13 July 2016

Love You Lots with paint splatter technique


How fun is this? Ignore the copper embossing; while I love the new copper embossing powder, it really doesn't work on this project, but I couldn’t find the white (it was before the Big Craft Sort).

Instead, concentrate on the main image. For this, I masked the elephant, then spattered paint all over the background. I did this at a Crafty Friday event and, again, took inspiration from one of my customers. Kate made a splattered background around her elephant image and we decided it looked like the elephant had done it with a paintbrush. So, between us, we carefully drew in a paintbrush - and I loved the effect so much that I just had to make my own version.

Thursday, 7 July 2016

Love You Lots with Pop of Paradise and a splashy watercolour technique


It’s that frog again (I don’t even like frogs!) from Love You Lots, the gorgeous new hostess stamp set. 

This is the result of some experimentation at June’s Crafty Friday event, where we played with watercolour techniques again. Here’s how to recreate this technique:

  1. Begin by stamping an outline image (ie, one you can colour in) twice in permanent ink; once on the watercolour paper and once on some thin scrap paper or sticky note. 
  2. Cut out the image from the scrap paper to create a mask.
  3. If using scrap paper, apply a temporary adhesive (Tombow is temporary if you allow it to dry thoroughly) on the back of the mask. 
  4. An alternative method would be to skip the mask and use masking fluid (available from art shop) all over the image on the watercolour paper. It can be rubbed off when the project is complete. 
  5. With your main image safely covered, now you can create the splashy background. Simply pick up ink with a paintbrush or aquapainter and tap the top of the brush.
  6. A wetter brush will result in larger, paler splashes.
  7. More concentrated ink, ie less water, will result in smaller, darker splashes. 
  8. When you’re happy with the results, allow it to dry thoroughly, then remove the mask. If you’ve gone a bit mad with the splashing (easy done) you may find some of the colour has seeped through, but you can remove this to a certain extent with a paintbrush and clear water. 
  9. Now you can paint your main image as desired. I soon realised that my frog couldn’t be green as he wouldn’t stand out, so went for So Saffron. Yes, this is So Saffron, you wouldn’t think it, would you? But when you use the ink in its concentrated form, with just a little water, it leans more towards Delightful Dijon. 
  10. Finally, to make the frog stand out even more, I tested the theory that the Fine Tip Glue Pen can be used as a substitute for Crystal Effects (which we no longer carry). It worked! It takes a little longer to dry but has very similar results. 
SaveSave

The small print

This is my personal blog and my sole responsibility as an Independent Stampin' Up!® demonstrator. All images are © Stampin' Up!® All content including photographs, projects and text are © Helen Read, unless otherwise stated. Please feel free to copy my ideas for your personal use and inspiration - if you are a SU demonstrator you may use these ideas for your events but please give credit where it is due. Please do not use my ideas for monetary gain, competitions or publication. The images on this blog - including blog buttons - should not be copied and used elsewhere on the internet or on CDs.