Showing posts with label Fancy Folds. Show all posts

Monday, 24 March 2025

Three amazing card ideas for Wildflower Designs and Elements of Text

Stampin Up UK Wildflower Designs Elements of Text card ideas
 

Sometimes you see two Stampin’ Up!® products which are just meant to go together - even if they aren’t advertised as such.

One is a bundle you may have overlooked – Wildflower Designs (163334) – while the other is an Online Exclusive called Elements of Text (164774). 

Stampin Up UK Wildflower Designs Elements of Text card ideas

I used these wonderful Stampin’ Up!® stamp sets in a class last week to make two cards in very different colour themes. Then I came home and pulled both stamp sets out again to make a very special birthday card for an incredible lady.

Let’s take a closer look at these Wildflower Designs and Elements of Text cards.

Tuesday, 6 August 2024

Inspiring card ideas for Thoughtful Journey Designer Series Paper

Stampin Up thoughtful journey fancy fold designer series paper card ideas

Exciting news! There’s a Designer Series Paper sale starting today at Stampin’ Up!® and I have four fab fancy fold ideas to inspire you.

I have used Thoughtful Journey 6x6 Designer Series Paper from Stampin’ Up!® but you could use almost any patterned paper from the 15% off sale with these versatile designs.

During the sale, which runs until the end of August, you can save 15% on standard 6x6 and 12x12 Designer Series Paper packs in the current 2024-2025 Annual Stampin’ Up!® Catalogue.

Check out the sale here 

Tuesday, 28 May 2024

Card ideas with Take to the Sky Designer Series Paper

Stampin Up Take to the Sky card ideas

I’ve said it before, I’ll say it again... you don’t always need to buy the stamp set. This may feel like shocking advice from a Stampin’ Up!® demonstrator but I know times are tough for many people right now and I would rather help you find ways to keep crafting than see you give it up for financial reasons.

Here are three cards I made using Take to the Sky Designer Series Paper from Stampin’ Up!® I don’t have the coordinating Adventurous Sky stamp set because, frankly, I didn’t think I’d get much use from it. But I love the paper featuring masculine patterns, planes, maps and clouds, and think it could be extremely versatile.

Tuesday, 28 March 2023

Eight projects using the Dainty Delight bundle from Stampin' Up!®

Dainty Delight bundle stampin up uk

Saturday was my long-awaited Spring Craft Day – a day of creating beautiful projects using the Dainty Delight bundle and the now-retired Dainty Flowers Designer Series Paper.

All through Sale-a-Bration, I used my rewards for this gorgeous paper so I would have enough for everyone to receive half a pack in their kit. Anyone who upgraded to include the bundle received a full pack.

And I was really glad I’d been hoarding it because by the time I came to place my final order, the paper had all gone and I couldn’t order any for the late bookers. Luckily I had just enough for everyone.

Tuesday, 31 May 2022

Fun fold wedding cards using Cup of Tea bundle

Cup of Tea fun fold Stampin Up card idea
 
Floral cards for special occasions are not my forte so when I happened upon this fabulous fun fold card idea from fellow Stampin’ Up!® demonstrator Terri Gaines, it was just what I needed for several special occasions. I fiddled around with her template and converted it for A4 cardstock and C6 envelopes – please read on for measurements, and an alternative version.

Tuesday, 15 March 2022

13 projects using the Grassy Grove bundle from Stampin’ Up!®

Stampin Up UK demonstrator Grassy Grove bundle

As a Stampin’ Up! UK demonstrator, I get to see new products early, so I’ve been lusting after this Grassy Grove bundle since way back in December.

I knew it would be perfect for my all-day craft event and had lots of projects in mind.

Everyone who attended the event on Zoom received the Grassy Grove bundle and a full pack of the Sale-a-Bration Designer Series Paper, Simply Marbleous. We made seven projects, and I’ve made some extra variations using New Horizons Designer Series Paper, too, as it’s just so absolutely gorgeous.

Finally I can show them off – so here are 12 projects using the Grassy Grove stamp set and Grove Dies. I haven’t included tutorials – please appreciate that these projects were exclusively created for the guests at my event. Nevertheless, I hope you love them as much as I do!

Stampin Up UK demonstrator Grassy Grove ideas
 

We began with this light-up card, which fits in a standard postage mailing box and will send in the UK as a Large Letter. This is the project I had in mind from the moment I laid my eyes on the Grassy Grove bundle. 

I’ve used tiny fairy lights within a box, covered in vellum and surrounded by white cardstock die cut with Grove Dies. 


Inside the box is a background of Designer Series Paper. Check out the video to see how it looks simply by changing the colour of this paper. The yellow really makes it glow with a lovely sunset-like warmth. 


Stampin Up UK demonstrator Grassy Grove ideas

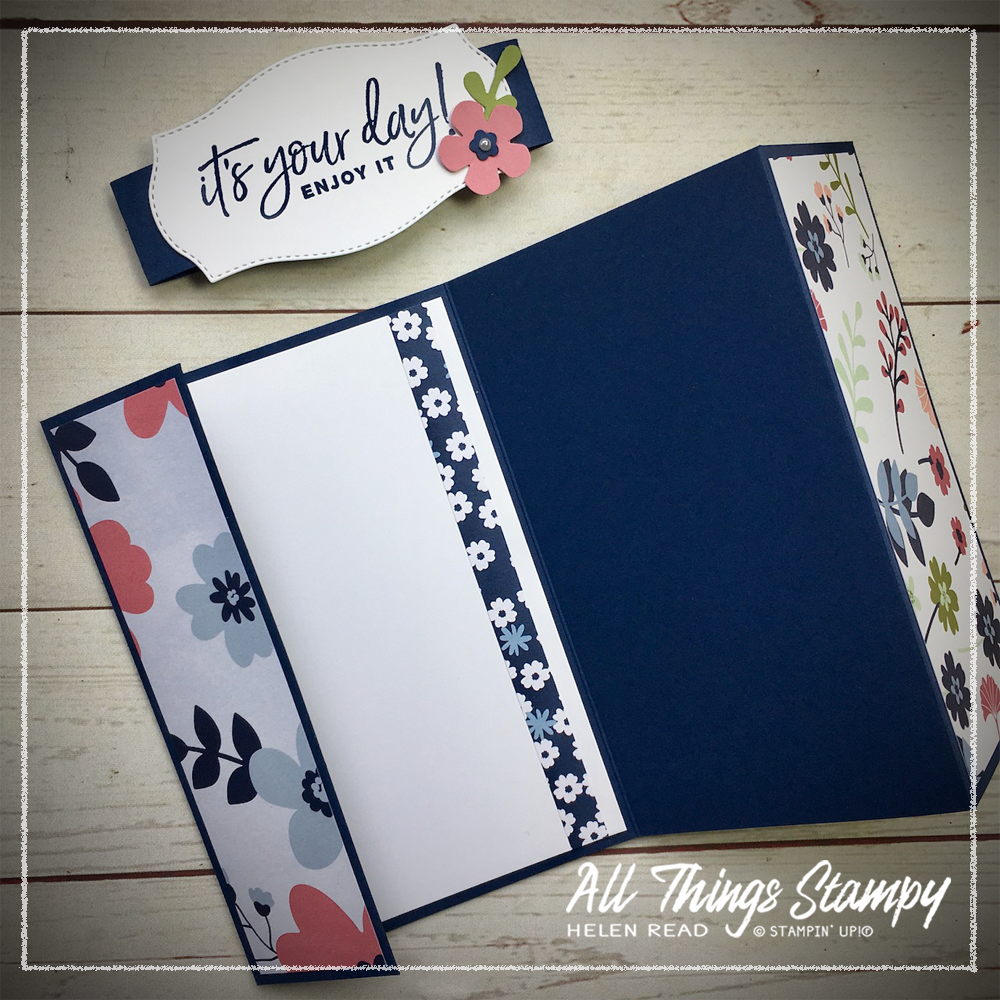
Our second project was this fancy fold which is so easy to make. Again, simply changing the Designer Series Paper can give the card a completely different look. 


This is a really simple fun fold which is simply made from two card bases. One is cut slightly smaller and inserted into the first with the fold on the right. So, as you can see in the video, you just open the card as normal to reveal the next layer, then open the ‘backwards’ card to reveal the message inside. 

Stampin Up UK demonstrator Grassy Grove ideas

The deer are die cut from Designer Series Paper and sponged/brushed with ink to darken the silhouettes. This meant everyone could make their deer match their projects, without me having to send out lots of scraps of different coloured cardstock. 


Stampin Up UK demonstrator Grassy Grove ideas

As well as their stamps, dies, craft supplies and snacks for the day, I also sent everyone a bar of natural vegan guest soap, so they would have something to pack into this little gift bag. The bag is made from a single sheet of 6"x6" Designer Series Paper, which we decorated using stamps and die-cut shapes from our bundle. These would make ideal table favours for any special occasion. 

Stampin Up UK demonstrator Grassy Grove ideas

The Grassy Grove bundle is perfect for creating “scene” cards like this one. I used a sheet of Designer Series Paper as a background then overlaid the various elements on top.

Stampin Up UK demonstrator Grassy Grove ideas


I’ve stamped these in Old Olive and Mossy Meadow, two of my favourite greens, with a Soft Suede deer, all finished off with some linen thread. 

Stampin Up UK demonstrator Grassy Grove ideas

To mix things up a little, I made another version of this card using New Horizons Designer Series Paper. This wasn’t available when I was planning my projects, but I have it now and don’t like making the same card twice so created this one on the day. 

Stampin Up UK demonstrator Grassy Grove ideas

This time I have stamped in Soft Succulent, Evening Evergreen and Early Espresso, for a much bolder look. Here they are together... for comparison.
 
Stampin Up UK demonstrator Grassy Grove ideas

Whatever events I run, I always start with the most complicated projects and work my way down to the simplest. This means we get the difficult crafting out of the way early on and can relax into the day. It also means if anyone has to dash off early, they have had help on hand for the challenging bits and can finish off their projects unaided. 

So the next few projects are nice and simple, so everyone could chat and craft at the same time. 


Stampin Up UK demonstrator Grassy Grove ideas

This is actually a variation of this Christmas card I made last December – and I don’t think anyone noticed!

Stampin Up UK demonstrator Grassy Grove ideas

This is the version from the class, using Simply Marbleous paper in So Saffron and Bumblebee. I’ve stamped in Crumb Cake, stamping off for the grass to make it paler.

Stampin Up UK demonstrator Grassy Grove ideas

And this is my alternative version, using New Horizons paper. I’ve covered the whole card front using the paper as this is my favourite way to use DSP at the moment, and stamped using Soft Succulent, Crumb Cake and Soft Suede. 

A simpler version is this card, with no die cutting at all, just stamping...


Stampin Up UK demonstrator Grassy Grove ideas

This would be really quick to turn out, especially if you used the Stamparatus for the grasses and deer, and just stamped the trees freehand. 

Stampin Up UK demonstrator Grassy Grove ideas

I particularly love the alternative version here, using New Horizons paper and stamping in Soft Succulent, Evening Evergreen and Early Espresso. The greeting comes from Wildlife Wonder and makes this the ideal masculine birthday card. 


Stampin Up UK demonstrator Grassy Grove ideas

You don’t have to use deer on your projects all the time though; this really simple card uses one of the die-cut shapes as a mask to create layers of greenery at the bottom of the panel, which are over-stamped with grasses. 

Stampin Up UK demonstrator Grassy Grove ideas


The clouds are created by using the template, that’s the piece of cardstock left behind after die cutting. This is again used as a mask with some very light brushing of Pool Party to evoke the sky. 

Stampin Up UK demonstrator Grassy Grove ideas

Finally, here’s one I made earlier... another Grassy Grove project using New Horizons Designer Series Paper to show just how perfect these products go together.

I hope you have enjoyed my Grassy Grove projects and are inspired to make your own. While the Simply Marbleous paper is no longer available as it was a Sale-a-Bration freebie, I highly recommend the New Horizons Designer Series Paper to coordinate with this bundle and many other products you are sure to have in your craft stash.

If you are in the UK and would like to order these or any other products, please visit my store and, if you use the current host code UDVDUXFH, I’ll send you a thank you gift in the following month.


Does your wish list come to more than £99? Please get in touch and I will help you get more for your money and unlock discounts all year round.  


Tuesday, 1 March 2022

Floral Squares Dies fancy fold and slimline cards

Stampin Up UK Floral Squares Dies

Don’t you just love black, white and purple? Or do you prefer the black, white and pink? I think this gingham ribbon from Stampin' Up!® really sets off both of these colour combinations.

We made this card at a recent Zoom class for my Stampin’ Up!® UK customers, using the Floral Squares Dies These Stampin’ Up!® dies are really fabulous, and can be used with or without the coordinating All Squared Away stamp set.

However, it is worth buying the bundle because during March 2022, the All Squared Away Bundle is part of Stampin’ Up!'s Savings Are In Bloom promotion, which means an extra 20% off on top of the usual bundle saving. This means the stamps and dies will cost you just £36.75 instead of the usual price of £46.

I designed this class around white and neutral cardstock so I could send out kits to people taking part on Zoom. This meant they could use whatever ink pad they liked to add colour. Here it is using Gorgeous Grape...

Stampin Up UK Floral Squares Dies

And here’s another version using Polished Pink, one of our 2021-2023 In Colors. 

Stampin Up UK Floral Squares Dies

This is a Pull Tab Flip Card fancy fold with a fun secret element. Take a look at the video here to see how it works.


It looks complicated but it was actually quite easy to make, once I’d adapted the measurements to metric, following a video from US demonstrator Tami White. Check out her video here

We used blending brushes/sponges to add colour, along with some spattering (I used Quiet Meadow). Timeworn Type 3D Embossing Folder adds texture to the main panel. It’s a really fun card to make with any square image as your focal point and I would love you to have a go so have added a PDF of instructions to my website. 
 
Stampin Up UK Floral Squares Dies

Our second card was much more straightforward and uses our new Stampin’ Up!® Slimline Envelopes. Slimline cards are really on trend right now so these envelopes are a welcome addition to our collection.
 
Stampin Up UK Floral Squares Dies card
 
Again it’s made from all-white cardstock; the colour is added using Blending Brushes, which make it easy to create a lovely ombre effect by adding more colour to one end of the cardstock, and tapering it off to a paler shade on the right. 
 
Stampin Up UK Floral Squares Dies card

I could have simply added the squares to this panel but I decided to make a slightly longer panel to leave room for a gap for some more gorgeous Gingham Ribbon. The greeting is small and subtle and comes from the Sweet as a Peach stamp set. 

Stampin Up UK Floral Squares Dies card

I’d love to know what you think. Do you prefer the pink or the purple? Will you have a go at this fun fancy fold card, or will the simpler slimline card be on your to do list instead?
 
And please do let me know if you are in the UK and would like to purchase any of these products. You can do this through me if you wish but it’s really easy to shop online at my Stampin’ Up! store. If you do this and use the March host code UDVDUXFH I will send you a thank you gift next month.


Does your wish list come to more than £99? Please get in touch and I will help you get more for your money and unlock discounts all year round.  


Monday, 1 February 2021

FREE tutorials: Paper Blooms birthday cards

Happy new month! To mark the end of possibly the longest January in history, I held a lovely relaxing craft class on Saturday. I called this my Birthday Bash event... which in retrospect was not the best name as several people have asked if I was my birthday (they didn’t send cake though, sadly).

But no, the idea was to create a set of six cards ready for all those birthdays that spring up on you in the new year.

It was also a great opportunity to use the Paper Blooms Designer Series Paper from the Sale-a-Bration brochure. Everyone received a quarter of a pack for their six projects, giving them lots of versatility and choice. 


We began with this fun fold card – although I’m not sure everyone found it as fun as I did! It's made from a full sheet of A4 cardstock; the piece you cut off can be trimmed down to use as the belly band – and in fact provided the belly band for the second card, too.

Download the FREE tutorial here (opens in new window)


This is what the card looks like when it’s opened out. Plenty of space to write. 

 
The second card was a simple Z-fold, where you just score the front at the halfway point and fold it back on itself. I set out to make this a masculine card but failed miserably. Never mind – we can always use more floral cards, can’t we?


Our third card utilised vellum to tone down this lovely but bold Designer Series Paper. By offsetting it a little, you can add interest. The front is decorated with flowers cut out from the Paper Blooms pack. 
 
 
When using vellum, you don't want your adhesive to show, so make sure you only apply glue or tape behind your elements. I quite like the way the vellum then sits loosely on the card but if you need more security, add a glue dot and cover it with another flower or rhinestone/pearl.
 
 
Our last three cards were from a three-in-one pattern, which is fun to make and really speeds things along. Basically, you cut three pieces of DSP to the same size, then cut them up in exactly the same pattern – I used a guillotine-style cutter so did them all in one go. Then you mix up the designs to create three different cards. You don't have to follow this pattern, you can do it with vertical or horizontal strips, or use your imagination!

If you would like to follow this pattern, however...


You can earn this gorgeous Designer Series Paper FREE during Sale-a-Bration, which runs to the end of February. This is one of your choices when you place a £45 order. If you are in the UK and would like to order, please visit my store and, if you use the February host code D6PKN76U, I’ll send you a little thank you gift in March!


Does your wish list come to more than £99? Please get in touch and I will help you get more for your money and unlock discounts all year round.  
 

NB: Please note orders are currently taking quite a bit longer than usual to arrive, due to a combination of extra paperwork required following Brexit, lower staffing levels due to the pandemic, and an influx of orders as a result of both lockdown and Sale-a-Bration. Please ask if you require more information.


Monday, 25 January 2021

Tutorials: Double Dutch Door Fold and Desk Calendar


Our first Crafty Friday of the year saw us use this gorgeous Flower & Field DSP from the Sale-a-Bration brochure. This beautiful paper is free with a £45 order during January and February.
 
 
During the morning, we made two projects using just two 6x6 pieces of paper (cut from 12x12 sheets). A I only had one pack to play with, not everybody received the same designs, which is quite nice as we get to see lots of variations on the different projects. 
 

We began with this fun Double Dutch Door Fold. And question of the day was “what is a double Dutch door?” Turns out a Dutch door is what we in the UK know as a stable door... and suddenly the card design makes sense!
 

I don’t do complicated fancy folds so this one was right up my street. You begin by cutting a standard piece of cardstock (A4 in most countries) and cutting it in half lengthways to create a card base. Slice off a section of the front then create the bottom doors from a separate, wrap-around piece.


As this was a remote class, guests were using their own greeting stamps to complete the card. Therefore I sent them a selection of die-cut and punched pieces for decoration. I used Nature’s Roots Dies to create these pretty Granny Apple Green leaves and the Small Bloom Punch for some Bumblebee flowers. The mini flower accents are created using the Confetti Flowers Border Punch. I have to say, punching lots of flowers is easier than die-cutting lots of leaves!

 
Use the piece you slice off the front of the card to create a layer for your main greeting/image panel. Waste not, want not.


Our second project was this cute desk calendar. I have to thank my downline Tracey for the inspiration for this as she made one for me for Christmas. 
 

Again this starts with a simple card base, created by cutting a sheet of cardstock in half lengthways. A second piece of cardstock creates a supporting piece and a third creates a simple box on the front for a sticky note pad and pen or pencil. You could decorate it further if you wish, but I like to let the DSP do all the hard work here. 


This side view shows how the supporting piece works. Simple but effective, and stops the weight of the pad making the card fall open. 

You can earn this gorgeous Designer Series Paper FREE during Sale-a-Bration, which runs to the end of Feburary. This is one of your choices when you place a £45 order. If you are in the UK and would like to order, please visit my store and, if you use the host code YK2NNMYW, I’ll send you a little thank you gift in February!

To make it easy for you, please shop using this link (opens in new window)

Does your wish list come to more than £99? Please get in touch and I will help you get more for your money and unlock discounts all year round.  Please message me via my website.
 
NB: Please note orders are currently taking longer than usual to arrive, due to a combination of extra paperwork required following Brexit, lower staffing levels due to the pandemic, and an influx of orders as a result of both lockdown and Sale-a-Bration. Please ask if you require more information.  


The small print

This is my personal blog and my sole responsibility as an Independent Stampin' Up!® demonstrator. All images are © Stampin' Up!® All content including photographs, projects and text are © Helen Read, unless otherwise stated. Please feel free to copy my ideas for your personal use and inspiration - if you are a SU demonstrator you may use these ideas for your events but please give credit where it is due. Please do not use my ideas for monetary gain, competitions or publication. The images on this blog - including blog buttons - should not be copied and used elsewhere on the internet or on CDs.