The first of our cards to go inside was arguably the most complex, although even this is not too fiddly. We stamped our tallest image on a white panel, popped this up onto the note card, showing a strip of co-ordinating DSP to the right. Then it's finished off with a dragonfly (stamped or cut from the paper), a greeting and a ladybird.
The Ladybug Trinkets are hollow so the best way to stick them down is using Mini Glue Dots. Don’t have any Mini Glue Dots? (Why not, they’re amazing!) You could use a small piece of double-sided tape, but it will be fiddly!
This Designer Series Paper is too beautiful to hide so these cards show it off by making it a feature of both the cards and the envelopes.
Covering the envelope flap is really easy but be warned: 6x6" DSP is only wide enough to cover the flaps of a notecard envelope, not our standard C6.
Simply apply adhesive all over the envelope flap then, making sure you have the pattern the right way up (if that matters with your chosen design), stick the full piece of DSP to the flap, butting it up neatly to the fold. Then turn it over and cut it out freehand, using scissors.
These cards are scaled right back but are no less striking for their simplicity. The card on the left features dandelions stamped onto separate cardstock and cut out with the dies. ‘Hello’ looked a bit lost on its own so I stamped it three times.
The card on the right has its flowers stamped directly onto the notecard, with a popped up dragonfly cut out from the DSP.
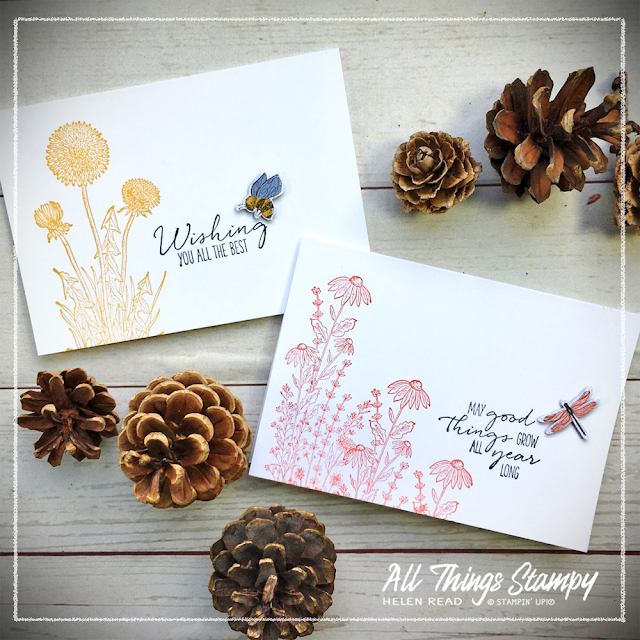
Even simpler are these two note cards, with no colouring, just the image stamped in a colour directly onto the card. In both cases, the inset is cut out from the DSP. Did you know the bee from the Dandy Wishes dies fits the DSP perfectly? So you can stamp and cut or just cut them out of the paper if you prefer.
Similarly, the Dragonflies Punch fits both the stamp set and the DSP. You can punch both the largest and medium dragonflies from the paper although not at the same time. You will need to rough cut them out first to avoid spoiling the surrounding dragonflies.
Since the ladies shared their projects in our private customer group at the weekend, orders for one or both of these amazing bundles have been flooding in. If you would like to order any of the products you see here, remember the best time to do so is before the end of the month, as orders over £45 will qualify for a free Sale-a-Bration item. You can either contact me and I will place the order for you – if you are local you an even hop on to my order and save shipping costs – or shop via my store. If you use February host code D6PKN76U, I’ll send you a thank you gift in March!


No comments:
Post a Comment
Thank you so much for taking the time to comment.