I love all the gorgeous Designer Series Papers from Stampin’ Up!® and love making them the focus of my projects because they do all the work for you.
On Saturday I ran a class on Zoom which I called a Paper Caper as customers could choose from two packs of Stampin’ Up!® Designer Series Paper from the Sale-a-Bration brochure: Favored Flowers or Day At The Farm.
We used the big Stampin’ Up!® greeting set called Good Feelings to make three cards and a little box. All of these projects could be made with any Designer Series Paper, and are a great way of using up any leftovers to make quick and easy cards.
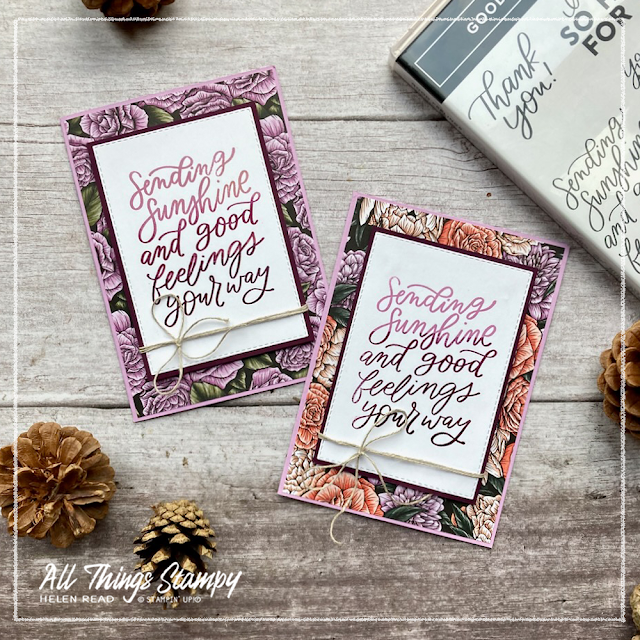
This Sending Sunshine stamp from the Good Feelings stamp set is a lovely sentiment which is perfect for making an impact. I stamped the greeting using the Stamparatus, applying one colour ink at a time.
For the vegetable card, I used Daffodil Delight and Garden Green, while for the floral card I used Fresh Freesia, Rich Razzleberry and Blackberry Bliss.
Inside the card I used an off-cut strip of matching Stampin’ Up!® Designer Series Paper and a flower cut out as decoration for the Favored Flowers card.
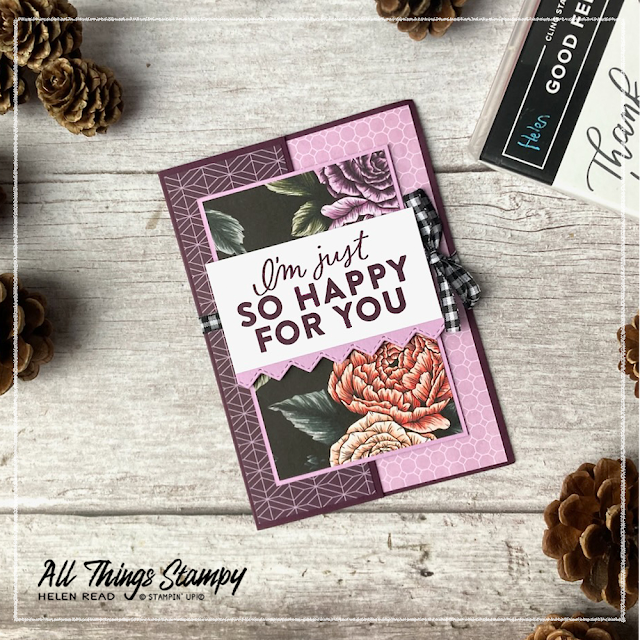
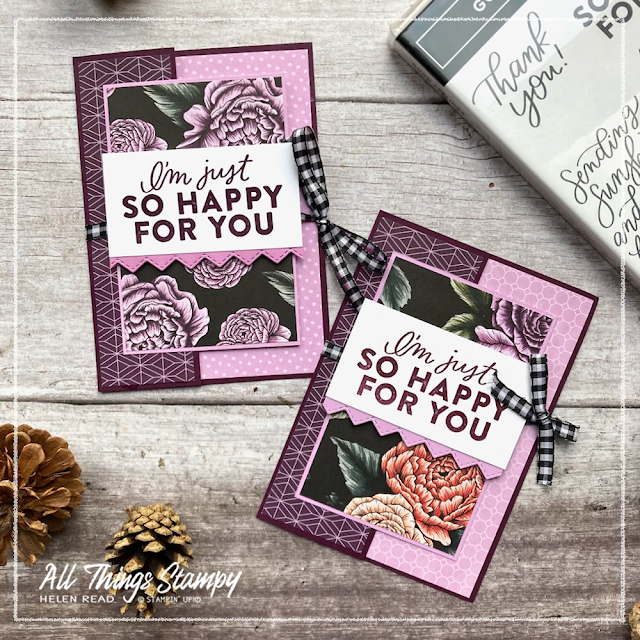
The So Happy For Your card is a sort-of fancy fold. Not that fancy to be honest – but the recipient doesn’t need to know that! All you do is cut a strip off the card front, then decorate the front and inside with coordinating Designer Series Paper.
Some of the patterns in the Day At The Farm Designer Series Paper pack are big and busy, and this card design is perfect to show them off. I used this fun ducks and hens design for my main panel, then added a greeting on top, with just a small strip of zigzag cardstock (Basic Borders Dies) to add interest.
Inside my Favored Flowers card, I used some delicate Fresh Freesia paper which is pale enough to write on but if you don’t have anything suitable you could add a panel of white.
For my second Favored Flowers card on the day, I had run out of this lovely Fresh Freesia design so borrowed some spotty paper from another Stampin’ Up!® Sale-a-Bration pack – Dainty Flowers. Nobody will know!
I’d also forgotten to cut myself a zigzag border in Fresh
Freesia and time was running short so I found one I’d pre-cut from
white and coloured it using Fresh Freesia ink and a Stampin’ Up!®
Blending Brush.
Colouring small pieces of cardstock with a Blending Brush or sponge, or even a marker or directly with the ink pad, is a great hack if you don’t have the right colour for your project.
The whole card is tied up with Black and White Gingham Ribbon, which runs underneath the greeting. I love this stuff and am now on my fourth roll.
Our final card is this simple thank you card which makes the big floral (or cows and trees) design the star. It’s just a simple layering job, with a two-tone greeting on a die-cut label.
I love the rural scene in the Day At The Farm pack and thought this was a great way to show it off, with some trees and cows on top.
For my Favored Flowers cards, again I had run out of paper for the background of my card. I confess I have been using it for lots of other projects and forgot to save myself a kit for the class! But no matter, I found a sheet from an upcoming pack of Stampin’ Up!® Designer Series Paper called Hello, Irresistible. It has a sheet which is heavy on the Petal Pink, so I used that for my background instead.
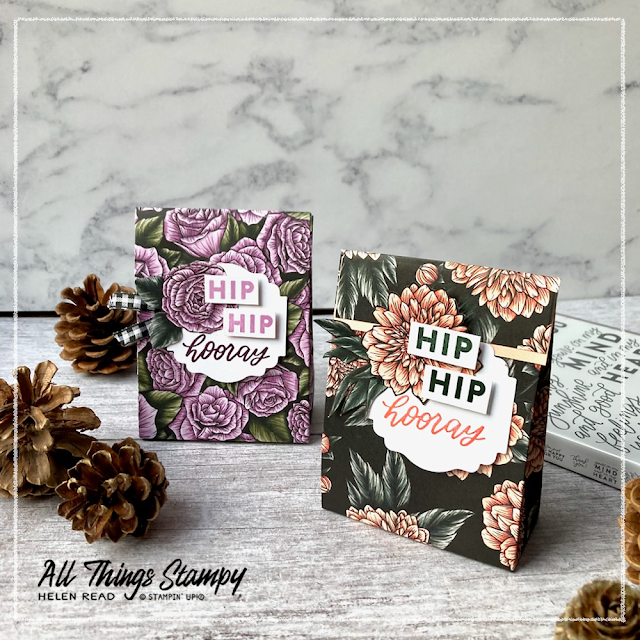
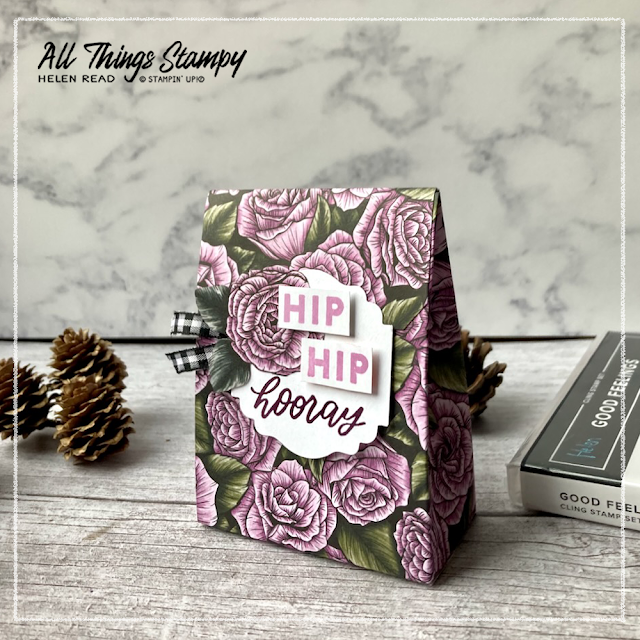
Finally, we made a cute little box from Designer Series Paper which is perfect for just a few chocolates for another small gift.
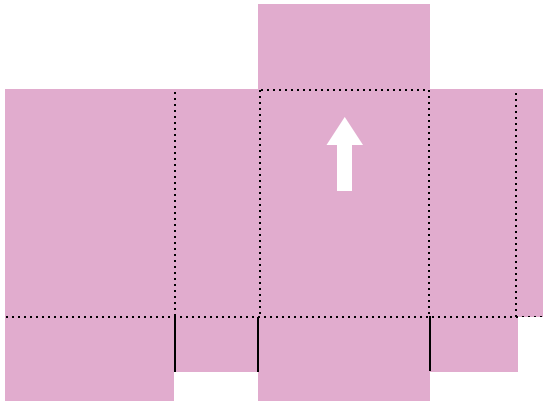
You make it from a piece of 7" x 9½" paper, scored as shown here.
Once it’s scored, cut away as shown and assemble. The panel directly above the arrow flips over to form a front flap which tucks under the greeting label.
If you want to get two boxes from a 12x12" sheet, reduce the top and bottom flaps to 1" instead of 1½" and add an extender piece to the top flap as I’ve done with Petal Pink on this box.
Otherwise the flap will blend into the background, to give a more seamless look like on this more purple version.
I hope you enjoy these Designer Series Paper projects. You can make these cards and box from literally any Designer Series Paper you have but remember, if you want either of the packs shown here, you only have until the end of February 2023 to earn either of them FREE with a £45 order.
If you are in the UK or Ireland, please consider shopping at my Stampin’ Up!® store, helenread.stampinup.net. Thank you!
Does
your wish list come to more than £99? Please get in touch and I will
help you get more for your money and unlock discounts all year round.







No comments:
Post a Comment
Thank you so much for taking the time to comment.