Wednesday, 30 December 2009

Free stamps anyone?

I do love this little bird cage stamp – but just haven’t had much chance to use it yet. It’s from a brand new stamp set called Happy Moments and it’s one of those really useful sets that is just perfect for starting out as it contains almost everything you need; a variety of images suitable for males and females, as well as greetings.

But you can’t buy this set, oh no you can’t. And that’s good news... honest! Because once again it’s time for a Stampin’ Up!® Sale-A-Bration!

This is one of the big events of the Stampin’ Up! calendar – for two whole months, every time you spend £45 you earn yourself a FREE stamp set! There are four brand new, exclusive stamp sets to choose from and it gets better because you can earn a free set as many times as you like! Yes, spend £90 and get two sets, etc.

Best of all, this offer applies to absolutely everyone – customers, hostesses, demonstrators. So if you’re at a Stampin’ Up! party it’s not just the hostess who will get freebies. And you don’t have to be at a party to place an order and earn a free set – all you have to do is email or call.

There are extra freebies for hostesses, too – as well as a great deal if you decide to sign up with Stampin’ Up! during Sale-A-Bration. Here’s the info:

Customers: Spend £45 and earn a free set from the Sale-A-Bration brochure. Spend £90 and earn two free sets ... and so on. There is no limit to the number of free sets you can earn.

Hostesses: As well as a free SAB stamp set for every £45 you spend, there’s an extra one for the hostess if the workshop total reaches £300 or more.

New recruits: If you sign up with Stampin’ Up! during Sale-A-Bration, as well as your fabulous Starter Kit you can choose an extra stamp set to the value of £38.95 from the Idea Book & Catalogue. And, of course, you can start earning free SAB sets as soon as you place your first order.

Stamps: Happy Moments (SAB)
Cardstock: So Saffron, Basic Gray, Regal Rose, Very Vanilla
Paper: Kaleidoscope
Ink: Basic Gray
Accessories: Filigree brads, Rhinestone brads, corner rounder, 5/8” Grosgrain Ribbon - Regal Rose

All products by Stampin' Up!®
Read More » I do love this little bird cage stamp – but just haven’t had much chance to use it yet. It’s from a brand new stamp set called Happy Moments and it’s one of those really useful sets that is just perfect for starting out as it contains almost everything you need; a variety of images suitable for males and females, as well as greetings.

But you can’t buy this set, oh no you can’t. And that’s good news... honest! Because once again it’s time for a Stampin’ Up!® Sale-A-Bration!

This is one of the big events of the Stampin’ Up! calendar – for two whole months, every time you spend £45 you earn yourself a FREE stamp set! There are four brand new, exclusive stamp sets to choose from and it gets better because you can earn a free set as many times as you like! Yes, spend £90 and get two sets, etc.

Best of all, this offer applies to absolutely everyone – customers, hostesses, demonstrators. So if you’re at a Stampin’ Up! party it’s not just the hostess who will get freebies. And you don’t have to be at a party to place an order and earn a free set – all you have to do is email or call.

There are extra freebies for hostesses, too – as well as a great deal if you decide to sign up with Stampin’ Up! during Sale-A-Bration. Here’s the info:

Customers: Spend £45 and earn a free set from the Sale-A-Bration brochure. Spend £90 and earn two free sets ... and so on. There is no limit to the number of free sets you can earn.

Hostesses: As well as a free SAB stamp set for every £45 you spend, there’s an extra one for the hostess if the workshop total reaches £300 or more.

New recruits: If you sign up with Stampin’ Up! during Sale-A-Bration, as well as your fabulous Starter Kit you can choose an extra stamp set to the value of £38.95 from the Idea Book & Catalogue. And, of course, you can start earning free SAB sets as soon as you place your first order.

Stamps: Happy Moments (SAB)
Cardstock: So Saffron, Basic Gray, Regal Rose, Very Vanilla
Paper: Kaleidoscope
Ink: Basic Gray
Accessories: Filigree brads, Rhinestone brads, corner rounder, 5/8” Grosgrain Ribbon - Regal Rose

All products by Stampin' Up!®

Monday, 28 December 2009

Belated Christmas greetings

Sorry for the lack of posts over the last few days – I’m sure you can imagine why I’ve been too busy. I hope you had an excellent Christmas and that things are calming down a little now.

So now it’s time to mop up the last few Christmas cards which I didn’t get round to posting before the big day. Here’s one I made for my friend and downline, Alison, who loves circles on cards.

This is a popular card design on the Stampin’ Up! circuit but I’ve seen it so often I can’t actually recall whose design was my inspiration. It’s been doing the rounds so long now that it would be nigh on impossible to find the original.

The circles are made up of images stamped with Circle Circus and circles punched out from Merry Moments paper. It was quite quick to make and could easily be adapted, using different papers and colours, to a non-Christmassy card.

Stamps: Circle Circus, Sparkly & Bright
Cardstock: Old Olive, Real Red, Very Vanilla
Paper: Merry Moments
Ink: Old Olive, Garden Green, Real Red
Accessories: 1 ¾” circle punch, 1 ¼” circle punch, 1” circle punch, ¾” circle punch, ½” circle punch, ¼” Grosgrain Ribbon – Real Red, Silver Cord

All products by Stampin' Up!®
Read More » Sorry for the lack of posts over the last few days – I’m sure you can imagine why I’ve been too busy. I hope you had an excellent Christmas and that things are calming down a little now.

So now it’s time to mop up the last few Christmas cards which I didn’t get round to posting before the big day. Here’s one I made for my friend and downline, Alison, who loves circles on cards.

This is a popular card design on the Stampin’ Up! circuit but I’ve seen it so often I can’t actually recall whose design was my inspiration. It’s been doing the rounds so long now that it would be nigh on impossible to find the original.

The circles are made up of images stamped with Circle Circus and circles punched out from Merry Moments paper. It was quite quick to make and could easily be adapted, using different papers and colours, to a non-Christmassy card.

Stamps: Circle Circus, Sparkly & Bright
Cardstock: Old Olive, Real Red, Very Vanilla
Paper: Merry Moments
Ink: Old Olive, Garden Green, Real Red
Accessories: 1 ¾” circle punch, 1 ¼” circle punch, 1” circle punch, ¾” circle punch, ½” circle punch, ¼” Grosgrain Ribbon – Real Red, Silver Cord

All products by Stampin' Up!®

Wednesday, 23 December 2009

It's a winter wonderland!

Well it’s still a winter wonderland here and, even better, I’ve broken up from work at last. Still loads to do though before the big day!

Finally managed to get together with my old and original stamping buddies at the weekend and we were just making this project when, appropriately, the snow began to fall. How cute is this? Alison was almost beside herself with excitement... and not a drop of alcohol was consumed.

All it is is the 5-10-15-20 box (click here for instructions) with a hole punched in one panel and a piece of vellum secured behind. Pieces of Whisper White cardstock are cut freehand to represent snowy hills and gently chalked along one edge. The trees are cut out and popped up.

As for the “candle” inside... it’s a battery tealight. Fabulous invention. They even flicker!

Stamps: Trendy Trees, In The Stars (small star), Sparkling Wheel
Cardstock: Bashful Blue, Brocade Blue, Whisper White, Vellum
Ink: Bashful Blue, Brocade Blue, Night of Navy, Whisper White craft ink refill
Accessories: Stampin’ Pastels, sponge daubers, 1 ¾” circle punch, 1 3/8” circle punch, scallop edge punch, eyelet border punch

All stamped images © Stampin’ Up! All products by Stampin' Up!
Read More » Well it’s still a winter wonderland here and, even better, I’ve broken up from work at last. Still loads to do though before the big day!

Finally managed to get together with my old and original stamping buddies at the weekend and we were just making this project when, appropriately, the snow began to fall. How cute is this? Alison was almost beside herself with excitement... and not a drop of alcohol was consumed.

All it is is the 5-10-15-20 box (click here for instructions) with a hole punched in one panel and a piece of vellum secured behind. Pieces of Whisper White cardstock are cut freehand to represent snowy hills and gently chalked along one edge. The trees are cut out and popped up.

As for the “candle” inside... it’s a battery tealight. Fabulous invention. They even flicker!

Stamps: Trendy Trees, In The Stars (small star), Sparkling Wheel
Cardstock: Bashful Blue, Brocade Blue, Whisper White, Vellum
Ink: Bashful Blue, Brocade Blue, Night of Navy, Whisper White craft ink refill
Accessories: Stampin’ Pastels, sponge daubers, 1 ¾” circle punch, 1 3/8” circle punch, scallop edge punch, eyelet border punch

All stamped images © Stampin’ Up! All products by Stampin' Up!

Monday, 21 December 2009

A card for Kate

I should be showing you all my leftover Christmas projects that I’ve not posted on my blog yet but that means getting the camera out. I’ll photograph them later – at least it’s nice and bright with all this SNOW! Isn’t it exciting having a white Christmas... assuming you’re sharing the snow, that is!

Anyway, I said there was another glittery chipboard card in the offing and here it is. Check out the groovy Designer Series Paper – it’s from the Kaleidoscope pack and it’s so very, very lovely. Not as acid-looking as it appears in the catalogue. I’ve teamed it here with a hint of Tempting Turquoise, a card base of Rose Red and a panel of Kraft, doodled around the edges with the white gel pen.

Cardstock: Rose Red, Tempting Turquoise, Kraft
Paper: Kaleidoscope
Ink: Versamark
Accessories: Stitched Grosgrain Ribbon - Rose Red, chipboard letters, Fine Cosmo glitter, Heat & Stick powder, heat tool, corner rounder

All products by Stampin' Up! Please email me to order a catalogue, or click the link on the right to view it online.
Read More » I should be showing you all my leftover Christmas projects that I’ve not posted on my blog yet but that means getting the camera out. I’ll photograph them later – at least it’s nice and bright with all this SNOW! Isn’t it exciting having a white Christmas... assuming you’re sharing the snow, that is!

Anyway, I said there was another glittery chipboard card in the offing and here it is. Check out the groovy Designer Series Paper – it’s from the Kaleidoscope pack and it’s so very, very lovely. Not as acid-looking as it appears in the catalogue. I’ve teamed it here with a hint of Tempting Turquoise, a card base of Rose Red and a panel of Kraft, doodled around the edges with the white gel pen.

Cardstock: Rose Red, Tempting Turquoise, Kraft
Paper: Kaleidoscope
Ink: Versamark
Accessories: Stitched Grosgrain Ribbon - Rose Red, chipboard letters, Fine Cosmo glitter, Heat & Stick powder, heat tool, corner rounder

All products by Stampin' Up! Please email me to order a catalogue, or click the link on the right to view it online.

Saturday, 19 December 2009

More dry embossing

Another simple card using the dry embossing technique – click here for longer explanation. This time I stamped the tree from Trendy Trees and added my own line and some doodling using markers. But you know what this card needs?

Glitter.

Too late, it's gone in the post without it.

Stamps: Trendy Trees, A Bit of Birthday Cheer
Cardstock: A5 Greeting Cards
Ink: Old Olive, Chocolate Chip
Accessories: Old Olive, Chocolate Chip markers, Stamp-a-ma-jig®

All products by Stampin' Up! Please email me to order a catalogue, or click the link on the right to view it online.

Read More » Another simple card using the dry embossing technique – click here for longer explanation. This time I stamped the tree from Trendy Trees and added my own line and some doodling using markers. But you know what this card needs?

Glitter.

Too late, it's gone in the post without it.

Stamps: Trendy Trees, A Bit of Birthday Cheer
Cardstock: A5 Greeting Cards
Ink: Old Olive, Chocolate Chip
Accessories: Old Olive, Chocolate Chip markers, Stamp-a-ma-jig®

All products by Stampin' Up! Please email me to order a catalogue, or click the link on the right to view it online.

Wednesday, 16 December 2009

Embossed book

Embossing is so much easier on smooth cardstock – the Kraft cover on this little book from Paperchase is very rough, which made it really hard to minimise speckles. Still, nothing ventured...

Stamps: Circle Circus
Ink: Versamark
Accessories: Black gingham ribbon, Black embossing powder, heat tool

All products, apart from book, by Stampin' Up! Please email me to order a catalogue, or click the link on the right to view it online.
Read More » Embossing is so much easier on smooth cardstock – the Kraft cover on this little book from Paperchase is very rough, which made it really hard to minimise speckles. Still, nothing ventured...

Stamps: Circle Circus
Ink: Versamark
Accessories: Black gingham ribbon, Black embossing powder, heat tool

All products, apart from book, by Stampin' Up! Please email me to order a catalogue, or click the link on the right to view it online.

Monday, 14 December 2009

Little snowflakes

I had made 17 of these little devils before I realised that the Merry Christmas stamp has retired! I have no idea how that nugget of information passed me by.

And if anyone thinks it's getting a bit too late to be making Christmas cards, well I'm still making mine! Frantic doesn't even begin to describe it; my eye has been twitching for a fortnight.

Stamps: Snow Burst, Seasonal Wishes
Cardstock: Bordering Blue, Sahara Sand, Real Red, Very Vanilla
Ink: Bordering Blue, Real Red, Versamark
Accessories: Red Gingham ribbon, 5/8” Grosgrain Ribbon – Brocade Blue, Stampin’ Dimensionals

All products by Stampin' Up! Please email me to order a catalogue, or click the link on the right to view it online.

Read More » I had made 17 of these little devils before I realised that the Merry Christmas stamp has retired! I have no idea how that nugget of information passed me by.

And if anyone thinks it's getting a bit too late to be making Christmas cards, well I'm still making mine! Frantic doesn't even begin to describe it; my eye has been twitching for a fortnight.

Stamps: Snow Burst, Seasonal Wishes
Cardstock: Bordering Blue, Sahara Sand, Real Red, Very Vanilla
Ink: Bordering Blue, Real Red, Versamark
Accessories: Red Gingham ribbon, 5/8” Grosgrain Ribbon – Brocade Blue, Stampin’ Dimensionals

All products by Stampin' Up! Please email me to order a catalogue, or click the link on the right to view it online.

Friday, 11 December 2009

Clean and simple... but a bit tricky

So... even demonstrators who have been placing orders for two years make mistakes sometimes. Which is how I ended up with these Whisper White card blanks when I meant to order just the envelopes. I could have returned them but I thought I’d have a go at some one layer cards.

I saw this idea in Blogland and I’m really sorry to say I cannot remember on whose blog it appeared so if anyone knows, please shout out and I’ll give credit where it’s due. But the idea is to make your own dry embossing template using scrap cardstock such as cereal packet. You cut it to exactly the same size as your card front and then cut out a shape – in this case, a rectangle. Lay your card front over the top of the template and, using an embossing stylus, press all the way round to create an embossed rectangle. The blog I was reading said a light box wasn’t necessary but it’s so blooming dark in this house that I felt the need to make my own, using a clear-ish plastic box containing a torch!

Next I used the template again as a mask and sponged chalk around the raised rectangle, leaving a white area in the centre. I coloured the scarf and mittens using a marker and stamped the greeting. Simple to look at but not particularly quick to produce! Still, you can’t have everything, can you?

Stamps: A Tree For All Seasons, A Bit of Birthday Cheer
Cardstock: A5 Greeting Cards
Ink: Real Red, Basic Grey
Accessories: Real Red, Creamy Caramel markers, Stampin’ Pastels, sponge dauber

All products by Stampin' Up! Please email me to order a catalogue, or click the link on the right to view it online.
Read More » So... even demonstrators who have been placing orders for two years make mistakes sometimes. Which is how I ended up with these Whisper White card blanks when I meant to order just the envelopes. I could have returned them but I thought I’d have a go at some one layer cards.

I saw this idea in Blogland and I’m really sorry to say I cannot remember on whose blog it appeared so if anyone knows, please shout out and I’ll give credit where it’s due. But the idea is to make your own dry embossing template using scrap cardstock such as cereal packet. You cut it to exactly the same size as your card front and then cut out a shape – in this case, a rectangle. Lay your card front over the top of the template and, using an embossing stylus, press all the way round to create an embossed rectangle. The blog I was reading said a light box wasn’t necessary but it’s so blooming dark in this house that I felt the need to make my own, using a clear-ish plastic box containing a torch!

Next I used the template again as a mask and sponged chalk around the raised rectangle, leaving a white area in the centre. I coloured the scarf and mittens using a marker and stamped the greeting. Simple to look at but not particularly quick to produce! Still, you can’t have everything, can you?

Stamps: A Tree For All Seasons, A Bit of Birthday Cheer
Cardstock: A5 Greeting Cards
Ink: Real Red, Basic Grey
Accessories: Real Red, Creamy Caramel markers, Stampin’ Pastels, sponge dauber

All products by Stampin' Up! Please email me to order a catalogue, or click the link on the right to view it online.

Thursday, 10 December 2009

Rockin' robin?

Being just a little pedantic (*cough cough*) I can’t stop thinking that this robin should have some white on its chest somewhere.

Anyway, as I mentioned previously, proper British robins are pretty scarce in the stamping world as so many manufacturers are American, so I thought I’d have a go at creating my own using the little bird from the So Tweet chipboard.

Using a sponge dauber, I inked the chipboard pieces (bird and wing) with Creamy Caramel and Real Red. Yes, that really is Creamy Caramel – our standard inks dry much darker on chipboard so I compensated with a paler shade. I popped out the eye and coloured that with a black marker before popping back in (secured with a piece of Sticky Strip at the back).

The result was nice but it didn’t excite me that much, so I took a risk and pressed the whole lot into my Versamark® pad (it is so stained that really it wouldn’t matter if it had got worse – but it didn’t). Then I poured clear embossing powder all over both pieces and heated to set. The result is a very shiny bird which I think I quite like.

The background paper is from the Merry Moments Designer Series Paper pack – needless to say, this is my favourite sheet (it’s Old Olive, see?). The greetings is from the hostess set, Punches Three – I just inked the words using a red marker.

Stamps: Punches Three
Cardstock: Real Red, Old Olive, Very Vanilla
Paper: Merry Moments
Ink: Real Red, Creamy Caramel, Versamark
Accessories: Real Red marker, Basic Black journaller, ¼” Grosgrain Ribbon – Real Red, Eyelet Border punch, Earth Elements and Neutrals buttons, linen thread, clear embossing powder, heat tool

All products by Stampin' Up!® Please email me to order a catalogue, or click the link on the right to view it online.
Read More » Being just a little pedantic (*cough cough*) I can’t stop thinking that this robin should have some white on its chest somewhere.

Anyway, as I mentioned previously, proper British robins are pretty scarce in the stamping world as so many manufacturers are American, so I thought I’d have a go at creating my own using the little bird from the So Tweet chipboard.

Using a sponge dauber, I inked the chipboard pieces (bird and wing) with Creamy Caramel and Real Red. Yes, that really is Creamy Caramel – our standard inks dry much darker on chipboard so I compensated with a paler shade. I popped out the eye and coloured that with a black marker before popping back in (secured with a piece of Sticky Strip at the back).

The result was nice but it didn’t excite me that much, so I took a risk and pressed the whole lot into my Versamark® pad (it is so stained that really it wouldn’t matter if it had got worse – but it didn’t). Then I poured clear embossing powder all over both pieces and heated to set. The result is a very shiny bird which I think I quite like.

The background paper is from the Merry Moments Designer Series Paper pack – needless to say, this is my favourite sheet (it’s Old Olive, see?). The greetings is from the hostess set, Punches Three – I just inked the words using a red marker.

Stamps: Punches Three
Cardstock: Real Red, Old Olive, Very Vanilla
Paper: Merry Moments
Ink: Real Red, Creamy Caramel, Versamark
Accessories: Real Red marker, Basic Black journaller, ¼” Grosgrain Ribbon – Real Red, Eyelet Border punch, Earth Elements and Neutrals buttons, linen thread, clear embossing powder, heat tool

All products by Stampin' Up!® Please email me to order a catalogue, or click the link on the right to view it online.

Wednesday, 9 December 2009

Oops

Sorry, no project for you yet. I have a stack lined up to photograph but you know how it is at this time of year... never home in daylight. Will see what I can do with the help of a lamp this evening...
Read More » Sorry, no project for you yet. I have a stack lined up to photograph but you know how it is at this time of year... never home in daylight. Will see what I can do with the help of a lamp this evening...

Monday, 7 December 2009

The joy of glittery chipboard

Yet more glittery chipboard (and I still have another one to come!). This was actually the first card I made using my new glitter, I just haven’t got round to showing you yet.

I stamped the swirl from Season of Joy all over the Elegant Eggplant panel in Versamark then sprinkled Heat & Stick Powder over the top and heated it. Sprinkled Fine Cosmo glitter over that and heated again. Same technique for the chipboard – sparkly, isn’t it?

Stamps: Season of Joy
Cardstock: Rose Red, Elegant Eggplant, Whisper White
Paper: Patterns – Perfect Plum
Ink: Versamark®
Accessories: On Board Chipboard letters, Stitched Grosgrain Ribbon - Rose Red, Scallop Edge Punch, Heat & Stick Powder, Fine Cosmo Glitter, Corner Rounder

All products by Stampin' Up!® Please email me to order a catalogue, or click the link on the right to view it online.
Read More » Yet more glittery chipboard (and I still have another one to come!). This was actually the first card I made using my new glitter, I just haven’t got round to showing you yet.

I stamped the swirl from Season of Joy all over the Elegant Eggplant panel in Versamark then sprinkled Heat & Stick Powder over the top and heated it. Sprinkled Fine Cosmo glitter over that and heated again. Same technique for the chipboard – sparkly, isn’t it?

Stamps: Season of Joy
Cardstock: Rose Red, Elegant Eggplant, Whisper White
Paper: Patterns – Perfect Plum
Ink: Versamark®
Accessories: On Board Chipboard letters, Stitched Grosgrain Ribbon - Rose Red, Scallop Edge Punch, Heat & Stick Powder, Fine Cosmo Glitter, Corner Rounder

All products by Stampin' Up!® Please email me to order a catalogue, or click the link on the right to view it online.

Saturday, 5 December 2009

Emma's card using my FREE punch

I am a bit hooked on glittery chipboard at the moment; here’s another card I made for a teenager called... well you can guess what she’s called, I suppose.

I used a selection of chipboard letters from both current and retirerd On Board collections – it’s much easier to find the letters you need if you’re willing to mix fonts! I pressed each letter into my Versamark® pad and then covered with Heat & Stick powder. Heated it to melt the powder then sprinkled on the glitter and heated again gently to set. Bits still do fall off but it’s not as bad as it could be.

Check out the two new (to me) punches! Spiral Punch on the right and the Tag Punch on the left. The spiral punch was part of my Christmas Extravaganza order, which meant that the Tag Punch was FREE! Click here to find out how you can get your free punch, then contact me as soon as possible to place your order if you want it to arrive before Christmas.

Stamps: Hello Again
Cardstock: Gable Green, Taken with Teal, Whisper White
Ink: Gable Green, Versamark
Accessories: On Board Chipboard letters, Fine Cosmo Glitter, Heat & Stick Powder, Tag Punch, Spiral Punch, ¼” Grosgrain Ribbon - Whisper White, Rhinestone Brads – Circle Ice

All products by Stampin' Up! Please email me to order a catalogue, or click the link on the right to view it online.
Read More » I am a bit hooked on glittery chipboard at the moment; here’s another card I made for a teenager called... well you can guess what she’s called, I suppose.

I used a selection of chipboard letters from both current and retirerd On Board collections – it’s much easier to find the letters you need if you’re willing to mix fonts! I pressed each letter into my Versamark® pad and then covered with Heat & Stick powder. Heated it to melt the powder then sprinkled on the glitter and heated again gently to set. Bits still do fall off but it’s not as bad as it could be.

Check out the two new (to me) punches! Spiral Punch on the right and the Tag Punch on the left. The spiral punch was part of my Christmas Extravaganza order, which meant that the Tag Punch was FREE! Click here to find out how you can get your free punch, then contact me as soon as possible to place your order if you want it to arrive before Christmas.

Stamps: Hello Again
Cardstock: Gable Green, Taken with Teal, Whisper White
Ink: Gable Green, Versamark
Accessories: On Board Chipboard letters, Fine Cosmo Glitter, Heat & Stick Powder, Tag Punch, Spiral Punch, ¼” Grosgrain Ribbon - Whisper White, Rhinestone Brads – Circle Ice

All products by Stampin' Up! Please email me to order a catalogue, or click the link on the right to view it online.

Thursday, 3 December 2009

Watch the birdie

Something a bit different for me today. I was playing around (tentatively) with my new So Tweet chipboard. It’s too lovely to use but I have a chipboard class coming up early next year so want to get some ideas rolling.

Anyway, I made this. I covered the little bird with some paper from the gorgeous Kaleidoscope pack. I thought it looked a little feathery but maybe not unless someone pointed it out! I stuck a square of paper on to the chipboard and then cut it out: mistake. Next time I will draw around the bird and cut out the paper first, then stick it to the chipboard, which should be much easier. See? I make mistakes so you don’t have to! I have to say, the Tombow Multi-Adhesive is brilliant for covering chipboard.

The eye pops out so I coloured this with the black journaller and then popped it back in again when it was dry.

The panel is another piece of paper from the Kaleidoscope pack, stamped with Only Orange stars from Hello Again. It says this paper co-ordinates with Only Orange in the catalogue but personally I think this particular sheet would have looked better with Pumpkin Pie. This panel is popped up because I just felt like it – but actually it works better that way because it stops the ribbon from bulging.

I want to have another go with one of these birds - and see if I can turn it into a robin. You don't see many proper British robins in the stamping world so this could be the answer.

Stamps: A Bit of Birthday Cheer, Hello Again
Cardstock: Kraft, Basic Black
Paper: Kaleidoscope
Ink: Only Orange, Basic Black
Accessories: So Tweet chipboard, Stampin’ Write Journaller, Stamp-a-ma-jig®, 1 ¼” striped Grosgrain Ribbon - Basic Black

All products by Stampin' Up! Please email me to order a catalogue, or click the link on the right to view it online.

Read More » Something a bit different for me today. I was playing around (tentatively) with my new So Tweet chipboard. It’s too lovely to use but I have a chipboard class coming up early next year so want to get some ideas rolling.

Anyway, I made this. I covered the little bird with some paper from the gorgeous Kaleidoscope pack. I thought it looked a little feathery but maybe not unless someone pointed it out! I stuck a square of paper on to the chipboard and then cut it out: mistake. Next time I will draw around the bird and cut out the paper first, then stick it to the chipboard, which should be much easier. See? I make mistakes so you don’t have to! I have to say, the Tombow Multi-Adhesive is brilliant for covering chipboard.

The eye pops out so I coloured this with the black journaller and then popped it back in again when it was dry.

The panel is another piece of paper from the Kaleidoscope pack, stamped with Only Orange stars from Hello Again. It says this paper co-ordinates with Only Orange in the catalogue but personally I think this particular sheet would have looked better with Pumpkin Pie. This panel is popped up because I just felt like it – but actually it works better that way because it stops the ribbon from bulging.

I want to have another go with one of these birds - and see if I can turn it into a robin. You don't see many proper British robins in the stamping world so this could be the answer.

Stamps: A Bit of Birthday Cheer, Hello Again
Cardstock: Kraft, Basic Black
Paper: Kaleidoscope
Ink: Only Orange, Basic Black
Accessories: So Tweet chipboard, Stampin’ Write Journaller, Stamp-a-ma-jig®, 1 ¼” striped Grosgrain Ribbon - Basic Black

All products by Stampin' Up! Please email me to order a catalogue, or click the link on the right to view it online.

Wednesday, 2 December 2009

Christmas lollipop

There's a new poll on the left for the new month (yes I know I'm a day late) so please be sure to vote for your favourite Christmas colours! And if your favourite combination isn't there, please leave me a comment to tell me what it is. (Shameless request for comments!)

Today’s project is for Kate C, as I forgot to post this project after her workshop last month and apparently she’s (gasp!) lost (eaten?) the sample I gave her!

It’s a lollipop cover, as you can see, and it’s really easy to make. The hardest part is finding flat lollipops but I’ve seen festive chocolate ones in Sainsbury’s and Home Bargains. If you don’t want festive ones and can’t find anything suitable, you could cover them with plain foil.

So, the cover... all you need is a strip of Designer Series Paper (or cardstock) which measures about 1cm wider than your lollipop. The length depends on how you plan to join the ends – this strip I think was about 14cm. Basically, when you fold the strip of paper in half, it should be at least 1cm taller than the lollipop.

With your paper folded in half, punch a hole halfway along the crease – this is where the stick pokes through. Then decorate the front and seal at the top. If you have used a longer piece of paper you can punch a couple of holes and tie the top with ribbon. But stapling is very quick and easy and you know that’s what I like.

Stamps: Sparkly & Bright
Cardstock: Old Olive, Real Red, Very Vanilla
Paper: Merry Moments
Ink: Old Olive
Accessories: ¼” Grosgrain Ribbon - Very Vanilla, Mat Pack, Paper Piercer, Crop-A-Dile™, household staple

All products by Stampin' Up! Please email me to order a catalogue, or click the link on the right to view it online.
Read More » There's a new poll on the left for the new month (yes I know I'm a day late) so please be sure to vote for your favourite Christmas colours! And if your favourite combination isn't there, please leave me a comment to tell me what it is. (Shameless request for comments!)

Today’s project is for Kate C, as I forgot to post this project after her workshop last month and apparently she’s (gasp!) lost (eaten?) the sample I gave her!

It’s a lollipop cover, as you can see, and it’s really easy to make. The hardest part is finding flat lollipops but I’ve seen festive chocolate ones in Sainsbury’s and Home Bargains. If you don’t want festive ones and can’t find anything suitable, you could cover them with plain foil.

So, the cover... all you need is a strip of Designer Series Paper (or cardstock) which measures about 1cm wider than your lollipop. The length depends on how you plan to join the ends – this strip I think was about 14cm. Basically, when you fold the strip of paper in half, it should be at least 1cm taller than the lollipop.

With your paper folded in half, punch a hole halfway along the crease – this is where the stick pokes through. Then decorate the front and seal at the top. If you have used a longer piece of paper you can punch a couple of holes and tie the top with ribbon. But stapling is very quick and easy and you know that’s what I like.

Stamps: Sparkly & Bright
Cardstock: Old Olive, Real Red, Very Vanilla
Paper: Merry Moments
Ink: Old Olive
Accessories: ¼” Grosgrain Ribbon - Very Vanilla, Mat Pack, Paper Piercer, Crop-A-Dile™, household staple

All products by Stampin' Up! Please email me to order a catalogue, or click the link on the right to view it online.

Tuesday, 1 December 2009

Girly and glittery

This was the final project at my glitter class last week – and it’s the most “in your face”, glitter-wise. This uses the French Filigree background stamp which is just gorgeous stamped onto Rose Red cardstock. It’s stamped in Versamark then Heat & Stick powder applied, heated until melted and then Fine Cosmo glitter applied and heated again. The effect is almost like flocked wallpaper – although a whole lot more sparkly!

The flower is beautiful, too – this is from the Pretties kit, withi some Felt Flowers layered on top and topped with a rhinestone brad.

Thanks so much to Kirsten Brown, a US Stampin’ Up!® demonstrator for the idea!

Stamps: French Filigree
Cardstock: Old Olive, Bravo Burgundy, Rose Red
Ink: Versamark
Accessories: Pretties Kit, Felt Flowers, Rhinestone Brads, 5/8” Grosgrain Ribbon - Regal Rose, Fine Cosmo Glitter, Heat & Stick powder

All products by Stampin' Up! Please email me to order a catalogue, or click the link on the right to view it online.
Read More » This was the final project at my glitter class last week – and it’s the most “in your face”, glitter-wise. This uses the French Filigree background stamp which is just gorgeous stamped onto Rose Red cardstock. It’s stamped in Versamark then Heat & Stick powder applied, heated until melted and then Fine Cosmo glitter applied and heated again. The effect is almost like flocked wallpaper – although a whole lot more sparkly!

The flower is beautiful, too – this is from the Pretties kit, withi some Felt Flowers layered on top and topped with a rhinestone brad.

Thanks so much to Kirsten Brown, a US Stampin’ Up!® demonstrator for the idea!

Stamps: French Filigree
Cardstock: Old Olive, Bravo Burgundy, Rose Red
Ink: Versamark
Accessories: Pretties Kit, Felt Flowers, Rhinestone Brads, 5/8” Grosgrain Ribbon - Regal Rose, Fine Cosmo Glitter, Heat & Stick powder

All products by Stampin' Up! Please email me to order a catalogue, or click the link on the right to view it online.

Sunday, 29 November 2009

Yes, more glitter...

Another project from Monday’s glitter class – this time using Sticky Cuts. These are 12x12 sheets of die-cut images made from the same stuff as Sticky Strip. So they’re REALLY sticky and you can apply embossing powder (yes, you can heat them), glitter, fun flock or tiny beads.

We stamped the flower from Hello Again. We didn’t bother masking as the flower head was completely covered by the Sticky Cuts flower. Then we peeled away the large part – the petals – leaving behind the circle in the centre. Next we applied glitter and heated gently to set. Once this was done we peeled the backing (fronting?) from the centre circle and applied glitter in a different colour and heated again.

The Certainly Celery panel is stamped repeatedly with flowers from the Simply Said stamp set. We positioned the brads using the mat pack, although some of us had them closer together, some had them farther apart and one person (that would be me) completely forgot about the brads until it was too late and everything was stuck down!

Stamps: Hello Again, Simply Said
Cardstock: Perfect Plum, So Saffron, Whisper White, Lavender Lace, Certainly Celery
Ink: Certainly Celery
Accessories: ½” Striped Grosgrain Ribbon – So Saffron, Sticky Cuts, Fine Cosmo Glitter, Silver Brads

All products by Stampin' Up! Please email me to order a catalogue, or click the link on the right to view it online.
Read More » Another project from Monday’s glitter class – this time using Sticky Cuts. These are 12x12 sheets of die-cut images made from the same stuff as Sticky Strip. So they’re REALLY sticky and you can apply embossing powder (yes, you can heat them), glitter, fun flock or tiny beads.

We stamped the flower from Hello Again. We didn’t bother masking as the flower head was completely covered by the Sticky Cuts flower. Then we peeled away the large part – the petals – leaving behind the circle in the centre. Next we applied glitter and heated gently to set. Once this was done we peeled the backing (fronting?) from the centre circle and applied glitter in a different colour and heated again.

The Certainly Celery panel is stamped repeatedly with flowers from the Simply Said stamp set. We positioned the brads using the mat pack, although some of us had them closer together, some had them farther apart and one person (that would be me) completely forgot about the brads until it was too late and everything was stuck down!

Stamps: Hello Again, Simply Said
Cardstock: Perfect Plum, So Saffron, Whisper White, Lavender Lace, Certainly Celery
Ink: Certainly Celery
Accessories: ½” Striped Grosgrain Ribbon – So Saffron, Sticky Cuts, Fine Cosmo Glitter, Silver Brads

All products by Stampin' Up! Please email me to order a catalogue, or click the link on the right to view it online.

Friday, 27 November 2009

Dazzling trees

This was voted the favourite project at my glitter class on Monday – not surprisingly as it uses that ever-popular stamp set, Lovely as a Tree.

Not sure if you can see the glitter on it but we used Dazzling Diamonds to highlight parts of the image such as the snow on the ground and a few of the branches. Subtle, but dazzling! We did this by “drawing” on the image with the Two-Way Glue Pen then spooning glitter over the top, tapping off the excess back into the pot (I use those plastic Chinese takeaway pots to store the glitter).

And I finally cracked open the Hodgepodge Hardware. It’s really beautiful and falls into the “too pretty to use” category. Must stop hoarding nice things as it’s completely pointless.

Stamps: Lovely as a Tree, Fresh Cuts
Cardstock: Bashful Blue, Brocade Blue, Whisper White
Paper: Patterns - Bashful Blue
Ink: Brocade Blue
Accessories: Stampin’ Glitter – Dazzling Diamonds, Mat Pack, Paper Piercing Tool, Hodgepodge Hardware® - Stylised Silver, 5/8” Grosgrain Ribbon - Brocade Blue

All products by Stampin' Up! Please email me to order a catalogue, or click the link on the right to view it online.
Read More » This was voted the favourite project at my glitter class on Monday – not surprisingly as it uses that ever-popular stamp set, Lovely as a Tree.

Not sure if you can see the glitter on it but we used Dazzling Diamonds to highlight parts of the image such as the snow on the ground and a few of the branches. Subtle, but dazzling! We did this by “drawing” on the image with the Two-Way Glue Pen then spooning glitter over the top, tapping off the excess back into the pot (I use those plastic Chinese takeaway pots to store the glitter).

And I finally cracked open the Hodgepodge Hardware. It’s really beautiful and falls into the “too pretty to use” category. Must stop hoarding nice things as it’s completely pointless.

Stamps: Lovely as a Tree, Fresh Cuts
Cardstock: Bashful Blue, Brocade Blue, Whisper White
Paper: Patterns - Bashful Blue
Ink: Brocade Blue
Accessories: Stampin’ Glitter – Dazzling Diamonds, Mat Pack, Paper Piercing Tool, Hodgepodge Hardware® - Stylised Silver, 5/8” Grosgrain Ribbon - Brocade Blue

All products by Stampin' Up! Please email me to order a catalogue, or click the link on the right to view it online.

Thursday, 26 November 2009

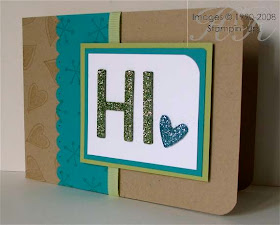
A glittery hi

Fine Cosmo glitter... £12.95. Heat & Stick Powder... £3.25. Cat’s bottom covered in glitter... priceless.

Yes it was my glitter class on Monday night and I’ve only just managed to get rid of all (ok, most) of the glitter from the floor. Despite the tribulations of being in my house for the class, I think everyone had a good time.

This is one of the cards we made; another which uses Neutral cardstock – but you simply can’t beat Kraft. Do you know we now sell it in a single colour pack of 12x12? Very handy for scrapbooking but equally useful if you’re a huge fan of Kraft!

To create this glitter effect, take some chipboard and press into your Versamark pad. Sprinkle with Heat & Stick Powder (I keep mine in a plastic pot so can dip the chipboard in and out easily) then heat until the powder has melted. Sprinkle (or dip) with glitter – in this case it’s Fine Cosmo Celery for the letters and Fine Cosmo Turquoise for the heart. Then heat again to set.

The stamping is done with Versamark, too – it really is a useful pad to have around.

Stamps: Hello Again
Cardstock: Kraft, Taken with Teal, Certainly Celery, Whisper White
Ink: Versamark
Accessories: ¼” Grosgrain Ribbon - Certainly Celery, Fine Cosmo Glitter (Celery and Turquoise), Heat & Stick Powder, Heat Tool, Scallop Edge punch

All products by Stampin' Up! Please email me to order a catalogue, or click the link on the right to view it online.
Read More » Fine Cosmo glitter... £12.95. Heat & Stick Powder... £3.25. Cat’s bottom covered in glitter... priceless.

Yes it was my glitter class on Monday night and I’ve only just managed to get rid of all (ok, most) of the glitter from the floor. Despite the tribulations of being in my house for the class, I think everyone had a good time.

This is one of the cards we made; another which uses Neutral cardstock – but you simply can’t beat Kraft. Do you know we now sell it in a single colour pack of 12x12? Very handy for scrapbooking but equally useful if you’re a huge fan of Kraft!

To create this glitter effect, take some chipboard and press into your Versamark pad. Sprinkle with Heat & Stick Powder (I keep mine in a plastic pot so can dip the chipboard in and out easily) then heat until the powder has melted. Sprinkle (or dip) with glitter – in this case it’s Fine Cosmo Celery for the letters and Fine Cosmo Turquoise for the heart. Then heat again to set.

The stamping is done with Versamark, too – it really is a useful pad to have around.

Stamps: Hello Again
Cardstock: Kraft, Taken with Teal, Certainly Celery, Whisper White
Ink: Versamark
Accessories: ¼” Grosgrain Ribbon - Certainly Celery, Fine Cosmo Glitter (Celery and Turquoise), Heat & Stick Powder, Heat Tool, Scallop Edge punch

All products by Stampin' Up! Please email me to order a catalogue, or click the link on the right to view it online.

Tuesday, 24 November 2009

Can't see the Funky Forest for the Trendy Trees?

Finally had chance to use my new Funky Forest wheel, which co-ordinates with the fabulous Trendy Trees stamp set. I had some strips of Whisper White cardstock which were about the right width so I had a practice then decided I may as well use them to make some cards. Here are two of them – I made the one with the horizontal ribbon first then decided it would look better going vertically so made another which opened at the side. The birthday card is going to a very fabulous stamper in America so no pressure there then! Hope she likes it.


Stamps: Trendy Trees, Funky Forest wheel, Basic Phrases
Cardstock: Certainly Celery, Chocolate Chip, Whisper White
Ink: Certainly Celery ink pad and ink cartridge, Chocolate Chip, Always Artichoke
Accessories: Stamp-a-ma-jig®, Stampin’ Dimensionals, ¼” Grosgrain Ribbon - Chocolate Chip

All products by Stampin' Up! Please email me to order a catalogue, or click the link on the right to view it online.

Read More » Finally had chance to use my new Funky Forest wheel, which co-ordinates with the fabulous Trendy Trees stamp set. I had some strips of Whisper White cardstock which were about the right width so I had a practice then decided I may as well use them to make some cards. Here are two of them – I made the one with the horizontal ribbon first then decided it would look better going vertically so made another which opened at the side. The birthday card is going to a very fabulous stamper in America so no pressure there then! Hope she likes it.


Stamps: Trendy Trees, Funky Forest wheel, Basic Phrases
Cardstock: Certainly Celery, Chocolate Chip, Whisper White
Ink: Certainly Celery ink pad and ink cartridge, Chocolate Chip, Always Artichoke
Accessories: Stamp-a-ma-jig®, Stampin’ Dimensionals, ¼” Grosgrain Ribbon - Chocolate Chip

All products by Stampin' Up! Please email me to order a catalogue, or click the link on the right to view it online.

Sunday, 22 November 2009

Saffron Silhouettes

I don’t think I’ve used this colour combination before but I quite like it so you may see it again. For this card I stamped the Very Vanilla panel with Pocket Silhouettes, stamping again and again without reinking the stamp so that it created different shades. Did the same on the circle and that’s about it.

Stamps: Pocket Silhouettes, Trendy Trees
Cardstock: So Saffron, More Mustard, Chocolate Chip, Very Vanilla
Ink: Chocolate Chip, So Saffron
Accessories: 1 3/8” circle punch, Scallop Circle Punch, Paper piercing tool, linen thread

All products by Stampin' Up! Please email me to order a catalogue, or click the link on the right to view it online.
Read More » I don’t think I’ve used this colour combination before but I quite like it so you may see it again. For this card I stamped the Very Vanilla panel with Pocket Silhouettes, stamping again and again without reinking the stamp so that it created different shades. Did the same on the circle and that’s about it.

Stamps: Pocket Silhouettes, Trendy Trees
Cardstock: So Saffron, More Mustard, Chocolate Chip, Very Vanilla
Ink: Chocolate Chip, So Saffron
Accessories: 1 3/8” circle punch, Scallop Circle Punch, Paper piercing tool, linen thread

All products by Stampin' Up! Please email me to order a catalogue, or click the link on the right to view it online.

Friday, 20 November 2009

Three trees

I love this stamp set and I love this design which I saw on a photo of one of the swaps that somebody received at the Stampin’ Up! Convention. So all credit to the designer but unfortunately I don’t know who that was!

I copied it from memory so it may be different – the colours certainly are as I used what I had out on the table at the time which was, surprise surprise, Old Olive and Chocolate Chip.

The card base is Sahara Sand which I’m loving at the moment – it comes in the Neutrals pack along with Kraft, Basic Gray and Basic Black. All really useful but often overlooked (especially by me).

I made this card for a friend who has done really really well to get her dream job – there were loads of applicants but she did it and well deserves it after all her hard work.

Stamps: Trendy Trees, Basic Phrases
Cardstock: Sahara Sand, Chocolate Chip, Old Olive, Very Vanilla
Ink: Chocolate Chip, Old Olive
Accessories: 1 ¼” circle punch, 1 3/8” circle punch, Striped Grosgrain Ribbon – Old Olive, Stamp-a-ma-jig®, Stampin’ Dimensionals

All products by Stampin' Up! Please email me to order a catalogue, or click the link on the right to view it online.
Read More » I love this stamp set and I love this design which I saw on a photo of one of the swaps that somebody received at the Stampin’ Up! Convention. So all credit to the designer but unfortunately I don’t know who that was!

I copied it from memory so it may be different – the colours certainly are as I used what I had out on the table at the time which was, surprise surprise, Old Olive and Chocolate Chip.

The card base is Sahara Sand which I’m loving at the moment – it comes in the Neutrals pack along with Kraft, Basic Gray and Basic Black. All really useful but often overlooked (especially by me).

I made this card for a friend who has done really really well to get her dream job – there were loads of applicants but she did it and well deserves it after all her hard work.

Stamps: Trendy Trees, Basic Phrases
Cardstock: Sahara Sand, Chocolate Chip, Old Olive, Very Vanilla
Ink: Chocolate Chip, Old Olive
Accessories: 1 ¼” circle punch, 1 3/8” circle punch, Striped Grosgrain Ribbon – Old Olive, Stamp-a-ma-jig®, Stampin’ Dimensionals

All products by Stampin' Up! Please email me to order a catalogue, or click the link on the right to view it online.

Thursday, 19 November 2009

A glitter class sneak peek

A sneak preview for those who are attending my Glitterati Class on Monday... I initially rejected this card because I thought it was too dull-looking for a Christmas card but I kept coming back to it. I think that, not being a glittery sort of person, I am drawn to the subtlety of the neutrals to offset the bling.

But is the black too gloomy? I was thinking of switching to Night of Navy but have cut up the black now – I decided I like how striking it is next to the Sahara Sand.

To create this glitter effect, stamp the snowflake in Versamark then cover with Heat & Stick Powder. Tap off the excess and then heat with your heat tool. A hairdryer will not do, sorry – it will just blow the powder away and not be hot enough. When the powder has melted, cover with glitter and tap off the excess. Heat again lightly to set.

Reliable sources tell me that the Embossing Buddy will prevent any stray glitter from sticking to your paper but mine is due to arrive today so I’ll have to let you know my views when I’ve tried it.

The ribbon is something I’ve seen everywhere but never tried. It didn’t sit as flat as I’d have liked but some of the samples I’ve seen involve stitching and that’s never going to happen in this house. So I put a strip of Sticky Strip along the card and stuck the ribbon to that, pleating it as I went along.

Stamps: Snowburst, Basic Phrases
Cardstock: Sahara Sand, Basic Black, Brocade Blue, Whisper White
Ink: Basic Black, Versamark
Accessories: Heat & Stick Powder, Fine Cosmo glitter (Light Blue), Heat Tool, Stamp-a-ma-jig, 5/8” Grosgrain Ribbon – Brocade Blue, Stampin’ Dimensionals

All products by Stampin' Up! Please email me to order a catalogue, or click the link on the right to view it online.
Read More » A sneak preview for those who are attending my Glitterati Class on Monday... I initially rejected this card because I thought it was too dull-looking for a Christmas card but I kept coming back to it. I think that, not being a glittery sort of person, I am drawn to the subtlety of the neutrals to offset the bling.

But is the black too gloomy? I was thinking of switching to Night of Navy but have cut up the black now – I decided I like how striking it is next to the Sahara Sand.

To create this glitter effect, stamp the snowflake in Versamark then cover with Heat & Stick Powder. Tap off the excess and then heat with your heat tool. A hairdryer will not do, sorry – it will just blow the powder away and not be hot enough. When the powder has melted, cover with glitter and tap off the excess. Heat again lightly to set.

Reliable sources tell me that the Embossing Buddy will prevent any stray glitter from sticking to your paper but mine is due to arrive today so I’ll have to let you know my views when I’ve tried it.

The ribbon is something I’ve seen everywhere but never tried. It didn’t sit as flat as I’d have liked but some of the samples I’ve seen involve stitching and that’s never going to happen in this house. So I put a strip of Sticky Strip along the card and stuck the ribbon to that, pleating it as I went along.

Stamps: Snowburst, Basic Phrases
Cardstock: Sahara Sand, Basic Black, Brocade Blue, Whisper White
Ink: Basic Black, Versamark
Accessories: Heat & Stick Powder, Fine Cosmo glitter (Light Blue), Heat Tool, Stamp-a-ma-jig, 5/8” Grosgrain Ribbon – Brocade Blue, Stampin’ Dimensionals

All products by Stampin' Up! Please email me to order a catalogue, or click the link on the right to view it online.

Wednesday, 18 November 2009

Christmas four

This was a contender for my glitter class but it didn't get through to the finals because I already have a Christmas card and I want to show that glitter isn’t just for Christmas.

First job was to decide which circle punch to use. I settled on the 1 3/8” because it fits the reindeer and the stocking perfectly; Santa has to have his legs cut off but that’s ok and it’s a bit of a squeeze with the tree but manageable.

There’s Dazzling Diamonds glitter on Santa’s hat, the stocking “bells” and the start on top of the tree. Rudolph’s nose is Fine Cosmo Rose Pink. It’s a small enough area to look red but if you want a proper bright red, go for the Fine Cosmo Galaxy selection. The glitter is applied with the two-way glue pen – just “draw” where you want it to go and then sprinkle.

Looking at this now I wish I’d pierced the red layer so that I could have a narrower band of Chocolate Chip around it but it’s too late now. You live and learn.

Stamps: Sparkly & Bright
Cardstock: Whisper White, Real Red, Chocolate Chip, Old Olive, textured Chocolate Chip
Ink: Real Red, Chocolate Chip, Old Olive, Whisper White
Accessories: 1 3/8” circle punch, Mat pack and paper piercing tool, Two-Way Glue Pen, Stampin’ Dimensionals, Stampin’ Glitter – Dazzling Diamonds and Fine Cosmo, Striped Grosgrain Ribbon – Old Olive

All products by Stampin' Up! Please email me to order a catalogue, or click the link on the right to view it online.
Read More » This was a contender for my glitter class but it didn't get through to the finals because I already have a Christmas card and I want to show that glitter isn’t just for Christmas.

First job was to decide which circle punch to use. I settled on the 1 3/8” because it fits the reindeer and the stocking perfectly; Santa has to have his legs cut off but that’s ok and it’s a bit of a squeeze with the tree but manageable.

There’s Dazzling Diamonds glitter on Santa’s hat, the stocking “bells” and the start on top of the tree. Rudolph’s nose is Fine Cosmo Rose Pink. It’s a small enough area to look red but if you want a proper bright red, go for the Fine Cosmo Galaxy selection. The glitter is applied with the two-way glue pen – just “draw” where you want it to go and then sprinkle.

Looking at this now I wish I’d pierced the red layer so that I could have a narrower band of Chocolate Chip around it but it’s too late now. You live and learn.

Stamps: Sparkly & Bright
Cardstock: Whisper White, Real Red, Chocolate Chip, Old Olive, textured Chocolate Chip
Ink: Real Red, Chocolate Chip, Old Olive, Whisper White
Accessories: 1 3/8” circle punch, Mat pack and paper piercing tool, Two-Way Glue Pen, Stampin’ Dimensionals, Stampin’ Glitter – Dazzling Diamonds and Fine Cosmo, Striped Grosgrain Ribbon – Old Olive

All products by Stampin' Up! Please email me to order a catalogue, or click the link on the right to view it online.

Tuesday, 17 November 2009

Christmas cottage

How cute is this? (Am I allowed to say that?) A little chipboard house covered in Merry Moments papers which are just perfect for your Christmas cards, gifts and post-Christmas scrapbooking.

Cardstock: Very Vanilla
Paper: Merry Moments
Accessories: Stampin’ Write marker - Chocolate Chip, Filigree Brads
Other – chipboard house from stash

All products by Stampin' Up! except for chipboard house. Please email me to order a catalogue, or click the link on the right to view it online.
Read More » How cute is this? (Am I allowed to say that?) A little chipboard house covered in Merry Moments papers which are just perfect for your Christmas cards, gifts and post-Christmas scrapbooking.

Cardstock: Very Vanilla
Paper: Merry Moments
Accessories: Stampin’ Write marker - Chocolate Chip, Filigree Brads
Other – chipboard house from stash

All products by Stampin' Up! except for chipboard house. Please email me to order a catalogue, or click the link on the right to view it online.

Monday, 16 November 2009

Circle Christmas

You don’t need Christmas stamps to make Christmas cards – here’s one made with Circle Circus and some festive paper.

You will need your Stamp-a-ma-jig® for this one and this was my second attempt to get it right. Lucky our Whisper White cardstock has two sides, eh?

The pot is made from another Circle Circus stamp cut to shape; it would have perhaps been better in red, I don’t know.

Stamps: Circle Circus
Cardstock: Ruby Red, Chocolate Chip, Close to Cocoa, Whisper White
Paper: Merry Moments
Ink: Garden Green, Chocolate Chip
Accessories: Striped Grosgrain Ribbon - Chocolate Chip, Stamp-a-ma-jig®, Scallop Edge Punch, Earth Elements and Neutrals buttons, linen thread

All products by Stampin' Up! Please email me to order a catalogue, or click the link on the right to view it online.
Read More » You don’t need Christmas stamps to make Christmas cards – here’s one made with Circle Circus and some festive paper.

You will need your Stamp-a-ma-jig® for this one and this was my second attempt to get it right. Lucky our Whisper White cardstock has two sides, eh?

The pot is made from another Circle Circus stamp cut to shape; it would have perhaps been better in red, I don’t know.

Stamps: Circle Circus
Cardstock: Ruby Red, Chocolate Chip, Close to Cocoa, Whisper White
Paper: Merry Moments
Ink: Garden Green, Chocolate Chip
Accessories: Striped Grosgrain Ribbon - Chocolate Chip, Stamp-a-ma-jig®, Scallop Edge Punch, Earth Elements and Neutrals buttons, linen thread

All products by Stampin' Up! Please email me to order a catalogue, or click the link on the right to view it online.

Sunday, 15 November 2009

And the winner is... Earth Elements!

My colour family poll shows that the majority of blog visitors love Earth Elements! Hmmm... no surprise really because it’s my favourite, too!

So I have yet another Earth Elements card to show you... this is one of those end-of-craft-session card where you just throw a few leftover bits together and it turns out ok. I love these autumnal shades – but you knew that, didn’t you?

Stamps: Circle Circus, Basic Phrases
Cardstock: Really Rust, More Mustard, Pumpkin Pie, Chocolate Chip, Whisper White, Kraft
Ink: Chocolate Chip, Really Rust, More Mustard, Pumpkin Pie, Summer Sun, Whisper White
Accessories: 1 ¼” circle punch, 1 3/8” circle punch, Scallop Circle Punch, linen thread, 5/8” Grosgrain Ribbon - Chocolate Chip

All products by Stampin' Up! Please email me to order a catalogue, or click the link on the right to view it online.
Read More » My colour family poll shows that the majority of blog visitors love Earth Elements! Hmmm... no surprise really because it’s my favourite, too!

So I have yet another Earth Elements card to show you... this is one of those end-of-craft-session card where you just throw a few leftover bits together and it turns out ok. I love these autumnal shades – but you knew that, didn’t you?

Stamps: Circle Circus, Basic Phrases
Cardstock: Really Rust, More Mustard, Pumpkin Pie, Chocolate Chip, Whisper White, Kraft
Ink: Chocolate Chip, Really Rust, More Mustard, Pumpkin Pie, Summer Sun, Whisper White
Accessories: 1 ¼” circle punch, 1 3/8” circle punch, Scallop Circle Punch, linen thread, 5/8” Grosgrain Ribbon - Chocolate Chip

All products by Stampin' Up! Please email me to order a catalogue, or click the link on the right to view it online.

Friday, 13 November 2009

A little hi

Found this at the bottom of my samples box – it’s the second Make and Take from my Catalogue Launch. It’s a simple card but it had to be as there were about 30 people there! The stamp is that shape and fits the Scallop Square Punch perfectly. I stamped it twice – once in Taken with Teal and once in Night of Navy, then punched the “hi” out of the navy image using the ½” circle punch. It’s popped up using a Stampin’ Dimensional.

Stamps: Say It With Scallops
Cardstock: Night of Navy, Whisper White
Ink: Taken with Teal, Night of Navy
Accessories: Love Notes, ¼” Grosgrain Ribbon – Night of Navy, Silver Brads, ½” Circle Punch

All products by Stampin' Up! Please email me to order a catalogue, or click the link on the right to view it online.
Read More » Found this at the bottom of my samples box – it’s the second Make and Take from my Catalogue Launch. It’s a simple card but it had to be as there were about 30 people there! The stamp is that shape and fits the Scallop Square Punch perfectly. I stamped it twice – once in Taken with Teal and once in Night of Navy, then punched the “hi” out of the navy image using the ½” circle punch. It’s popped up using a Stampin’ Dimensional.

Stamps: Say It With Scallops
Cardstock: Night of Navy, Whisper White
Ink: Taken with Teal, Night of Navy
Accessories: Love Notes, ¼” Grosgrain Ribbon – Night of Navy, Silver Brads, ½” Circle Punch

All products by Stampin' Up! Please email me to order a catalogue, or click the link on the right to view it online.

Wednesday, 11 November 2009

Autumn moon

I cracked open the new ribbons at last! This was my Mum’s birthday card – realised too late that she doesn’t like cards which open this way as they fall off her (sloping) shelf.

I can’t get enough of the brayer at the moment, although admittedly it’s not a quick process. For this card I punched a circle of scrap paper with my new 1 ¾” circle punch and applied temporary adhesive (the Two-Way Glue Pen is temporary if you allow it to dry clear before sticking) to the back. Stuck it onto a piece of Very Vanilla cardstock and then began to brayer. I can’t remember now but I think I used Summer Sun, More Mustard and Pumpkin Pie ink.

Once the ink had dried I stamped the pheasant, which I inked using markers. Finally I added some foliage from the Autumn Days set and from Pocket Silhouettes.

Love that new ribbon!

Stamps: Autumn Days, Pocket Silhouettes
Cardstock: Kraft, More Mustard, Chocolate Chip, Very Vanilla
Ink: More Mustard, Pumpkin Pie, Summer Sun, Whisper White (craft)
Accessories: 1 ¾” circle punch, Two-Way Glue Pen, Striped Grosgrain Ribbon - Chocolate Chip, ¼” Grosgrain Ribbon - Chocolate Chip, brayer

All products by Stampin' Up! Please email me to order a catalogue, or click the link on the right to view it online.
Read More » I cracked open the new ribbons at last! This was my Mum’s birthday card – realised too late that she doesn’t like cards which open this way as they fall off her (sloping) shelf.

I can’t get enough of the brayer at the moment, although admittedly it’s not a quick process. For this card I punched a circle of scrap paper with my new 1 ¾” circle punch and applied temporary adhesive (the Two-Way Glue Pen is temporary if you allow it to dry clear before sticking) to the back. Stuck it onto a piece of Very Vanilla cardstock and then began to brayer. I can’t remember now but I think I used Summer Sun, More Mustard and Pumpkin Pie ink.

Once the ink had dried I stamped the pheasant, which I inked using markers. Finally I added some foliage from the Autumn Days set and from Pocket Silhouettes.

Love that new ribbon!

Stamps: Autumn Days, Pocket Silhouettes
Cardstock: Kraft, More Mustard, Chocolate Chip, Very Vanilla
Ink: More Mustard, Pumpkin Pie, Summer Sun, Whisper White (craft)
Accessories: 1 ¾” circle punch, Two-Way Glue Pen, Striped Grosgrain Ribbon - Chocolate Chip, ¼” Grosgrain Ribbon - Chocolate Chip, brayer

All products by Stampin' Up! Please email me to order a catalogue, or click the link on the right to view it online.

Tuesday, 10 November 2009

Buy a gift, receive a gift... and free giftwrap, too!

What do YOU want for Christmas?

Slippers? Socks? Bath salts? Or would you prefer something fabulous from Stampin’ Up!?

To me, that one is a no-brainer. But how will you persuade your other halves and families to step away from the novelty bubble bath?

Simply follow these three steps to Christmas present heaven...

Step 1: Make your wish list. Go on, go wild! Include a variety of price ranges to suit every family member’s pocket.

Step 2: Sellotape it to the fridge, stick it to your spouse’s forehead or email it to everyone you know. Or even do all three!

Step 3: Tell your own Secret Santa that all they have to do is email me or call me and I will do the rest. I’ll place the order and even gift-wrap the goodies for them if they want me to!

And don’t forget that the Christmas Extravaganza is running until 29th December, so you can do your Christmas shopping and get a free tag punch, too! See here for details.

Read More »

What do YOU want for Christmas?

Slippers? Socks? Bath salts? Or would you prefer something fabulous from Stampin’ Up!?

To me, that one is a no-brainer. But how will you persuade your other halves and families to step away from the novelty bubble bath?

Simply follow these three steps to Christmas present heaven...

Step 1: Make your wish list. Go on, go wild! Include a variety of price ranges to suit every family member’s pocket.

Step 2: Sellotape it to the fridge, stick it to your spouse’s forehead or email it to everyone you know. Or even do all three!

Step 3: Tell your own Secret Santa that all they have to do is email me or call me and I will do the rest. I’ll place the order and even gift-wrap the goodies for them if they want me to!

And don’t forget that the Christmas Extravaganza is running until 29th December, so you can do your Christmas shopping and get a free tag punch, too! See here for details.

Monday, 9 November 2009

A sweet challenge

I only managed to complete two challenges on In Love With Stamping over the weekend – it was a busy weekend with firework displays, sleepovers and Remembrance Sunday parades.

But this was my second effort – the challenge was to produce a container for sweets or chocolates. I’m better at emptying them than creating them but made this using origami to make the base. Lots of people have asked me for the pattern but I couldn’t find it online. However, I did find this one – which I think would be better as it’s less fussy and the box should slide in and out more easily.

Then I just cut a strip of cardstock and scored it so that it would wrap around the origami box. To punch the aperture in the centre, I made a paper template of the top of the wrap-around piece and folded it into quarters. Then I overlaid it onto the red cardstock and punched, using the score lines to help me find the centre. NB: If your box is more than 3” wide, you won’t be able to punch in the centre because your punch won’t reach.

I attached a piece of acetate on the inside of the wrap-around so that the sweets wouldn’t fall out. Stampin’ Up!® does some Window Sheets which would be perfect for this, although I admit I don’t have any... yet.

The divider inside the box was really simple and is just resting inside, not attached in any way. I did discover that it sits better if you have diagonal strips; just measure the diagonal and cut two strips of cardstock to this length. At the centrepoint of each piece, cut halfway along the width – then you can join slot them together without any adhesives.

As usual, when creating my own boxes (ie not from an existing template), I realised too late that I should have stamped before scoring and sticking. Doh! So this is fairly plain – I just doodled around the aperture and decorated with some punched flowers and a tasty strawberry.

Inside there are not enough jelly beans. The reason for this is that back in April, I visited the chocolate shop in Ambleside, where they have a Jelly Belly Jelly Bean pick ‘n’ mix and bought some strawberry, orange, apple and cherry jelly beans so that I could make something fabulous using all four stamps from Tart & Tangy. It has, of course, not happened yet!

Stamps: Tart & Tangy
Cardstock: Real Red, Old Olive, Very Vanilla
Paper: Merry Moments
Accessories: Real Red and Old Olive markers, Stampin’ Write journaller, Boho Blossoms punch, 1 ¾” circle punch, 1 ¼” circle punch, 1 3/8” circle punch, Bold Brights brads, 5/8” Grosgrain Ribbon – Real Red, stapler, acetate

All products by Stampin' Up! Please email me to order a catalogue, or click the link on the right to view it online.
Read More » I only managed to complete two challenges on In Love With Stamping over the weekend – it was a busy weekend with firework displays, sleepovers and Remembrance Sunday parades.

But this was my second effort – the challenge was to produce a container for sweets or chocolates. I’m better at emptying them than creating them but made this using origami to make the base. Lots of people have asked me for the pattern but I couldn’t find it online. However, I did find this one – which I think would be better as it’s less fussy and the box should slide in and out more easily.

Then I just cut a strip of cardstock and scored it so that it would wrap around the origami box. To punch the aperture in the centre, I made a paper template of the top of the wrap-around piece and folded it into quarters. Then I overlaid it onto the red cardstock and punched, using the score lines to help me find the centre. NB: If your box is more than 3” wide, you won’t be able to punch in the centre because your punch won’t reach.

I attached a piece of acetate on the inside of the wrap-around so that the sweets wouldn’t fall out. Stampin’ Up!® does some Window Sheets which would be perfect for this, although I admit I don’t have any... yet.
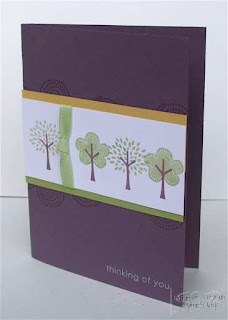
The divider inside the box was really simple and is just resting inside, not attached in any way. I did discover that it sits better if you have diagonal strips; just measure the diagonal and cut two strips of cardstock to this length. At the centrepoint of each piece, cut halfway along the width – then you can join slot them together without any adhesives.

As usual, when creating my own boxes (ie not from an existing template), I realised too late that I should have stamped before scoring and sticking. Doh! So this is fairly plain – I just doodled around the aperture and decorated with some punched flowers and a tasty strawberry.

Inside there are not enough jelly beans. The reason for this is that back in April, I visited the chocolate shop in Ambleside, where they have a Jelly Belly Jelly Bean pick ‘n’ mix and bought some strawberry, orange, apple and cherry jelly beans so that I could make something fabulous using all four stamps from Tart & Tangy. It has, of course, not happened yet!

Stamps: Tart & Tangy
Cardstock: Real Red, Old Olive, Very Vanilla
Paper: Merry Moments
Accessories: Real Red and Old Olive markers, Stampin’ Write journaller, Boho Blossoms punch, 1 ¾” circle punch, 1 ¼” circle punch, 1 3/8” circle punch, Bold Brights brads, 5/8” Grosgrain Ribbon – Real Red, stapler, acetate

All products by Stampin' Up! Please email me to order a catalogue, or click the link on the right to view it online.

Saturday, 7 November 2009

A modern winter card

Over on In Love With Stamping there are challenges all day today. This is to make those demonstrators who aren’t at the Stampin’ Up!® convention feel better about being left behind but anyone can take part – you just have to join the site so that you can upload your projects into the gallery.

I only managed one of yesterday’s challenges, which was to make a modern winter card. This is a bit different – and was inspired by a screen printing I saw at an art exhibition in Ambleside last week. I loved the artwork’s verdancy (yes it is a word, I just checked!) so thought I’d have a go at something using the brighter greens.

First I brayered all over the card using Gable Green and Green Galore, then made a paper mask in the rough shape of a hill and brayered again with Tempting Turquoise. How bright and scary is that?

I wanted snowflakes in the sky but couldn’t find my Sparkly & Bright set (found it now!) so went a bit random with these sprigs from Autumn Days. I thought they looked a bit Northern Lights-ish but Alison reckons they look like the wind, so I’m happy with that.

I didn’t want to use the new Whisper White craft ink for this because you can’t stamp too well on the top so I used bleach. The thing with bleach is that you never really know how it’s going to turn out and, because its power fades with time, you get different results as time progresses. So if you want bright white, work fast! And if you want a surprise, work slowly. I have a bleach tutorial here if you want more info.

Finally, I stamped the trees – bare ones on the right and an evergreen on the left. The “thanks” was masked with a scrap of paper and then stamped in Whisper White craft ink.

And I'm delighted to say that my card was chosen as the project of the day and I won a prize! Enter your project today and you could win, too!

Stamps: Trendy Trees, Autumn Days
Cardstock: Whisper White, Taken with Teal, Glorious Green, textured Whisper White
Ink: Gable Green, Green Galore, Taken with Teal, Tempting Turquoise, Whisper White craft
Accessories: Stamp-a-ma-jig®, brayer, bleach

All products by Stampin' Up! Please email me to order a catalogue, or click the link on the right to view it online.

Read More » Over on In Love With Stamping there are challenges all day today. This is to make those demonstrators who aren’t at the Stampin’ Up!® convention feel better about being left behind but anyone can take part – you just have to join the site so that you can upload your projects into the gallery.

I only managed one of yesterday’s challenges, which was to make a modern winter card. This is a bit different – and was inspired by a screen printing I saw at an art exhibition in Ambleside last week. I loved the artwork’s verdancy (yes it is a word, I just checked!) so thought I’d have a go at something using the brighter greens.

First I brayered all over the card using Gable Green and Green Galore, then made a paper mask in the rough shape of a hill and brayered again with Tempting Turquoise. How bright and scary is that?

I wanted snowflakes in the sky but couldn’t find my Sparkly & Bright set (found it now!) so went a bit random with these sprigs from Autumn Days. I thought they looked a bit Northern Lights-ish but Alison reckons they look like the wind, so I’m happy with that.

I didn’t want to use the new Whisper White craft ink for this because you can’t stamp too well on the top so I used bleach. The thing with bleach is that you never really know how it’s going to turn out and, because its power fades with time, you get different results as time progresses. So if you want bright white, work fast! And if you want a surprise, work slowly. I have a bleach tutorial here if you want more info.

Finally, I stamped the trees – bare ones on the right and an evergreen on the left. The “thanks” was masked with a scrap of paper and then stamped in Whisper White craft ink.

And I'm delighted to say that my card was chosen as the project of the day and I won a prize! Enter your project today and you could win, too!

Stamps: Trendy Trees, Autumn Days
Cardstock: Whisper White, Taken with Teal, Glorious Green, textured Whisper White
Ink: Gable Green, Green Galore, Taken with Teal, Tempting Turquoise, Whisper White craft
Accessories: Stamp-a-ma-jig®, brayer, bleach

All products by Stampin' Up! Please email me to order a catalogue, or click the link on the right to view it online.

Friday, 6 November 2009

Autumn moves into winter

Autumn Days is also perfect for Winter Days – ie, Christmas. The lovely pinecone image was inked here with markers (Chocolate Chip and Always Artichoke) and stamped on a piece of Very Vanilla. Then I stamped Merry Christmas in Ruby Red and sponged around the edges of the cardstock with chalks. The rest is made from scraps – hence the rather excessive use of the Scallop Edge Punch!

Stamps: Autumn Days, Season of Joy
Cardstock: Ruby Red, Old Olive, Chocolate Chip, Very Vanilla
Ink: Ruby Red
Accessories: Chocolate Chip and Always Artichoke markers, Scallop Edge Punch, Stampin’ Pastels, sponge daubers

All products by Stampin' Up! Please email me to order a catalogue, or click the link on the right to view it online.
Read More » Autumn Days is also perfect for Winter Days – ie, Christmas. The lovely pinecone image was inked here with markers (Chocolate Chip and Always Artichoke) and stamped on a piece of Very Vanilla. Then I stamped Merry Christmas in Ruby Red and sponged around the edges of the cardstock with chalks. The rest is made from scraps – hence the rather excessive use of the Scallop Edge Punch!

Stamps: Autumn Days, Season of Joy
Cardstock: Ruby Red, Old Olive, Chocolate Chip, Very Vanilla
Ink: Ruby Red
Accessories: Chocolate Chip and Always Artichoke markers, Scallop Edge Punch, Stampin’ Pastels, sponge daubers

All products by Stampin' Up! Please email me to order a catalogue, or click the link on the right to view it online.

Thursday, 5 November 2009

A Christmas double

Two for the price of one today. Very similar cards but an insight into the process of creating cards for Stampin’ Up!® parties. Of course, I don’t NEED to create my own cards as there are stacks of ideas on the SU demonstrator website ... but I always end up designing my own. More fun for me that way!

This first one, with the reindeer, is the reject, although you’ll notice that it was the beginnings of the idea for the Make and Take I showed you yesterday.

I was trying to incorporate piercing around a circle but the holes ended up just a bit too close to the edge for my liking so that technique will have to wait for another day... another project.


The second card – with the Santa Claus – is the one I settled on for one of my demonstrations for my pre-Christmas parties. It uses the new 1 ¾” circle punch. I was a bit unsure how to use this at first as it doesn’t fit inside the Scallop Circle Punch – nor does the Scallop Circle Punch fit inside it (they’re exactly the same size, in case you were wondering). So I played around and came up with this idea.

Using the Scallop Oval Punch, I punched out three scalloped ovals and cut them in half, then spaced them out evenly around the back of the white circle. With five scallops showing, as shown here, you need a small space between each piece – not quite a millimetre. I haven’t tried it with more or fewer scallops showing yet – you have a go and let me know!

Hmmm... just looking at this card now I am thinking wouldn’t it be better with the greeting stamped in Whisper White using our new Craft pad? Yes it would – will do that for the next party!

Stamps: Sparkly & Bright, Sparkling wheel
Cardstock: Real Red, Garden Green, Whisper White
Ink: Real Red, Garden Green, Chocolate Chip
Accessories: 1 ¾” circle punch, 1 3/8” circle punch, Scallop Oval Punch, ½” Striped Grosgrain Ribbon – Real Red, Two-Way Glue Pen, Dazzling Diamonds Glitter, Stampin’ Dimensionals, Jumbo handle, unkinked jumbo cartridge, Whisper White craft ink refill, Mat Pack, Paper Piercing Tool

All products by Stampin' Up! Please email me to order a catalogue, or click the link on the right to view it online.


Read More » Two for the price of one today. Very similar cards but an insight into the process of creating cards for Stampin’ Up!® parties. Of course, I don’t NEED to create my own cards as there are stacks of ideas on the SU demonstrator website ... but I always end up designing my own. More fun for me that way!

This first one, with the reindeer, is the reject, although you’ll notice that it was the beginnings of the idea for the Make and Take I showed you yesterday.

I was trying to incorporate piercing around a circle but the holes ended up just a bit too close to the edge for my liking so that technique will have to wait for another day... another project.


The second card – with the Santa Claus – is the one I settled on for one of my demonstrations for my pre-Christmas parties. It uses the new 1 ¾” circle punch. I was a bit unsure how to use this at first as it doesn’t fit inside the Scallop Circle Punch – nor does the Scallop Circle Punch fit inside it (they’re exactly the same size, in case you were wondering). So I played around and came up with this idea.

Using the Scallop Oval Punch, I punched out three scalloped ovals and cut them in half, then spaced them out evenly around the back of the white circle. With five scallops showing, as shown here, you need a small space between each piece – not quite a millimetre. I haven’t tried it with more or fewer scallops showing yet – you have a go and let me know!

Hmmm... just looking at this card now I am thinking wouldn’t it be better with the greeting stamped in Whisper White using our new Craft pad? Yes it would – will do that for the next party!

Stamps: Sparkly & Bright, Sparkling wheel
Cardstock: Real Red, Garden Green, Whisper White
Ink: Real Red, Garden Green, Chocolate Chip
Accessories: 1 ¾” circle punch, 1 3/8” circle punch, Scallop Oval Punch, ½” Striped Grosgrain Ribbon – Real Red, Two-Way Glue Pen, Dazzling Diamonds Glitter, Stampin’ Dimensionals, Jumbo handle, unkinked jumbo cartridge, Whisper White craft ink refill, Mat Pack, Paper Piercing Tool

All products by Stampin' Up! Please email me to order a catalogue, or click the link on the right to view it online.


Wednesday, 4 November 2009

Dashing through the snowflakes

This is the Make & Take for all my pre-Christmas workshops, so if you fancy making one, you only have to book a party! You’ll get a free catalogue, a small hostess gift from me, plus all the hostess benefits if the party reaches sales of £150.

The hostess for this party earned a Level 3 hostess stamp set PLUS £60 of free merchandise of her choice. Yes, I’ll say that again... SIXTY POUNDS of free merchandise of her choice! To say she was delighted would be an understatement.

The Rudolph comes from the fun and funky Sparkly & Bright stamp set – he’s stamped in Chocolate Chip and his nose is coloured in with a red marker. The Garden Green panel is stamped in Garden Green using the snowflake stamp that comes with the set.

The white snowflakes are made with the Sparkling wheel. I bought an unkinked cartridge and a Whisper White Craft ink refill so that I could make my snowflakes in white – and I love the way they look!

Check out the fabulous new ribbon, too – this ½” striped ribbon is now available in Real Red, Pumpkin Pie and Old Olive – three of my very favourite colours!

Stamps: Sparkly & Bright, Sparkling wheel
Cardstock: Real Red, Garden Green, Whisper White
Ink: Chocolate Chip, Garden Green
Accessories: Stampin’ Write marker – Real Red, ½” striped Grosgrain Ribbon – Real Red, Jumbo Handle, Uninked cartridge, Whisper White Craft ink refill

All products by Stampin' Up! Please email me to order a catalogue, or click the link on the right to view it online.

Read More » This is the Make & Take for all my pre-Christmas workshops, so if you fancy making one, you only have to book a party! You’ll get a free catalogue, a small hostess gift from me, plus all the hostess benefits if the party reaches sales of £150.

The hostess for this party earned a Level 3 hostess stamp set PLUS £60 of free merchandise of her choice. Yes, I’ll say that again... SIXTY POUNDS of free merchandise of her choice! To say she was delighted would be an understatement.

The Rudolph comes from the fun and funky Sparkly & Bright stamp set – he’s stamped in Chocolate Chip and his nose is coloured in with a red marker. The Garden Green panel is stamped in Garden Green using the snowflake stamp that comes with the set.

The white snowflakes are made with the Sparkling wheel. I bought an unkinked cartridge and a Whisper White Craft ink refill so that I could make my snowflakes in white – and I love the way they look!

Check out the fabulous new ribbon, too – this ½” striped ribbon is now available in Real Red, Pumpkin Pie and Old Olive – three of my very favourite colours!

Stamps: Sparkly & Bright, Sparkling wheel
Cardstock: Real Red, Garden Green, Whisper White
Ink: Chocolate Chip, Garden Green
Accessories: Stampin’ Write marker – Real Red, ½” striped Grosgrain Ribbon – Real Red, Jumbo Handle, Uninked cartridge, Whisper White Craft ink refill

All products by Stampin' Up! Please email me to order a catalogue, or click the link on the right to view it online.

Monday, 2 November 2009

Little Red Rooster

I felt very lucky to have a play with the Rustic Rooster set. It’s a Level 2 hostess set and I had the chance to buy it during September (demonstrators can pre-order from the new catalogue) but decided not to. Then, at my Catalogue Launch, I offered the hostess set from the orders placed on the day as a prize. Janet won and, as a farmer, she naturally chose Rustic Rooster.

I was green with envy! So I was delighted when I presented Janet with her prize at my Contain Yourself 2 class and she mounted it there and then and let me have a play.

I made this with the supplies for the Trendy Trees card we were making – I turned the white layer on its end and stamped the cockerel on it. Can’t claim it as my idea as Janet had already made one just like it!

Stamps: Rustic Rooster, Trendy Trees
Cardstock: So Saffron, Rose Red, Whisper White
Paper: Perfect Plum Patterns
Ink: Rose Red, So Saffron

All products by Stampin' Up! Please email me to order a catalogue, or click the link on the right to view it online.
Read More » I felt very lucky to have a play with the Rustic Rooster set. It’s a Level 2 hostess set and I had the chance to buy it during September (demonstrators can pre-order from the new catalogue) but decided not to. Then, at my Catalogue Launch, I offered the hostess set from the orders placed on the day as a prize. Janet won and, as a farmer, she naturally chose Rustic Rooster.

I was green with envy! So I was delighted when I presented Janet with her prize at my Contain Yourself 2 class and she mounted it there and then and let me have a play.

I made this with the supplies for the Trendy Trees card we were making – I turned the white layer on its end and stamped the cockerel on it. Can’t claim it as my idea as Janet had already made one just like it!

Stamps: Rustic Rooster, Trendy Trees
Cardstock: So Saffron, Rose Red, Whisper White
Paper: Perfect Plum Patterns
Ink: Rose Red, So Saffron

All products by Stampin' Up! Please email me to order a catalogue, or click the link on the right to view it online.

Sunday, 1 November 2009

I added a poll!

It's just for fun but look left for my very first poll! So... what IS your favourite SU colour family? I'd love to know - I'm sure you can guess mine...
Read More » It's just for fun but look left for my very first poll! So... what IS your favourite SU colour family? I'd love to know - I'm sure you can guess mine...

Earn a free punch worth £12.50!

Today is the first day of a fabulous new special offer from Stampin’ Up!®

To help you make your Christmas cards, create gifts for friends and find the perfect presents for crafters, Stampin’ Up! has put together a Christmas Gift-Giving Guide.

Best of all, when you spend £45 on products featured in the guide, you’ll receive a FREE Tag Punch or Small Tag Punch worth £12.50! And there’s no limit to the number of free punches you can earn – you’ll get one for every £45 you spend on items from the Gift-Giving Guide. That’s the important bit – only items in the Gift-Giving Guide will qualify you for a free punch.

This offer runs from 1st November to 29th December, 2009 and the following items will count towards your £45 and earn you a free punch. Notice that the colours favour that classic colour combination: Old Olive and Real Red! Everyone will be using this colour combo this Christmas!

And this means that even if you don’t want any of the larger items such as stamp sets and scrapbooking kits at this time, you could stock up on useful consumables such as cardstock and ribbon in order to earn the free punch.

Have a look at the list:

Stamp sets
Spotlight on Christmas - £18.95 (p22)
Fresh Cuts - £18.95 (p53)
Circle Circus - £23.95 (p55)
Starring You - £11.95 (p77)
Wow Flowers - £10.95 (p77)

Simply Scrappin’® kits and Card Elements
Rock Star Simply Sent Card Elements - £12.50 (p77)
Flower Power Simply Sent Card Elements - £12.50 (p77)
Sunny Day - £15.50 (p78)
Christmas Jingle - £15.50 (p79)
Petal Party - £15.50 (p79)
Love Stories - £15.50 (p79)

Cardstock
Whisper White A4 card stock - £5.50 (p71)
Real Red A4 card stock - £4.50 (p72)
Old Olive A4 card stock - £4.50 (p72)
Bold Brights A4 card stock - £6.75 (p72)
Fresh-Cut Notes - £6.95 (p80)

Ribbon
Old Olive 5/8" grosgrain ribbon - £6.25 (p87)
Real Red 5/8" grosgrain ribbon - £6.25 (p87)

Miscellaneous
Medium flat cellophane bags - £3.25 (p80)
On Board 12.7 x 12.7 cm (5”) Art Journal - £5.50 (p82)

Tools
Bold Brights Stampin’ Write markers - £24.95 (p72)
Spiral punch - £8.50 (p88)
Cutter Kit - £13.25 (p90)

Accessories
Latte Designer buttons - £6.50 (p83)
Playground Designer buttons - £6.50 (p83)

Please let me know what you’d like to order by sending me an email or giving me a call.
Read More » Today is the first day of a fabulous new special offer from Stampin’ Up!®

To help you make your Christmas cards, create gifts for friends and find the perfect presents for crafters, Stampin’ Up! has put together a Christmas Gift-Giving Guide.

Best of all, when you spend £45 on products featured in the guide, you’ll receive a FREE Tag Punch or Small Tag Punch worth £12.50! And there’s no limit to the number of free punches you can earn – you’ll get one for every £45 you spend on items from the Gift-Giving Guide. That’s the important bit – only items in the Gift-Giving Guide will qualify you for a free punch.

This offer runs from 1st November to 29th December, 2009 and the following items will count towards your £45 and earn you a free punch. Notice that the colours favour that classic colour combination: Old Olive and Real Red! Everyone will be using this colour combo this Christmas!

And this means that even if you don’t want any of the larger items such as stamp sets and scrapbooking kits at this time, you could stock up on useful consumables such as cardstock and ribbon in order to earn the free punch.

Have a look at the list:

Stamp sets
Spotlight on Christmas - £18.95 (p22)
Fresh Cuts - £18.95 (p53)
Circle Circus - £23.95 (p55)
Starring You - £11.95 (p77)
Wow Flowers - £10.95 (p77)

Simply Scrappin’® kits and Card Elements
Rock Star Simply Sent Card Elements - £12.50 (p77)
Flower Power Simply Sent Card Elements - £12.50 (p77)
Sunny Day - £15.50 (p78)
Christmas Jingle - £15.50 (p79)
Petal Party - £15.50 (p79)
Love Stories - £15.50 (p79)

Cardstock
Whisper White A4 card stock - £5.50 (p71)
Real Red A4 card stock - £4.50 (p72)
Old Olive A4 card stock - £4.50 (p72)
Bold Brights A4 card stock - £6.75 (p72)
Fresh-Cut Notes - £6.95 (p80)

Ribbon
Old Olive 5/8" grosgrain ribbon - £6.25 (p87)
Real Red 5/8" grosgrain ribbon - £6.25 (p87)

Miscellaneous
Medium flat cellophane bags - £3.25 (p80)
On Board 12.7 x 12.7 cm (5”) Art Journal - £5.50 (p82)

Tools
Bold Brights Stampin’ Write markers - £24.95 (p72)
Spiral punch - £8.50 (p88)
Cutter Kit - £13.25 (p90)

Accessories
Latte Designer buttons - £6.50 (p83)
Playground Designer buttons - £6.50 (p83)

Please let me know what you’d like to order by sending me an email or giving me a call.

Saturday, 31 October 2009

Celery trees

I was playing around at my Contain Yourself 2 workshop (well, everyone seemed to be coping quite nicely so I took the opportunity to stamp a little!) and made this. It uses exactly the same pieces of cardstock and ribbon as the card from yesterday but I used Trendy Trees instead. LOVE that set!

It does illustrate how you can adapt a card idea to suit the products that you already have. This is what makes the Idea Book & Catalogue so useful - you don't have to copy the ideas exactly, you can change the colours, the stamp set or even turn a card on its side. Why not have a go at changing an idea around from the catalogue?

Stamps: Trendy Trees
Cardstock: Perfect Plum, So Saffron, Certainly Celery, Whisper White
Ink: Perfect Plum, Certainly Celery, Whisper White
Accessories: ¼” Grosgrain Ribbon - Certainly Celery, Stamp-a-ma-jig®

All products by Stampin' Up! Please email me to order a catalogue, or click the link on the right to view it online.

Read More » I was playing around at my Contain Yourself 2 workshop (well, everyone seemed to be coping quite nicely so I took the opportunity to stamp a little!) and made this. It uses exactly the same pieces of cardstock and ribbon as the card from yesterday but I used Trendy Trees instead. LOVE that set!

It does illustrate how you can adapt a card idea to suit the products that you already have. This is what makes the Idea Book & Catalogue so useful - you don't have to copy the ideas exactly, you can change the colours, the stamp set or even turn a card on its side. Why not have a go at changing an idea around from the catalogue?

Stamps: Trendy Trees
Cardstock: Perfect Plum, So Saffron, Certainly Celery, Whisper White
Ink: Perfect Plum, Certainly Celery, Whisper White
Accessories: ¼” Grosgrain Ribbon - Certainly Celery, Stamp-a-ma-jig®

All products by Stampin' Up! Please email me to order a catalogue, or click the link on the right to view it online.

Friday, 30 October 2009

Take time to smell the flowers

Hello Again is a fabulous set. I admit I only bought it because it was so cheap (less than a tenner!) but now I love it. It’s cute and funky!

We used it at my Contain Yourself 2 workshop to make two of these cards each. It’s a great way to use up all those long strips of cardstock in your scraps box which you think you’ll never get round to using. A strip of Certainly Celery at the top; a strip of So Saffron at the bottom and who cares about the middle bit because it's covered up and nobody can see it!

Stamps: Hello Again
Cardstock: Perfect Plum, Certainly Celery, So Saffron, Whisper White
Ink: Perfect Plum, So Saffron
Accessories: ¼” Grosgrain Ribbon - Certainly Celery, Paper Snips, Stampin' Dimensionals

All products by Stampin' Up! Please email me to order a catalogue, or click the link on the right to view it online.
Read More » Hello Again is a fabulous set. I admit I only bought it because it was so cheap (less than a tenner!) but now I love it. It’s cute and funky!

We used it at my Contain Yourself 2 workshop to make two of these cards each. It’s a great way to use up all those long strips of cardstock in your scraps box which you think you’ll never get round to using. A strip of Certainly Celery at the top; a strip of So Saffron at the bottom and who cares about the middle bit because it's covered up and nobody can see it!

Stamps: Hello Again
Cardstock: Perfect Plum, Certainly Celery, So Saffron, Whisper White
Ink: Perfect Plum, So Saffron
Accessories: ¼” Grosgrain Ribbon - Certainly Celery, Paper Snips, Stampin' Dimensionals

All products by Stampin' Up! Please email me to order a catalogue, or click the link on the right to view it online.

Thursday, 29 October 2009

I'm in love with another tree stamp set

I really like the clean and simple look of this card. Love the Certainly Celery card base, too, which is a shame for those who attended my Contain Yourself 2 workshop as I accidentally cut them out of So Saffron. I have NO idea what I was thinking and unfortunately I didn’t have time to cut new ones out of Certainly Celery. But they looked lovely in So Saffron, too, so I think all was well.

And something forgot to say yesterday: a BIG thank you to Pam and Jenny for doing the washing up after the workshop! It was much appreciated.

Stamps: Trendy Trees
Cardstock: Certainly Celery, Rose Red, Whisper White
Paper: Perfect Plum Patterns
Ink: Certainly Celery, Perfect Plum, Rose Red
Accessories: Striped Grosgrain Ribbon – Rose Red, Stamp-a-ma-jig®, Stampin’ Dimensionals

All products by Stampin' Up! Please email me to order a catalogue, or click the link on the right to view it online.

Read More » I really like the clean and simple look of this card. Love the Certainly Celery card base, too, which is a shame for those who attended my Contain Yourself 2 workshop as I accidentally cut them out of So Saffron. I have NO idea what I was thinking and unfortunately I didn’t have time to cut new ones out of Certainly Celery. But they looked lovely in So Saffron, too, so I think all was well.

And something forgot to say yesterday: a BIG thank you to Pam and Jenny for doing the washing up after the workshop! It was much appreciated.

Stamps: Trendy Trees
Cardstock: Certainly Celery, Rose Red, Whisper White
Paper: Perfect Plum Patterns
Ink: Certainly Celery, Perfect Plum, Rose Red
Accessories: Striped Grosgrain Ribbon – Rose Red, Stamp-a-ma-jig®, Stampin’ Dimensionals

All products by Stampin' Up! Please email me to order a catalogue, or click the link on the right to view it online.

Wednesday, 28 October 2009

I'm back with another Circle Circus card

Oops, sorry I’ve been neglecting my blog. I’ve had a few email issues, camera battery issues and daylight issues! I’ve also been busy helping some lovely ladies join my Stampin’ Up!® team.

Lots of crafters are now realising what fun it would be to become a Stampin’ Up! demonstrator – make sure you don’t miss out on the fabulous 10% off deal which runs until 13th November. Send me an email if you want to find out more.

On to today’s project... this was one of the cards we made at my Contain Yourself 2 class, where everyone covered a tin and made six cards to go inside. I was really worried that I was overstretching things so bullied them into working fast... and most people finished early! It helped that we made two of each card and, of course, all the supplies are already cut up and ready.

The colour scheme for the evening was Rose Red, Perfect Plum, Certainly Celery and So Saffron, which I think go really well together. I really like this card made with Circle Circus. I like all the Rose Red circles peeping out from behind the main image and I think the Whisper White greeting, stamped in our new Craft ink pad, really stands out.

Stamps: Circle Circus, Trendy Trees
Cardstock: Rose Red, Perfect Plum, So Saffron, Certainly Celery, Whisper White
Paper: Patterns – Perfect Plum
Ink: Rose Red, White Craft
Accessories: Scallop Edge Punch, Scallop Circle Punch, 1 3/8” circle punch, 1 ¼” circle punch, Paper Piercing Tool, Mat Pack, ¼” Grosgrain Ribbon - Certainly Celery

All products by Stampin' Up! Please email me to order a catalogue, or click the link on the right to view it online.

Read More » Oops, sorry I’ve been neglecting my blog. I’ve had a few email issues, camera battery issues and daylight issues! I’ve also been busy helping some lovely ladies join my Stampin’ Up!® team.

Lots of crafters are now realising what fun it would be to become a Stampin’ Up! demonstrator – make sure you don’t miss out on the fabulous 10% off deal which runs until 13th November. Send me an email if you want to find out more.

On to today’s project... this was one of the cards we made at my Contain Yourself 2 class, where everyone covered a tin and made six cards to go inside. I was really worried that I was overstretching things so bullied them into working fast... and most people finished early! It helped that we made two of each card and, of course, all the supplies are already cut up and ready.

The colour scheme for the evening was Rose Red, Perfect Plum, Certainly Celery and So Saffron, which I think go really well together. I really like this card made with Circle Circus. I like all the Rose Red circles peeping out from behind the main image and I think the Whisper White greeting, stamped in our new Craft ink pad, really stands out.

Stamps: Circle Circus, Trendy Trees
Cardstock: Rose Red, Perfect Plum, So Saffron, Certainly Celery, Whisper White
Paper: Patterns – Perfect Plum
Ink: Rose Red, White Craft
Accessories: Scallop Edge Punch, Scallop Circle Punch, 1 3/8” circle punch, 1 ¼” circle punch, Paper Piercing Tool, Mat Pack, ¼” Grosgrain Ribbon - Certainly Celery

All products by Stampin' Up! Please email me to order a catalogue, or click the link on the right to view it online.

Sunday, 25 October 2009

What's stopping you from signing up?

Have I ever mentioned how much fun it is being a Stampin’ Up!® demonstrator? That you’ll meet like-minded people, make new friends, learn fantastic new techniques and... wait for it... get paid for it, too?

Have I ever mentioned that being a demonstrator is so flexible that you can work at it as much or as little as you like? That you don’t even have to do workshops if you don’t want to? But that the rewards are there if you do have the time (and the inclination) to turn it into a successful business?

Have I ever told you that the Starter Kit contains more than £240 of stamping and business supplies? And that you can change some of the supplies to suit your personal tastes? That it’s a mega-bargain even if you never plan to demonstrate? That it’s a no-risk investment because, no matter what happens, you get to keep the kit?

Have I ever told you that you have until the end of your first FULL quarter to meet your first sales target? So that, if you signed up during November, you would have until the end of March?

Have I ever told you about all the extra rewards you can earn with Stampin’ Up!? That you earn the same benefits on your own orders as a hostess does, so lots of freebies could come your way? And have I ever mentioned the chance to earn 15 free stamp sets in your first six months?

I’m sure I must have ... but I know I haven’t told you this: if you sign up before 13th November, you’ll get 10% off the Starter Kit, making it an even bigger bargain at just £125!

What’s holding you back? Why not email me today and see if I can allay your fears?
Read More » Have I ever mentioned how much fun it is being a Stampin’ Up!® demonstrator? That you’ll meet like-minded people, make new friends, learn fantastic new techniques and... wait for it... get paid for it, too?

Have I ever mentioned that being a demonstrator is so flexible that you can work at it as much or as little as you like? That you don’t even have to do workshops if you don’t want to? But that the rewards are there if you do have the time (and the inclination) to turn it into a successful business?

Have I ever told you that the Starter Kit contains more than £240 of stamping and business supplies? And that you can change some of the supplies to suit your personal tastes? That it’s a mega-bargain even if you never plan to demonstrate? That it’s a no-risk investment because, no matter what happens, you get to keep the kit?

Have I ever told you that you have until the end of your first FULL quarter to meet your first sales target? So that, if you signed up during November, you would have until the end of March?

Have I ever told you about all the extra rewards you can earn with Stampin’ Up!? That you earn the same benefits on your own orders as a hostess does, so lots of freebies could come your way? And have I ever mentioned the chance to earn 15 free stamp sets in your first six months?

I’m sure I must have ... but I know I haven’t told you this: if you sign up before 13th November, you’ll get 10% off the Starter Kit, making it an even bigger bargain at just £125!

What’s holding you back? Why not email me today and see if I can allay your fears?

Saturday, 24 October 2009

Hmmmm.... chocolate

Gift ideas don’t have to be difficult or time-consuming. This is just a bag of chocolate balls with a tag. I wouldn’t buy the chocolates again because many of them were chipped so the brown of the chocolate was showing through and they don’t look nice but this would look good with mint imperials or toffee bonbons instead. As for what happened to the chipped and smashed chocolates... do you really need me to tell you?

Stamps: Say It With Scallops
Cardstock: Whisper White, Chocolate Chip
Ink: Pumpkin Pie
Accessories: Scallop Square Punch, ¼” Grosgrain Ribbon - Pumpkin Pie

All products by Stampin' Up! Please email me to order a catalogue, or click the link on the right to view it online.
Read More » Gift ideas don’t have to be difficult or time-consuming. This is just a bag of chocolate balls with a tag. I wouldn’t buy the chocolates again because many of them were chipped so the brown of the chocolate was showing through and they don’t look nice but this would look good with mint imperials or toffee bonbons instead. As for what happened to the chipped and smashed chocolates... do you really need me to tell you?

Stamps: Say It With Scallops
Cardstock: Whisper White, Chocolate Chip
Ink: Pumpkin Pie
Accessories: Scallop Square Punch, ¼” Grosgrain Ribbon - Pumpkin Pie

All products by Stampin' Up! Please email me to order a catalogue, or click the link on the right to view it online.

Thursday, 22 October 2009

The buckle card...

So... the Buckle Card, as demonstrated at my catalogue launch. I’ve wanted to demo this card for such a long time but only now do we have the necessary Word Window Punch in our catalogue. And we’re all thrilled!

Have I mentioned how much I LOVE our new catalogue? My wish list is dangerously long. I’m chipping away at it but still covet so much more.

But back to the card. It’s really easy actually; you just make a standard card, then slice part of the front off (save the piece for another project!). The punch a Word Window, vertically, in the remaining flap.

Next you make a flap – or “buckle” - to slot inside the Word Window. The is the only important measurement – this buckle should be narrower than the Word Window.

If you make an inner piece to go inside the card – mine is Old Olive, unsurprisingly - this can be stuck on top of the end of the buckle/flap to cover any joins.

One thing worth knowing is that the Word Window Punch will NOT like it if you try to punch through two layers of cardstock. It will, however, happily punch through a sheet of Designer Series Paper and a sheet of cardstock. So, if you’re using paper and cardstock, go for it. If you’re using two sheets of cardstock, punch one layer then overlay the second layer and use that as a guide to punch again.

Of course, you don’t need a second layer or cardstock or DSP at all – you could always stamp the front.

Stamps: Animal Stories
Cardstock: So Saffron, Old Olive, Chocolate Chip, Whisper White
Paper: Tall Tales
Ink: Chocolate Chip
Accessories: ¼” Grosgrain Ribbon - Chocolate Chip, Word Window Punch, corner rounder

All products by Stampin' Up! Please email me to order a catalogue, or click the link on the right to view it online.
Read More » So... the Buckle Card, as demonstrated at my catalogue launch. I’ve wanted to demo this card for such a long time but only now do we have the necessary Word Window Punch in our catalogue. And we’re all thrilled!

Have I mentioned how much I LOVE our new catalogue? My wish list is dangerously long. I’m chipping away at it but still covet so much more.

But back to the card. It’s really easy actually; you just make a standard card, then slice part of the front off (save the piece for another project!). The punch a Word Window, vertically, in the remaining flap.

Next you make a flap – or “buckle” - to slot inside the Word Window. The is the only important measurement – this buckle should be narrower than the Word Window.

If you make an inner piece to go inside the card – mine is Old Olive, unsurprisingly - this can be stuck on top of the end of the buckle/flap to cover any joins.

One thing worth knowing is that the Word Window Punch will NOT like it if you try to punch through two layers of cardstock. It will, however, happily punch through a sheet of Designer Series Paper and a sheet of cardstock. So, if you’re using paper and cardstock, go for it. If you’re using two sheets of cardstock, punch one layer then overlay the second layer and use that as a guide to punch again.

Of course, you don’t need a second layer or cardstock or DSP at all – you could always stamp the front.

Stamps: Animal Stories
Cardstock: So Saffron, Old Olive, Chocolate Chip, Whisper White
Paper: Tall Tales
Ink: Chocolate Chip
Accessories: ¼” Grosgrain Ribbon - Chocolate Chip, Word Window Punch, corner rounder

All products by Stampin' Up! Please email me to order a catalogue, or click the link on the right to view it online.

Wednesday, 21 October 2009

The painless way to get a full set of markers

Do you love markers? Do you only dream of owning the full set of Stampin’ Up!® Stampin’ Write markers in their handy storage box?

You can buy each colour family for £24.95 for 12 markers – £2.08 per marker. But if you want the lovely storage box so that you can store them easily and horizontally to keep both tips inked evenly, you have to buy the full set in one go for £99.95... until now.

Yes, I have a cunning plan. All it needs is four people who all want the full set of markers in the box and are willing to spend £24.95 a month for four months. I’ll even pay your shipping!* It’s
a perfect plan for those who aren’t able, or can’t bring themselves, to fork out £99.95 all at once. And, when you receive your final set of markers, you’ll get the box to put them all in, too!

* Free shipping is offered by me and only applies to the markers, not to any other items ordered. If postage is required to your home, this will be charged at cost for recorded delivery.
Read More » Do you love markers? Do you only dream of owning the full set of Stampin’ Up!® Stampin’ Write markers in their handy storage box?

You can buy each colour family for £24.95 for 12 markers – £2.08 per marker. But if you want the lovely storage box so that you can store them easily and horizontally to keep both tips inked evenly, you have to buy the full set in one go for £99.95... until now.

Yes, I have a cunning plan. All it needs is four people who all want the full set of markers in the box and are willing to spend £24.95 a month for four months. I’ll even pay your shipping!* It’s
a perfect plan for those who aren’t able, or can’t bring themselves, to fork out £99.95 all at once. And, when you receive your final set of markers, you’ll get the box to put them all in, too!

* Free shipping is offered by me and only applies to the markers, not to any other items ordered. If postage is required to your home, this will be charged at cost for recorded delivery.

Tuesday, 20 October 2009

Too early for Bold Brights!

I do like this Circle Circus stamp set. It’s so versatile as you can use it to make pretty girlie cards or geometric masculine cards. Or even funky teenage cards. You get the idea.

This is an unusual colour combination for me – in fact, I’m typing this early in the morning and it’s hurting my eyes! But I do like it a lot.

Stamps: Circle Circus
Cardstock: Tempting Turquoise, Brilliant Blue, Green Galore, Whisper White
Ink: Tempting Turquoise, Green Galore, Brilliant Blue
Accessories: Scallop Edge Punch, Scallop Circle Punch, 1 3/8” circle punch, ½” circle punch, Mat Pack, Paper Piercer

All products by Stampin' Up! Please email me to order a catalogue, or click the link on the right to view it online.
Read More » I do like this Circle Circus stamp set. It’s so versatile as you can use it to make pretty girlie cards or geometric masculine cards. Or even funky teenage cards. You get the idea.

This is an unusual colour combination for me – in fact, I’m typing this early in the morning and it’s hurting my eyes! But I do like it a lot.

Stamps: Circle Circus
Cardstock: Tempting Turquoise, Brilliant Blue, Green Galore, Whisper White
Ink: Tempting Turquoise, Green Galore, Brilliant Blue
Accessories: Scallop Edge Punch, Scallop Circle Punch, 1 3/8” circle punch, ½” circle punch, Mat Pack, Paper Piercer

All products by Stampin' Up! Please email me to order a catalogue, or click the link on the right to view it online.

Monday, 19 October 2009

Elephant box

Not my finest hour but it was fab in my head, honest! I need a handle and don’t have any of that fabulous striped ribbon yet (order going in today though!). It probably wasn’t a good idea to stamp Creamy Caramel elephants on the tissue paper either – when it’s scrunched up, they just look brown and smeary.

But ignoring all the faults of the box, check out the fabulous paper used here. Isn’t it gorgeous? It co-ordinates with Animal Stories, the cheeky new set I’ve used. And some of the sheets in this paper pack are so fabulous that you could frame them and put them on your wall!

Stamps: Animal Stories
Cardstock: Summer Sun, Whisper White
Paper: Tall Tales
Ink: Chocolate Chip
Accessories: 5/8” Grosgrain Ribbon - Chocolate Chip

All products by Stampin' Up! Please email me to order a catalogue, or click the link on the right to view it online.
Read More » Not my finest hour but it was fab in my head, honest! I need a handle and don’t have any of that fabulous striped ribbon yet (order going in today though!). It probably wasn’t a good idea to stamp Creamy Caramel elephants on the tissue paper either – when it’s scrunched up, they just look brown and smeary.

But ignoring all the faults of the box, check out the fabulous paper used here. Isn’t it gorgeous? It co-ordinates with Animal Stories, the cheeky new set I’ve used. And some of the sheets in this paper pack are so fabulous that you could frame them and put them on your wall!

Stamps: Animal Stories
Cardstock: Summer Sun, Whisper White
Paper: Tall Tales
Ink: Chocolate Chip
Accessories: 5/8” Grosgrain Ribbon - Chocolate Chip

All products by Stampin' Up! Please email me to order a catalogue, or click the link on the right to view it online.

Saturday, 17 October 2009

Friendly flowers

I’m not supposed to tell you this but my cousin made this card for me during her visit from Canada this summer. Not sure why I wasn’t supposed to say she made it – she has nothing to be ashamed of because it’s a fab card and I love it!

Stamps: Good Friend
Cardstock: Chocolate Chip, Old Olive, Whisper White
Ink: Pumpkin Pie, More Mustard, Ruby Red, Old Olive. Always Artichoke
Accessories: Scallop Edge Punch, 5/8” Grosgrain Ribbon - Chocolate Chip

All products by Stampin' Up! Please email me to order a catalogue, or click the link on the right to view it online.
Read More » I’m not supposed to tell you this but my cousin made this card for me during her visit from Canada this summer. Not sure why I wasn’t supposed to say she made it – she has nothing to be ashamed of because it’s a fab card and I love it!

Stamps: Good Friend
Cardstock: Chocolate Chip, Old Olive, Whisper White
Ink: Pumpkin Pie, More Mustard, Ruby Red, Old Olive. Always Artichoke
Accessories: Scallop Edge Punch, 5/8” Grosgrain Ribbon - Chocolate Chip

All products by Stampin' Up! Please email me to order a catalogue, or click the link on the right to view it online.

Friday, 16 October 2009

Olive circus

Oooh, I like this. Am I allowed to say that? Oh well, I have done. I do like the monochromatic look and I expect it’s the Old Olive which makes me love this card so much! I particularly the like Old Olive scalloped edge on Old Olive. I was playing around with my new Circle Circus set, which is great fun and has tons of possibilities.

Stamps: Circle Circus
Cardstock: Old Olive, Whisper White
Ink: Old Olive
Accessories: Scallop Edge Punch, 5/8” Grosgrain Ribbon - Old Olive

All products by Stampin' Up! Please email me to order a catalogue, or click the link on the right to view it online.
Read More » Oooh, I like this. Am I allowed to say that? Oh well, I have done. I do like the monochromatic look and I expect it’s the Old Olive which makes me love this card so much! I particularly the like Old Olive scalloped edge on Old Olive. I was playing around with my new Circle Circus set, which is great fun and has tons of possibilities.

Stamps: Circle Circus
Cardstock: Old Olive, Whisper White
Ink: Old Olive
Accessories: Scallop Edge Punch, 5/8” Grosgrain Ribbon - Old Olive

All products by Stampin' Up! Please email me to order a catalogue, or click the link on the right to view it online.