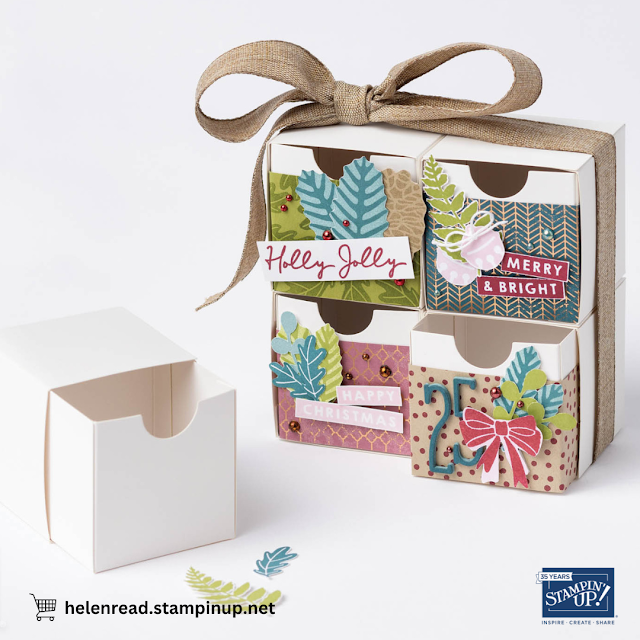
I absolutely loved the Stampin’ Up!® catalogue sample showing the Nested Treat Boxes in the September-December Mini Catalogue, and couldn’t resist recreating it for my December Crafty Friday class.
Here’s the original project from the Stampin’ Up!® Mini Catalogue, which inspired my version.
As half a pack of Nested
Treat Boxes had already bust the budget for this class (I purchased them
before they were reduced to £7.52 per pack), I used some retired
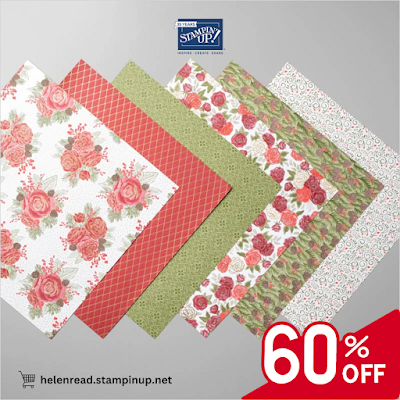
Designer Series Paper. This is called Christmastime is Here (152154) and
at the time of writing is still available in the European store on the
Clearance Rack.
My tip for assembling these Nested Treat Boxes is to ensure you make the inner boxes quite tight, and the outer boxes a little loose. This will enable them to slide in and out more easily... although I have to say they are still quite tricky. The boxes come with their own double-sided taped sides which is very strong, so make sure the flaps are in the right position before sticking down, or you’ll end up with imperfections like I have.
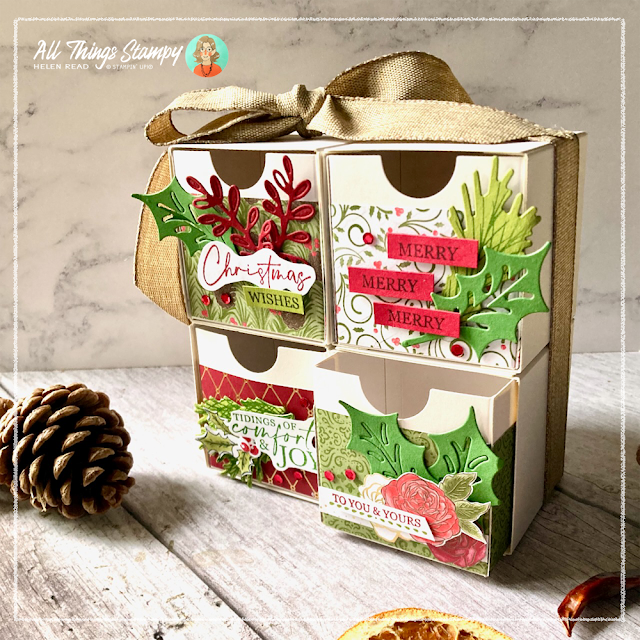
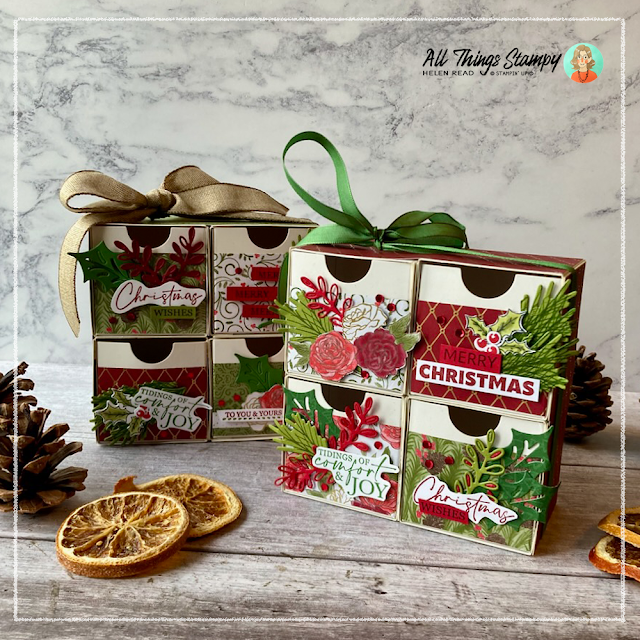
You can decorate the Nested Treat Box fronts however you like, but I did decide to keep all the front Designer Series Paper panels to the same size for some continuity.
Another thing to consider is balance. I made sure any overhanging foliage was on the outside of the boxes, so you can slide each box out individually without disturbing the others.
Similarly, the front panels are carefully positioned for balance. I didn't want a mainly red piece on top of another red piece, so positioned these on the diagonal. Too confused? Make them all the same!
For decoration, I used a variety of Stampin’ Up!® products. The stamped and die-cut images came from the Christmas Classics bundle, as did most of the greetings. I added some more greetings from the Joy to You stamp set, with the individual words cut out.
As this was a remote class, and the guests were providing their own stamps and dies, I wanted to show how they could also use images from the Christmastime is Here Designer Series Paper to decorate their boxes, too. I cut out some of the red roses and leaves to add to the box fronts, adding some die-cut leaves and red bling for interest.
On my second box (with the green ribbon), you can see a multi-coloured leaf on the bottom right box. This is a happy accident, when I inadvertently cut out a leave from a piece of Old Olive and Real Red cardstock at the same time. When I removed it from the die, some tiny red pieces remained within the green leaves. I liked it, so I left them there.
You’ll also see the stamped pine sprigs are a little, shall we say, "busy". This is because I stamped one sprig, die-cut it and realised the die had shifted, so the image was in the wrong place. Instead of discarding it, I simply stamped again and again on top for a fuller image. Another happy accident, as I liked it enough to repeat the process deliberately!
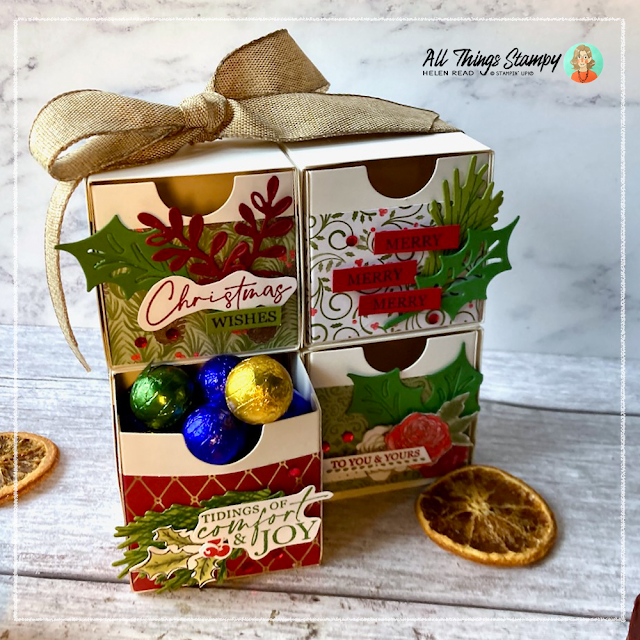
The four Stampin’ Up!® Nested Treat Boxes are stuck together with double-sided tape. Don't skimp here as it’s quite a big ask. Then you can finish off with a long piece of ribbon around the whole lot – this is purely for decoration and doesn’t hold the boxes together.
Alternatively, you can add some extra Stampin’ Up!® Designer Series Paper on the sides before adding the ribbon. This was an afterthought for me, which is why some photos have no paper and some are decorated. I think I prefer the decorated look, and it feels more secure having the paper holding the Nested Treat Boxes together, too.
Now the Nested Treat Boxes can be filled with a variety of Christmas treats, or maybe some handmade decorations, socks or whatever you choose.
Does your wish list come to more than £99? Please get in touch and I will help you get more for your money and unlock discounts all year round.




No comments:
Post a Comment
Thank you so much for taking the time to comment.