Stampin’ Up!® demonstrators are a fabulous source of inspiration and for some of today’s Peaceful Cabin projects I have been inspired by two US demonstrators; Candy Rattray and Anna Helman.
What
I love about finding inspiration from other Stampin’ Up!® demonstrators
is that it gives you the opportunity either to CASE (copy and share
everything) something using products you have or, as in this case, to
adapt projects to suit your own supplies.
I have been crafting with the gorgeous Peaceful Cabin bundle for my first in-person Stampin’ Up!® party for many, many months.
In these times of online shopping and growing offspring who don’t want big presents any more, the gift wallet has really come into its own.
 |
| Candy Rattray’s beautiful wedding gift wallet. |
 |
| Inside Candy’s gift wallet. |
I
found this fabulous design on Candy’s blog but I’m not one for measurements and I knew I’d have to convert
them to fit our A4 cardstock anyway so just winged it.
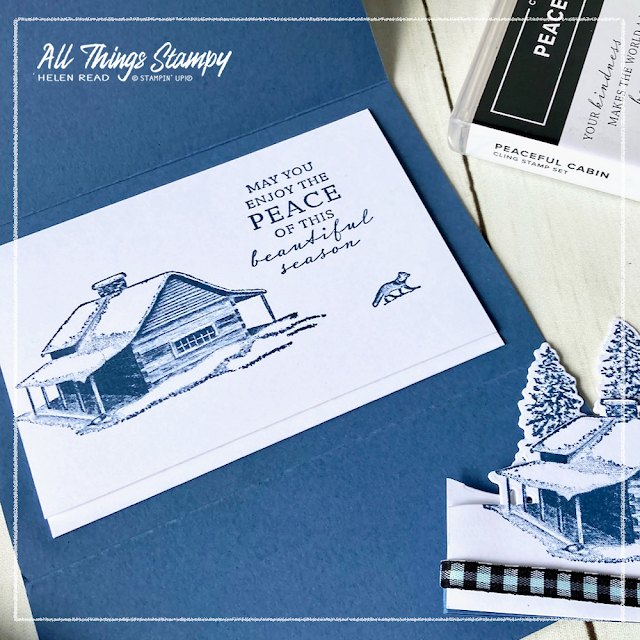
My own version is made from:
- Outer cardstock: 14.8cm x 26cm
- Scored at 6cm and 16.5cm
The inner is just a smaller card with a lip to hold money, a gift card or gift certificate, so I would make this to fit the contents instead of winging it, as I did.
I stuck to a monochromatic colour palette of Misty Moonlight and white, with a hint of Pool Party on the black gingham ribbon as it was the only blue I have in Stampin’ Blends and I was too impatient to colour it in any other way.
You
can colour your ribbons in various ways, including Stampin’ Write
(water-based) markers or sponging ink from an ink pad onto the ribbon.
These both take quite a while to dry and if you don’t wait long enough
the ink will transfer onto your project. It’s quicker to use Stampin’
Blends alcohol markers which dry quickly, although they can make your
ribbon a little stiff. Weigh up the options and prepare ahead if
necessary!
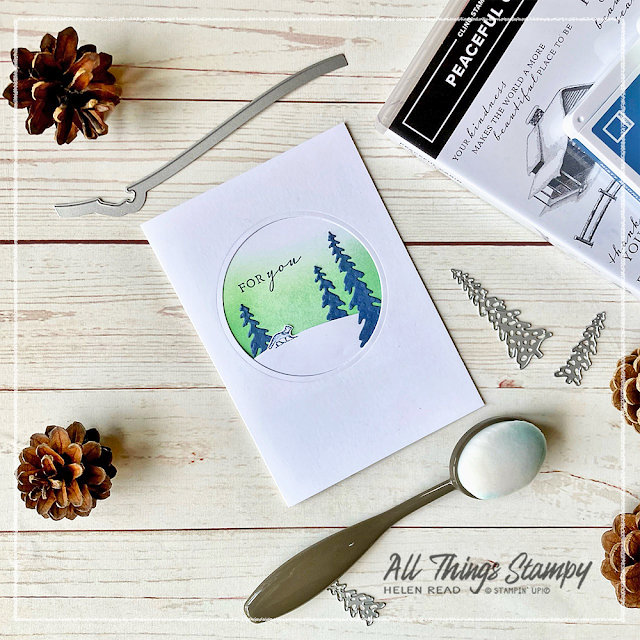
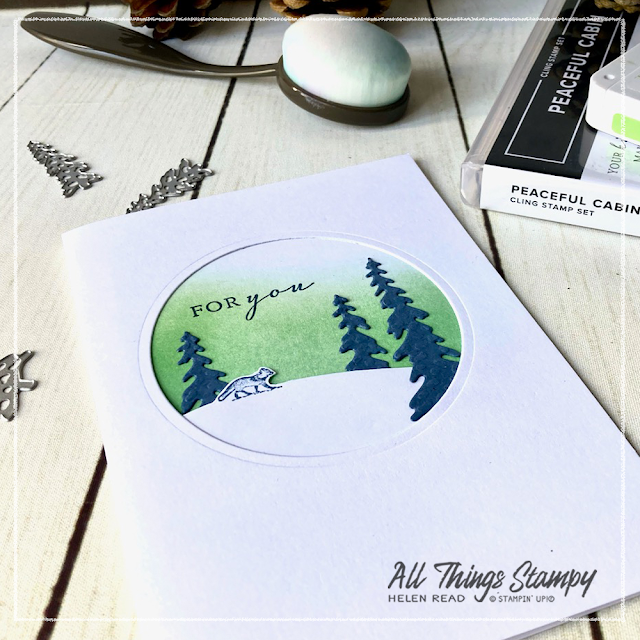
I found more inspiration on Anna’s blog for this simple circle aperture card. Anna’s project
is actually a paper lantern which was inspired by the July Paper Pumpkin Kit which was available in the North American market. We occasionally get a global Paper Pumpkin Kit and I really wish we’d had this one as I love the colours and theme.
 |
| Anna Helman’s paper lantern, which was the inspiration for my card. |
I tried to emulate the colours using Granny Apple Green. Well, I confess I just used what was on a dirty Blending Brush from an earlier craft session but I’m confident it was Granny Apple Green! I’m experimenting with not washing my brushes to see how that goes as they do take a long time to dry.
I used the cute fox stamp and dies from the Peaceful Cabin Bundle and some Misty Moonlight die-cut trees from the same set of Cabin Dies. I love that this could be a Christmas card or just a generic card for any occasion.
My
Peaceful Cabin mojo was by now well and truly active so I carried on to
create more projects, including this white scene (the photo has turned
it grey) with an Evergreen embossed background.
I am so happy we still have this Embossing Folder in the catalogue as it’s perfect for Christmas and for my favourite themes of woodlands.
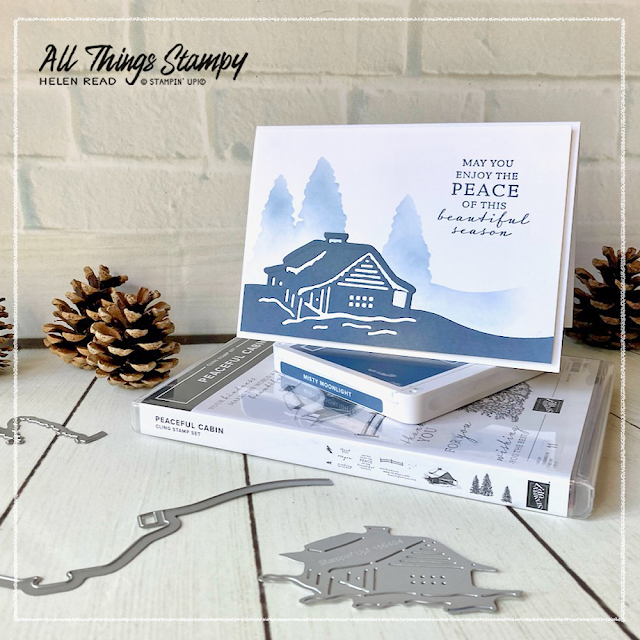
Finally I made this very simple card for the Make & Take for a Stampin’ Up!® party on Saturday. I used the tree die from Cabin Dies to create a simple stencil, which I then brushed around using Blending Brushes. It’s a really quick and easy way to make a stunning background for the die-cut cabin, and makes a Christmas card that isn’t too time-consuming to reproduce in bulk.
I hope you are inspired by my Peaceful Cabin projects and that you, too, will find inspiration from Candy and Anna’s blogs. I love to hear what you think, so please leave a comment below if you can.
If you are in the UK and would like to order, please To order these or any other current Stampin’ Up!® products from my store, please shop using this link
Stampin’ Up!® demonstrators are a fabulous source of inspiration and for some of today’s Peaceful Cabin projects I have been inspired by two US demonstrators; Candy Rattray and Anna Helman.
What
I love about finding inspiration from other Stampin’ Up!® demonstrators
is that it gives you the opportunity either to CASE (copy and share
everything) something using products you have or, as in this case, to
adapt projects to suit your own supplies.
I have been crafting with the gorgeous Peaceful Cabin bundle for my first in-person Stampin’ Up!® party for many, many months.
In these times of online shopping and growing offspring who don’t want big presents any more, the gift wallet has really come into its own.
 |
| Candy Rattray’s beautiful wedding gift wallet. |
 |
| Inside Candy’s gift wallet. |
I
found this fabulous design on Candy’s blog but I’m not one for measurements and I knew I’d have to convert
them to fit our A4 cardstock anyway so just winged it.
My own version is made from:
- Outer cardstock: 14.8cm x 26cm
- Scored at 6cm and 16.5cm
The inner is just a smaller card with a lip to hold money, a gift card or gift certificate, so I would make this to fit the contents instead of winging it, as I did.
I stuck to a monochromatic colour palette of Misty Moonlight and white, with a hint of Pool Party on the black gingham ribbon as it was the only blue I have in Stampin’ Blends and I was too impatient to colour it in any other way.
You
can colour your ribbons in various ways, including Stampin’ Write
(water-based) markers or sponging ink from an ink pad onto the ribbon.
These both take quite a while to dry and if you don’t wait long enough
the ink will transfer onto your project. It’s quicker to use Stampin’
Blends alcohol markers which dry quickly, although they can make your
ribbon a little stiff. Weigh up the options and prepare ahead if
necessary!
I found more inspiration on Anna’s blog for this simple circle aperture card. Anna’s project
is actually a paper lantern which was inspired by the July Paper Pumpkin Kit which was available in the North American market. We occasionally get a global Paper Pumpkin Kit and I really wish we’d had this one as I love the colours and theme.
 |
| Anna Helman’s paper lantern, which was the inspiration for my card. |
I tried to emulate the colours using Granny Apple Green. Well, I confess I just used what was on a dirty Blending Brush from an earlier craft session but I’m confident it was Granny Apple Green! I’m experimenting with not washing my brushes to see how that goes as they do take a long time to dry.
I used the cute fox stamp and dies from the Peaceful Cabin Bundle and some Misty Moonlight die-cut trees from the same set of Cabin Dies. I love that this could be a Christmas card or just a generic card for any occasion.
My
Peaceful Cabin mojo was by now well and truly active so I carried on to
create more projects, including this white scene (the photo has turned
it grey) with an Evergreen embossed background.
I am so happy we still have this Embossing Folder in the catalogue as it’s perfect for Christmas and for my favourite themes of woodlands.
Finally I made this very simple card for the Make & Take for a Stampin’ Up!® party on Saturday. I used the tree die from Cabin Dies to create a simple stencil, which I then brushed around using Blending Brushes. It’s a really quick and easy way to make a stunning background for the die-cut cabin, and makes a Christmas card that isn’t too time-consuming to reproduce in bulk.
I hope you are inspired by my Peaceful Cabin projects and that you, too, will find inspiration from Candy and Anna’s blogs. I love to hear what you think, so please leave a comment below if you can.


Absolutely gorgeous! Your cards and photos are simply beautiful.
ReplyDeleteThank you so much! You inspired me :)
Delete