We are rapidly approaching Christmas – I know, right? This year has been
so weird that some days I have to remind myself it’s November.
In
preparation for the Big Day, I have been running craft sessions using
the Snowman Season stamp set, after taking quick bookings in one day during the
Flash Sale. I held three sessions – two short daytime events and a
longer Saturday morning.
Guests signed up for all three sessions, which
included the stamp set and instructions so they could make the cards
even if they couldn't attend. This is how I send out my kits – packed in plant-based biodegradable cello bags in boxes made from recycled card, held together with paper tape. Just doing my bit to avoid plastic waste!
These sessions were popular both with the guests and with me; I cannot tell you how much easier it is to design projects when everyone has the same stamp set! Having said that, preparation coincided with my holiday in the Lake District so I inevitably turned to other talented crafters for inspiration.
So in one mega blog post, let’s take a look at the projects we made...
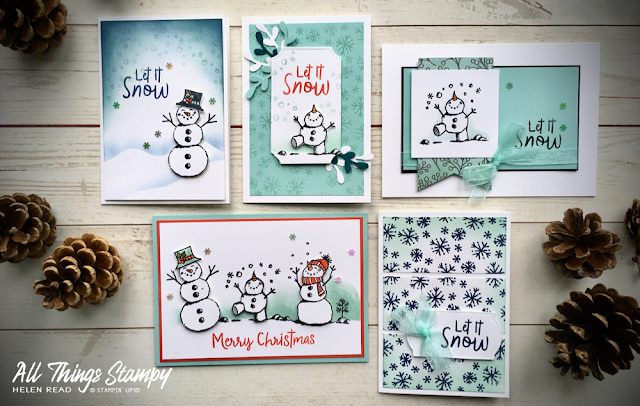
I love this one, which was heavily inspired by Mary Fish. I switched to the Evergreen Forest 3D Embossing Folder because it’s new and I love it. I cut my snowy hills with the Pine Woods Dies, although I expected the guests to cut them freehand. Sorry, ladies!
I coloured the images using ink pad lids and blender pens – my most-used method because I always have both on hand. But what about black? You can’t squeeze the Memento Tuxedo Black ink pad to get ink in the lid, so simply swipe the pad onto a clear block or other shiny surface and pick up your colour from there. Because it’s water-based, it will clean off easily.
Our second project for the first session was this little notecard which we stamped all over in Pool Party. A simple but fun design which I blatantly CASEd from Kim Quade.
The Saturday session saw us tackle five cards, starting with this cute little notecard. To get the shading behind the snowman, we just sponged directly onto the die-cut label (which I’d pre-cut using the Tasteful Labels dies), then the snowman is stamped separately, fussy-cut and popped up on Dimensionals. Yes, even his little twig arms! The sprigs are punched using the Sprig Punch – I wasn’t die-cutting that lot for 10 people, sorry!
More sponging for this card – I’m all about the sponging at the moment, have you noticed? For this one, we cut a snowy hill freehand from scrap paper (you can also tear it for a softer effect) and used it as a mask for sponging. You need a very light tough on the sponging here. The sky is also sponged, working from the corners inwards.
I love this design, which is an almost direct copy of one by Laura Mackie. We named the snowmen Tom, Dick and Harry so I had a frame of reference when talking the ladies through this project.
The trick here is to stamp the two right images (Dick and Harry) twice. Stamp them once on the background, along with Tom’s twig arms. Then trace the ground onto some scrap paper, cut this out and use as a mask for sponging the Pool Party. (My sponging is a little rough because I made this one on holiday and didn’t have my sponges with me so compromised using a tissue!)Next stamp all three snowmen onto some Whisper White cardstock and cut them out. This means you can cut off those fiddly twig arms as they will be there on the background for you. Then you can add all the cut-out images to the card base, popping up for some dimension.
Just to mix things up a little, we made a snowman-free card simply by stamping and sponging onto some Whisper White cardstock and cutting it into three equal strips. Want to make this one quicker and easier? Use Designer Series Paper and a punched greeting label instead – you’ll have a batch of Christmas cards in no time!
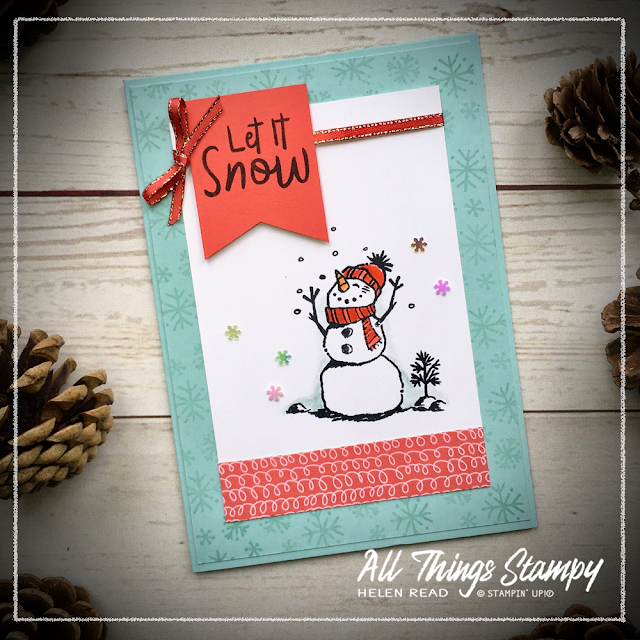
This is one of my favourite cards of the sessions, with this cheery little snowman who looks like he’s practising his yoga and saluting the sun. Not a wise move for a snowman, if you ask me. To get an even flag, you can use one side of the Tailored Tag Punch, which I did here.
Our final project was this snow globe-inspired card. I took inspiration from Bonnie O’Neill but changed things up a little as it seemed a shame not to use my Snow Globe Scenes dies. Working on the theory that if you’ve got it, use it, I mounted this onto a scalloped circle from the Layering Circles Dies, too. Cutting round the greeting freehand gives you an interesting shape – and it’s really easy to do, too.
I hope you’ve been inspired by these Snowman Season projects, many of which can be adapted to other images, too.
If you’d like to order anything you see here, please visit my store and, if shopping in November 2020, please use the host code RMK743TS. The host code allows me to earn Stampin’ Rewards which I use to order thank you gifts for my online customers.


Helen, absolutely adorable cards. I don't have this stamp set but with all your tips I just may have to add it to December order. Thanks for bringing a smile to my face reading about this set!
ReplyDeleteHelen, absolutely adorable cards. I don't have this stamp set but with all your tips I just may have to add it to December order. Thanks for bringing a smile to my face reading about this set!
ReplyDeleteThank you! I love the fact you can colour them in seconds!
Delete